ECU MITSUBISHI SHOGUN 2003 (in English) User Guide
[x] Cancel search | Manufacturer: MITSUBISHI, Model Year: 2003, Model line: SHOGUN, Model: MITSUBISHI SHOGUN 2003Pages: 392, PDF Size: 14.34 MB
Page 51 of 392
G23F041A
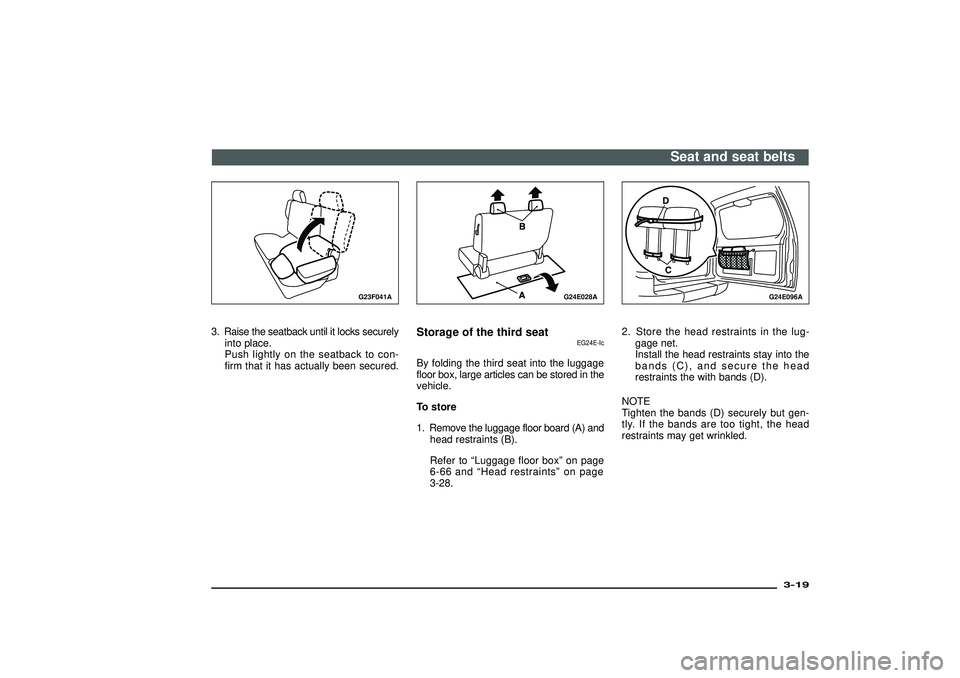
3. Raise the seatback until it locks securelyinto place.
Push lightly on the seatback to con-
firm that it has actually been secured.
G24E028A
Storage of the third seat
EG24E-Ic
By folding the third seat into the luggage
floor box, large articles can be stored in the
vehicle.
To store
1. Remove the luggage floor board (A) andhead restraints (B).
Refer to “Luggage floor box ”on page
6-66 an d“Hea drestraints ”on page
3-28.
G24E096A
2. Store the head restraints in the lug- gage net.
Install the head restraints stay into the
bands (C), and secure the head
restraints the with bands (D).
NOTE
Tighten the bands (D) securely but gen-
tly. If the bands are too tight, the head
restraints may get wrinkled.
Seat and seat belts
3-19
Div:
Out put date:
Page 53 of 392
G24F014A
CAUTION
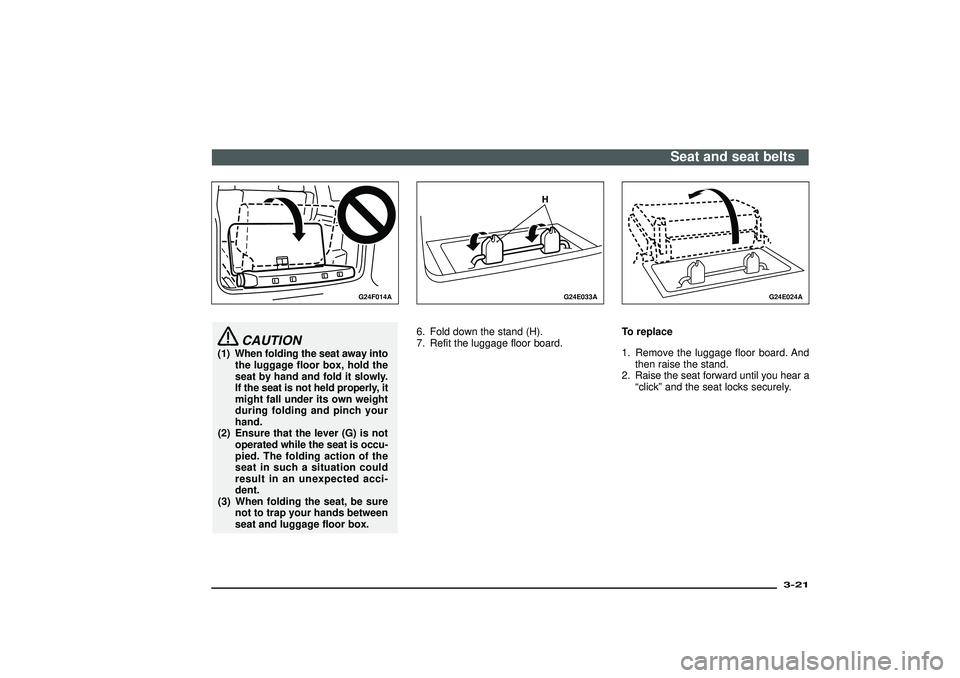
(1) When folding the seat away into
the luggage floor box, hold the
seat by hand and fold it slowly.
If the seat is not held properly, it
might fall under its own weight
during folding and pinch your
hand.
(2) Ensure that the lever (G) is not
operated while the seat is occu-
pied. The folding action of the
seat in such a situation could
result in an unexpected acci-
dent.
(3) When folding the seat, be sure
not to trap your hands between
seat and luggage floor box.
G24E033A
6. Fold down the stand (H).
7. Refit the luggage floor board.
G24E024A
To replace
1. Remove the luggage floor board. And
then raise the stand.
2. Raise the seat forward until you hear a
“click”and the seat locks securely.
Seat and seat belts
3-21
Div:
Out put date:
Page 54 of 392
G24E034A
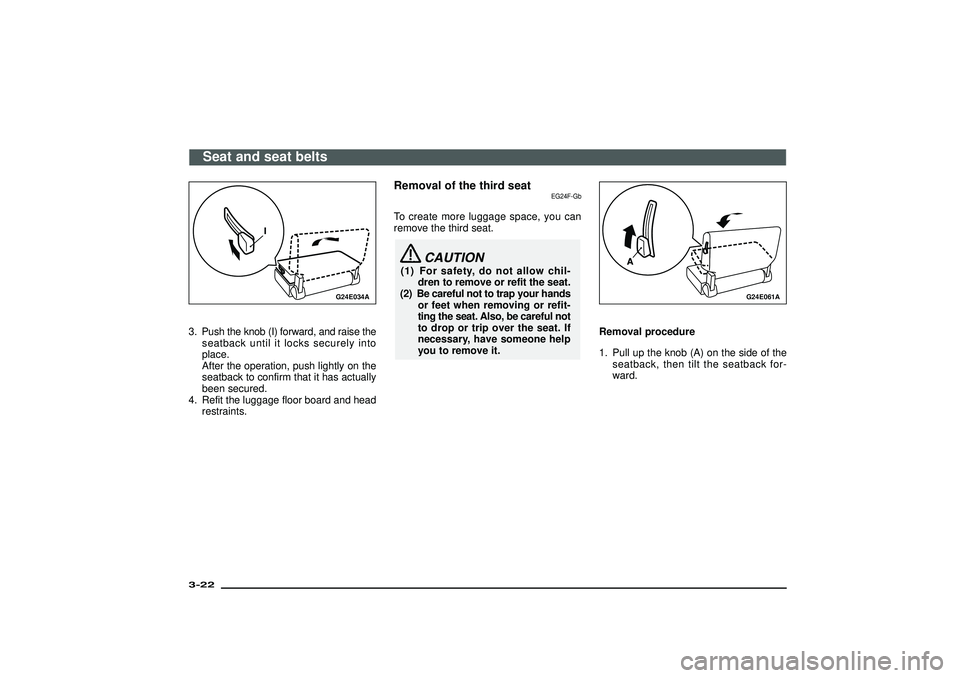
3. Push the knob (I) forward, and raise the
seatback until it locks securely into
place.
After the operation, push lightly on the
seatback to confirm that it has actually
been secured.
4. Refit the luggage floor board and head
restraints.
Removal of the third seat
EG24F-Gb
To create more luggage space, you can
remove the third seat.
CAUTION
(1) For safety, do not allow chil-
dren to remove or refit the seat.
(2) Be careful not to trap your hands
or feet when removing or refit-
ting the seat. Also, be careful not
to drop or trip over the seat. If
necessary, have someone help
you to remove it.
G24E061A
Removal procedure
1. Pull up the knob (A) on the side of the
seatback, then tilt the seatback for-
ward.
Seat and seat belts
3-22Div:
Out put date:
Page 57 of 392
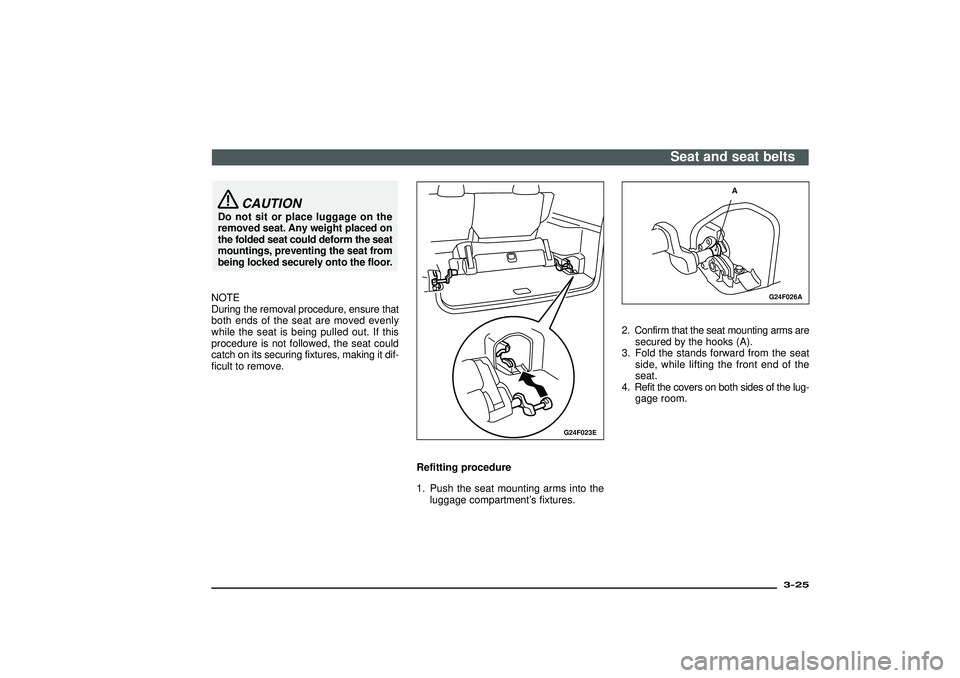
CAUTION
Do not sit or place luggage on the
removed seat. Any weight placed on
the folded seat could deform the seat
mountings, preventing the seat from
being locked securely onto the floor.
NOTE
During the removal procedure, ensure that
both ends of the seat are moved evenly
while the seat is being pulled out. If this
procedure is not followed, the seat could
catch on its securing fixtures, making it dif-
ficult to remove.
G24F023E
Refitting procedure
1. Push the seat mounting arms into the
luggage compartment’s fixtures.
G24F026A
A
2. Confirm that the seat mounting arms are
secured by the hooks (A).
3. Fold the stands forward from the seat
side, while lifting the front end of the
seat.
4. Refit the covers on both sides of the lug-
gage room.
Seat and seat belts
3-25
Div:
Out put date:
Page 58 of 392
G24E048A
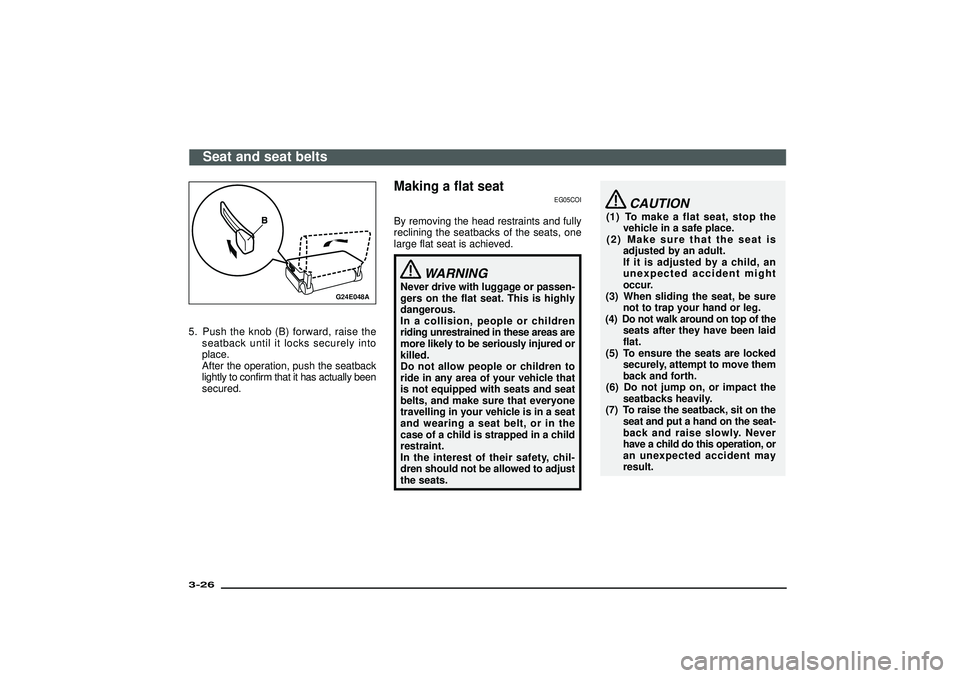
5. Push the knob (B) forward, raise the
seatback until it locks securely into
place.
After the operation, push the seatback
lightly to confirm that it has actually been
secured.
Making a flat seat
EG05COI
By removing the head restraints and fully
reclining the seatbacks of the seats, one
large flat seat is achieved.
WARNING
Never drive with luggage or passen-
gers on the flat seat. This is highly
dangerous.
In a collision, people or children
riding unrestrained in these areas are
more likely to be seriously injured or
killed.
Do not allow people or children to
ride in any area of your vehicle that
is not equipped with seats and seat
belts, and make sure that everyone
travelling in your vehicle is in a seat
and wearing a seat belt, or in the
case of a child is strapped in a child
restraint.
In the interest of their safety, chil-
dren should not be allowed to adjust
the seats.
CAUTION
(1) To make a flat seat, stop the
vehicle in a safe place.
(2) Make sure that the seat is
adjusted by an adult.
If it is adjusted by a child, an
unexpected accident might
occur.
(3) When sliding the seat, be sure
not to trap your hand or leg.
(4) Do not walk around on top of the
seats after they have been laid
flat.
(5) To ensure the seats are locked
securely, attempt to move them
back and forth.
(6) Do not jump on, or impact the
seatbacks heavily.
(7) To raise the seatback, sit on the
seat and put a hand on the seat-
back and raise slowly. Never
have a child do this operation, or
an unexpected accident may
result.
Seat and seat belts
3-26Div:
Out put date:
Page 67 of 392
G28B005A
Infants and small children
EG20B-Ba
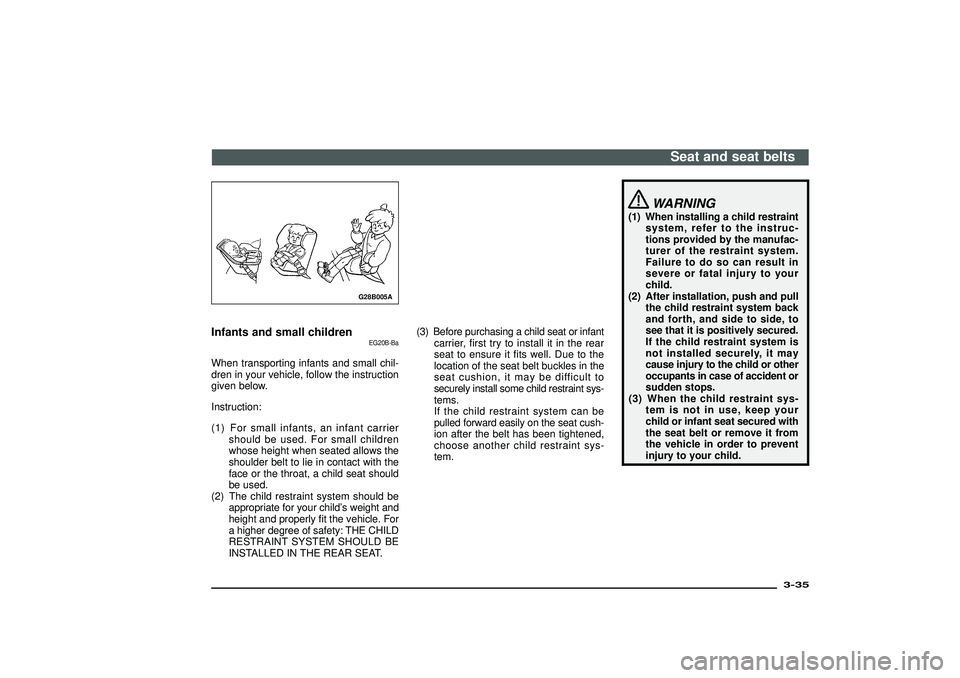
When transporting infants and small chil-
dren in your vehicle, follow the instruction
given below.
Instruction:
(1) For small infants, an infant carrier
should be used. For small children
whose height when seated allows the
shoulder belt to lie in contact with the
face or the throat, a child seat should
be used.
(2) The child restraint system should be
appropriate for your child’s weight and
height and properly fit the vehicle. For
a higher degree of safety: THE CHILD
RESTRAINT SYSTEM SHOULD BE
INSTALLED IN THE REAR SEAT.(3) Before purchasing a child seat or infant
carrier, first try to install it in the rear
seat to ensure it fits well. Due to the
location of the seat belt buckles in the
seat cushion, it may be difficult to
securely install some child restraint sys-
tems.
If the child restraint system can be
pulled forward easily on the seat cush-
ion after the belt has been tightened,
choose another child restraint sys-
tem.
WARNING
(1) When installing a child restraint
system, refer to the instruc-
tions provided by the manufac-
turer of the restraint system.
Failure to do so can result in
severe or fatal injury to your
child.
(2) After installation, push and pull
the child restraint system back
and forth, and side to side, to
see that it is positively secured.
If the child restraint system is
not installed securely, it may
cause injury to the child or other
occupants in case of accident or
sudden stops.
(3) When the child restraint sys-
tem is not in use, keep your
child or infant seat secured with
the seat belt or remove it from
the vehicle in order to prevent
injury to your child.
Seat and seat belts
3-35
Div:
Out put date:
Page 71 of 392

G18C055A
3. To activate the ALR mode, slowly pullthe shoulder part of the belt all the way
out until it stops, then let the belt feed
back into the retractor.
4. After the belt has retracted, tug on it. If the belt is locked, you will not be able to
pull it out. If you can pull the belt out, it
is not locked and you will need to repeat
these steps.
G18C056A
5. After confirming that the belt is locked,grab the shoulder part of the belt near
the buckle and pull up to remove any
slack from the lap part of the belt.
Remember, if the lap part of the belt is
not tight, the child restraint will not be
secure. It may help to put weight on the
child restraint, or push on the seat-
back while pulling up on the belt.
6. Before putting the child in the restraint, push and pull the restraint in all direc-
tions to be sure it is secure. Do this
before each use.
7. To deactivate the ALR mode in order to remove a child restraint etc., after
removing the child from the restraint,
unlatch the buckle, unroute the seat belt,
let the belt fully retract, and rewind the
belt. NOTE
I
f th e sea tbel tdoe sno tlock ,rewin dit full y,
then perform step 2 to 7 again.
WARNING
(1) Before putting the child in the restraint, be absolutely sure to
make the conversion of the
retractor from the ELR mode to
the ALR mode. By doing so, the
child restraint system is always
tightly secured to the seat by the
automatic lock. If the conver-
sion to ALR is not made, the
child restraint system could
move forward in the event of
sudden braking or an accident,
seriously injuring the child or
other occupants.
(2) If a person wearing the seat belt moves one ’s upper body signifi-
cantly such that the belt com-
pletely unwinds, the retractor
may switch to its ALR mode and
lock, thus preventing further
movement. If this happens, the
person should switch the retrac-
tor back to its ELR mode by tak-
ing off the seat belt and fully
rewinding it. The person should
then wear the seat belt again.
Seat and seat belts
3-39
Div:
Out put date:
Page 72 of 392

G18C052A
3-door modelsInstalling a child restraint system to
a 3-point type seat belt (with emer-
gency locking mechanism)
EG20E-E
For safety, you are advised to install the
child restraint system using a 3-point type
seat belt with emergency/automatic lock-
ing mechanism. If you cannot avoid install-
ing it using another type of seat belt, follow
the instructions given below.
Installation:
1. Fasten the seat belt to secure the child
restraint system. Make sure you hear a
“click”when you insert the latch plate in
the buckle.
G18C053A
5-door models2. Remove all slack of a lap belt by pull-
ing the webbing through the belt’s
adjustment feature.
3-point type seat belt requires no length
adjustment, remove all slack by using
the locking clip.
3. Push and pull the child restraint in all
directions to be sure it is secure.
G28B059A
CAUTION
For some type of child restraint, the
locking clip (A) should be used to
help avoid personal injury during a
collision or sudden manoeuver.
It must be fitted and used in accor-
dance with the child restraint manu-
facturer’s instructions.
The locking clip must be removed
when the child restraint is removed.
Seat and seat belts
3-40Div:
Out put date:
Page 179 of 392
CAUTION
(1) Upward shifts do not take place
automatically in sports mode.
The driver must execute upward
shifts in accordance with pre-
vailing road conditions, taking
care to keep the engine speed
below the red zone.
(2) By rapidly moving the selector
lever backwards (DOWN) twice,
it is possible to skip one gear,
i.e., 3rd to 1st, 4th to 2nd or 5th
to 3rd. Since sudden engine
braking and/or rapid accelera-
tion can cause a loss of trac-
tion, however, downshifts must
be made carefully in accor-
dance with the vehicle’s speed.
NOTE
(1) In sports mode, only the 5 forward
gears can be selected. To reverse or
park the vehicle, move the selector
lever to the“R”(REVERSE) or“P”
(PARK) position as required.
(2) To maintain good running perfor-
mance, the transmission may refuse to
perform an upshift when the selector
lever is moved to the“+ (UP)”posi-
tion at certain vehicle speeds. Also, to
prevent over-revving of the engine, the
transmission may refuse to perform a
downshift when the lever is moved to
the“−(DOWN)”position at certain
vehicle speeds.(3) In sports mode, downward shifts are
made automatically when the vehicle
slows down. When the vehicle stops,
1st gear is automatically selected.
(4) When driving away on a slippery road,
push the selector lever forward into the
+ (UP) position. This causes the trans-
mission to shift into the 2nd gear which
is better for smooth driving away on a
slippery road. Push the selector lever
to the—(DOWN) side to shift back to
the 1st gear.
(5) Move the selector lever gently between
the manual and main gates and
between positions in the manual gate.
Undue force could damage the selec-
tor lever.
I04S021A
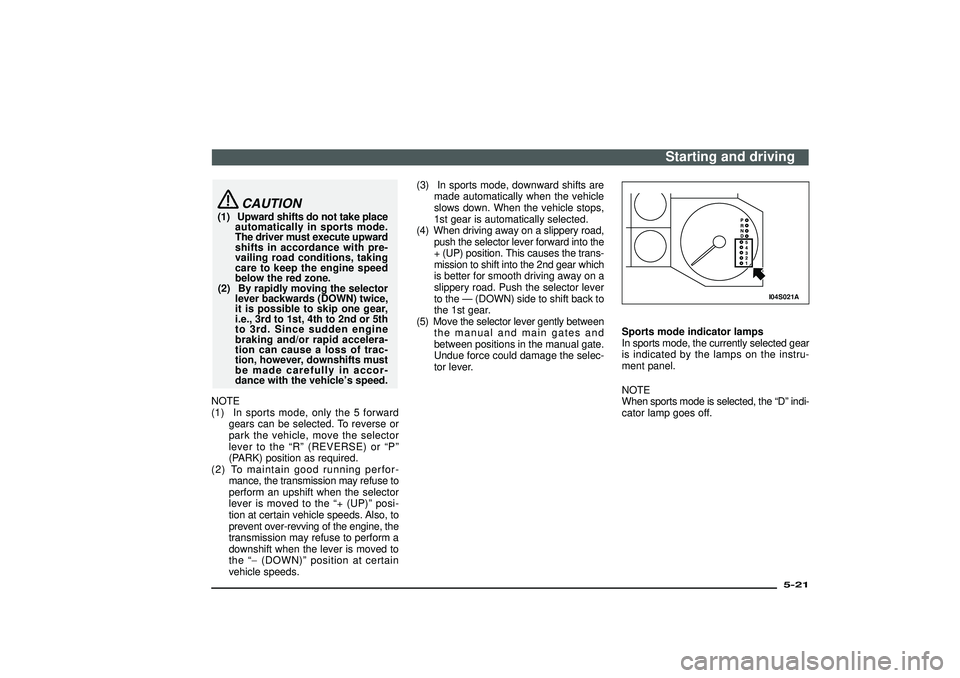
Sports mode indicator lamps
In sports mode, the currently selected gear
is indicated by the lamps on the instru-
ment panel.
NOTE
When sports mode is selected, the“D”indi-
cator lamp goes off.
Starting and driving
5-21
Div:
Out put date:
Page 198 of 392
NOTE
(1) Choose a slope as smooth as pos-
sible with few stones or other
obstacles.
(2) Before attempting to drive up the slope,
walk it up to confirm that the vehicle
can handle the grade.Descending sharp gradesSet the transfer shift lever to“4L”(part time
4WD) or“4LLc”(super select 4WD II), use
the engine brake (downshifting) and
descend slowly.
WARNING
Avoid snaking down a sharp grade.
Descend the grade as straight as
possible.NOTE
(1) When descending a sharp grade, if the
brakes are applied suddenly because
of an obstacle encountered, control of
the vehicle could be lost. Before
descending the slope, walk it down and
confirm the path.
(2) Before descending a grade, it is nec-
essary to choose the appropriate gear.
Avoid changing gears or depressing
the clutch while descending the grade.
(3) MITSUBISHI is not responsible to the
operator for any damage or injury
caused or liability incurred by the
improper and negligent operation of a
vehicle. All techniques of vehicle opera-
tion described herein depend on the
skill and experience of the operator and
other participating parties and any
deviation from the recommended
operation instructions above is at their
own risk.
Turning sharp cornersWhen turning a sharp corner in“4H”or“4L”
position (part time 4WD), or“4HLc”or
“4LLc”position (super select 4WD II) at low
speed, a slight difference in steering may
be experienced similar to as if the brakes
were applied. This is called tight corner
braking and results from each of the four
tyres being at a different distance from the
corner.
The phenomenon is peculiar to 4-wheel
drive vehicles. If this occurs, either
straighten the steering wheel, or change to
rear-wheel drive.
Starting and driving
5-40Div:
Out put date: