belt MITSUBISHI SHOGUN 2003 (in English) Repair Manual
[x] Cancel search | Manufacturer: MITSUBISHI, Model Year: 2003, Model line: SHOGUN, Model: MITSUBISHI SHOGUN 2003Pages: 392, PDF Size: 14.34 MB
Page 89 of 392
The pre-tensioner activates whenever a
strong impact is applied at the front of the
vehicle, even if the seat belt is not worn.
The pre-tensioner seat belts may not acti-
vate in certain frontal collisions, even
though the vehicle may be severely dam-
aged. Such non-activation does not mean
that something is wrong with the SRS sys-
tem, but rather that the collision forces were
not severe enough to activate it.
WARNING
(1) Following the pre-tensioner seat
belt activation, several
pre-tensioner seat belt system
components will be hot. Do not
touch them after activation.
(2) The pre-tensioner seat belt sys-
tem is designed to work only
once. After the pre-tensioner
seat belts have been activated,
they will not work again. They
must promptly be replaced, and
the entire pre-tensioner seat belt
system inspected by an autho-
rized MITSUBISHI dealer.
(3) If the vehicle is involved in a
frontal collision but the
pre-tensioner seat belts are not
activated, be sure to have the
pre-tensioner seat belt system
checked and, if necessary,
replaced by an authorized MIT-
SUBISHI dealer.
G28L103A
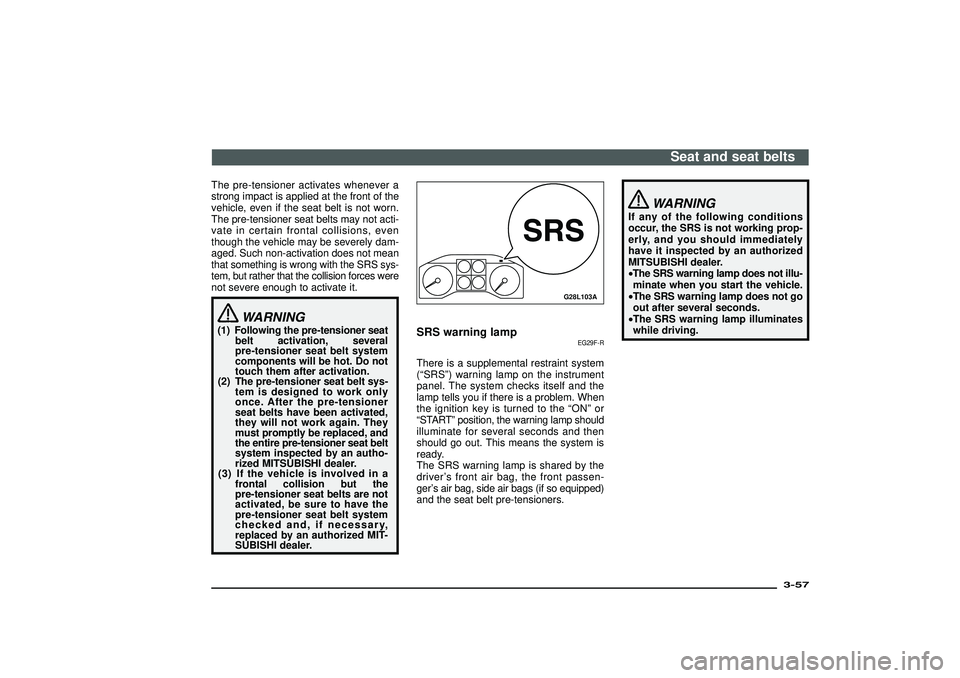
SRS warning lamp
EG29F-R
There is a supplemental restraint system
(“SRS”) warning lamp on the instrument
panel. The system checks itself and the
lamp tells you if there is a problem. When
the ignition key is turned to the“ON”or
“START”position, the warning lamp should
illuminate for several seconds and then
should go out. This means the system is
ready.
The SRS warning lamp is shared by the
driver’s front air bag, the front passen-
ger’s air bag, side air bags (if so equipped)
and the seat belt pre-tensioners.
WARNING
If any of the following conditions
occur, the SRS is not working prop-
erly, and you should immediately
have it inspected by an authorized
MITSUBISHI dealer.
•The SRS warning lamp does not illu-
minate when you start the vehicle.
•The SRS warning lamp does not go
out after several seconds.
•The SRS warning lamp illuminates
while driving.
Seat and seat belts
3-57
Div:
Out put date:
Page 90 of 392
SRS servicing
EG29G-A
The entire SRS including air bag and
pre-tensioner seat belt must be inspected
by an authorized MITSUBISHI dealer after
10 years.
WARNING
(1) Any maintenance performed on
or near the components of the
SRS must be performed only by
an authorized MITSUBISHI
dealer. Do not permit anyone
else to do service, inspection,
maintenance or repair on any
SRS components or wiring;
similarly, no part of the SRS
should ever be handled or dis-
posed of by anyone except an
authorized MITSUBISHI dealer.
Improper work on the SRS com-
ponents or wiring could result in
inadvertent deployment of the air
bags, or could render the SRS
inoperative; either situation
could result in serious injury.
(2) Do not modify your steering
wheel, seat belt retractor or any
other SRS components. For
example, replacement of the
steering wheel, or modifica-
tions to the front bumper or
body structure can adversely
affect SRS performance and lead
to possible injury.
WARNING
(3) If your vehicle has received any
front-end damage, you should
have the SRS inspected by an
authorized MITSUBISHI dealer to
ensure it is in proper working
order.
(4) On vehicles with the side air
bags, do not modify your front
seats centre pillar and centre
console.
It can adversely affect SRS per-
formance and lead to possible
injury.
Also, if you have found any tear
or open seam in the seat fabric
at the portion near the side air
bag, have the seat inspected at
an authorized MITSUBISHI
dealer.
(5) On vehicles with the side air
bags, if your vehicles has
received any damage to either
side, you should have the SRS
inspected by an authorized MIT-
SUBISHI dealer to ensure it is in
proper working order.NOTE
(1) When you transfer ownership of the
vehicle to some other person, we urge
you to alert the new owner that it is
equipped with the SRS and refer that
owner to the applicable section in this
owner’s handbook.
(2) If you junk or scrap the vehicle, we urge
you to first take the vehicle to an autho-
rized MITSUBISHI dealer so that the
SRS can be rendered safe.
Seat and seat belts
3-58Div:
Out put date:
Page 91 of 392

G28G309A
Caution label
EG28H-Aa
Passenger restraint warning/caution labels
are attached as shown in the illustration.
Seat and seat belts
3-59
Div:
Out put date:
Page 103 of 392

Charge warning lamp - red
ED54A-Y
This lamp illuminates when the ignition switch is
turned“ON ”, and goes off after the engine has
started.
CAUTION
If it illuminates while the engine is running,
there is a problem in the charging system. In
this case, immediately park your vehicle in a
safe place and contact your nearest autho-
rized MITSUBISHI dealer.
[ Except for 2500 models ]
Abnormality in the charging system.
[ 2500 models ]
Broken alternator belt or abnormality in the
charging system. A broken alternator belt
causes poor braking efficiency. Depress the
brake pedal harder than usual to park the
vehicle in a safe place.
A/T (automatic transmission) fluid tempera-
ture warning lamp - red
(vehicles with automatic transmission)
ED73AAK
The A/T fluid temperature warning lamp comes on
when the A/T fluid temperature becomes abnor-
mally high. Normally the warning lamp comes on
when the engine switch is placed in the “ON ”posi-
tion, and it goes out when the engine is started.
When the lamp comes on, reduce the engine speed
and move the vehicle to a safe area.
Then, set the selector lever to “P”(PARK) posi-
tion and idle the engine until the warning lamp goes
off. When the warning lamp goes off, the vehicle can
run as before. If the warning lamp does not go off,
please have your vehicle inspected at an autho-
rized MITSUBISHI dealer.
Instruments and controls
4-11
Div:
Out put date:
Page 172 of 392
Normal conditions
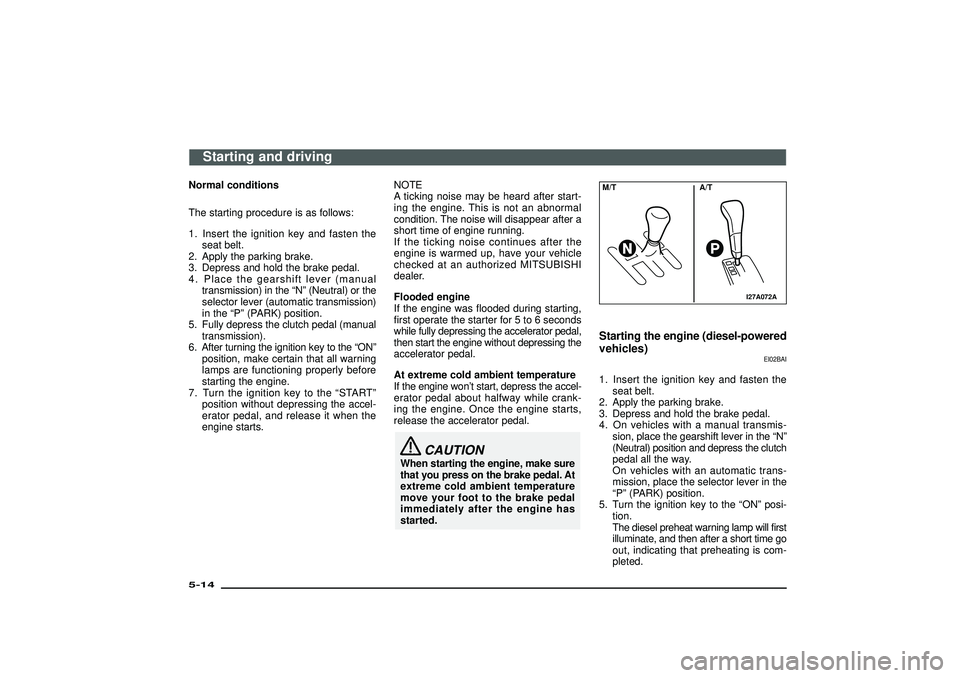
The starting procedure is as follows:
1. Insert the ignition key and fasten the
seat belt.
2. Apply the parking brake.
3. Depress and hold the brake pedal.
4. Place the gearshift lever (manual
transmission) in the“N”(Neutral) or the
selector lever (automatic transmission)
in the“P”(PARK) position.
5. Fully depress the clutch pedal (manual
transmission).
6. After turning the ignition key to the“ON”
position, make certain that all warning
lamps are functioning properly before
starting the engine.
7. Turn the ignition key to the“START”
position without depressing the accel-
erator pedal, and release it when the
engine starts.NOTE
A ticking noise may be heard after start-
ing the engine. This is not an abnormal
condition. The noise will disappear after a
short time of engine running.
If the ticking noise continues after the
engine is warmed up, have your vehicle
checked at an authorized MITSUBISHI
dealer.
Flooded engine
If the engine was flooded during starting,
first operate the starter for 5 to 6 seconds
while fully depressing the accelerator pedal,
then start the engine without depressing the
accelerator pedal.
At extreme cold ambient temperature
If the engine won’t start, depress the accel-
erator pedal about halfway while crank-
ing the engine. Once the engine starts,
release the accelerator pedal.
CAUTION
When starting the engine, make sure
that you press on the brake pedal. At
extreme cold ambient temperature
move your foot to the brake pedal
immediately after the engine has
started.
I27A072A
M/T A/TStarting the engine (diesel-powered
vehicles)
EI02BAI
1. Insert the ignition key and fasten the
seat belt.
2. Apply the parking brake.
3. Depress and hold the brake pedal.
4. On vehicles with a manual transmis-
sion, place the gearshift lever in the“N”
(Neutral) position and depress the clutch
pedal all the way.
On vehicles with an automatic trans-
mission, place the selector lever in the
“P”(PARK) position.
5. Turn the ignition key to the“ON”posi-
tion.
The diesel preheat warning lamp will first
illuminate, and then after a short time go
out, indicating that preheating is com-
pleted.
Starting and driving
5-14Div:
Out put date:
Page 196 of 392
Correct 4-wheel drive
operation
EI32ABCa
By shifting lock to 4-wheel drive, both axles
of the vehicle are rigidly connected with
each other. This improves the traction char-
acteristics. When turning sharp corners or
moving forward and backward repeat-
edly, however, the drive line is stressed,
which is felt as a braking effect. A 4-wheel
drive vehicle can accelerate more quickly
and smoothly.
However, note that the braking distance is
not shorter than that of a rear-wheel drive
vehicle.
When using 4-wheel drive on rough roads
(snow, mud, sand, etc.), it is important to
operate the vehicle correctly.
NOTE
(1) The driving posture should be more
upright and closer to the wheel than
usual; adjust the seat to a good posi-
tion for easy steering and pedal opera-
tion. Be sure to wear the seat belt.
(2) After driving on rough roads, check
each part of the vehicle and wash it
thoroughly with water. Refer to the sec-
tions“Vehicle care”and“Inspection and
maintenance following rough road
operation”.
Driving on dry paved road and high-
waySelect“2H”(part time 4WD),“2H”or“4H”
(super select 4WD II) to drive on a dry
paved road. Especially on dry highway,
never select the“4H”or“4L”(part time
4WD),“4HLc”or“4LLc”(super select 4WD
II).
CAUTION
Selecting“4H”or“4L”(part time
4WD),“4HLc”or“4LLc”(super select
4WD II), to drive on dry paved road
will increase the fuel consumption
with possible noise generation and
early tyre wear.
It may also increase the differential
oil temperature, resulting in pos-
sible damage to the driving system.
Further, the drive train will be sub-
jected to excessive loading, possi-
bly leading to oil leakage, component
seizure, or other serious faults.Driving on snowy or icy roadsSet the transfer shift lever to“4H”or“4L”
(part time 4WD),“4H”or“4HLc”(super
select 4WD II) in accordance with the road
conditions, and then gradually depress the
accelerator pedal for a smooth start.NOTE
(1) The use of snow tyres and/or tyre
chains is recommended.
(2) In order to ensure that the anti-lock
brake system (ABS) will operate cor-
rectly in situations where tyre chains
have been fitted, drive in“4H”or“4L”
for part time 4WD, or in“4H”,“4HLc”or
“4LLc”for super select 4WD II.
(3) Maintain a safe distance between
vehicles, avoid sudden braking, and
use engine braking (downshifting).
CAUTION
Avoid sudden braking, sudden accel-
eration, and sharp turning; such
operations could cause skidding and
spinouts.Driving on sandy or muddy roadsSet the transfer shift lever to“4H”or“4L”
(part time 4WD),“4HLc”or“4LLc”(super
select 4WD II), and then gradually depress
the accelerator pedal for a smooth start.
Keep the pressure on the accelerator pedal
as constant as possible, and drive at low
speed.
Starting and driving
5-38Div:
Out put date:
Page 321 of 392

6. Examine the radiator hoses for cool-
ant leakage and the fan belts for loose-
ness or damage.
If there is anything wrong with the cool-
ing system or fan belt, have the prob-
lem corrected at an authorized
MITSUBISHI dealer.
N07A015A
Bleeding the fuel system
(diesel-powered vehicles only)
EN07A-La
The fuel system should be bled to remove
air as described below if the fuel supply is
exhausted during travel.
1. Loosen the air plug (A) at the top of the
fuel filter.
N07A016A
2. Pump the hand pump (B) until there are
no more bubbles in the fuel coming out
of the air plug (A). When doing this,
place a cloth around the air plug (A) to
prevent the escaping fuel from spray-
ing about.
3. Tighten the air plug (A) when there are
no more bubbles in the fuel.
4. Continue pumping until the hand pump
(B) becomes stiff.
5. Finally, check to be sure that there is no
leakage of fuel.
If in doubt, consult your nearest autho-
rized MITSUBISHI dealer.
For emergencies
8-23
Div:
Out put date:
Page 324 of 392
N28A132A
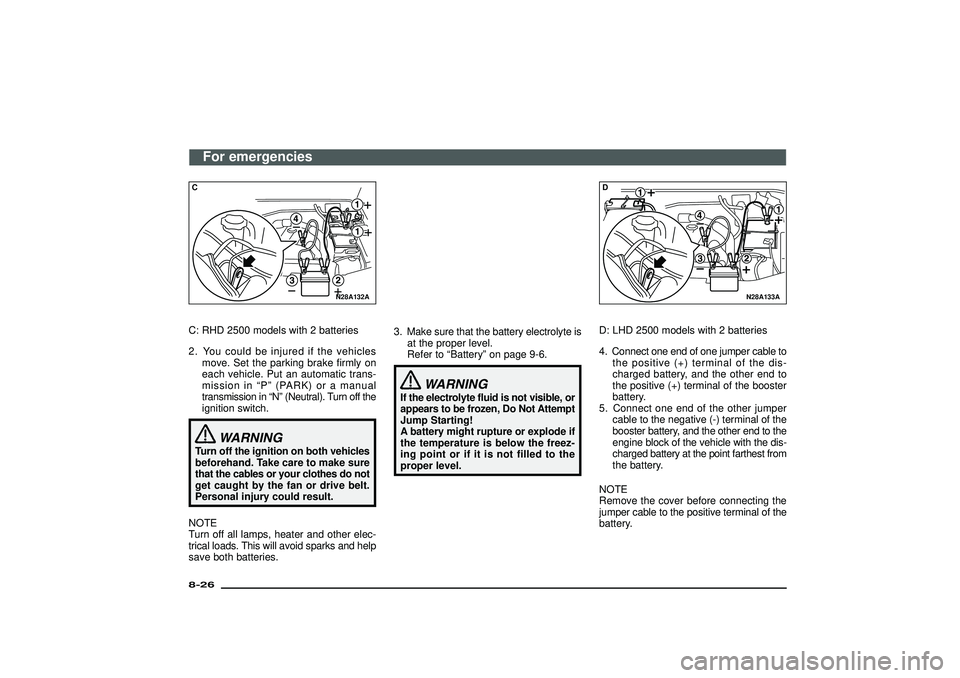
CC: RHD 2500 models with 2 batteries
2. You could be injured if the vehicles
move. Set the parking brake firmly on
each vehicle. Put an automatic trans-
mission in“P”(PARK) or a manual
transmission in“N”(Neutral). Turn off the
ignition switch.
WARNING
Turn off the ignition on both vehicles
beforehand. Take care to make sure
that the cables or your clothes do not
get caught by the fan or drive belt.
Personal injury could result.
NOTE
Turn off all lamps, heater and other elec-
trical loads. This will avoid sparks and help
save both batteries.3. Make sure that the battery electrolyte is
at the proper level.
Refer to“Battery”on page 9-6.
WARNING
If the electrolyte fluid is not visible, or
appears to be frozen, Do Not Attempt
Jump Starting!
A battery might rupture or explode if
the temperature is below the freez-
ing point or if it is not filled to the
proper level.
N28A133A
DD: LHD 2500 models with 2 batteries
4. Connect one end of one jumper cable to
the positive (+) terminal of the dis-
charged battery, and the other end to
the positive (+) terminal of the booster
battery.
5. Connect one end of the other jumper
cable to the negative (-) terminal of the
booster battery, and the other end to the
engine block of the vehicle with the dis-
charged battery at the point farthest from
the battery.
NOTE
Remove the cover before connecting the
jumper cable to the positive terminal of the
battery.
For emergencies
8-26Div:
Out put date:
Page 344 of 392
EM01A-Hh
Adequate care of your vehicle at regular
intervals serves to preserve the value and
appearance as long as possible.
Some maintenance items can be carried
out by the owner (do it yourself), while oth-
ers should be carried out by an autho-
rized MITSUBISHI dealer (periodic
inspection and maintenance). This sec-
tion describes only those items which can
be carried out by the owner. In the event a
malfunction or other problem is discov-
ered, have it corrected by an authorized
MITSUBISHI dealer. This section con-
tains information on inspection mainte-
nance procedures that you can do yourself,
if you wish to do so. Follow the instruc-
tions and cautions for each of the various
procedures.
WARNING
(1) When checking or servicing the
inside of the engine compart-
ment, make sure the engine is
switched off and has had a
chance to cool down.
(2) If it is necessary to do work in
the engine compartment with the
engine running, be especially
careful that your clothing, hair,
etc., does not become caught by
the fan, drive belts, or other
moving parts.
(3) Do not smoke, cause sparks or
allow open flames around fuel or
battery. The fumes are flam-
mable.
(4) Be extremely cautious when
working around the battery. It
contains poisonous and corro-
sive sulphuric acid.
(5) Do not get under your vehicle
with just the body jack support-
ing it. Always use automotive
jack stands.
(6) Improper handling of compo-
nents and materials used in the
vehicle can endanger your per-
sonal safety.
Consult an authorized
MITSUBISHI dealer for neces-
sary information.
M03A081A
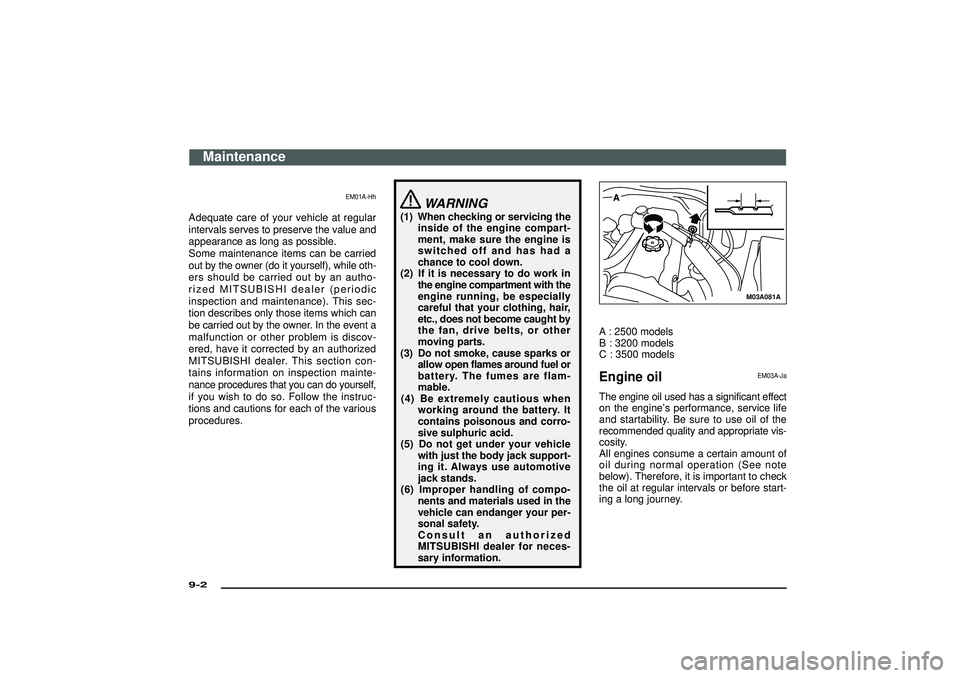
A : 2500 models
B : 3200 models
C : 3500 modelsEngine oil
EM03A-Ja
The engine oil used has a significant effect
on the engine’s performance, service life
and startability. Be sure to use oil of the
recommended quality and appropriate vis-
cosity.
All engines consume a certain amount of
oil during normal operation (See note
below). Therefore, it is important to check
the oil at regular intervals or before start-
ing a long journey.
Maintenance
9-2Div:
Out put date:
Page 383 of 392

Parking ............................................................... 5-43
Parking brake ..................................................... 5-42
Parking brake lever stroke ................................. 9-19
Part time 4WD ................................................... 5-24
Performance ...................................................... 10-7
Power steering fluid ............................................. 9-9
Power steering system ...................................... 5-49
Pregnant women restraint .................................. 3-41
Rear differential lock .......................................... 5-34
Rear fog lamp switch ......................................... 4-22
Rear heater/Rear air conditioning ...................... 6-52
Rear seat (3-door models)/Second seat (5-door models) ......................... 3-12
Rear shelf (3-door models) ................................ 6-69
Rear side/quarter window .................................. 2-15
Rear window demister switch ............................ 4-21
Rear window wiper and washer switch .............. 4-19
Removal of water from the fuel filter (diesel- powered vehicles only) ...................... 8-24
Replacement of lamp bulbs ............................... 8-34
Rheostat (meter illumination control) ................. 4-23
Roof carrier precaution ....................................... 1-11
Room lamps ....................................................... 4-24
Running-in recommendations .............................. 5-2
RV meter ............................................................ 4-40
Safe driving techniques ..................................... 1-13
Seat adjustment ................................................... 3-3
Seat arrangement ................................................ 3-3
Seat belt inspection ........................................... 3-41
Seat belts ........................................................... 3-30
Side box ............................................................. 6-67
Snow tyres ......................................................... 9-16
Spare wheel ....................................................... 8-11
Speedometer ....................................................... 4-2
Starting ............................................................... 5-12
Steering wheel height adjustment ...................... 5-49
Sun visors .......................................................... 6-56
Sunroof .............................................................. 2-15
Super select 4WD II (SS4 II) ............................. 5-28
Supplemental restraint system (SRS)-air bag ... 3-42 Tachometer .......................................................... 4-3
Third seat (5-door models) ................................ 3-14
Tools and jack ...................................................... 8-3
Towing ................................................................ 8-17
Trailer towing ....................................................... 5-8
Transmission ...................................................... 10-9
Tyre chains ......................................................... 9-16
Tyre inflation pressure ....................................... 9-14
Tyre rotation ....................................................... 9-15
Tyres and wheels ............................................. 10-10
UKW/MW/LW electronic tuning radio
with CD player ................................................ 6-17
UKW/MW/LW electronic tuning radio with tape player ................................................ 6-2
Used engine oils safety instructions .................. 1-13
Vanity mirror ....................................................... 6-58
Vehicle identification number plate (RHD vehicles only) ....................................... 10-3
Vehicle information code plate ........................... 10-3
Ventilation slots .................................................. 9-21
Ventilators .......................................................... 6-35
Washer fluid ....................................................... 9-11
Water temperature gauge .................................... 4-5
Weatherstripping ................................................ 9-21
Weight ................................................................ 10-7
Wheel condition ................................................. 9-12
Windscreen wiper and washer switch ................ 4-17
Wiper blades ............................................... 7-7, 9-19
Wiper deicer switch ........................................... 4-24
Alphabetical index
10 -19
Div:
Out put date: