MITSUBISHI SHOGUN 2008 (in English) Owner's Guide
SHOGUN 2008
MITSUBISHI
MITSUBISHI
https://www.carmanualsonline.info/img/19/34884/w960_34884-0.png
MITSUBISHI SHOGUN 2008 (in English) Owner's Guide
Page 431 of 538
For emergencies
6-27
6
12. Lower the jack all the way and remove it.
NOTE●
Occasionally when the vehicle is jacked up, the grooved portion of the designated point will not come off. When this happens, rock the
vehicle to lower the ram.
●
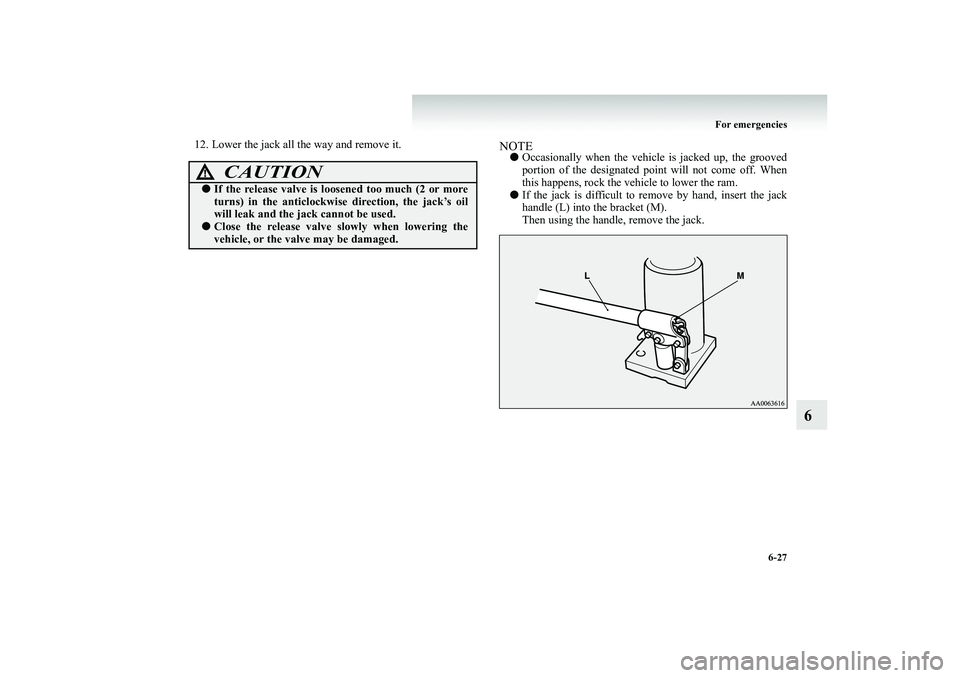
If the jack is difficult to remove by hand, insert the jack handle (L) into the bracket (M). Then using the handle, remove the jack.
CAUTION
!●
If the release valve is loos
ened too much (2 or more
turns) in the anticlockwise
direction, the jack’s oil
will leak and the jack cannot be used.
●
Close the release valve slowly when lowering the vehicle, or the valve may be damaged.
BK-BK2008E1ENUK.en-uk-Section9.fm Page
27 Wednesday, January 9, 2008 4:46 PM
Page 488 of 538
8-38 Maintenance
8
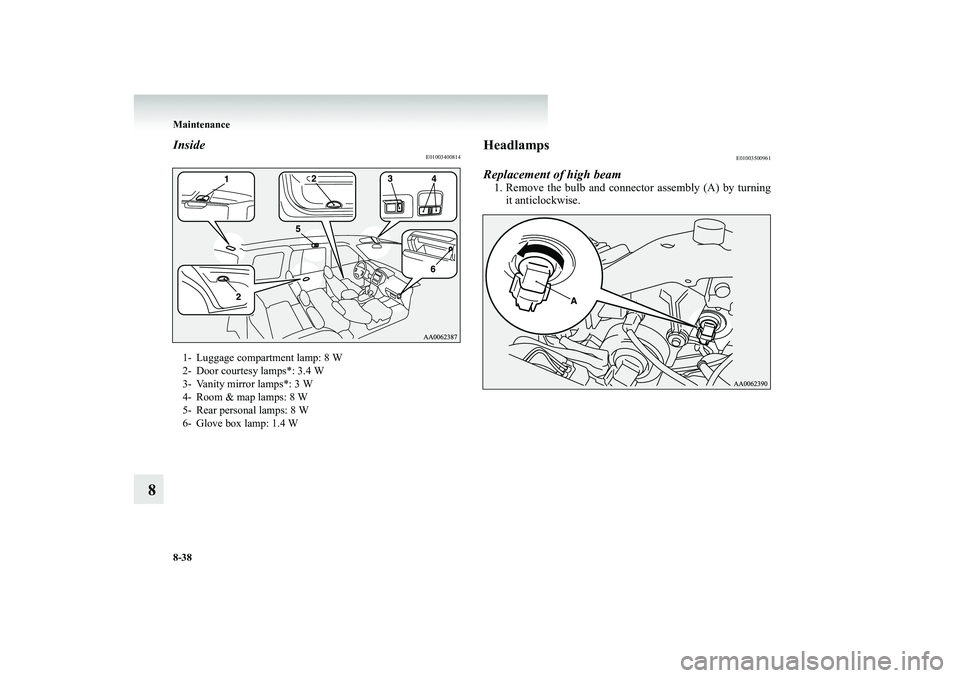
Inside
E01003400814
Headlamps
E01003500961
Replacement of high beam1. Remove the bulb and connector assembly (A) by turning
it anticlockwise.
1- Luggage compartment lamp: 8 W 2- Door courtesy lamps*: 3.4 W 3- Vanity mirror lamps*: 3 W 4- Room & map lamps: 8 W5- Rear personal lamps: 8 W 6- Glove box lamp: 1.4 W
BK-BK2008E1ENUK.en-uk-Section11.fm Page
38 Wednesday, January 9, 2008 4:50 PM
Page 489 of 538
Maintenance
8-39
8
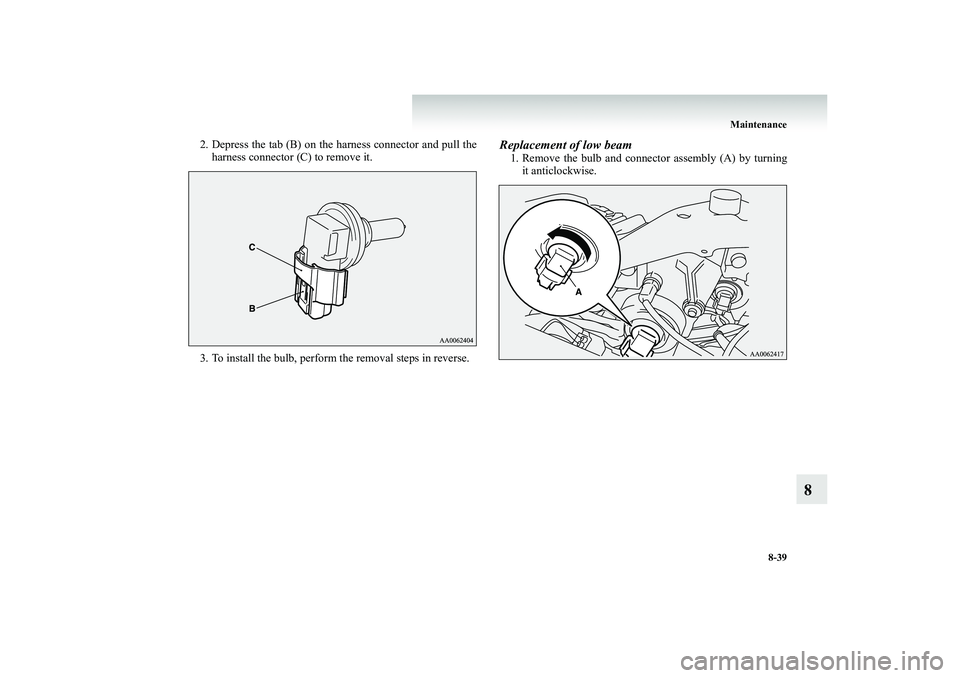
2. Depress the tab (B) on the harness connector and pull the
harness connector (C) to remove it.
3. To install the bulb, perform the removal steps in reverse.
Replacement of low beam1. Remove the bulb and connector assembly (A) by turning
it anticlockwise.
BK-BK2008E1ENUK.en-uk-Section11.fm Page
39 Wednesday, January 9, 2008 4:50 PM
Page 491 of 538
Maintenance
8-41
8
Position lamps
E01003700471
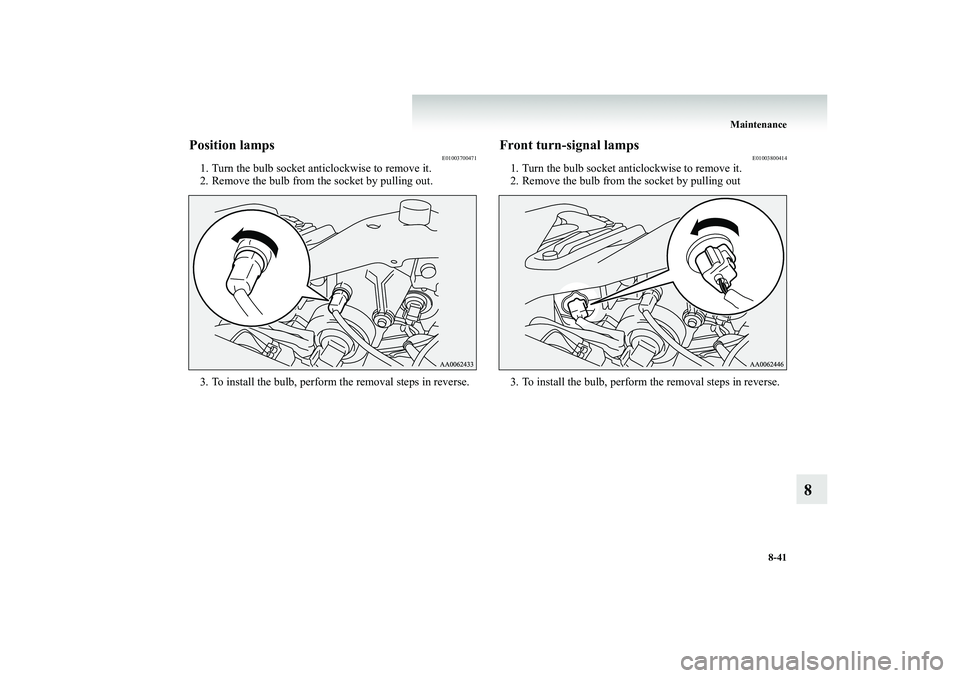
1. Turn the bulb socket an
ticlockwise to remove it.
2. Remove the bulb from the socket by pulling out. 3. To install the bulb, perform the removal steps in reverse.
Front turn-signal lamps
E01003800414
1. Turn the bulb socket anticlockwise to remove it. 2. Remove the bulb from the socket by pulling out 3. To install the bulb, perform the removal steps in reverse.
BK-BK2008E1ENUK.en-uk-Section11.fm Page
41 Wednesday, January 9, 2008 4:50 PM
Page 493 of 538
Maintenance
8-43
8
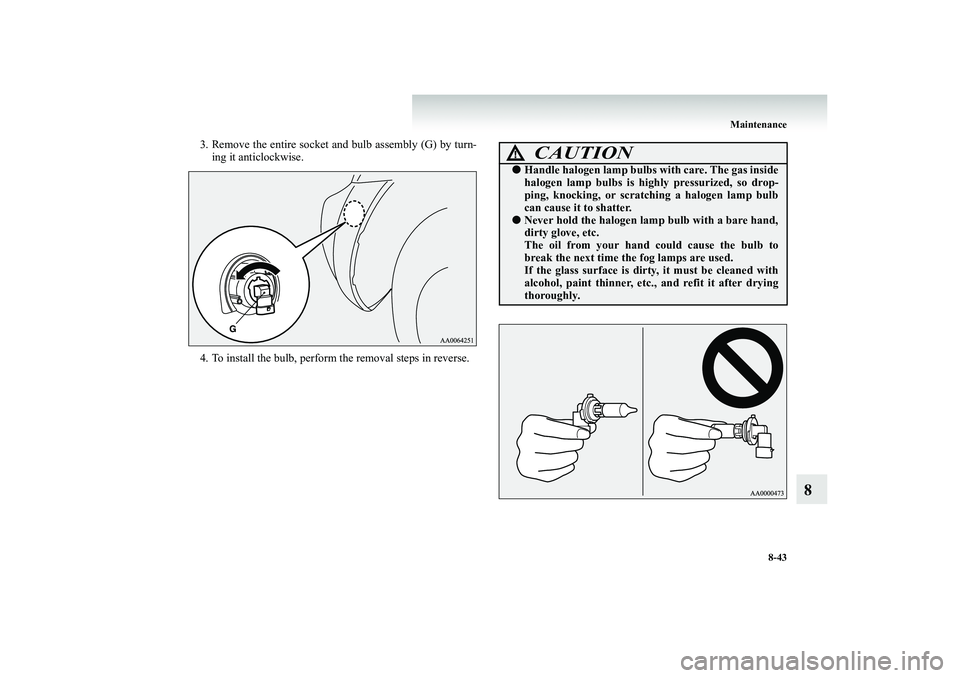
3. Remove the entire socket and bulb assembly (G) by turn-
ing it anticlockwise.
4. To install the bulb, perform the removal steps in reverse.
CAUTION
!●
Handle halogen lamp bulbs with care. The gas inside halogen lamp bulbs is highly pressurized, so drop-ping, knocking, or scratc
hing a halogen lamp bulb
can cause it to shatter.
●
Never hold the halogen lamp bulb with a bare hand, dirty glove, etc. The oil from your hand could cause the bulb to break the next time the fog lamps are used.If the glass surface is dirt
y, it must be cleaned with
alcohol, paint thinner, etc., and refit it after drying thoroughly.
BK-BK2008E1ENUK.en-uk-Section11.fm Page
43 Wednesday, January 9, 2008 4:50 PM
Page 495 of 538
Maintenance
8-45
8
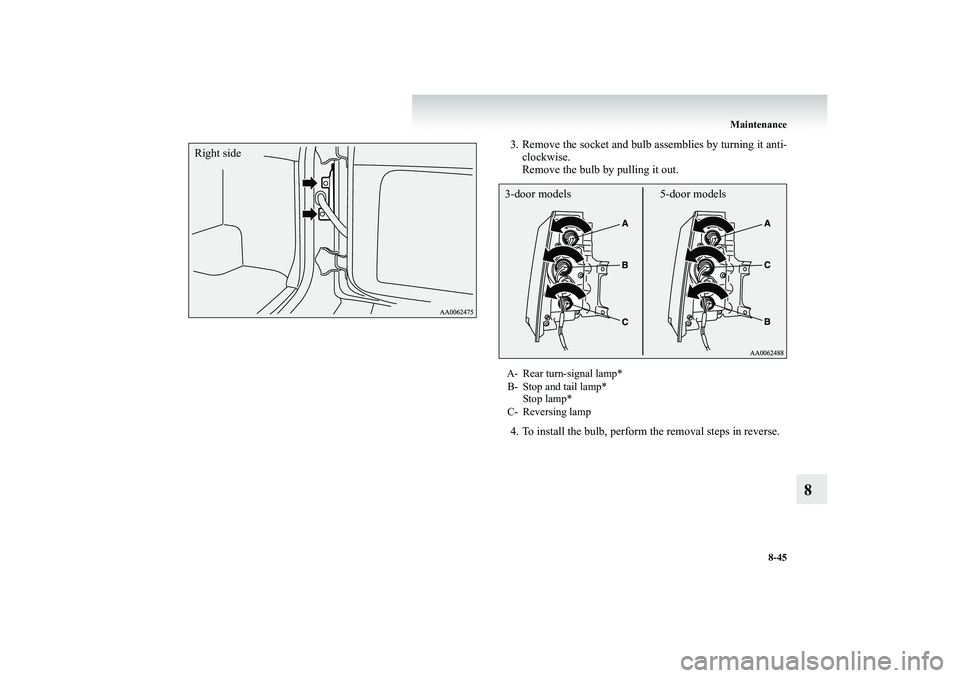
3. Remove the socket and bulb assemblies by turning it anti-
clockwise. Remove the bulb by pulling it out.
4. To install the bulb, perform the removal steps in reverse.
Right side
A- Rear turn-signal lamp* B- Stop and tail lamp*
Stop lamp*
C- Reversing lamp 3-door models 5-door models
BK-BK2008E1ENUK.en-uk-Section11.fm Page
45 Wednesday, January 9, 2008 4:50 PM
Page 496 of 538
8-46 Maintenance
8
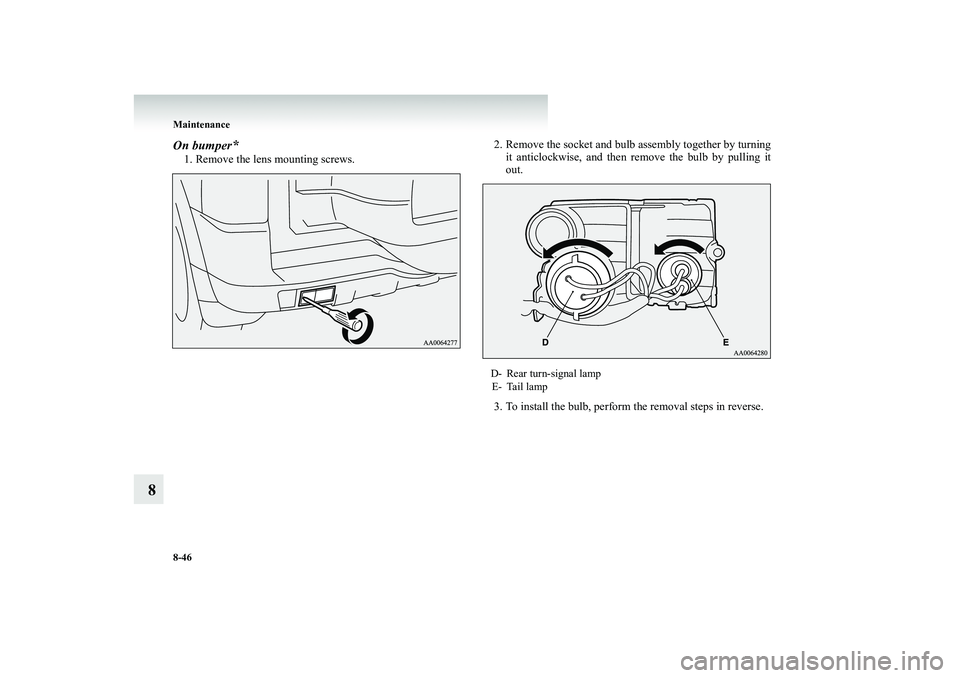
On bumper
*
1. Remove the lens mounting screws.
2. Remove the socket and bulb assembly together by turning
it anticlockwise, and then remove the bulb by pulling it out.
3. To install the bulb, perform the removal steps in reverse.D- Rear turn-signal lamp E- Tail lamp
BK-BK2008E1ENUK.en-uk-Section11.fm Page
46 Wednesday, January 9, 2008 4:50 PM
Page 497 of 538
Maintenance
8-47
8
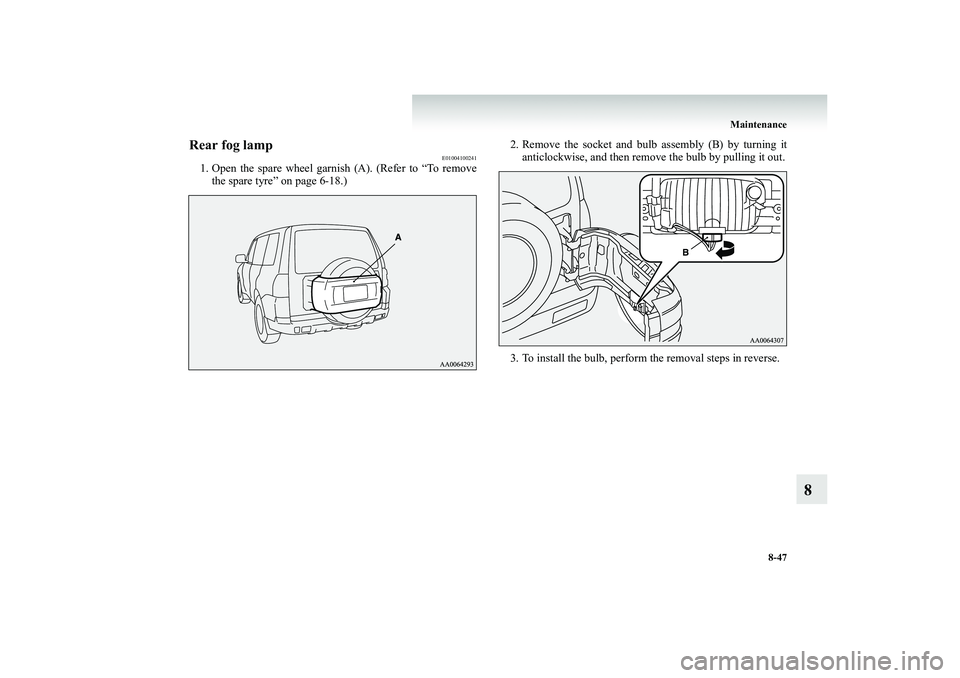
Rear fog lamp
E01004100241
1. Open the spare wheel garnis
h (A). (Refer to “To remove
the spare tyre” on page 6-18.)
2. Remove the socket and bulb assembly (B) by turning it
anticlockwise, and then remove the bulb by pulling it out.
3. To install the bulb, perform the removal steps in reverse.
BK-BK2008E1ENUK.en-uk-Section11.fm Page
47 Wednesday, January 9, 2008 4:50 PM
Page 498 of 538
8-48 Maintenance
8
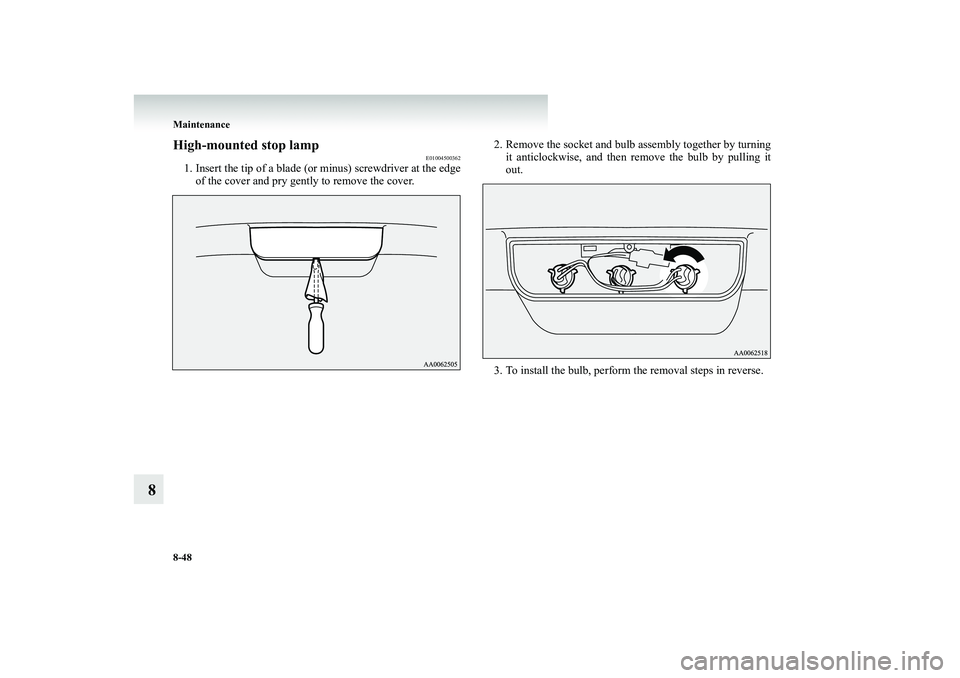
High-mounted stop lamp
E01004500362
1. Insert the tip of a blade (or
minus) screwdriver at the edge
of the cover and pry gently to remove the cover.
2. Remove the socket and bulb assembly together by turning
it anticlockwise, and then remove the bulb by pulling it out.
3. To install the bulb, perform the removal steps in reverse.
BK-BK2008E1ENUK.en-uk-Section11.fm Page
48 Wednesday, January 9, 2008 4:50 PM
Page 499 of 538
Maintenance
8-49
8
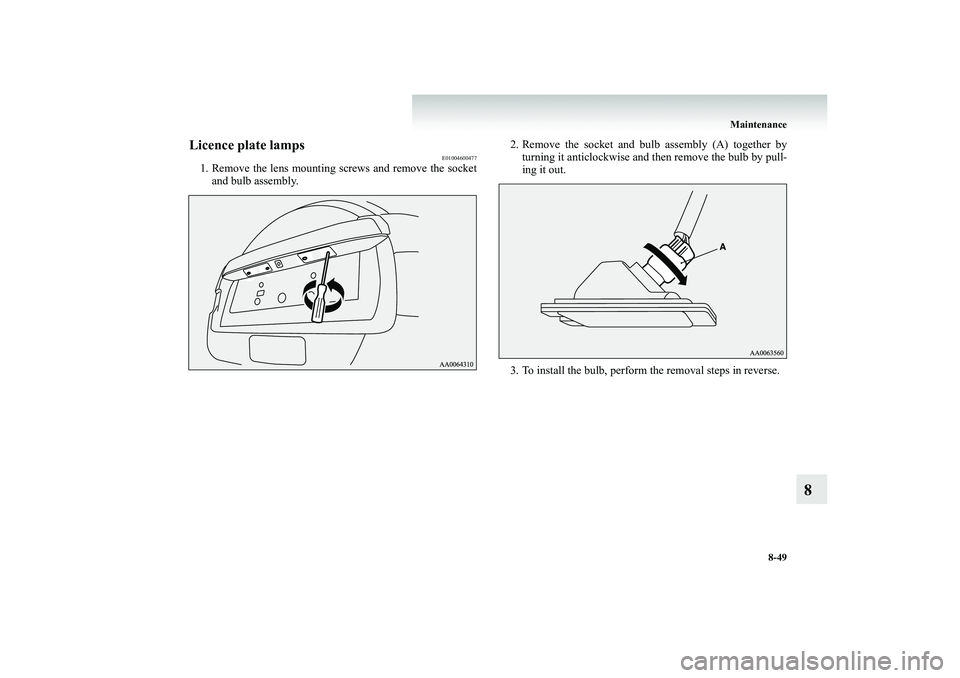
Licence plate lamps
E01004600477
1. Remove the lens mounting screws and remove the socket
and bulb assembly.
2. Remove the socket and bulb assembly (A) together by
turning it anticlockwise and then remove the bulb by pull- ing it out.
3. To install the bulb, perform the removal steps in reverse.
BK-BK2008E1ENUK.en-uk-Section11.fm Page
49 Wednesday, January 9, 2008 4:50 PM
