MITSUBISHI SHOGUN 2008 Owner's Manual (in English)
SHOGUN 2008
MITSUBISHI
MITSUBISHI
https://www.carmanualsonline.info/img/19/34884/w960_34884-0.png
MITSUBISHI SHOGUN 2008 Owner's Manual (in English)
Trending: MPG, instrument cluster, reset, child restraint, lock, heater, immobilizer
Page 501 of 538
Maintenance
8-51
8
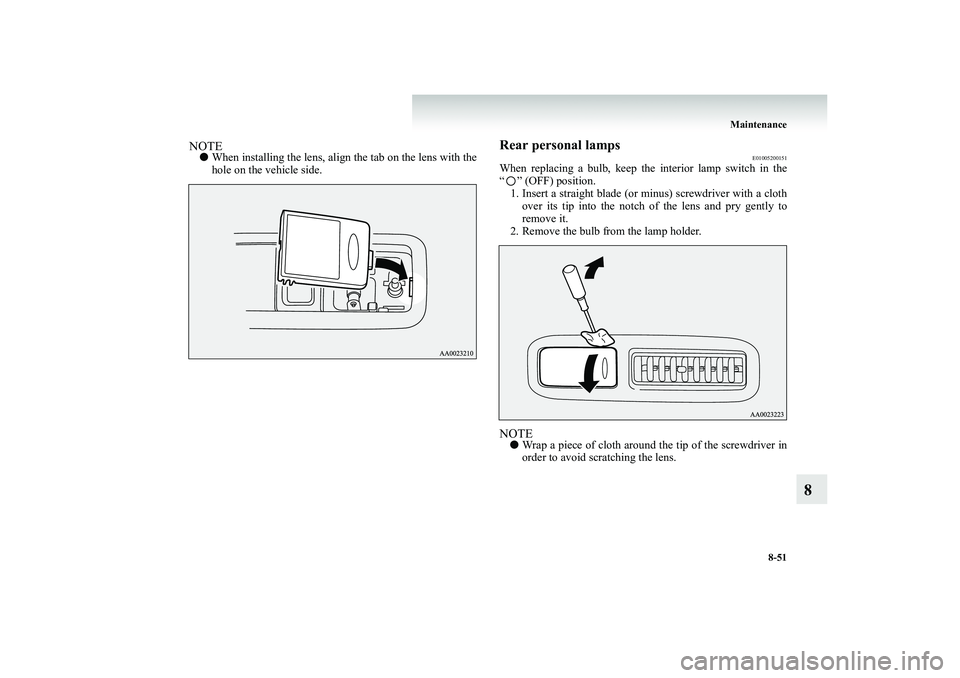
NOTE●
When installing the lens, align the tab on the lens with the hole on the vehicle side.
Rear personal lamps
E01005200151
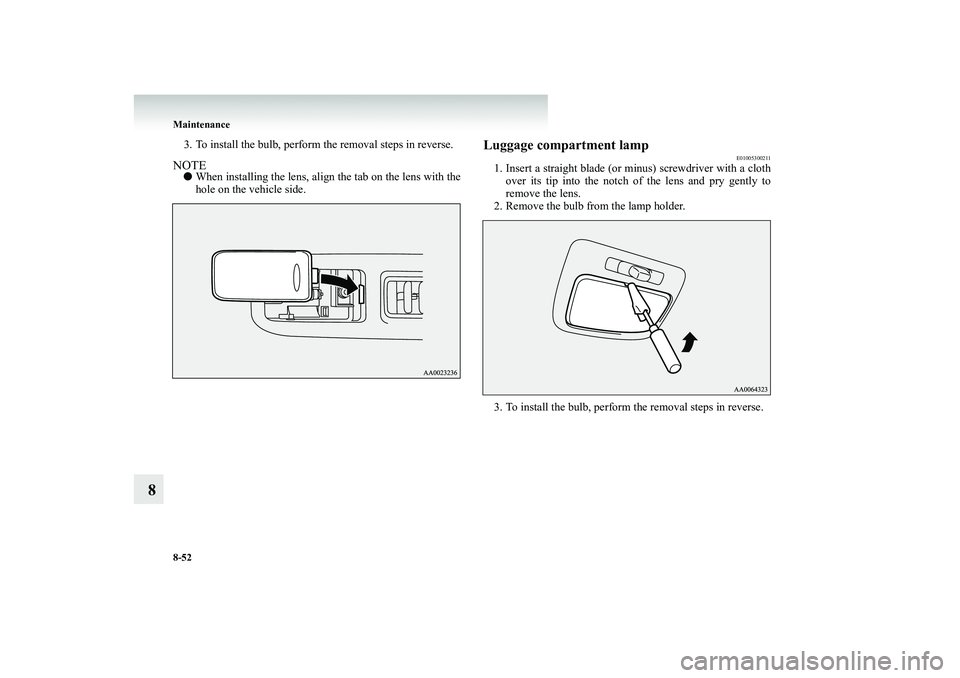
When replacing a bulb, keep the
interior lamp switch in the
“ ” (OFF) position. 1. Insert a straight blade (or minus) screwdriver with a cloth
over its tip into the notch of the lens and pry gently toremove it.
2. Remove the bulb from the lamp holder.NOTE●
Wrap a piece of cloth around th
e tip of the screwdriver in
order to avoid scratching the lens.
BK-BK2008E1ENUK.en-uk-Section11.fm Page
51 Wednesday, January 9, 2008 4:50 PM
Page 502 of 538
8-52 Maintenance
8
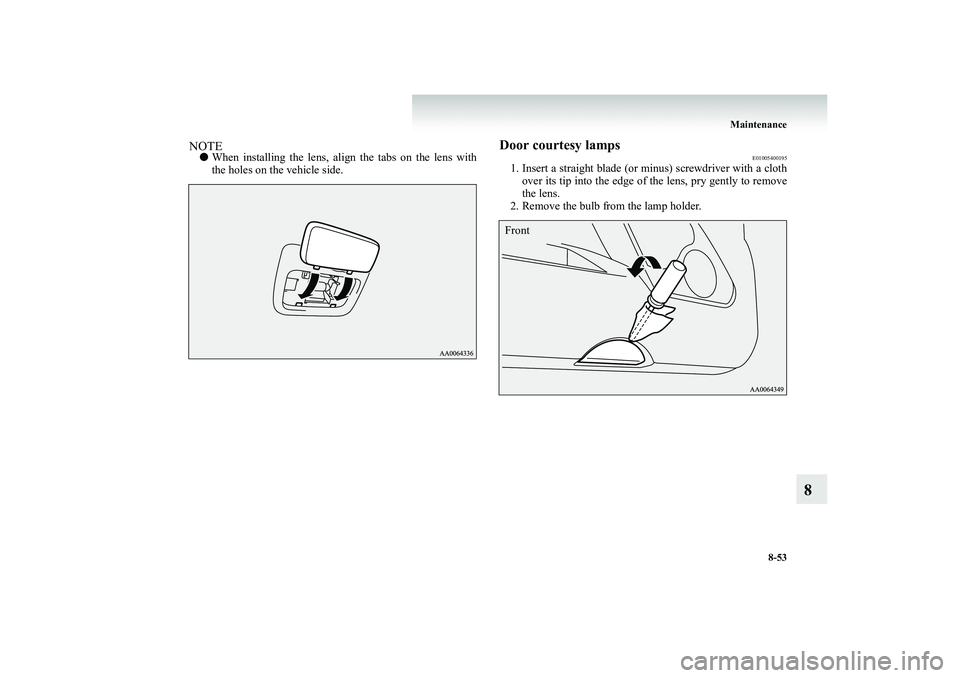
3. To install the bulb, perform the removal steps in reverse.NOTE●
When installing the lens, align the tab on the lens with the hole on the vehicle side.
Luggage compartment lamp
E01005300211
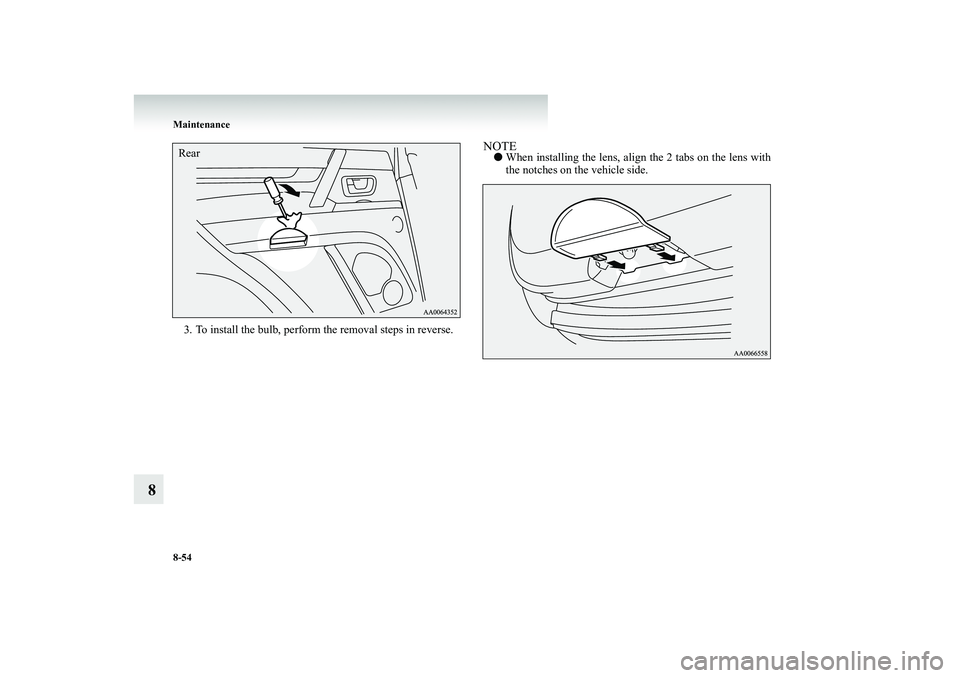
1. Insert a straight blade (or minus) screwdriver with a cloth
over its tip into the notch of the lens and pry gently to remove the lens.
2. Remove the bulb from the lamp holder. 3. To install the bulb, perform the removal steps in reverse.
BK-BK2008E1ENUK.en-uk-Section11.fm Page
52 Wednesday, January 9, 2008 4:50 PM
Page 503 of 538
Maintenance
8-53
8
NOTE●
When installing the lens, align the tabs on the lens with the holes on the vehicle side.
Door courtesy lamps
E01005400195
1. Insert a straight blade (or minus) screwdriver with a cloth
over its tip into the edge of the lens, pry gently to remove the lens.
2. Remove the bulb from the lamp holder.Front
BK-BK2008E1ENUK.en-uk-Section11.fm Page
53 Wednesday, January 9, 2008 4:50 PM
Page 504 of 538
8-54 Maintenance
8
3. To install the bulb, perform the removal steps in reverse.
NOTE●
When installing the lens, align the 2 tabs on the lens with the notches on the vehicle side.
RearBK-BK2008E1ENUK.en-uk-Section11.fm Page
54 Wednesday, January 9, 2008 4:50 PM
Page 505 of 538
Maintenance
8-55
8
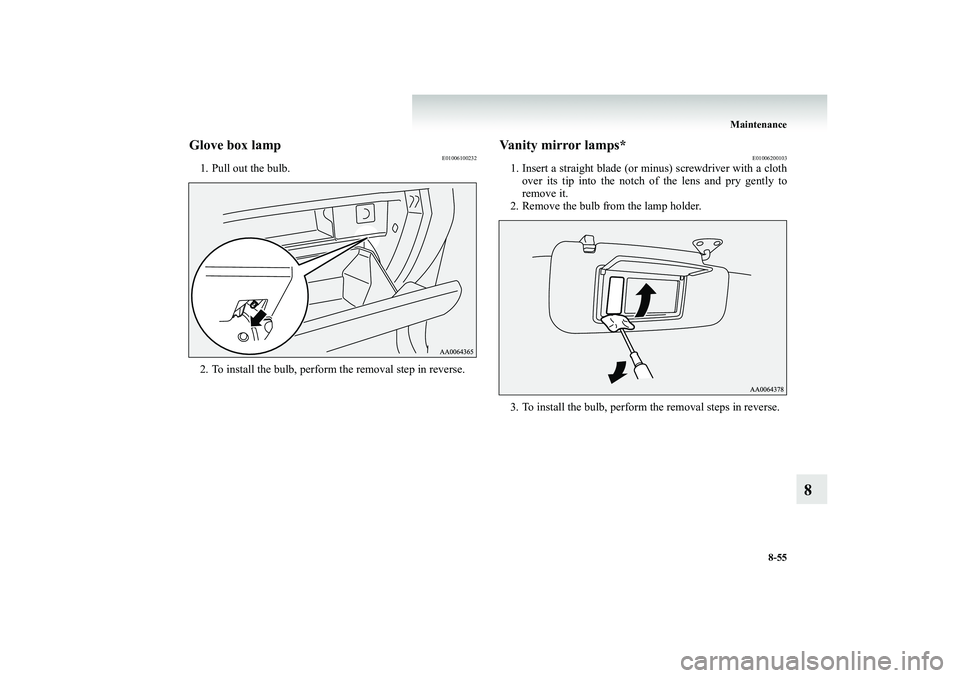
Glove box lamp
E01006100232
1. Pull out the bulb. 2. To install the bulb, perform the removal step in reverse.
Vanity mirror lamps*
E01006200103
1. Insert a straight blade (or minus) screwdriver with a cloth
over its tip into the notch of the lens and pry gently to remove it.
2. Remove the bulb from the lamp holder. 3. To install the bulb, perform the removal steps in reverse.
BK-BK2008E1ENUK.en-uk-Section11.fm Page
55 Wednesday, January 9, 2008 4:50 PM
Page 506 of 538
BK-BK2008E1ENUK.en-uk-Section11.fm Page
56 Wednesday, January 9, 2008 4:50 PM
Page 507 of 538
9
Specifications
Vehicle labeling . . . . . . . . . . . . . . . . . . . . . . . . . . .9- 2 Vehicle dimensions . . . . . . . . . . . . . . . . . . . . . . . .9- 4Vehicle performance . . . . . . . . . . . . . . . . . . . . . . .9- 6Vehicle weight . . . . . . . . . . . . . . . . . . . . . . . . . . . .9- 7Engine specifications . . . . . . . . . . . . . . . . . . . . . . .9- 11Electrical system . . . . . . . . . . . . . . . . . . . . . . . . . .9- 12Tyres and wheels . . . . . . . . . . . . . . . . . . . . . . . . . .9- 13Fuel consumption . . . . . . . . . . . . . . . . . . . . . . . . . .9- 14Notes regarding diesel fuel . . . . . . . . . . . . . . . . . .9- 15Refill capacities . . . . . . . . . . . . . . . . . . . . . . . . . . .9- 16
BK-BK2008E1ENUK.en-uk-Section12.fm Page
1 Thursday, January 10, 2008 7:49 AM
Page 508 of 538
9-2 Specifications
9
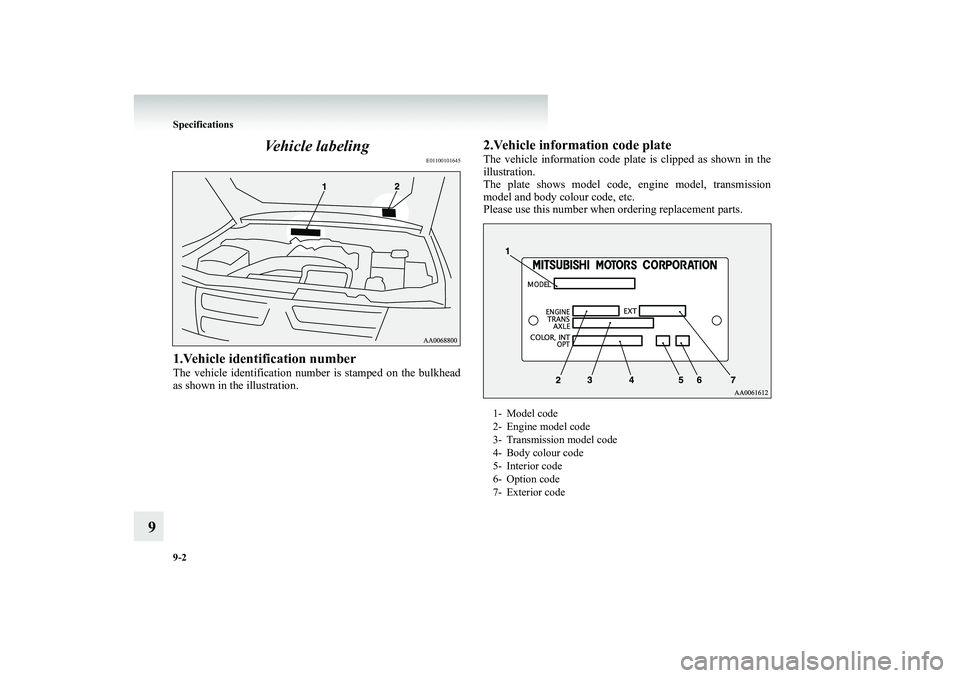
Vehicle labeling
E01100101645
1.Vehicle identification numberThe vehicle identification number
is stamped on the bulkhead
as shown in the illustration.
2.Vehicle information code plateThe vehicle information code plat
e is clipped as shown in the
illustration.The plate shows model code,
engine model, transmission
model and body colour code, etc. Please use this number when
ordering replacement parts.
1- Model code 2- Engine model code 3- Transmission model code4- Body colour code 5- Interior code 6- Option code7- Exterior code
BK-BK2008E1ENUK.en-uk-Section12.fm Page
2 Thursday, January 10, 2008 7:49 AM
Page 509 of 538
Specifications
9-3
9
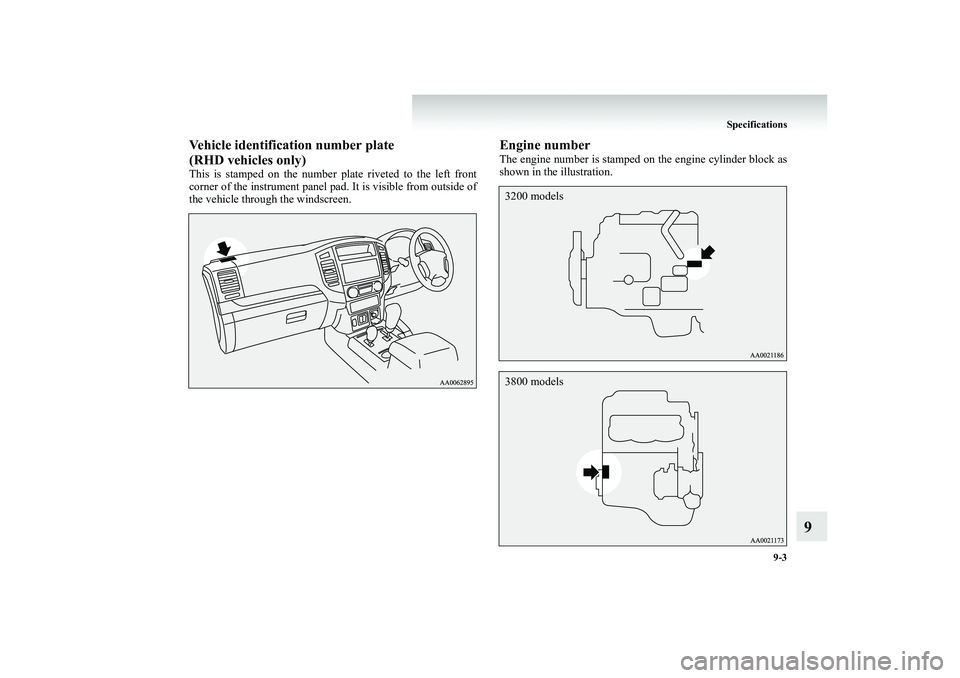
Vehicle identification number plate (RHD vehicles only)This is stamped on the number plate riveted to the left front corner of the instrument panel pad. It is visible from outside of the vehicle through the windscreen.
Engine numberThe engine number is stamped on the engine cylinder block asshown in the illustration.3200 models3800 models
BK-BK2008E1ENUK.en-uk-Section12.fm Page
3 Thursday, January 10, 2008 7:49 AM
Page 510 of 538
9-4 Specifications
9
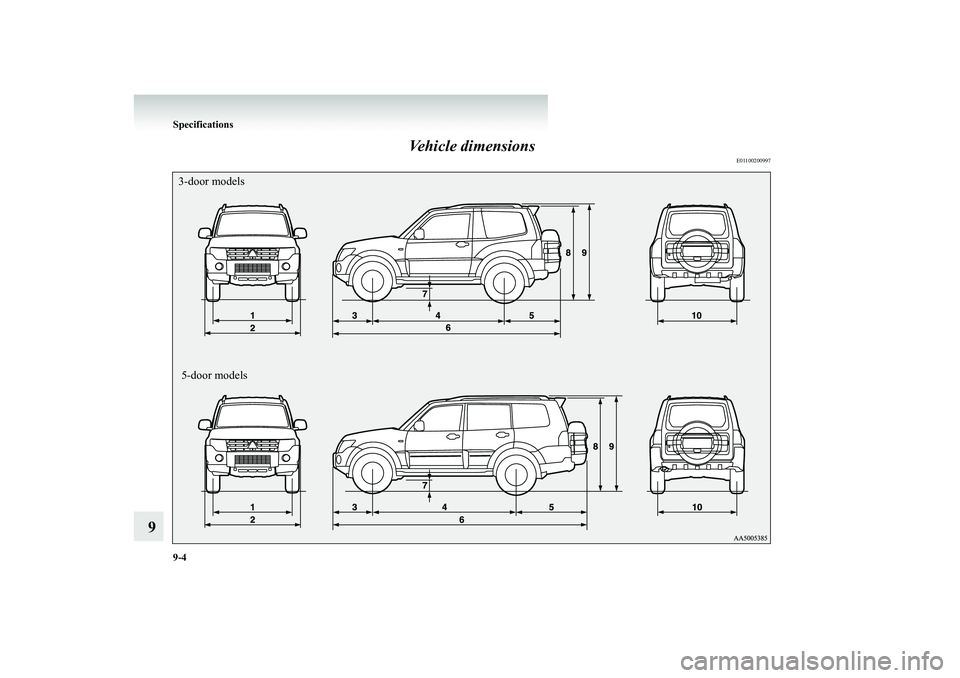
Vehicle dimensions
E01100200997
5-door models 3-door modelsBK-BK2008E1ENUK.en-uk-Section12.fm Page
4 Thursday, January 10, 2008 7:49 AM
Trending: keyless, oil filter, remote start, coolant, trailer, air filter, oil change
