oil pressure MITSUBISHI SHOGUN 2017 Owner's Manual (in English)
[x] Cancel search | Manufacturer: MITSUBISHI, Model Year: 2017, Model line: SHOGUN, Model: MITSUBISHI SHOGUN 2017Pages: 394, PDF Size: 19 MB
Page 2 of 394
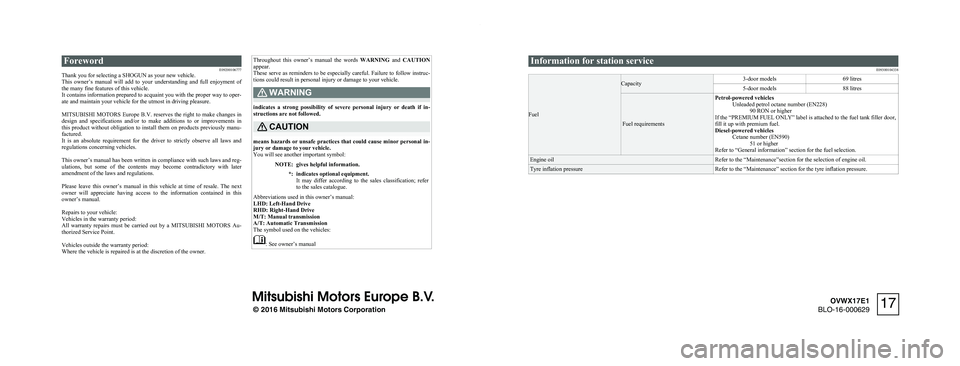
ForewordE09200106777
Thank you for selecting a SHOGUN as your new vehicle.
This owner’s manual will add to your understanding and full enjoyment of
the many fine features of this vehicle.
It contains information prepared to acquaint you with the proper way to oper-
ate and maintain your vehicle for the utmost in driving pleasure.
MITSUBISHI MOTORS Europe B.V. reserves the right to make changes in
design and specifications and/or to make additions to or improvements in
this product without obligation to install them on products previously manu- factured.
It is an absolute requirement for the driver to strictly observe all laws and
regulations concerning vehicles.
This owner’s manual has been written in compliance with such laws and reg- ulations, but some of the contents may become contradictory with later amendment of the laws and regulations.
Please leave this owner’s manual in this vehicle at time of resale. The next
owner will appreciate having access to the information contained in this
owner’s manual.
Repairs to your vehicle:
Vehicles in the warranty period:
All warranty repairs must be carried out by a MITSUBISHI MOTORS Au-
thorized Service Point.
Vehicles outside the warranty period:
Where the vehicle is repaired is at the discretion of the owner.
Throughout this owner’s manual the words WARNING and CAUTION
appear.
These serve as reminders to be especially careful. Failure to follow instruc-
tions could result in personal injury or damage to your vehicle.WARNING
indicates a strong possibility of severe personal injury or death if in- structions are not followed.
CAUTION
means hazards or unsafe practices that could cause minor personal in-
jury or damage to your vehicle.
You will see another important symbol:
NOTE:gives helpful information.*:indicates optional equipment.
It may differ according to the sales classification; refer to the sales catalogue.
Abbreviations used in this owner’s manual:
LHD: Left-Hand Drive
RHD: Right-Hand Drive
M/T: Manual transmission
A/T: Automatic Transmission
The symbol used on the vehicles:
: See owner’s manual
Information for station service
E09300104338
Fuel
Capacity3-door models69 litres5-door models88 litres
Fuel requirements
Petrol-powered vehiclesUnleaded petrol octane number (EN228)90 RON or higher
If the “PREMIUM FUEL ONLY” label is attached to the fuel tank filler door,
fill it up with premium fuel.
Diesel-powered vehicles Cetane number (EN590)51 or higher
Refer to “General information” section for the fuel selection.Engine oilRefer to the “Maintenance”section for the selection of engine oil.Tyre inflation pressureRefer to the “Maintenance” section for the tyre inflation pressure.
© 2016 Mitsubishi Motors Corporation
17
OVWX17E1
BLO-16-000629
Page 96 of 394
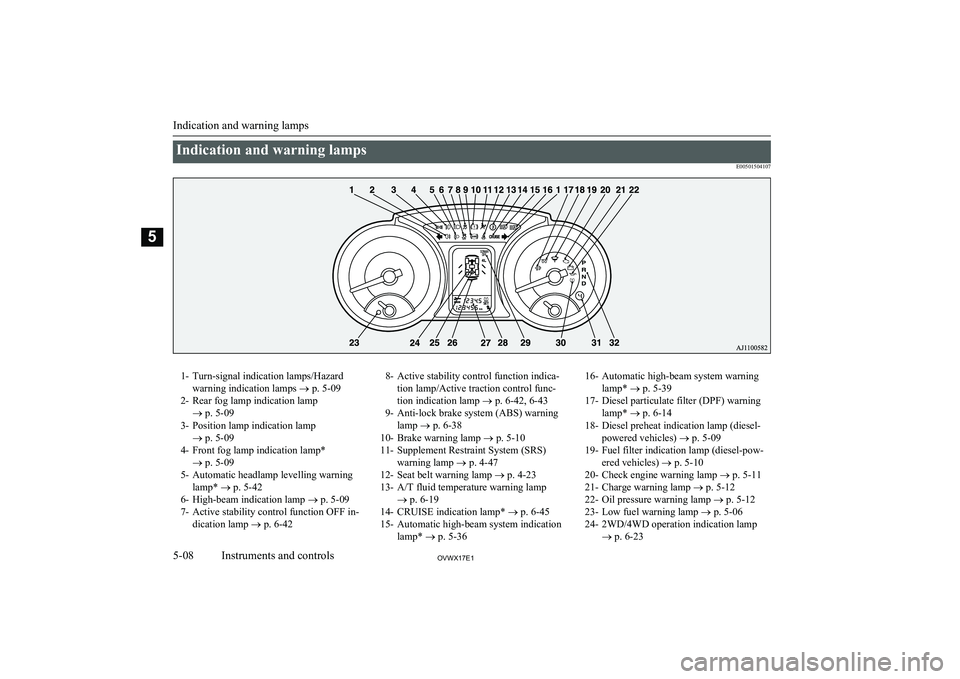
Indication and warning lampsE005015041071- Turn-signal indication lamps/Hazardwarning indication lamps ® p. 5-09
2- Rear fog lamp indication lamp ® p. 5-09
3- Position lamp indication lamp ® p. 5-09
4- Front fog lamp indication lamp* ® p. 5-09
5- Automatic headlamp levelling warning lamp* ® p. 5-42
6- High-beam indication lamp ® p. 5-09
7- Active stability control function OFF in- dication lamp ® p. 6-428- Active stability control function indica-
tion lamp/Active traction control func-
tion indication lamp ® p. 6-42, 6-43
9- Anti-lock brake system (ABS) warning lamp ® p. 6-38
10- Brake warning lamp ® p. 5-10
11- Supplement Restraint System (SRS) warning lamp ® p. 4-47
12- Seat belt warning lamp ® p. 4-23
13- A/T fluid temperature warning lamp ® p. 6-19
14- CRUISE indication lamp* ® p. 6-45
15- Automatic high-beam system indication lamp* ® p. 5-3616- Automatic high-beam system warning
lamp* ® p. 5-39
17- Diesel particulate filter (DPF) warning lamp* ® p. 6-14
18- Diesel preheat indication lamp (diesel- powered vehicles) ® p. 5-09
19- Fuel filter indication lamp (diesel-pow- ered vehicles) ® p. 5-10
20- Check engine warning lamp ® p. 5-11
21- Charge warning lamp ® p. 5-12
22- Oil pressure warning lamp ® p. 5-12
23- Low fuel warning lamp ® p. 5-06
24- 2WD/4WD operation indication lamp ® p. 6-23
Indication and warning lamps
5-08OVWX17E1Instruments and controls5
Page 100 of 394
NOTElThe engine electronic control module ac-
commodating the onboard diagnostic system has various fault data (especially about the
exhaust emission) stored.
This data will be erased if a battery cable is
disconnected which will make a rapid diag- nosis difficult. Do not disconnect a batterycable when the check engine warning lamp
is ON.Charge warning display
E00502700472
This lamp illuminates when
the ignition switch is turnedto the “ON” position, and goes off after the engine has
started.
CAUTIONl If it illuminates while the engine is running,
there is a problem in the charging system. In
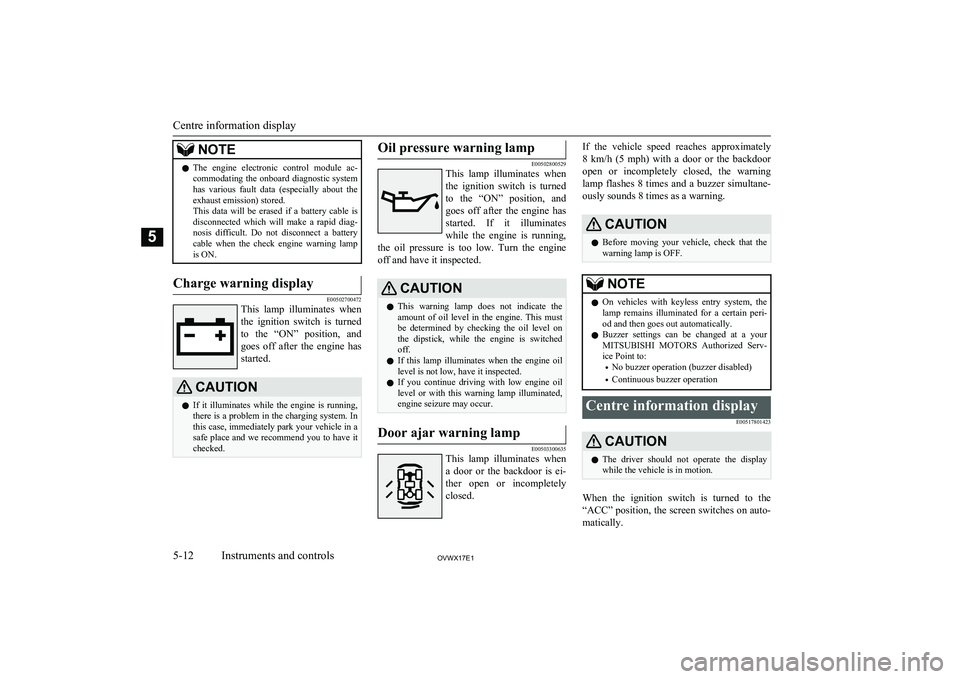
this case, immediately park your vehicle in a safe place and we recommend you to have it checked.Oil pressure warning lamp
E00502800529
This lamp illuminates when
the ignition switch is turnedto the “ON” position, and goes off after the engine has
started. If it illuminates
while the engine is running,
the oil pressure is too low. Turn the engine off and have it inspected.
CAUTIONl This warning lamp does not indicate the
amount of oil level in the engine. This must
be determined by checking the oil level on the dipstick, while the engine is switched off.
l If this lamp illuminates when the engine oil
level is not low, have it inspected.
l If you continue driving with low engine oil
level or with this warning lamp illuminated,
engine seizure may occur.Door ajar warning lamp
E00503300635
This lamp illuminates when
a door or the backdoor is ei-
ther open or incompletely closed.
If the vehicle speed reaches approximately
8 km/h (5 mph) with a door or the backdoor open or incompletely closed, the warning
lamp flashes 8 times and a buzzer simultane- ously sounds 8 times as a warning.CAUTIONl Before moving your vehicle, check that the
warning lamp is OFF.NOTEl On vehicles with keyless entry system, the
lamp remains illuminated for a certain peri-
od and then goes out automatically.
l Buzzer settings can be changed at a your
MITSUBISHI MOTORS Authorized Serv-
ice Point to:
• No buzzer operation (buzzer disabled)
• Continuous buzzer operationCentre information display
E00517801423CAUTIONlThe driver should not operate the display
while the vehicle is in motion.
When the ignition switch is turned to the
“ACC” position, the screen switches on auto- matically.
Centre information display
5-12OVWX17E1Instruments and controls5
Page 171 of 394
NOTElFrequent crossing of streams can adversely
affect the life span of the vehicle; we recom-mend you to take the necessary measures toprepare, inspect, and repair the vehicle.Inspection and maintenance
following rough roadoperation E00606700048
After operating the vehicle in rough road
conditions, be sure to perform the following inspection and maintenance procedures:
l Check that the vehicle has not been dam-
aged by rocks, gravel, etc.
l Carefully wash the vehicle with water.
After washing, drive the vehicle slowly
while lightly depressing the brake pedal in order to dry out the brakes. If the brakes still do not function properly, we
recommend you to have the brakes
checked as soon as possible
l Remove the insects, dried grass, etc.
clogging the radiator core.
l After crossing a stream, be sure to have
the following items inspected at a
MITSUBISHI MOTORS Authorized
Service Point and take the necessary
measures.
• Check the brake system and, if neces-
sary, have it serviced.
• Check the engine, transmission, trans-
fer, and differential oil or grease level
and turbidity. If the oil or grease is
milky, it indicates water contamina-
tion. Replace it with new oil or grease.
• Grease the propeller shaft.
• Check the inside of the vehicle. If in-
gress of water is found, dry the carpetetc.
• Inspect the headlamps. If the head-
lamp bulb is flooded with water, we
recommend you to have it drained.Cautions on handling of 4-
wheel drive vehicles E00606802144
Tyres and wheels
Since the driving torque can be applied to the
4 wheels, the performance of the vehicle when operating in 4-wheel drive is greatly af- fected by the condition of the tyres.
Pay close attention to the tyres.
l Install specified tyres on all wheels. Re-
fer to “Tyres and wheels” on page
11-11.
l Be sure to fit all 4 tyres and wheels of
the same size and type.
When replacement of any of the tyres or
wheels is necessary, replace all of them.
l All tyres should be rotated whenever the
wear difference between the front and
rear tyres is recognizable.
Good vehicle performance cannot be expec- ted if there is a difference in wear between
tyres. Refer to “Tyre rotation” on page 10-13.
l Check the tyre inflation pressure regular-
ly.
l If the tyre inflation pressure is inappro-
priate, the transfer gear may make some
noise and shock while changing the drive mode.CAUTIONl Always use tyres of the same size, same
type, and same brand, and which have no wear differences. Using tyres which differ in
size, type, brand or the degree of wear will
cause excessive loading, resulting in possi- ble damage to the drive system.
Inspection and maintenance following rough road operation
6-33OVWX17E1Starting and driving6
Page 198 of 394
Roof carrier precautionCAUTIONlMake sure that the weight of the luggage
does not exceed the allowable roof load.
If the allowable roof load is exceeded, this may cause damage to the vehicle.
The roof load is the total allowable load on
the roof (the weight of the roof carrier plus
the weight of luggage placed on the roof car- rier).
For specific figures, please refer to “Maxi-
mum roof load” on page 11-06 .
l When luggage is loaded onto the vehicle,
please make sure to drive slowly and avoid
excessive manoeuvres such as sudden brak- ing or quick turning.
In addition, place the luggage on the carrier
so that its weight is distributed evenly with the heaviest items on the bottom. Do not load items that are wider than the roof carri-
er.
The additional weight on the roof could raise
the vehicle’s centre of gravity and affect ve- hicle handling characteristics.
As a result, driving errors or emergency ma-
noeuvres could lead to a loss of control and
result in an accident.
l Before driving and after travelling a short
distance, always check the load to make sure it is securely fastened to the roof carrier.
Check periodically during your travel that
the load remains secure.NOTEl To prevent wind noise or reduction in fuel
economy, remove the roof carrier when not
in use.
l Before using an automatic car wash, remove
the roof carrier.
l Be sure that adequate clearance is main-
tained for raising the sunroof (if so equip-
ped) when installing a roof carrier.Trailer towing
E00610001850
In order to tow a trailer with your vehicle,
when having a trailer towing device mounted that meets all relevant regulations in your
area, consult a MITSUBISHI MOTORS Au-
thorized Service Point.
The regulations concerning the towing of a
trailer may differ from country to country. You are advised to obey the regulations in
each area.
CAUTIONl Danger of Accident!
A towing bar should be fitted according to MITSUBISHI MOTORS guidelines.
When you are going to tow a trailer, move
the transfer shift lever to “4H” position.
Selecting the “2H” drive may increase the differential oil temperature, resulting in pos-sible damage to the driving system.
Further, the drive train will be subjected to
excessive loading possibly leading to oil leakage, component seizure, or other serious faults.
Maximum towable weight with
brake and maximum trailer- nose weight
Never exceed the maximum towable weight
with brake and the maximum trailer-nose weight as listed in the specifications. (Referto “Vehicle weight” on page 11-06 .)
If you tow a trailer at an altitude of more than
1,000 m above sea-level, reduce your weight
by 10 % of the gross combination weight for
every increase of 1,000 m above sea-level, as the engine output is lowered owing to de-
crease in atmospheric pressure.
Trailer towing
6-60OVWX17E1Starting and driving6
Page 315 of 394
Genuine leather*
E00900600716
1. Gently wipe off with gauze or other soft
cloth soaked with a 5 % aqueous solu- tion of neutral detergent.
2. Dip cloth in fresh water and wring it out
well. Using this cloth, wipe off the deter-
gent thoroughly.
3. Apply leather protecting agent to the
genuine leather surface.
NOTEl If genuine leather is wet with water or is
washed in water, wipe off water as quickly
as possible with a dry, soft cloth. If left damp, mildew may grow.
l The genuine leather surface may be dam-
aged if a nylon brush or synthetic fibre is
rubbed hard against it.
l Organic solvents such as benzine, kerosene,
alcohol and petrol, acid or alkaline solvents
may discolour the genuine leather surface. Be sure to use neutral detergents.
l Remove dirty patches or oil substances
quickly as they can stain genuine leather.
l The genuine leather surface may harden and
shrink if it is exposed to direct sun for long
hours. When your vehicle is parked, place it in the shade as much as possible.
l When the temperature of the vehicle interior
rises in summer, vinyl products left on the
genuine leather seat may deteriorate and stick to the seat.Cleaning the exterior of
your vehicle E00900700195
If the following is left on your vehicle, it may cause corrosion, discolouration and stains, wash the vehicle as soon as possible.
l Seawater, road deicing products.
l Soot and dust, iron powder from facto-
ries, chemical substance (acids, alkalis, coal-tar, etc.).
l Droppings from birds, carcasses of in-
sects, tree sap, etc.Washing
E00900903895
Chemicals contained in the dirt and dust picked up from the road surface can damagethe paint coat and body of your vehicle if left
in prolonged contact.
Frequent washing and waxing is the best way to protect your vehicle from this damage.
This will also be effective in protecting it from environmental elements such as rain,snow, salt air, etc.
Do not wash the vehicle in direct sunlight.
Park the vehicle in the shade and spray it
with water to remove dust. Next, using an ample amount of clean water and a car wash- ing brush or sponge, wash the vehicle from
top to bottom.
Use a mild car washing soap if necessary.
Rinse thoroughly and wipe dry with a soft
cloth. After washing the vehicle, carefully clean the joints and flanges of the doors, bon-
net, etc., where dirt is likely to remain.CAUTIONl When washing the under side of your vehi-
cle or wheel, be careful not to injure your
hands.
l If your vehicle has a rain sensor, place the
wiper switch lever in the “OFF” position to deactivate the rain sensor before washing thevehicle. Otherwise, the wipers will operate
in the presence of water spray on the wind- screen and may get damaged as a result.
l Refrain from excessively using a car wash as
its brushes may scratch the paint surface, causing it to lose its gloss.
Scratches will be especially visible on darker
coloured vehicles.
l Never spray or splash water on the electrical
components in the engine compartment, as this may adversely affect engine starting.
Exercise caution also when washing the un-
derbody; be careful not to spray water into the engine compartment.
l Some types of hot water washing equipment
apply high pressure and heat to the vehicle. They may cause heat distortion and damage
to the vehicle resin parts and may result in flooding of the vehicle interior. Therefore:
Cleaning the exterior of your vehicle
9-03OVWX17E1Vehicle care9
Page 324 of 394
NOTElUse of additives is not recommended since
they may reduce the effectiveness of addi-
tives already included in the engine oil. It may result in failure of the mechanical as-
sembly.
Diesel-powered vehicles
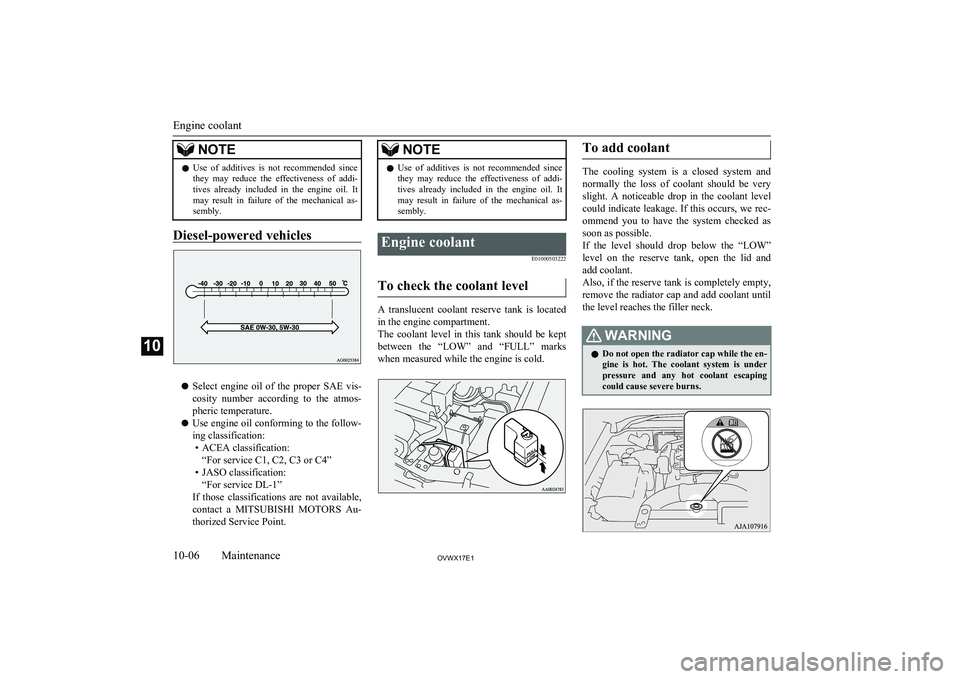
l Select engine oil of the proper SAE vis-
cosity number according to the atmos-pheric temperature.
l Use engine oil conforming to the follow-
ing classification:
• ACEA classification: “For service C1, C2, C3 or C4”
• JASO classification: “For service DL-1”
If those classifications are not available,
contact a MITSUBISHI MOTORS Au-
thorized Service Point.
NOTEl Use of additives is not recommended since
they may reduce the effectiveness of addi-
tives already included in the engine oil. It may result in failure of the mechanical as-
sembly.Engine coolant
E01000503222
To check the coolant level
A translucent coolant reserve tank is locatedin the engine compartment.
The coolant level in this tank should be kept
between the “LOW” and “FULL” marks when measured while the engine is cold.
To add coolant
The cooling system is a closed system and
normally the loss of coolant should be very
slight. A noticeable drop in the coolant level
could indicate leakage. If this occurs, we rec- ommend you to have the system checked as
soon as possible.
If the level should drop below the “LOW” level on the reserve tank, open the lid and
add coolant.
Also, if the reserve tank is completely empty, remove the radiator cap and add coolant until
the level reaches the filler neck.
WARNINGl Do not open the radiator cap while the en-
gine is hot. The coolant system is under pressure and any hot coolant escaping
could cause severe burns.
Engine coolant
10-06OVWX17E1Maintenance10
Page 330 of 394
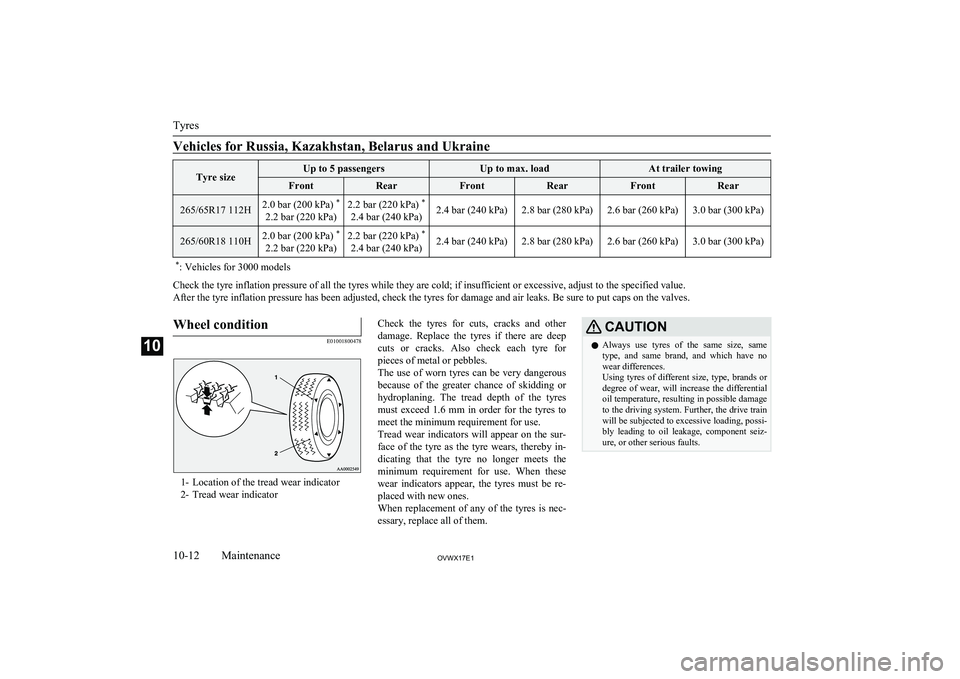
Vehicles for Russia, Kazakhstan, Belarus and UkraineTyre sizeUp to 5 passengersUp to max. loadAt trailer towingFrontRearFrontRearFrontRear265/65R17 112H2.0 bar (200 kPa) *
2.2 bar (220 kPa)2.2 bar (220 kPa) *
2.4 bar (240 kPa)2.4 bar (240 kPa)2.8 bar (280 kPa)2.6 bar (260 kPa)3.0 bar (300 kPa)265/60R18 110H2.0 bar (200 kPa) *
2.2 bar (220 kPa)2.2 bar (220 kPa) *
2.4 bar (240 kPa)2.4 bar (240 kPa)2.8 bar (280 kPa)2.6 bar (260 kPa)3.0 bar (300 kPa)* : Vehicles for 3000 models
Check the tyre inflation pressure of all the tyres while they are cold; if insufficient or excessive, adjust to the specified value.
After the tyre inflation pressure has been adjusted, check the tyres for damage and air leaks. Be sure to put caps on the valves.
Wheel condition
E01001800478
1- Location of the tread wear indicator
2- Tread wear indicator
Check the tyres for cuts, cracks and other
damage. Replace the tyres if there are deep
cuts or cracks. Also check each tyre for pieces of metal or pebbles.
The use of worn tyres can be very dangerous
because of the greater chance of skidding or
hydroplaning. The tread depth of the tyres
must exceed 1.6 mm in order for the tyres to meet the minimum requirement for use.
Tread wear indicators will appear on the sur-
face of the tyre as the tyre wears, thereby in-
dicating that the tyre no longer meets the
minimum requirement for use. When these
wear indicators appear, the tyres must be re-
placed with new ones.
When replacement of any of the tyres is nec- essary, replace all of them.CAUTIONl Always use tyres of the same size, same
type, and same brand, and which have no wear differences.
Using tyres of different size, type, brands or
degree of wear, will increase the differential
oil temperature, resulting in possible damage to the driving system. Further, the drive train
will be subjected to excessive loading, possi- bly leading to oil leakage, component seiz-ure, or other serious faults.
Tyres
10-12OVWX17E1Maintenance10
Page 369 of 394
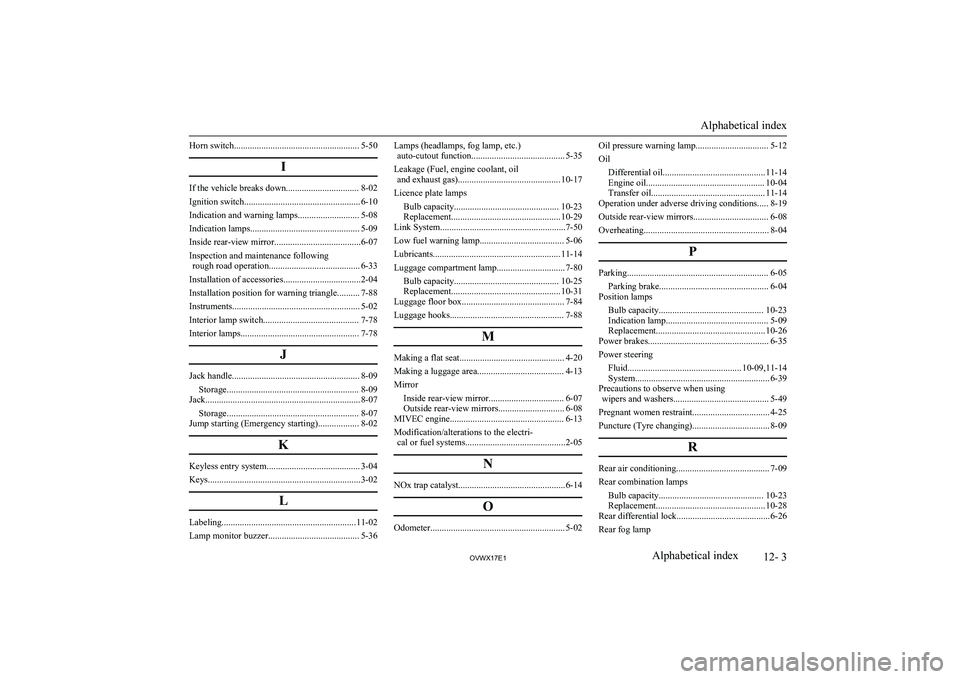
Horn switch....................................................... 5-50I
If the vehicle breaks down................................ 8-02
Ignition switch................................................... 6-10
Indication and warning lamps........................... 5-08
Indication lamps................................................ 5-09
Inside rear-view mirror......................................6-07
Inspection and maintenance following rough road operation........................................ 6-33
Installation of accessories..................................2-04
Installation position for warning triangle.......... 7-88
Instruments........................................................ 5-02
Interior lamp switch.......................................... 7-78
Interior lamps.................................................... 7-78
J
Jack handle........................................................ 8-09Storage.......................................................... 8-09
Jack.................................................................... 8-07
Storage.......................................................... 8-07
Jump starting (Emergency starting).................. 8-02
K
Keyless entry system......................................... 3-04
Keys...................................................................3-02
L
Labeling...........................................................11-02
Lamp monitor buzzer........................................ 5-36
Lamps (headlamps, fog lamp, etc.) auto-cutout function......................................... 5-35
Leakage (Fuel, engine coolant, oil and exhaust gas)............................................. 10-17
Licence plate lamps Bulb capacity.............................................. 10-23
Replacement................................................ 10-29
Link System.......................................................7-50
Low fuel warning lamp..................................... 5-06
Lubricants........................................................ 11-14
Luggage compartment lamp.............................. 7-80 Bulb capacity.............................................. 10-25
Replacement................................................ 10-31
Luggage floor box............................................. 7-84
Luggage hooks.................................................. 7-88
M
Making a flat seat.............................................. 4-20
Making a luggage area...................................... 4-13
Mirror Inside rear-view mirror................................. 6-07
Outside rear-view mirrors............................. 6-08
MIVEC engine.................................................. 6-13
Modification/alterations to the electri- cal or fuel systems............................................2-05
N
NOx trap catalyst...............................................6-14 O
Odometer........................................................... 5-02
Oil pressure warning lamp................................ 5-12
Oil Differential oil............................................. 11-14
Engine oil.................................................... 10-04 Transfer oil.................................................. 11-14
Operation under adverse driving conditions..... 8-19
Outside rear-view mirrors................................. 6-08
Overheating....................................................... 8-04
P
Parking.............................................................. 6-05Parking brake................................................ 6-04
Position lamps
Bulb capacity.............................................. 10-23
Indication lamp............................................. 5-09
Replacement................................................ 10-26
Power brakes..................................................... 6-35
Power steering Fluid.................................................. 10-09,11-14
System........................................................... 6-39
Precautions to observe when using wipers and washers.......................................... 5-49
Pregnant women restraint.................................. 4-25
Puncture (Tyre changing).................................. 8-09
R
Rear air conditioning......................................... 7-09
Rear combination lamps Bulb capacity.............................................. 10-23
Replacement................................................ 10-28
Rear differential lock.........................................6-26
Rear fog lamp
Alphabetical index
12- 3
OVWX17E1Alphabetical index
Page 371 of 394
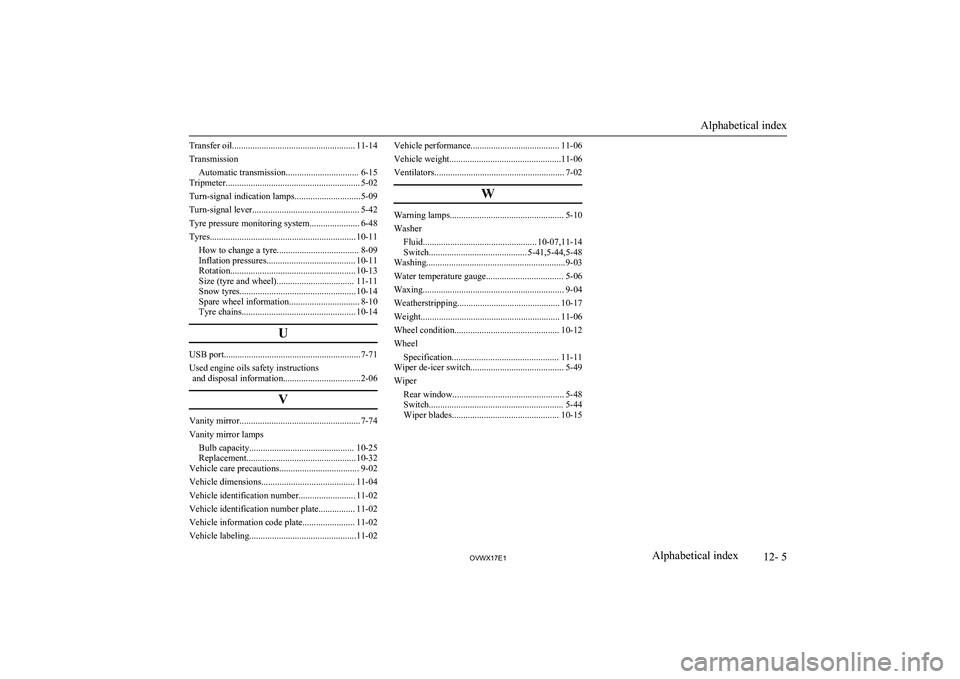
Transfer oil...................................................... 11-14
Transmission Automatic transmission................................ 6-15
Tripmeter........................................................... 5-02
Turn-signal indication lamps.............................5-09
Turn-signal lever............................................... 5-42
Tyre pressure monitoring system...................... 6-48
Tyres................................................................ 10-11 How to change a tyre.................................... 8-09
Inflation pressures....................................... 10-11
Rotation....................................................... 10-13
Size (tyre and wheel).................................. 11-11
Snow tyres................................................... 10-14
Spare wheel information............................... 8-10
Tyre chains.................................................. 10-14
U
USB port............................................................7-71
Used engine oils safety instructions and disposal information..................................2-06
V
Vanity mirror..................................................... 7-74
Vanity mirror lamps
Bulb capacity.............................................. 10-25
Replacement................................................ 10-32
Vehicle care precautions................................... 9-02
Vehicle dimensions......................................... 11-04
Vehicle identification number......................... 11-02
Vehicle identification number plate................ 11-02
Vehicle information code plate....................... 11-02
Vehicle labeling...............................................11-02
Vehicle performance....................................... 11-06
Vehicle weight.................................................11-06
Ventilators......................................................... 7-02
W
Warning lamps.................................................. 5-10
Washer Fluid.................................................. 10-07,11-14
Switch........................................... 5-41,5-44,5-48
Washing.............................................................9-03
Water temperature gauge.................................. 5-06
Waxing.............................................................. 9-04
Weatherstripping............................................. 10-17
Weight............................................................. 11-06
Wheel condition.............................................. 10-12
Wheel Specification............................................... 11-11
Wiper de-icer switch......................................... 5-49
Wiper Rear window................................................. 5-48Switch........................................................... 5-44 Wiper blades............................................... 10-15
Alphabetical index
12- 5
OVWX17E1Alphabetical index