brake pads NISSAN ALTIMA 1997 U13 / 1.G Owners Manual
[x] Cancel search | Manufacturer: NISSAN, Model Year: 1997, Model line: ALTIMA, Model: NISSAN ALTIMA 1997 U13 / 1.GPages: 203, PDF Size: 1.64 MB
Page 14 of 203

2. If the brake fluid level is correct, have the
warning system checked by your NIS-
SAN dealer.
WARNING
cYour brake system may not be work-
ing properly if the warning light is
on. Driving could be dangerous. If
you judge it to be safe, drive care-
fully to the nearest service station
for repairs. Otherwise, have your ve-
hicle towed.
cPressing the brake pedal with the
engine stopped and/or low brake
fluid level may increase your stop-
ping distance and braking will re-
quire greater pedal effort as well as
greater pedal travel.
cIf the brake fluid level is below the
minimum mark on the brake fluid
reservoir, do not drive until the brake
system has been checked at a NIS-
SAN dealer.
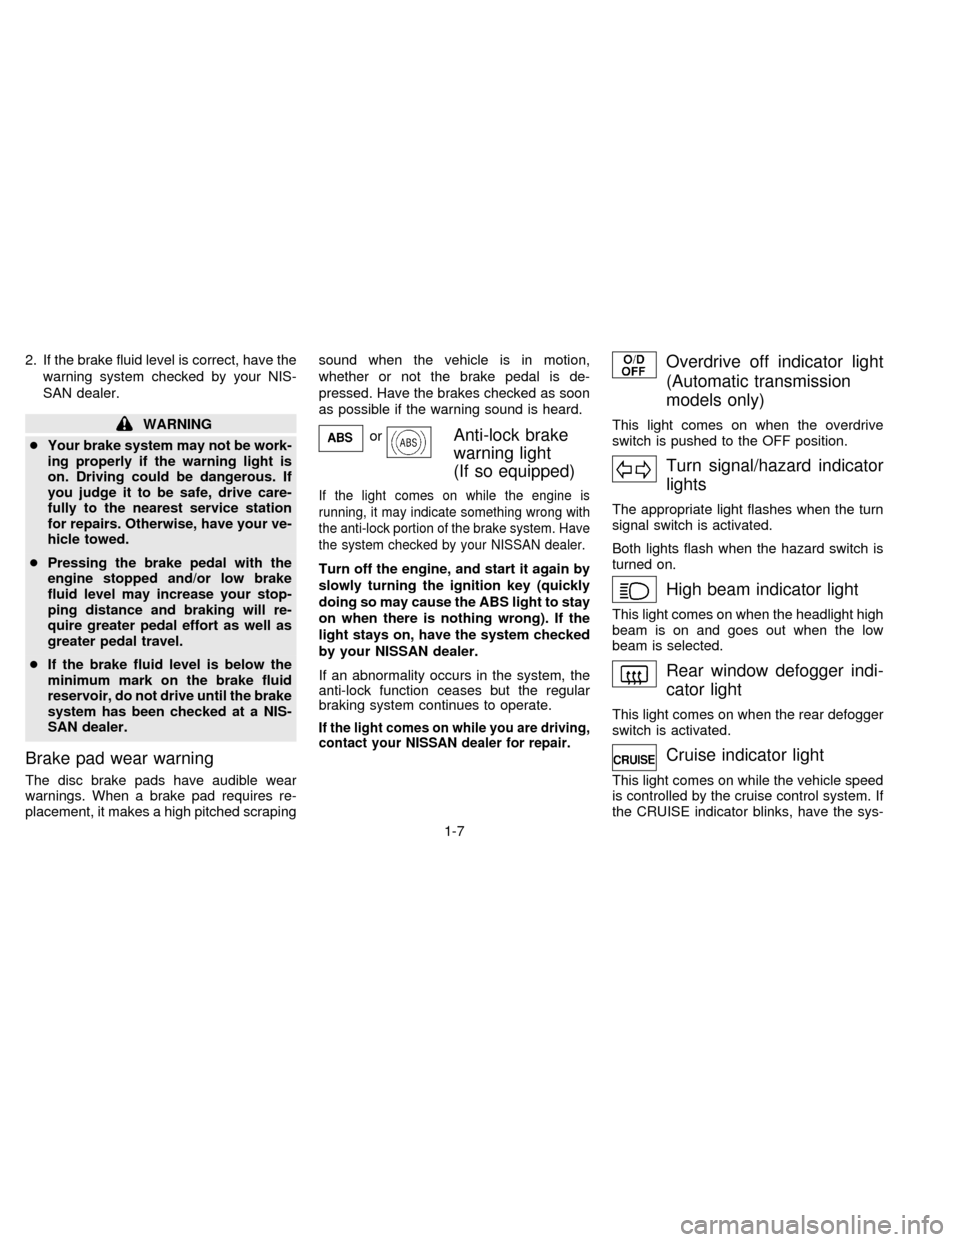
Brake pad wear warning
The disc brake pads have audible wear
warnings. When a brake pad requires re-
placement, it makes a high pitched scrapingsound when the vehicle is in motion,
whether or not the brake pedal is de-
pressed. Have the brakes checked as soon
as possible if the warning sound is heard.
orAnti-lock brake
warning light
(If so equipped)
If the light comes on while the engine is
running, it may indicate something wrong with
the anti-lock portion of the brake system. Have
the system checked by your NISSAN dealer.
Turn off the engine, and start it again by
slowly turning the ignition key (quickly
doing so may cause the ABS light to stay
on when there is nothing wrong). If the
light stays on, have the system checked
by your NISSAN dealer.
If an abnormality occurs in the system, the
anti-lock function ceases but the regular
braking system continues to operate.
If the light comes on while you are driving,
contact your NISSAN dealer for repair.
Overdrive off indicator light
(Automatic transmission
models only)
This light comes on when the overdrive
switch is pushed to the OFF position.
Turn signal/hazard indicator
lights
The appropriate light flashes when the turn
signal switch is activated.
Both lights flash when the hazard switch is
turned on.
High beam indicator light
This light comes on when the headlight high
beam is on and goes out when the low
beam is selected.
Rear window defogger indi-
cator light
This light comes on when the rear defogger
switch is activated.
Cruise indicator light
This light comes on while the vehicle speed
is controlled by the cruise control system. If
the CRUISE indicator blinks, have the sys-
1-7
ZX
Page 109 of 203

while driving. This overheats the brakes,
increases wear on the brake linings and
pads, and reduces gas mileage.
To help save the brakes and to prevent the
brakes from overheating, reduce speed and
downshift to a lower gear before going down
a slope or long grade. Overheated brakes
may reduce braking performance and could
result in loss of vehicle control.
WARNING
While driving on a slippery surface, be
careful when braking, accelerating or
downshifting. Abrupt braking or accel-
erating could cause the wheels to skid
and result in an accident.The anti-lock brake system installed in
some models controls the brakes at each
wheel so the wheels do not lock when
braking abruptly or when braking on slip-
pery surfaces. The system detects the rota-
tion speed at each wheel and varies the
brake fluid pressure to prevent each wheel
from locking and sliding. By preventing
wheel lockup, the system helps the driver
maintain steering control and helps to mini-
mize swerving and spinning on slippery
surfaces.
Using the System
Depress the brake pedal and hold it down.
WARNING
Do not pump the brake pedal. Doing so
may result in increased stopping dis-
tances.
Normal operation
The anti-lock brake system does not oper-
ate at speeds below 3 to 6 MPH (5 to 10
km/h) to completely stop the vehicle. (The
speeds vary according to road conditions.)
When the anti-lock system senses that one
or more wheels are close to locking up, theactuator (under the hood) rapidly applies
and releases hydraulic pressure (like pump-
ing the brakes very quickly). While the ac-
tuator is working, you may feel a pulsation in
the brake pedal and hear a noise or vibra-
tion from the actuator under the hood. This
is normal and indicates that the anti-lock
system is working properly. However, the
pulsation may indicate that road conditions
are hazardous and extra care is required
while driving.
Self-test feature
The anti-lock brake system is sophisticated,
with electronic sensors, electric pumps, and
hydraulic solenoids controlled by a com-
puter. The computer has a built-in diagnos-
tic feature that tests the system each time
you start the engine and move the vehicle at
a low speed in forward or reverse. When the
self-test occurs, you may hear a ``clunk''
noise and/or feel a pulsation in the brake
pedal. This is normal and is not an indica-
tion of any malfunction. If the computer
senses any malfunction, it switches the anti-
lock brake system OFF and turns on the
ABS brake warning light in the dashboard.
The brake system then operates normally,
but without anti-lock assistance.
ANTI-LOCK BRAKE SYSTEM
(ABS) (If so equipped)
4-17
ZX
Page 149 of 203

The front (and rear, if equipped) disc-type
brakes self-adjust every time the brake
pedal is applied. The rear drum- type brakes
also self-adjust every time the brake pedal
is applied.
If the brake pedal goes down farther than
normal, it may be due to a lack of adjust-
ment of the rear drum brakes. Apply the
parking brake several times.
WARNING
See your NISSAN dealer and have it
checked if the brake pedal height does
not return to normal.
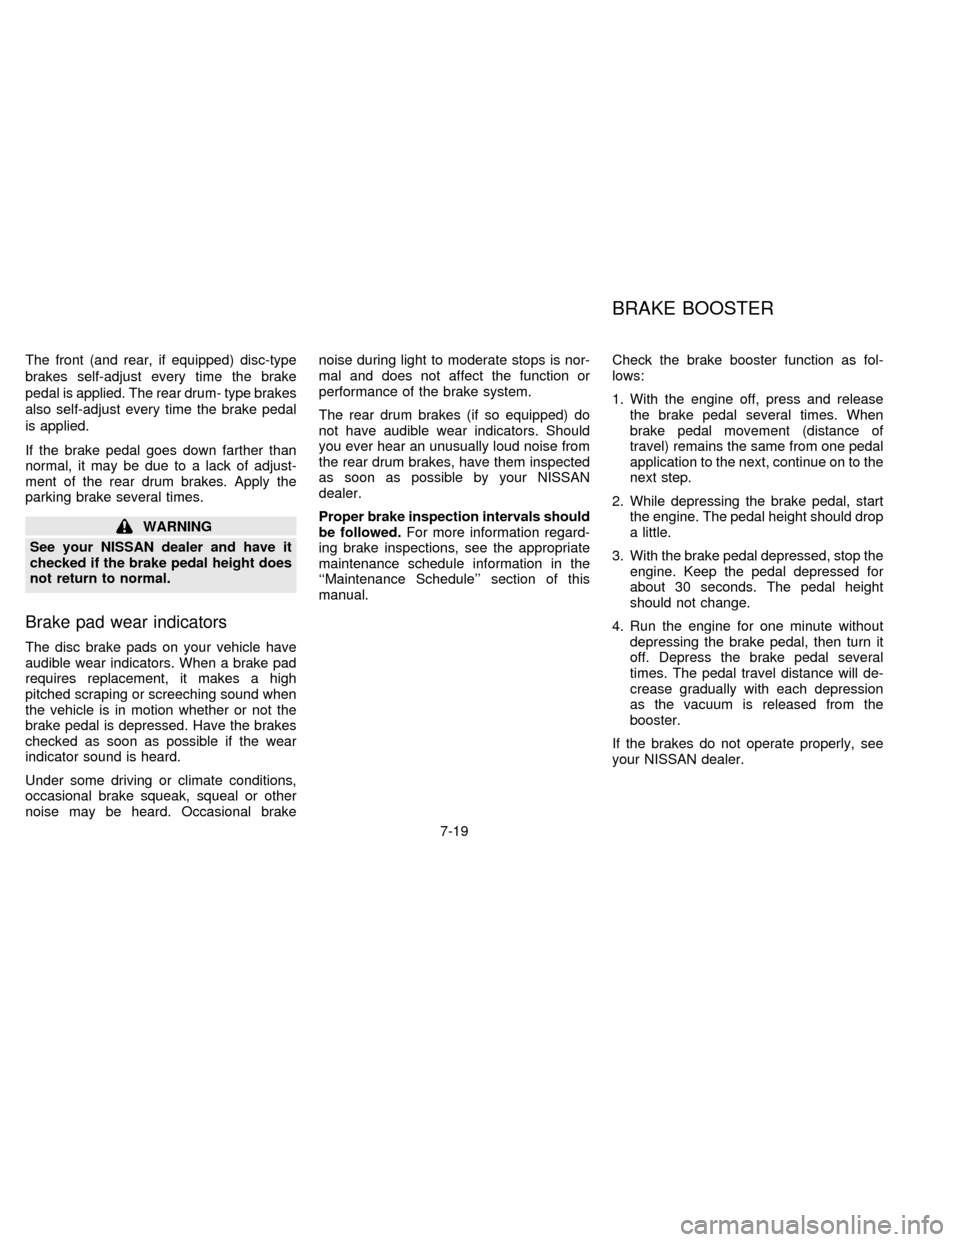
Brake pad wear indicators
The disc brake pads on your vehicle have
audible wear indicators. When a brake pad
requires replacement, it makes a high
pitched scraping or screeching sound when
the vehicle is in motion whether or not the
brake pedal is depressed. Have the brakes
checked as soon as possible if the wear
indicator sound is heard.
Under some driving or climate conditions,
occasional brake squeak, squeal or other
noise may be heard. Occasional brakenoise during light to moderate stops is nor-
mal and does not affect the function or
performance of the brake system.
The rear drum brakes (if so equipped) do
not have audible wear indicators. Should
you ever hear an unusually loud noise from
the rear drum brakes, have them inspected
as soon as possible by your NISSAN
dealer.
Proper brake inspection intervals should
be followed.For more information regard-
ing brake inspections, see the appropriate
maintenance schedule information in the
``Maintenance Schedule'' section of this
manual.Check the brake booster function as fol-
lows:
1. With the engine off, press and release
the brake pedal several times. When
brake pedal movement (distance of
travel) remains the same from one pedal
application to the next, continue on to the
next step.
2. While depressing the brake pedal, start
the engine. The pedal height should drop
a little.
3. With the brake pedal depressed, stop the
engine. Keep the pedal depressed for
about 30 seconds. The pedal height
should not change.
4. Run the engine for one minute without
depressing the brake pedal, then turn it
off. Depress the brake pedal several
times. The pedal travel distance will de-
crease gradually with each depression
as the vacuum is released from the
booster.
If the brakes do not operate properly, see
your NISSAN dealer.
BRAKE BOOSTER
7-19
ZX
Page 171 of 203

Abbreviations: I = Inspect. Correct or replace if necessary.
MAINTENANCE OPERATIONMAINTENANCE INTERVAL
Perform at number of miles, kilometers or
months, whichever comes first.Miles x 1,000 7.5 15 22.5 30 37.5 45 52.5 60
(km x 1,000) (12) (24) (36) (48) (60) (72) (84) (96)
Months 6 12 18 24 30 36 42 48
Chassis and body maintenance
Brake lines & cablesIIII
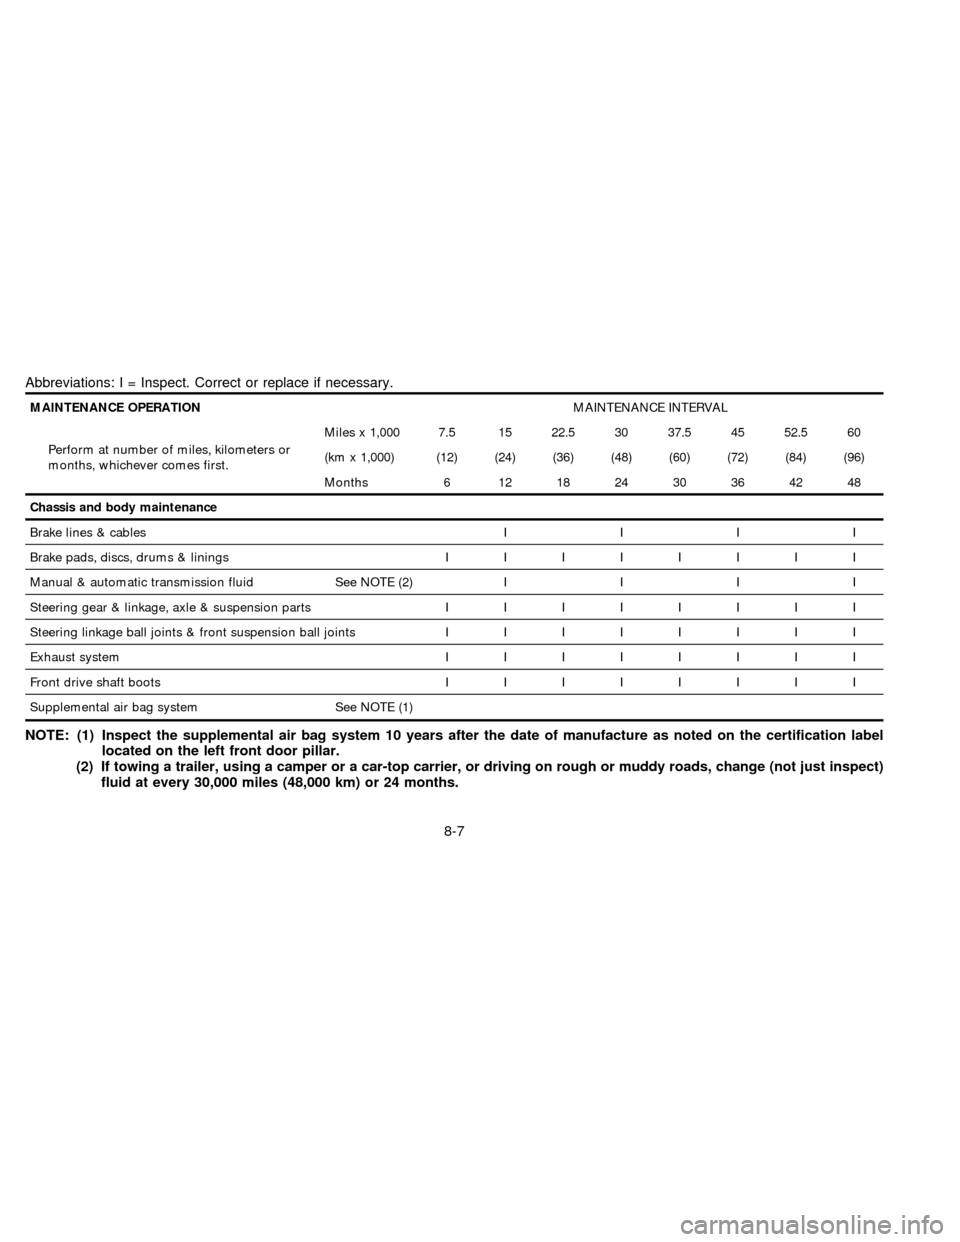
Brake pads, discs, drums & liningsIIIIIIII
Manual & automatic transmission fluid See NOTE (2)IIII
Steering gear & linkage, axle & suspension partsIIIIIIII
Steering linkage ball joints & front suspension ball jointsIIIIIIII
Exhaust systemIIIIIIII
Front drive shaft bootsIIIIIIII
Supplemental air bag system See NOTE (1)
NOTE: (1) Inspect the supplemental air bag system 10 years after the date of manufacture as noted on the certification label
located on the left front door pillar.
(2) If towing a trailer, using a camper or a car-top carrier, or driving on rough or muddy roads, change (not just inspect)
fluid at every 30,000 miles (48,000 km) or 24 months.
8-7
ZX
Page 173 of 203

Abbreviations: I = Inspect. Correct or replace if necessary.
MAINTENANCE OPERATIONMAINTENANCE INTERVAL
Perform at number of miles, kilometers or
months, whichever comes first.Miles x 1,000 7.5 15 22.5 30 37.5 45 52.5 60
(km x 1,000) (12) (24) (36) (48) (60) (72) (84) (96)
Months 6 12 18 24 30 36 42 48
Chassis and body maintenance
Brake lines & cablesIIII
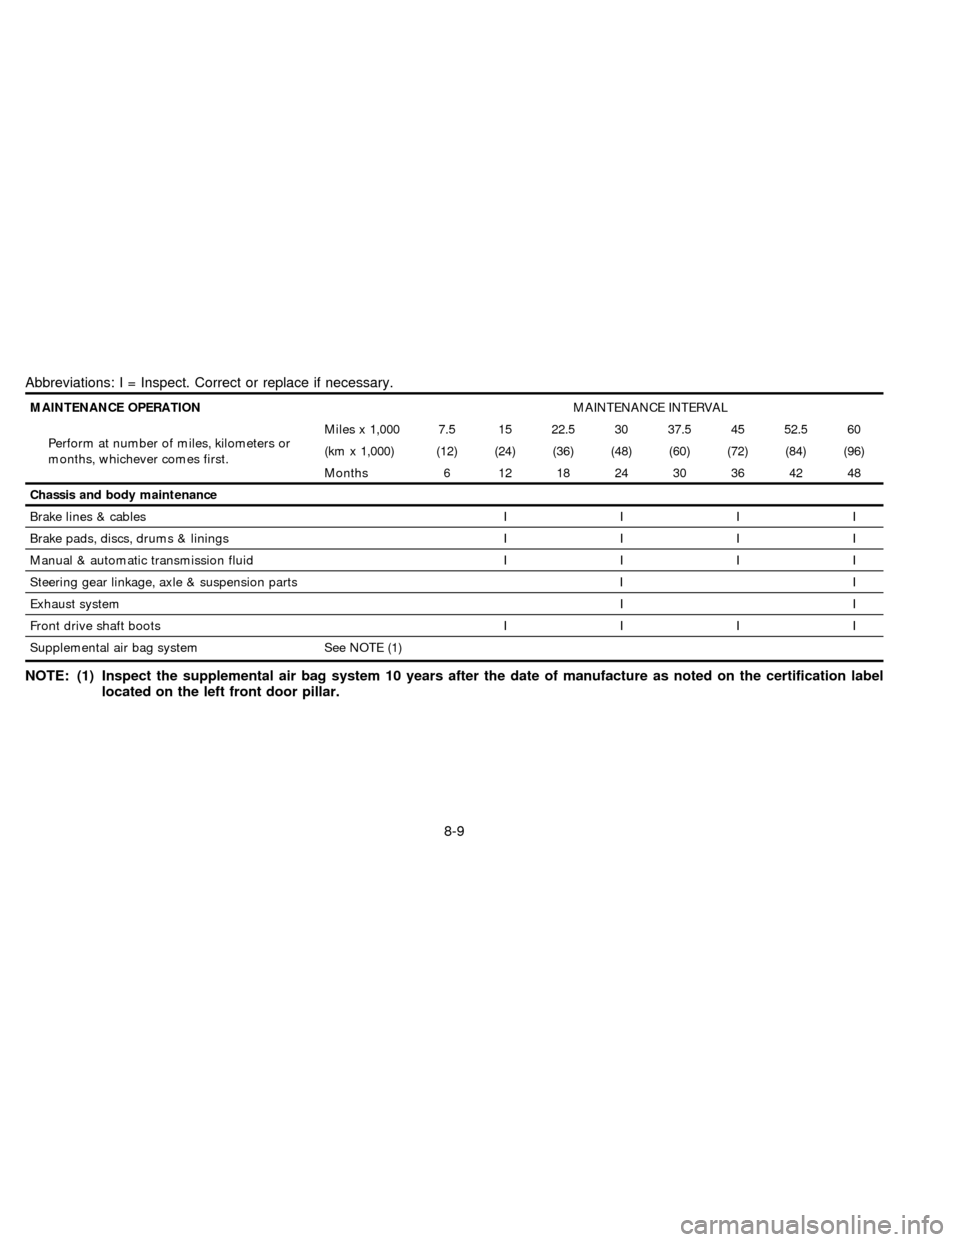
Brake pads, discs, drums & liningsIIII
Manual & automatic transmission fluidIIII
Steering gear linkage, axle & suspension parts I I
Exhaust systemII
Front drive shaft bootsIIII
Supplemental air bag system See NOTE (1)
NOTE: (1) Inspect the supplemental air bag system 10 years after the date of manufacture as noted on the certification label
located on the left front door pillar.
8-9
ZX
Page 174 of 203

Additional information on the following
items marked with ``*'' is found in the
``Do-it- yourself operations'' section.
Emission control system
maintenance
Drive belts*Ð Check drive belts for wear,
fraying or cracking and also for proper ten-
sion. Replace the drive belts if damaged.
Air cleaner filterÐ Under normal driving
conditions, the air cleaner filter should be
replaced in accordance with the mainte-
nance schedule. However, driving the ve-
hicle in dusty areas may cause more rapid
clogging of the element. Consequently, the
element may have to be replaced more
frequently.
Vapor linesÐ Check vapor lines and con-
nections for failure or looseness. If leaks are
found, replace them.
Fuel linesÐ Check the fuel hoses, piping
and connections for leaks, looseness or
deterioration. Replace any parts if they are
damaged.
Fuel filterÐ If the vehicle is operated under
extremely adverse weather conditions or in
areas where ambient temperatures are ei-
ther extremely low or extremely high, the
filter might become clogged. In such an
event, replace the filter immediately.
Engine coolant*Ð Drain and flush the
cooling system.
Engine oil & oil filter*Ð Under normal
driving conditions, the engine oil and oil filter
should be replaced in accordance with the
maintenance schedule. However, under se-
vere driving conditions, they may have to be
replaced more frequently.
Spark plugs*Ð Replace with new plugs
having the correct heat range.
Intake & exhaust valve clearanceÐ Check
the valve clearance if valve noise increases.
Chassis and body maintenance
Brake lines & cablesÐ Check the brake
lines and hoses (including brake booster
vacuum hoses, connections & check valve)
and parking brake cables for proper attach-
ment, leaks, cracks, chafing, abrasion, de-
terioration, etc.
Brake pads, discs, drums & liningsÐ
Check these and the other neighboring brake
components for wear, deterioration and
leaks. Under severe driving conditions, theymay have to be inspected more frequently.
Manual & automatic transmission fluid*
Ð Check the fluid level and visually inspect
for signs of leakage.
Under severe driving conditions, the fluid
should be replaced at the specified interval.
Steering gear & linkage, axle & suspen-
sion parts, and drive shaft bootsÐ
Check for damage, looseness and leakage
of oil or grease. Under severe driving con-
ditions, more frequent inspection should be
performed.
Steering linkage ball joints & front sus-
pension ball jointsÐ Check the ball joints
for damage, looseness and grease leakage.
Exhaust systemÐ Visually check the ex-
haust pipes, muffler, and hangers for proper
attachment, leaks, cracks, chafing, abra-
sion, deterioration, etc. Under severe driv-
ing conditions, inspection should be per-
formed more frequently.
Supplemental air bag systemÐ Check
the supplemental air bag system compo-
nents for proper attachment, damage, de-
formities, cracks, rust, etc. Work around and
on the supplemental air bag system should
be done by an authorized NISSAN dealer.
EXPLANATION OF
MAINTENANCE ITEMS
8-10
ZX