oil NISSAN ALTIMA 2023 Owners Manual
[x] Cancel search | Manufacturer: NISSAN, Model Year: 2023, Model line: ALTIMA, Model: NISSAN ALTIMA 2023Pages: 644, PDF Size: 4.12 MB
Page 16 of 644
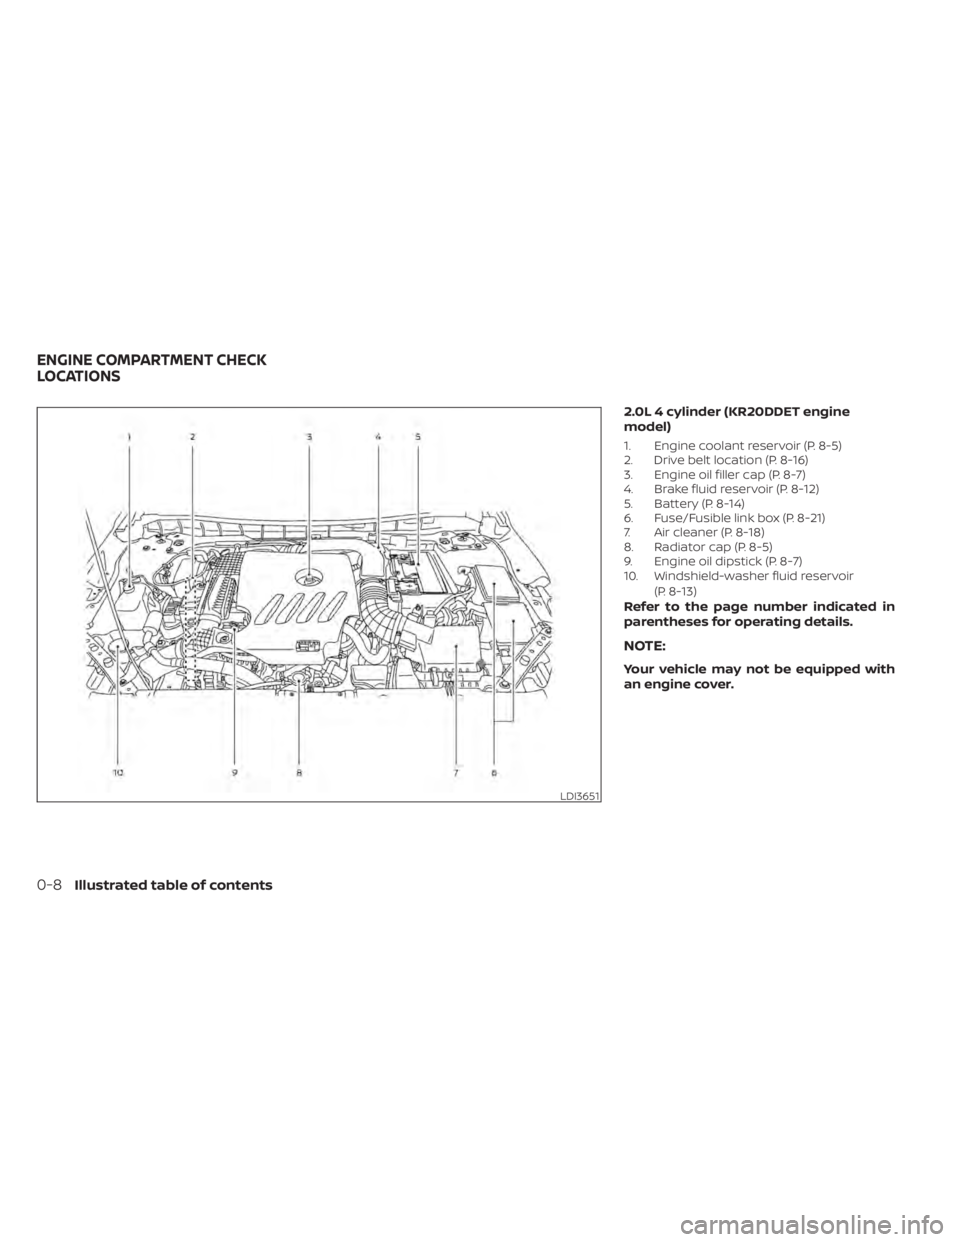
2.0L 4 cylinder (KR20DDET engine
model)
1. Engine coolant reservoir (P. 8-5)
2. Drive belt location (P. 8-16)
3. Engine oil filler cap (P. 8-7)
4. Brake fluid reservoir (P. 8-12)
5. Battery (P. 8-14)
6. Fuse/Fusible link box (P. 8-21)
7. Air cleaner (P. 8-18)
8. Radiator cap (P. 8-5)
9. Engine oil dipstick (P. 8-7)
10. Windshield-washer fluid reservoir(P. 8-13)
Refer to the page number indicated in
parentheses for operating details.
NOTE:
Your vehicle may not be equipped with
an engine cover.
LDI3651
ENGINE COMPARTMENT CHECK
LOCATIONS
0-8Illustrated table of contents
Page 17 of 644
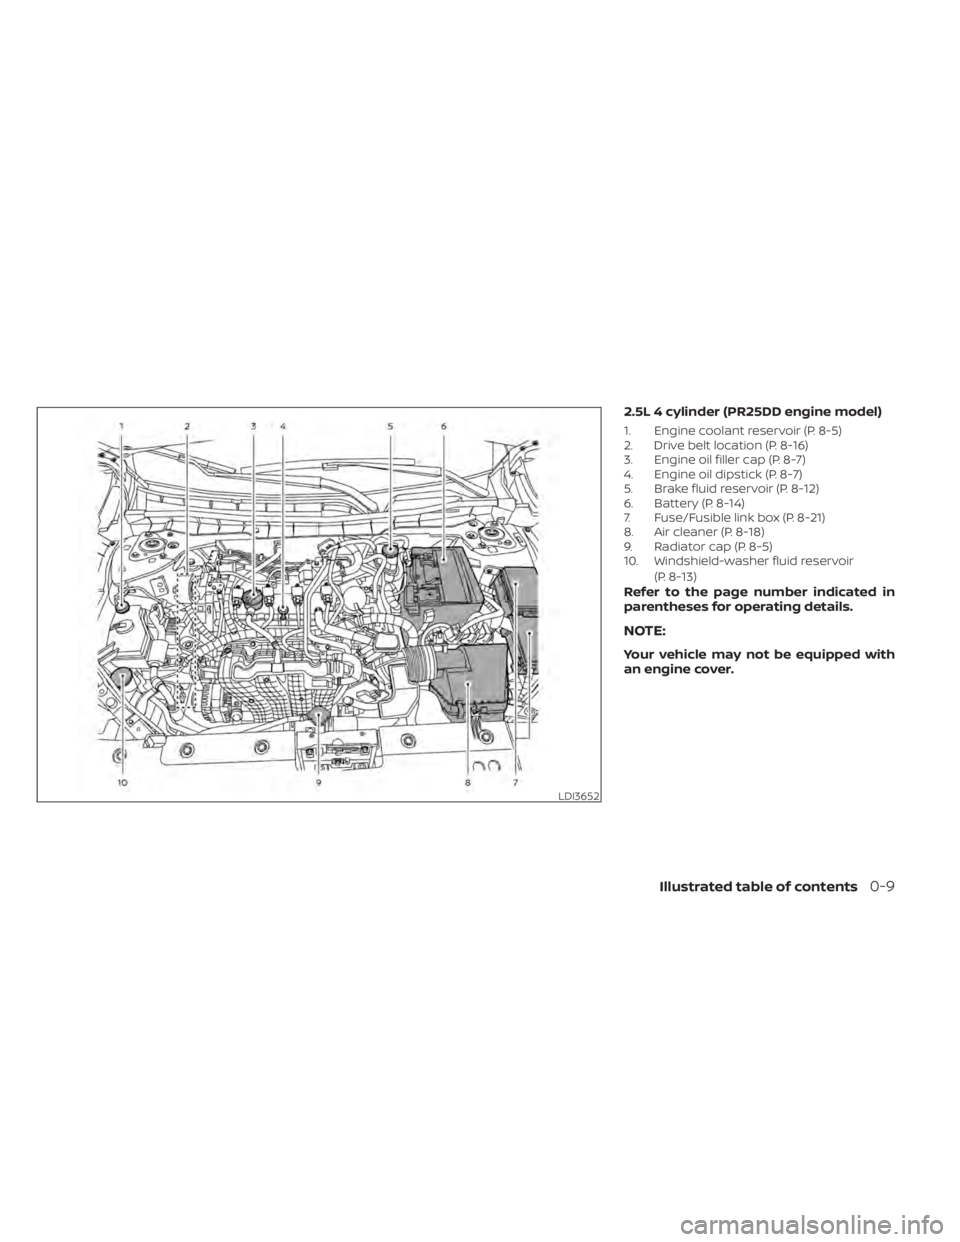
2.5L 4 cylinder (PR25DD engine model)
1. Engine coolant reservoir (P. 8-5)
2. Drive belt location (P. 8-16)
3. Engine oil filler cap (P. 8-7)
4. Engine oil dipstick (P. 8-7)
5. Brake fluid reservoir (P. 8-12)
6. Battery (P. 8-14)
7. Fuse/Fusible link box (P. 8-21)
8. Air cleaner (P. 8-18)
9. Radiator cap (P. 8-5)
10. Windshield-washer fluid reservoir(P. 8-13)
Refer to the page number indicated in
parentheses for operating details.
NOTE:
Your vehicle may not be equipped with
an engine cover.
LDI3652
Illustrated table of contents0-9
Page 18 of 644
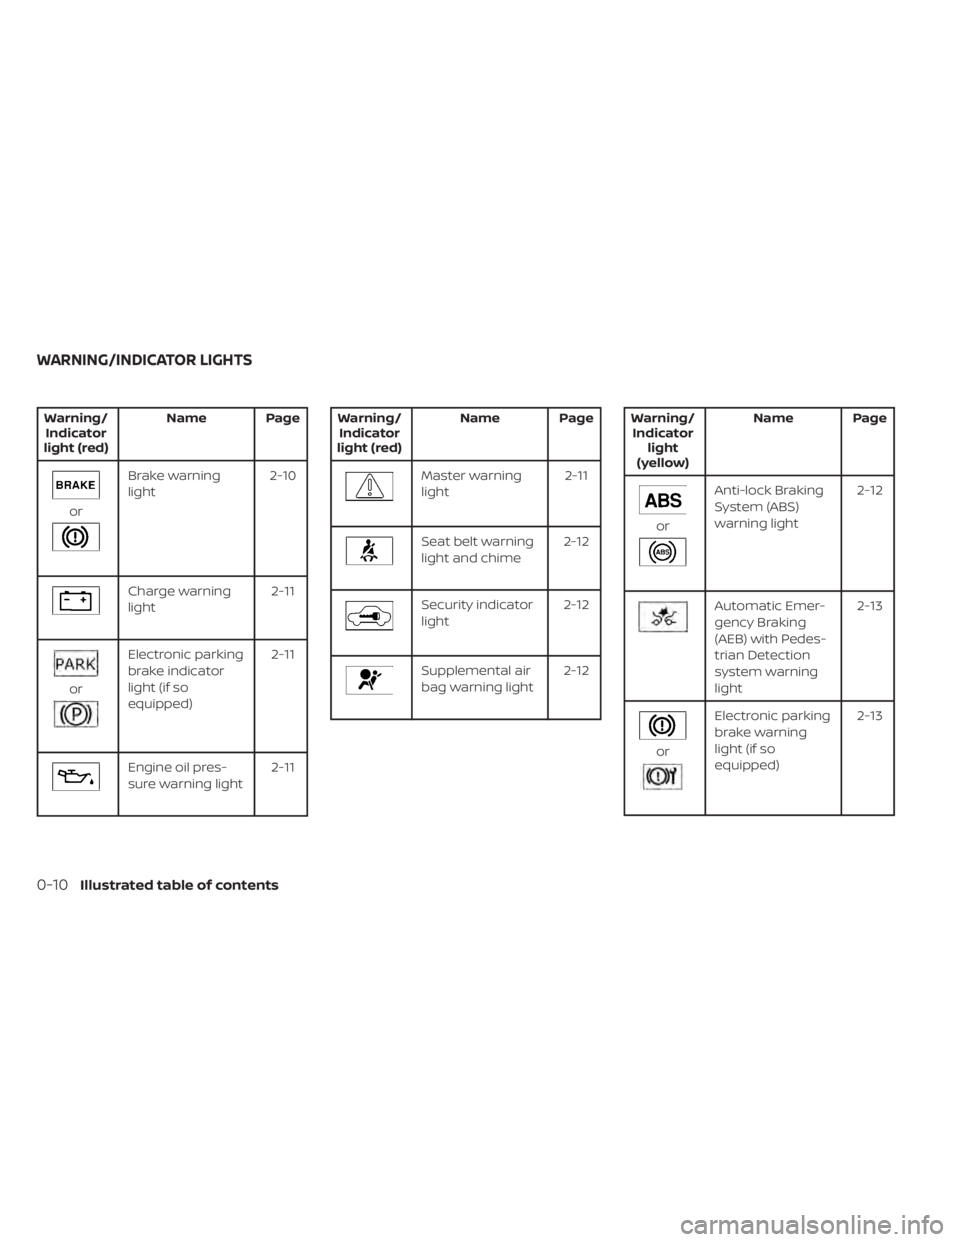
Warning/Indicator
light (red) Name Page
or
Brake warning
light
2-10
Charge warning
light 2-11
or
Electronic parking
brake indicator
light (if so
equipped)2-11
Engine oil pres-
sure warning light
2-11
Warning/
Indicator
light (red) Name Page
Master warning
light
2-11
Seat belt warning
light and chime2-12
Security indicator
light2-12
Supplemental air
bag warning light2-12
Warning/
Indicator light
(yellow) Name Page
or
Anti-lock Braking
System (ABS)
warning light
2-12
Automatic Emer-
gency Braking
(AEB) with Pedes-
trian Detection
system warning
light 2-13
or
Electronic parking
brake warning
light (if so
equipped)
2-13
WARNING/INDICATOR LIGHTS
0-10Illustrated table of contents
Page 90 of 644
2 Instruments and controls
Instrument panel................................2-2
Meters and gauges .............................2-4
Speedometer and odometer .................2-4
Tachometer ..................................2-6
Engine coolant temperature gauge ..........2-6
Fuel gauge ................................... 2-7
Distance To Empty (DTE) .....................2-8
Variable Compression Turbo
(if so equipped) ...............................2-8
Warning lights, indicator lights and audible
reminders .......................................2-9
Checking lights .............................. 2-10
Warning/Indicator lights (red) ...............2-10
Warning/Indicator lights (yellow) ............2-12
Warning/Indicator lights (other) .............2-17
Audible reminders ........................... 2-18
Vehicle information display- 5 inch (13 cm)
Type A (if so equipped) ......................... 2-18
How to use the vehicle information
display ...................................... 2-19
Startup display .............................. 2-19
Resetting the drive computer ...............2-20
Oil control system (if so equipped) ...........2-20
Settings ..................................... 2-21
Vehicle information display warnings
and indicators ............................... 2-28Vehicle information display —7 inch (18 cm)
Type B (if so equipped)
......................... 2-34
How to use the vehicle information
display ...................................... 2-35
Startup display .............................. 2-35
Resetting the drive computer ...............2-35
Oil control system (if so equipped) ...........2-36
Settings ..................................... 2-37
Vehicle information display warnings
and indicators ............................... 2-45
Security systems ............................... 2-52
Vehicle security system .....................2-52
NISSAN Vehicle Immobilizer System .........2-54
Wiper and washer switch .......................2-55
Switch operation ............................ 2-55
Rear window and outside mirror
(if so equipped) defroster switch ...............2-56
Headlight and turn signal switch ...............2-57
Headlight control switch ....................2-57
LED
Daytime Running Lights (DRL)
system (if so equipped) ......................2-62
Instrument brightness control ..............2-62
Turn signal switch ........................... 2-63
Fog light switch (if so equipped) .............2-63
Horn ........................................... 2-64
Page 99 of 644
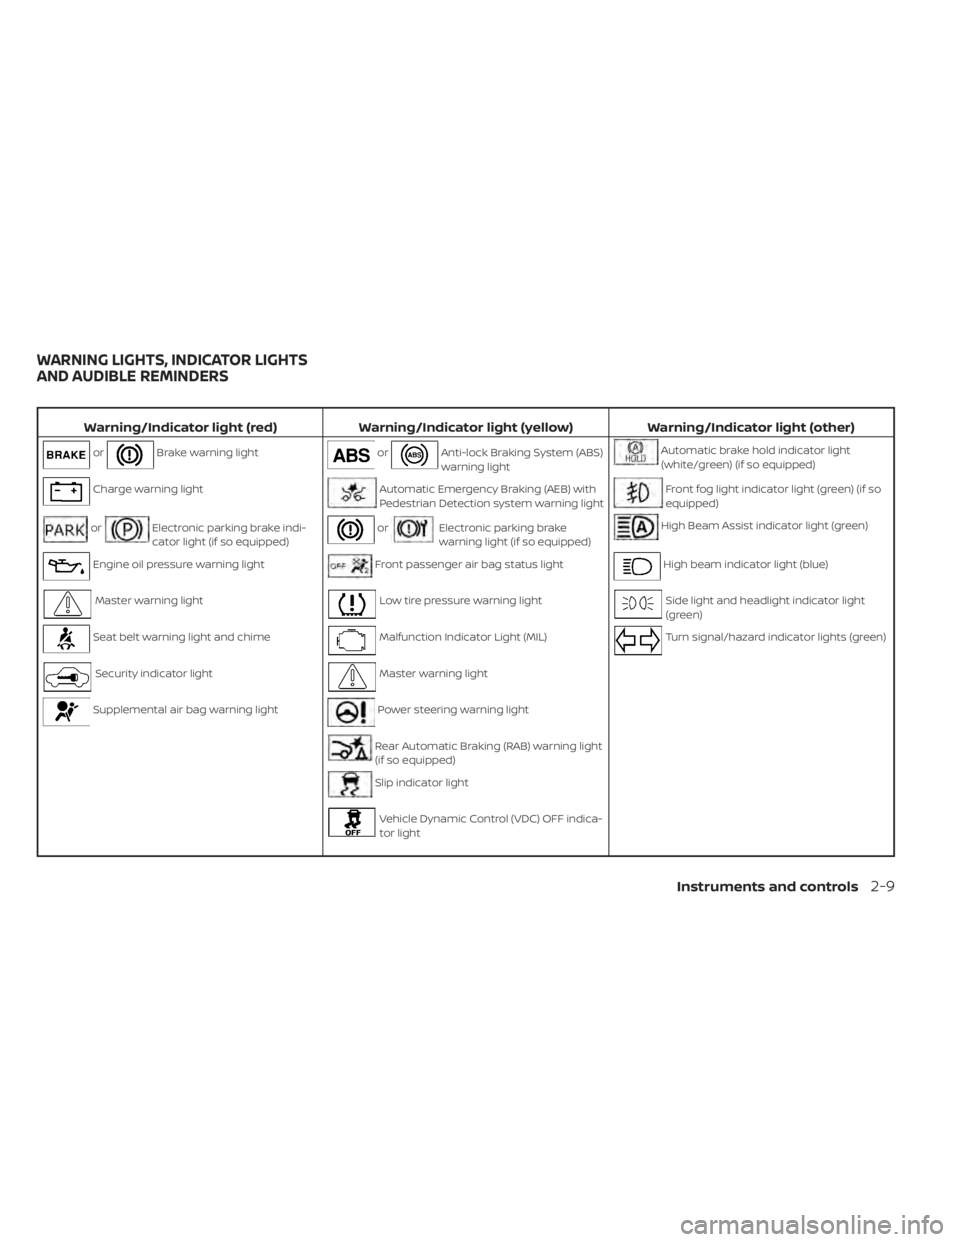
Warning/Indicator light (red)Warning/Indicator light (yellow) Warning/Indicator light (other)
orBrake warning lightorAnti-lock Braking System (ABS)
warning lightAutomatic brake hold indicator light
(white/green) (if so equipped)
Charge warning lightAutomatic Emergency Braking (AEB) with
Pedestrian Detection system warning lightFront fog light indicator light (green) (if so
equipped)
orElectronic parking brake indi-
cator light (if so equipped)orElectronic parking brake
warning light (if so equipped)High Beam Assist indicator light (green)
Engine oil pressure warning lightFront passenger air bag status lightHigh beam indicator light (blue)
Master warning lightLow tire pressure warning lightSide light and headlight indicator light
(green)
Seat belt warning light and chimeMalfunction Indicator Light (MIL)Turn signal/hazard indicator lights (green)
Security indicator lightMaster warning light
Supplemental air bag warning lightPower steering warning light
Rear Automatic Braking (RAB) warning light
(if so equipped)
Slip indicator light
Vehicle Dynamic Control (VDC) OFF indica-
tor light
WARNING LIGHTS, INDICATOR LIGHTS
AND AUDIBLE REMINDERS
Instruments and controls2-9
Page 101 of 644
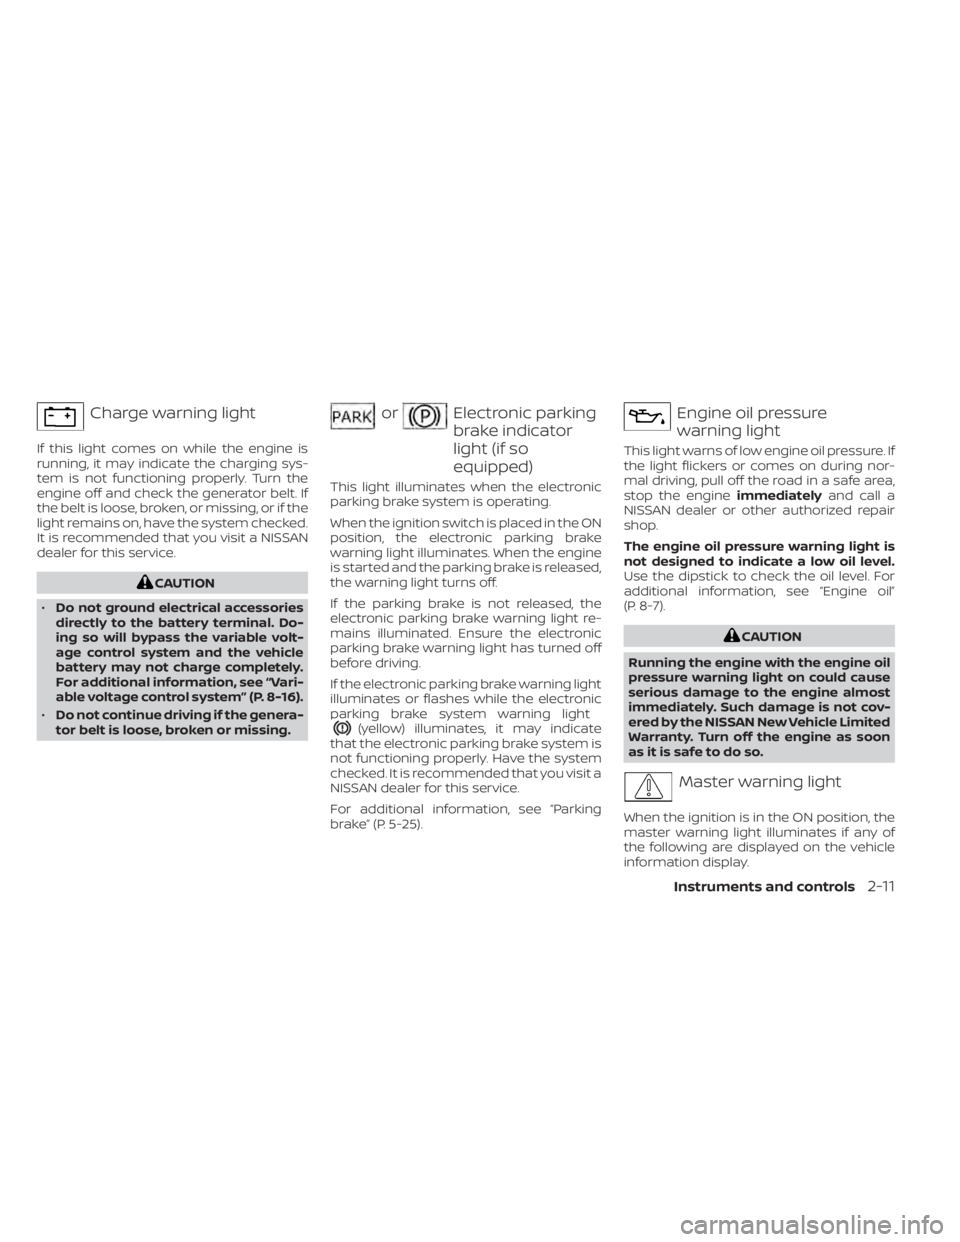
Charge warning light
If this light comes on while the engine is
running, it may indicate the charging sys-
tem is not functioning properly. Turn the
engine off and check the generator belt. If
the belt is loose, broken, or missing, or if the
light remains on, have the system checked.
It is recommended that you visit a NISSAN
dealer for this service.
CAUTION
• Do not ground electrical accessories
directly to the battery terminal. Do-
ing so will bypass the variable volt-
age control system and the vehicle
battery may not charge completely.
For additional information, see “Vari-
able voltage control system” (P. 8-16).
• Do not continue driving if the genera-
tor belt is loose, broken or missing.
orElectronic parking
brake indicator
light (if so
equipped)
This light illuminates when the electronic
parking brake system is operating.
When the ignition switch is placed in the ON
position, the electronic parking brake
warning light illuminates. When the engine
is started and the parking brake is released,
the warning light turns off.
If the parking brake is not released, the
electronic parking brake warning light re-
mains illuminated. Ensure the electronic
parking brake warning light has turned off
before driving.
If the electronic parking brake warning light
illuminates or flashes while the electronic
parking brake system warning light
(yellow) illuminates, it may indicate
that the electronic parking brake system is
not functioning properly. Have the system
checked. It is recommended that you visit a
NISSAN dealer for this service.
For additional information, see “Parking
brake” (P. 5-25).
Engine oil pressure
warning light
This light warns of low engine oil pressure. If
the light flickers or comes on during nor-
mal driving, pull off the road in a safe area,
stop the engine immediatelyand call a
NISSAN dealer or other authorized repair
shop.
The engine oil pressure warning light is
not designed to indicate a low oil level.
Use the dipstick to check the oil level. For
additional information, see “Engine oil”
(P. 8-7).
CAUTION
Running the engine with the engine oil
pressure warning light on could cause
serious damage to the engine almost
immediately. Such damage is not cov-
ered by the NISSAN New Vehicle Limited
Warranty. Turn off the engine as soon
as it is safe to do so.
Master warning light
When the ignition is in the ON position, the
master warning light illuminates if any of
the following are displayed on the vehicle
information display.
Instruments and controls2-11
Page 110 of 644
*Warnings will only display if there are any
present. For additional information, see
“Vehicle information display warnings and
indicators” (P. 2-28).
To control what items display in the vehicle
information display, see “How to use the
vehicle information display” (P. 2-19).
RESETTING THE DRIVE COMPUTER
The drive computer is divided across three
screens:
• Speed
• Trip Distance & Time
• Fuel Economy
1. Press the
orbuttons until the
desired drive computer screen is
displayed.
2. Press the OK button to bring up the drive computer Reset menu.
3. Use the
orto select the de-
sired option. Then press the OK button:
• “Cancel” — returns to the previous screen without resetting the trip computer.
• Drive computer value — resets only the displayed drive computer value.
– “Average Speed” - resets the average speed of the selected drive computer
screen. – “Distance & Time” - resets the distance
and time of the selected drive com-
puter screen.
– “Fuel Economy” - resets the fuel economy of the selected drive com-
puter screen.
• “All” — resets all linked drive computer val- ues. This includes distance & time, aver-
age fuel economy and average speed
information.
OIL CONTROL SYSTEM (if so
equipped)
The oil control system can be accessed in
the Maintenance portion of the vehicle in-
formation display settings.
Engine oil information informs the distance
to oil change. Never exceed one year or
7,500 miles (12,000 km) between oil change
intervals for the 2.0L 4 cylinder (KR20DDET
engine model) or 10,000 miles (16,000 km)
between oil change intervals for the 2.5L 4
cylinder (PR25DD engine model).
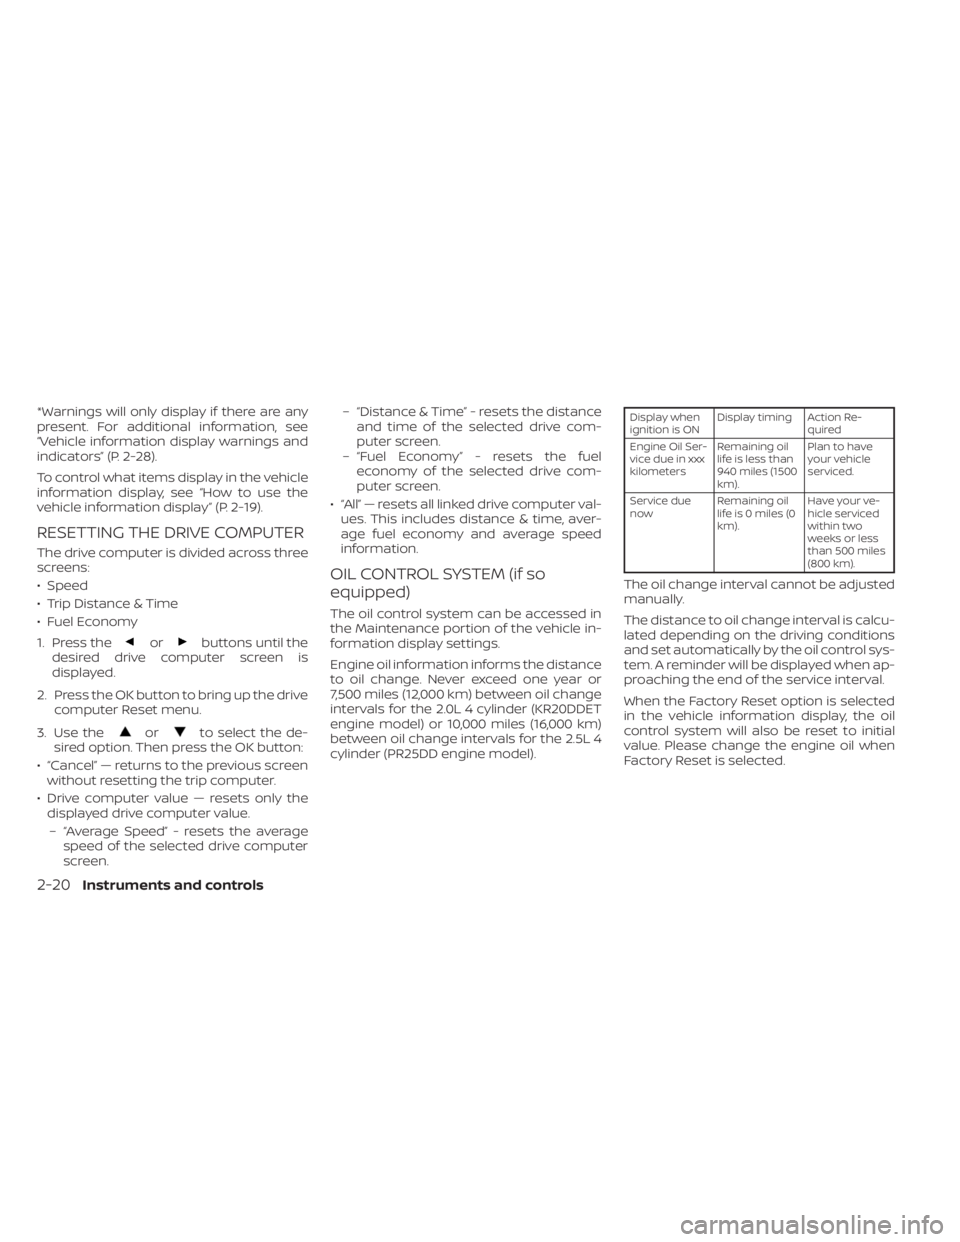
Display when
ignition is ON Display timing Action Re-
quired
Engine Oil Ser-
vice due in xxx
kilometers Remaining oil
life is less than
940 miles (1500
km). Plan to have
your vehicle
serviced.
Service due
now Remaining oil
lifeis0miles(0
km). Have your ve-
hicle serviced
within two
weeks or less
than 500 miles
(800 km).
The oil change interval cannot be adjusted
manually.
The distance to oil change interval is calcu-
lated depending on the driving conditions
and set automatically by the oil control sys-
tem. A reminder will be displayed when ap-
proaching the end of the service interval.
When the Factory Reset option is selected
in the vehicle information display, the oil
control system will also be reset to initial
value. Please change the engine oil when
Factory Reset is selected.
2-20Instruments and controls
Page 111 of 644
CAUTION
If the oil replacement indicator is dis-
played, change the engine oil within
two weeks or less than 500 miles (800
km).
Operating the vehicle with deteriorated
oil can damage the engine.
To reset oil control system:
1. Place the ignition switch in the ON position.
2. Press the
andbuttons located
on the steering wheel until “Settings” dis-
plays in the vehicle information display.
Use
to select “Maintenance”.
Then, press the OK button. 3. Select “Oil Control System” and press the
OK button.
4. Press the OK button according to the reset instructions displayed at the bot-
tom of the “Oil Control System” mainte-
nance screen.
5. For additional information, refer to the separate maintenance booklet.
SETTINGS
The setting mode allows you to change the
information displayed in the vehicle infor-
mation display. It also allows you to change
vehicle functions:
• VDC • Driver Assistance
• Clock
• Meter Settings
• Vehicle Settings
• Maintenance
• Alarm
• Tire Pressures
• Unit
• Language
• Factory Reset
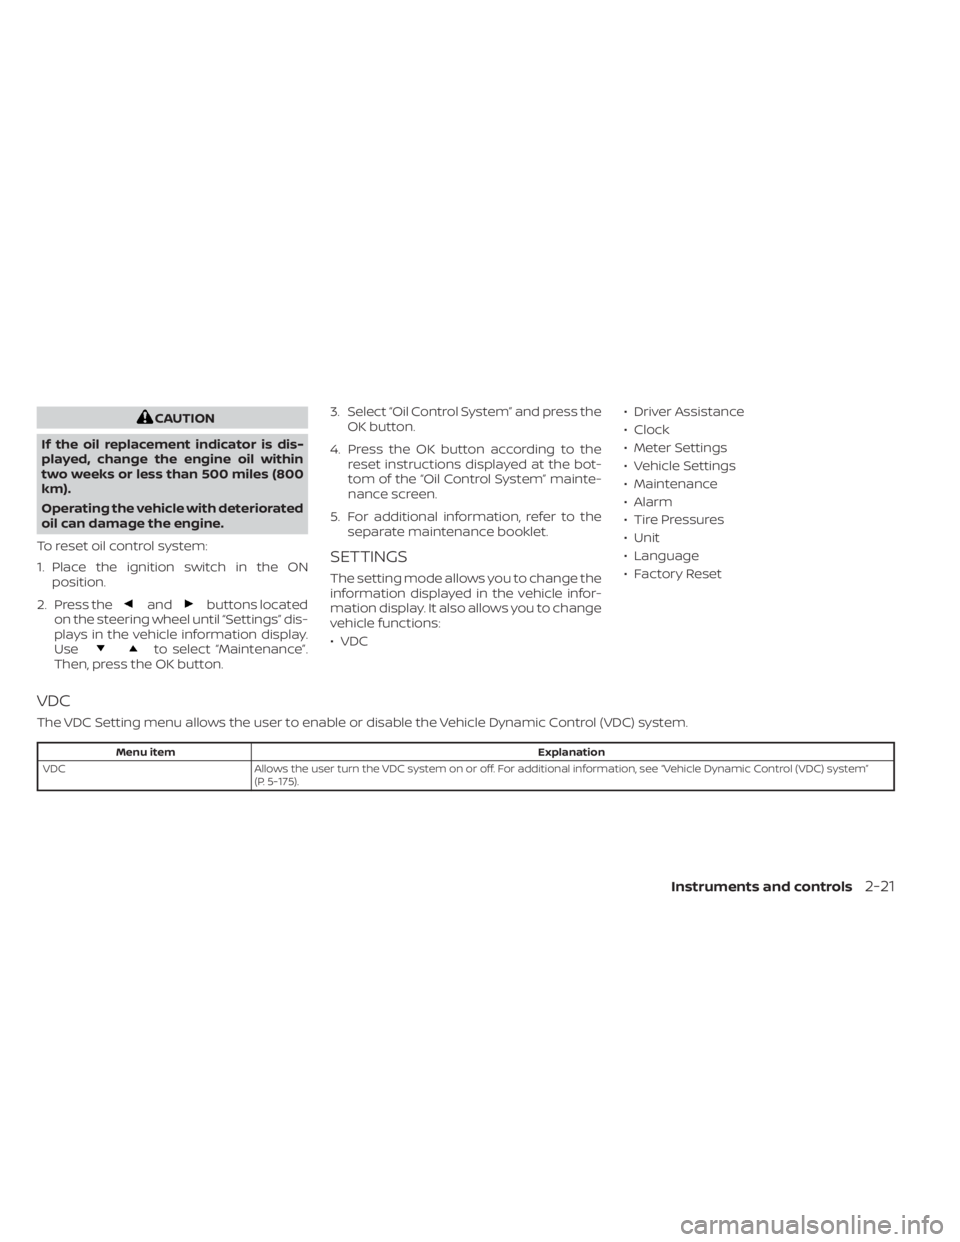
VDC
The VDC Setting menu allows the user to enable or disable the Vehicle Dynamic Control (VDC) system.
Menu item
Explanation
VDC Allows the user turn the VDC system on or off. For additional information, see “Vehicle Dynamic Control (VDC) system”
(P. 5-175).
Instruments and controls2-21
Page 116 of 644
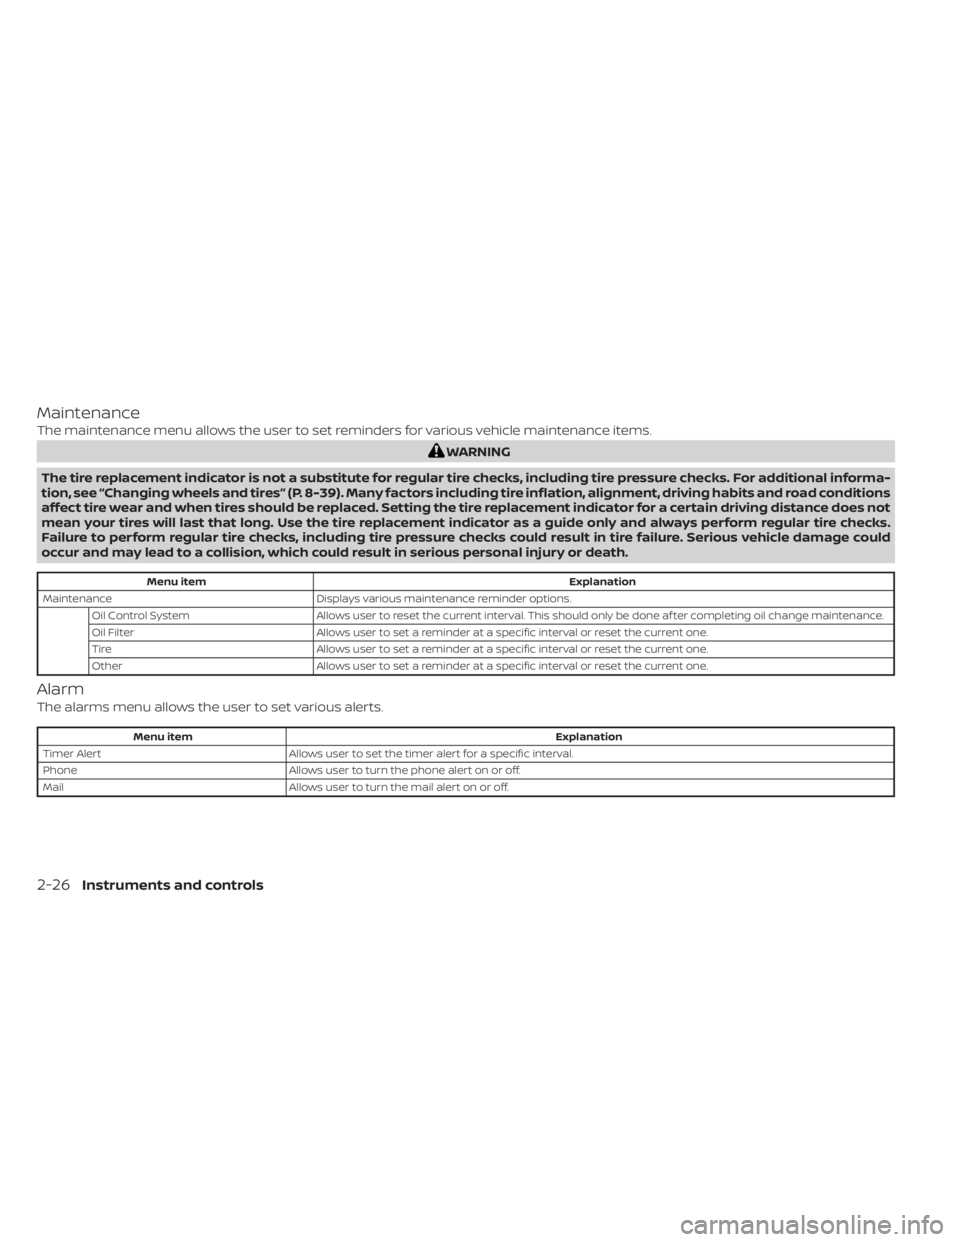
Maintenance
The maintenance menu allows the user to set reminders for various vehicle maintenance items.
WARNING
The tire replacement indicator is not a substitute for regular tire checks, including tire pressure checks. For additional informa-
tion, see “Changing wheels and tires” (P. 8-39). Many factors including tire inflation, alignment, driving habits and road conditions
affect tire wear and when tires should be replaced. Setting the tire replacement indicator for a certain driving distance does not
mean your tires will last that long. Use the tire replacement indicator as a guide only and always perform regular tire checks.
Failure to perform regular tire checks, including tire pressure checks could result in tire failure. Serious vehicle damage could
occur and may lead to a collision, which could result in serious personal injury or death.
Menu item Explanation
Maintenance Displays various maintenance reminder options.
Oil Control System Allows user to reset the current interval. This should only be done af ter completing oil change maintenance.
Oil Filter Allows user to set a reminder at a specific interval or reset the current one.
Tire Allows user to set a reminder at a specific interval or reset the current one.
Other Allows user to set a reminder at a specific interval or reset the current one.
Alarm
The alarms menu allows the user to set various alerts.
Menu item Explanation
Timer Alert Allows user to set the timer alert for a specific interval.
Phone Allows user to turn the phone alert on or off.
Mail Allows user to turn the mail alert on or off.
2-26Instruments and controls
Page 119 of 644
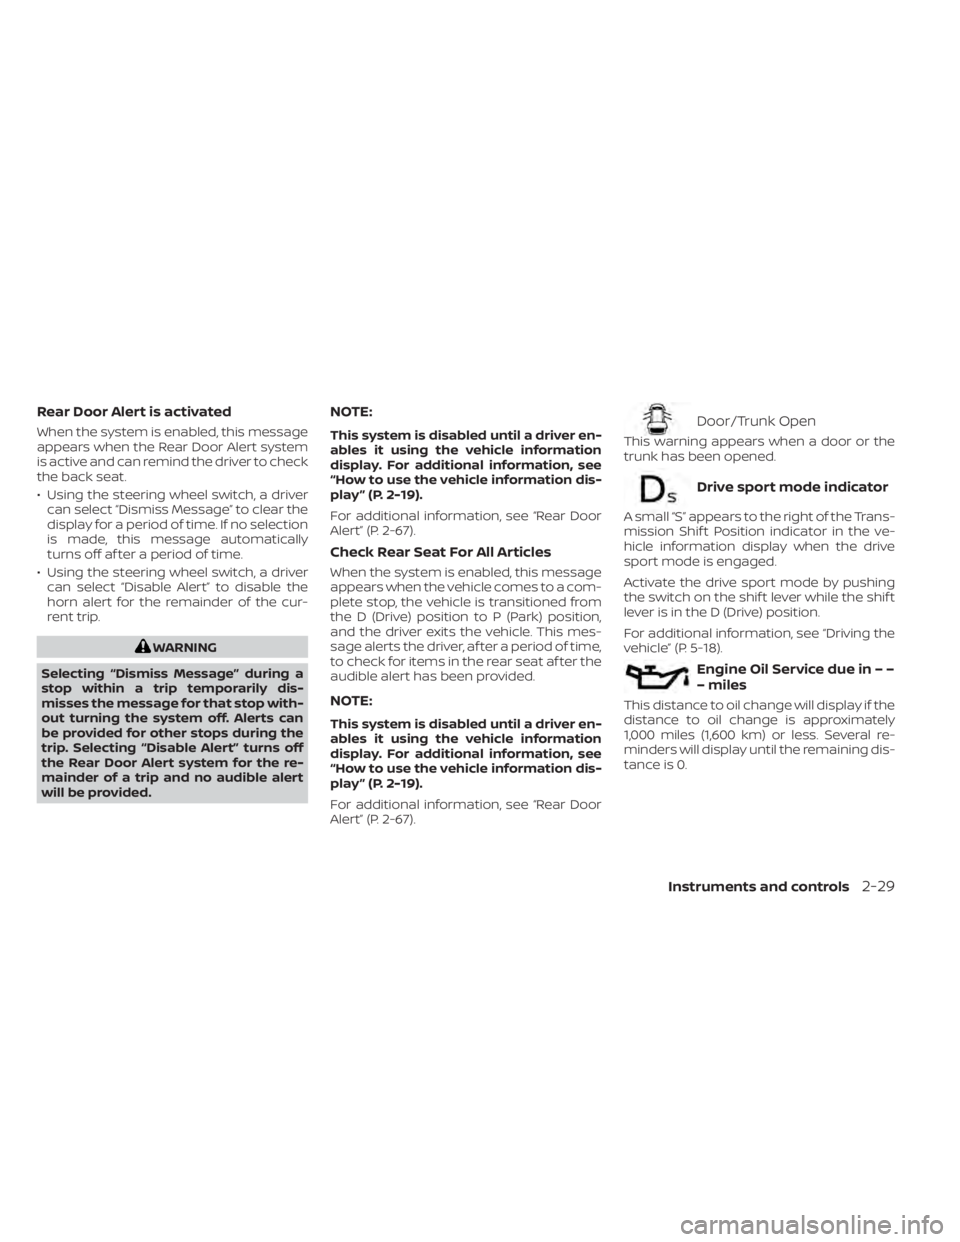
Rear Door Alert is activated
When the system is enabled, this message
appears when the Rear Door Alert system
is active and can remind the driver to check
the back seat.
• Using the steering wheel switch, a drivercan select “Dismiss Message” to clear the
display for a period of time. If no selection
is made, this message automatically
turns off af ter a period of time.
• Using the steering wheel switch, a driver can select “Disable Alert” to disable the
horn alert for the remainder of the cur-
rent trip.
WARNING
Selecting “Dismiss Message” during a
stop within a trip temporarily dis-
misses the message for that stop with-
out turning the system off. Alerts can
be provided for other stops during the
trip. Selecting “Disable Alert” turns off
the Rear Door Alert system for the re-
mainder of a trip and no audible alert
will be provided.
NOTE:
This system is disabled until a driver en-
ables it using the vehicle information
display. For additional information, see
“How to use the vehicle information dis-
play ” (P. 2-19).
For additional information, see “Rear Door
Alert” (P. 2-67).
Check Rear Seat For All Articles
When the system is enabled, this message
appears when the vehicle comes to a com-
plete stop, the vehicle is transitioned from
the D (Drive) position to P (Park) position,
and the driver exits the vehicle. This mes-
sage alerts the driver, af ter a period of time,
to check for items in the rear seat af ter the
audible alert has been provided.
NOTE:
This system is disabled until a driver en-
ables it using the vehicle information
display. For additional information, see
“How to use the vehicle information dis-
play ” (P. 2-19).
For additional information, see “Rear Door
Alert” (P. 2-67).
Door/Trunk Open
This warning appears when a door or the
trunk has been opened.
Drive sport mode indicator
A small “S” appears to the right of the Trans-
mission Shif t Position indicator in the ve-
hicle information display when the drive
sport mode is engaged.
Activate the drive sport mode by pushing
the switch on the shif t lever while the shif t
lever is in the D (Drive) position.
For additional information, see “Driving the
vehicle” (P. 5-18).
Engine Oil Service due in – –
– miles
This distance to oil change will display if the
distance to oil change is approximately
1,000 miles (1,600 km) or less. Several re-
minders will display until the remaining dis-
tance is 0.
Instruments and controls2-29