key NISSAN ALTIMA COUPE 2009 D32 / 4.G Service Manual
[x] Cancel search | Manufacturer: NISSAN, Model Year: 2009, Model line: ALTIMA COUPE, Model: NISSAN ALTIMA COUPE 2009 D32 / 4.GPages: 373, PDF Size: 4.79 MB
Page 167 of 373
When you use this system, make sure the engine
is running.
If you use the system with the engine not
running (ignition ON or ACC) for a long
time, it will use up all the battery power,
and the engine will not start.
Reference symbols:
SETUP button — This is a button on the control
panel.
“Display” key — This is a select key on the touch-
screen. By touching this key you can proceed to
the next function.
SETTING UP THE START-UP
SCREEN
With the ignition to ACC or ON, the SYSTEM
START-UP warning is displayed on the screen.
Read the warning and touch the “I agree” key
(English) or the “Enter” (Français) key.
If you do not touch the “I agree” key, the Naviga-
tion system will not proceed to the next step
display.If you do not press a button or touch a screen key
for more than 1 minute on the START-UP screen,
the screen will change to the audio screen auto-
matically.
To proceed to the next step, refer to the separate
Navigation System Owner’s Manual.
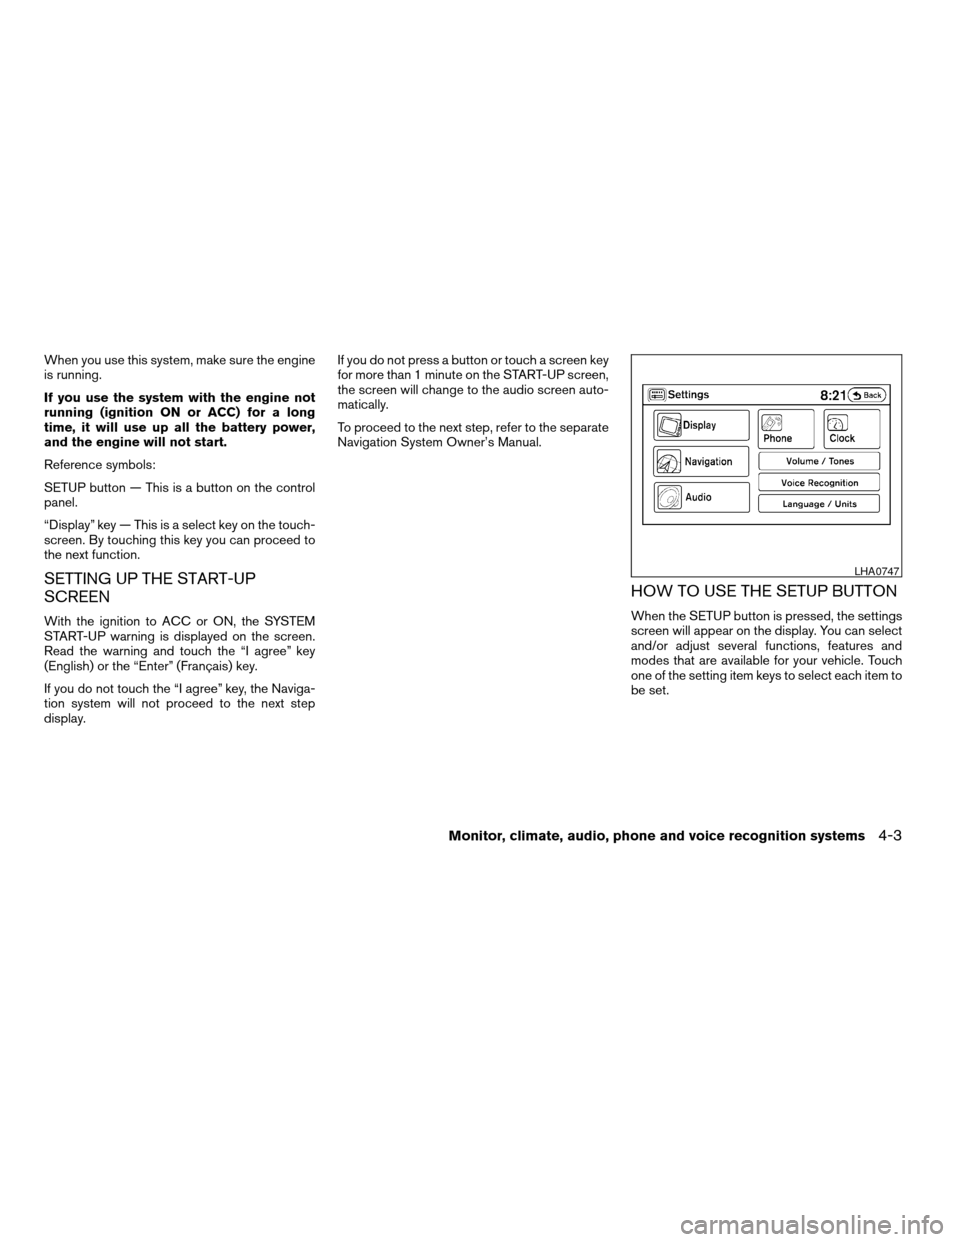
HOW TO USE THE SETUP BUTTON
When the SETUP button is pressed, the settings
screen will appear on the display. You can select
and/or adjust several functions, features and
modes that are available for your vehicle. Touch
one of the setting item keys to select each item to
be set.
LHA0747
Monitor, climate, audio, phone and voice recognition systems4-3
ZREVIEW COPYÐ2009 Altima(alt)
Owners Manual(owners)ÐUSA_English(nna)
02/03/09Ðdebbie
X
Page 168 of 373
Display settings
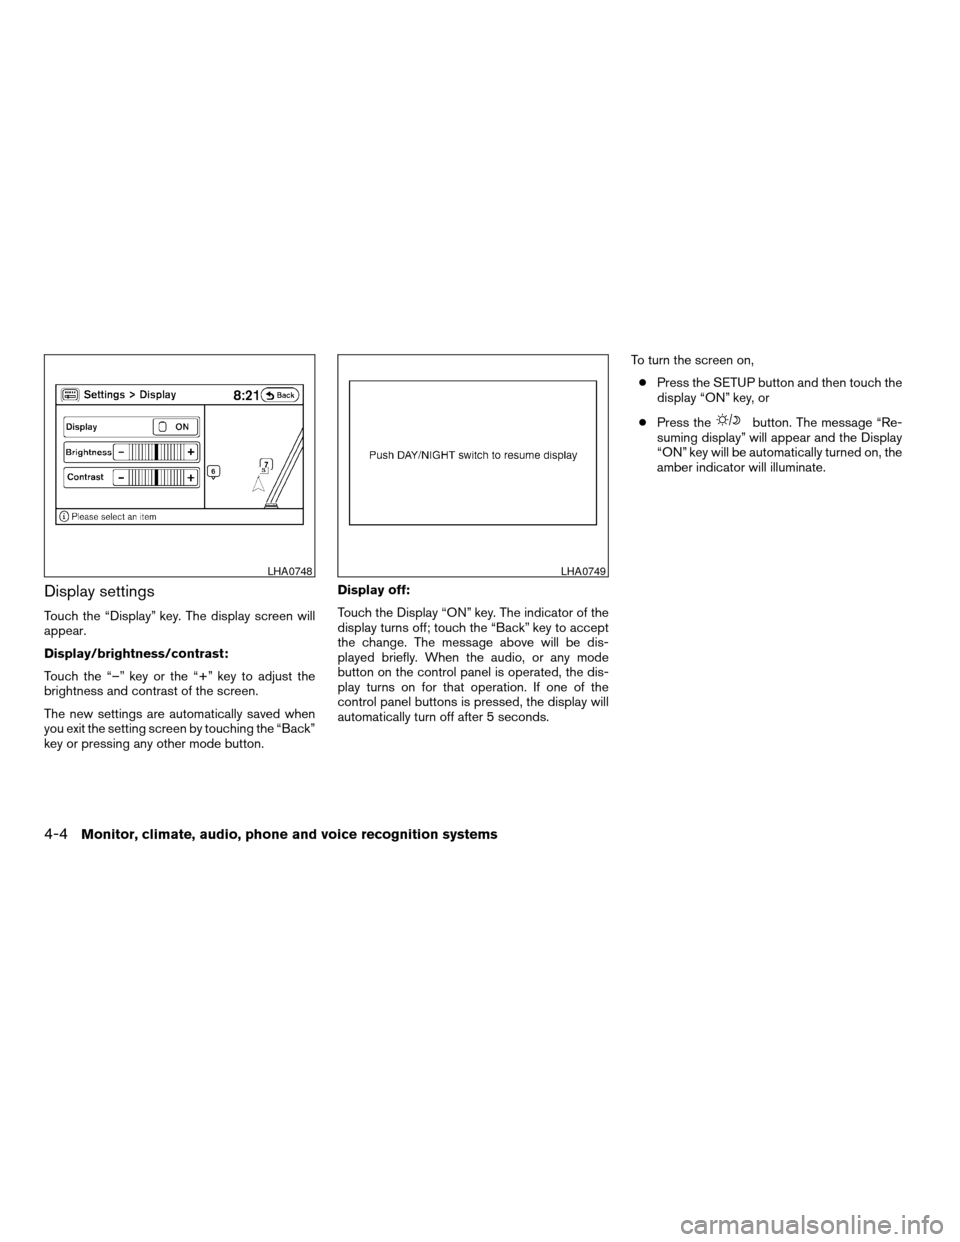
Touch the “Display” key. The display screen will
appear.
Display/brightness/contrast:
Touch the “–” key or the “+” key to adjust the
brightness and contrast of the screen.
The new settings are automatically saved when
you exit the setting screen by touching the “Back”
key or pressing any other mode button.Display off:
Touch the Display “ON” key. The indicator of the
display turns off; touch the “Back” key to accept
the change. The message above will be dis-
played briefly. When the audio, or any mode
button on the control panel is operated, the dis-
play turns on for that operation. If one of the
control panel buttons is pressed, the display will
automatically turn off after 5 seconds.To turn the screen on,
cPress the SETUP button and then touch the
display “ON” key, or
cPress the
button. The message “Re-
suming display” will appear and the Display
“ON” key will be automatically turned on, the
amber indicator will illuminate.
LHA0748LHA0749
4-4Monitor, climate, audio, phone and voice recognition systems
ZREVIEW COPYÐ2009 Altima(alt)
Owners Manual(owners)ÐUSA_English(nna)
02/03/09Ðdebbie
X
Page 169 of 373
Clock
Adjusting the time:
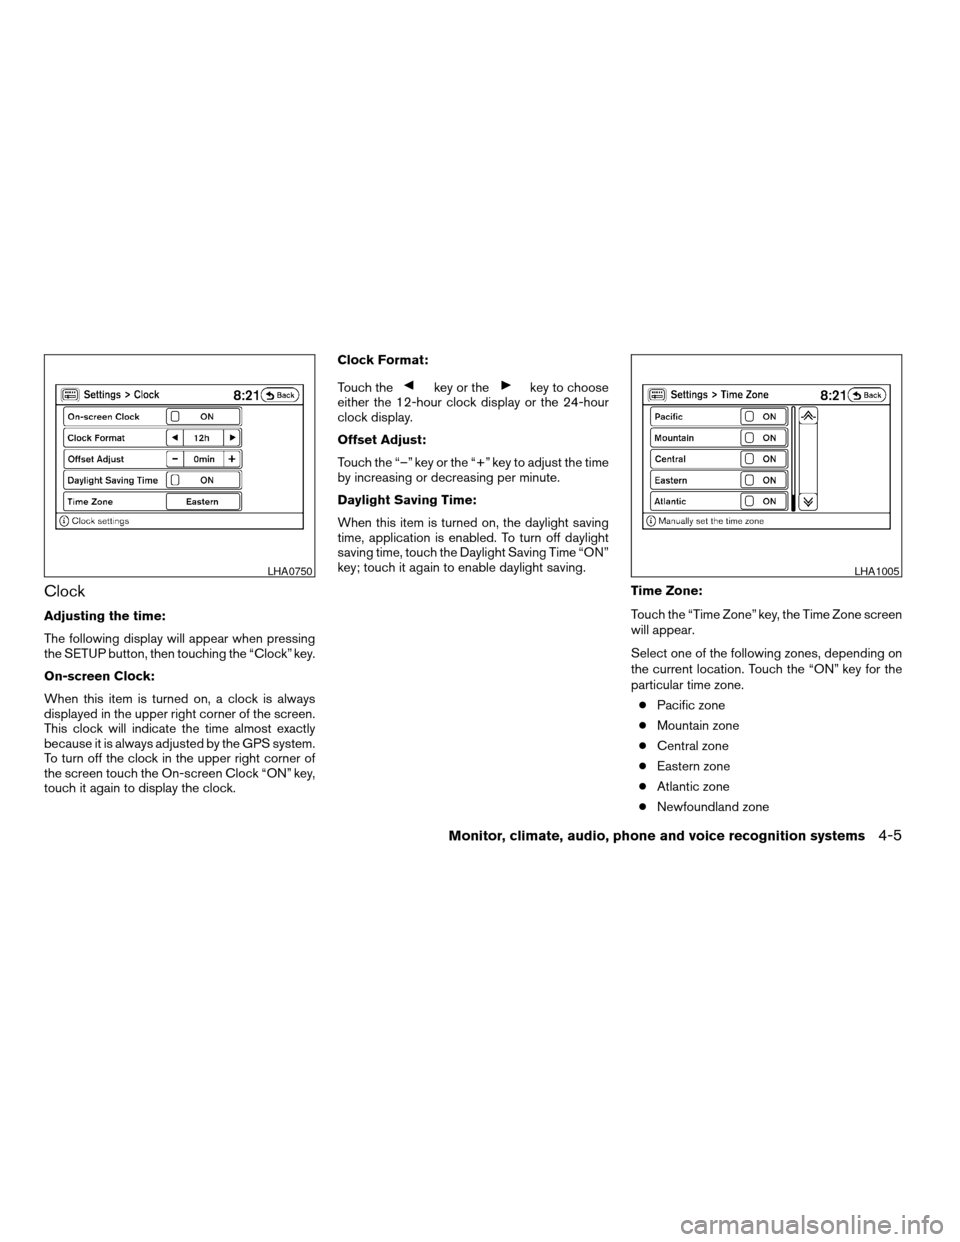
The following display will appear when pressing
the SETUP button, then touching the “Clock” key.
On-screen Clock:
When this item is turned on, a clock is always
displayed in the upper right corner of the screen.
This clock will indicate the time almost exactly
because it is always adjusted by the GPS system.
To turn off the clock in the upper right corner of
the screen touch the On-screen Clock “ON” key,
touch it again to display the clock.Clock Format:
Touch the
key or thekey to choose
either the 12-hour clock display or the 24-hour
clock display.
Offset Adjust:
Touch the “–” key or the “+” key to adjust the time
by increasing or decreasing per minute.
Daylight Saving Time:
When this item is turned on, the daylight saving
time, application is enabled. To turn off daylight
saving time, touch the Daylight Saving Time “ON”
key; touch it again to enable daylight saving.
Time Zone:
Touch the “Time Zone” key, the Time Zone screen
will appear.
Select one of the following zones, depending on
the current location. Touch the “ON” key for the
particular time zone.
cPacific zone
cMountain zone
cCentral zone
cEastern zone
cAtlantic zone
cNewfoundland zone
LHA0750LHA1005
Monitor, climate, audio, phone and voice recognition systems4-5
ZREVIEW COPYÐ2009 Altima(alt)
Owners Manual(owners)ÐUSA_English(nna)
02/03/09Ðdebbie
X
Page 170 of 373
After selection, touch the “Back” key the Clock
screen will appear.
Pacific zone has been set as the initial (default)
setting.
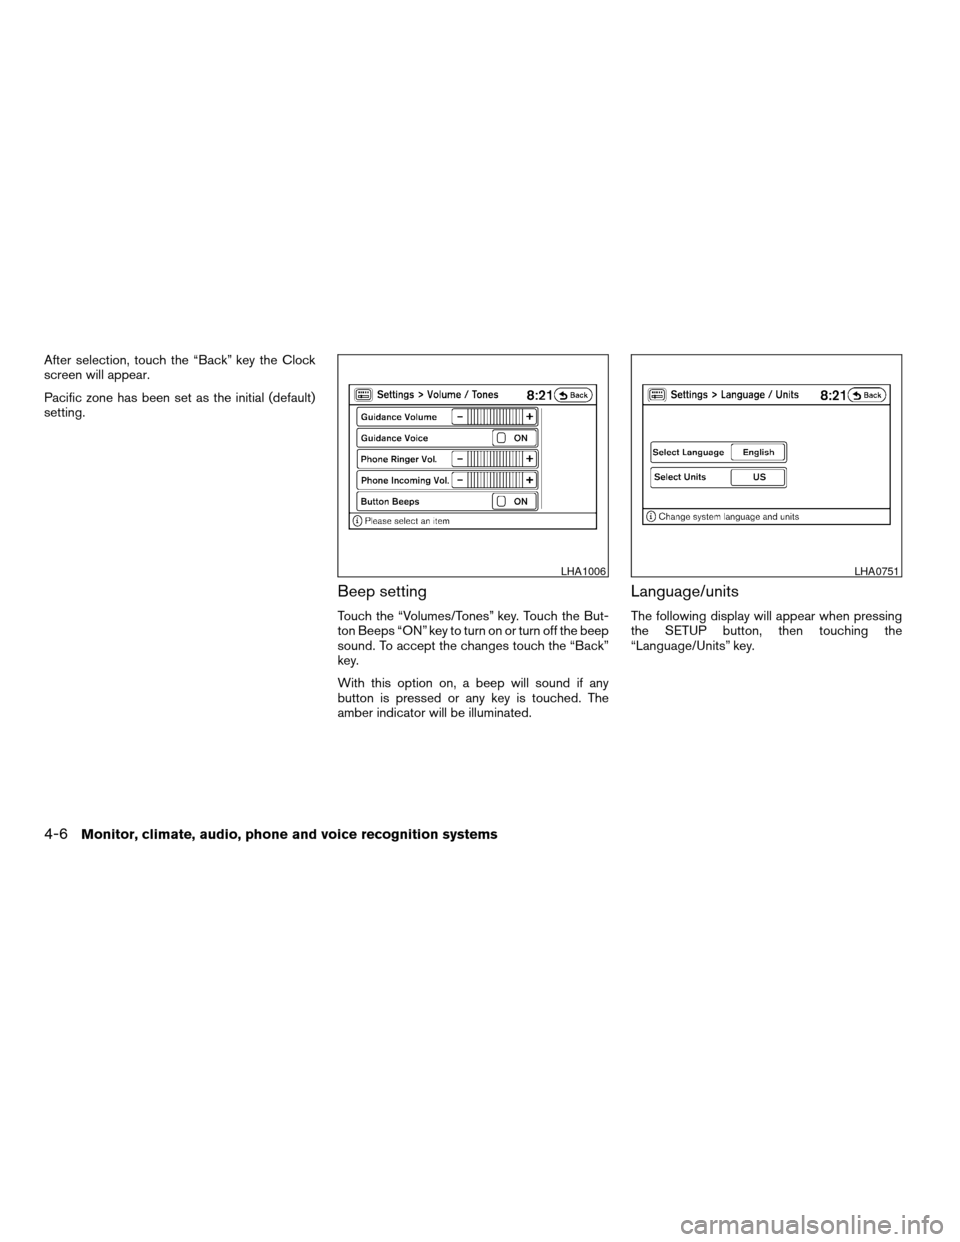
Beep setting
Touch the “Volumes/Tones” key. Touch the But-
ton Beeps “ON” key to turn on or turn off the beep
sound. To accept the changes touch the “Back”
key.
With this option on, a beep will sound if any
button is pressed or any key is touched. The
amber indicator will be illuminated.
Language/units
The following display will appear when pressing
the SETUP button, then touching the
“Language/Units” key.
LHA1006LHA0751
4-6Monitor, climate, audio, phone and voice recognition systems
ZREVIEW COPYÐ2009 Altima(alt)
Owners Manual(owners)ÐUSA_English(nna)
02/03/09Ðdebbie
X
Page 171 of 373
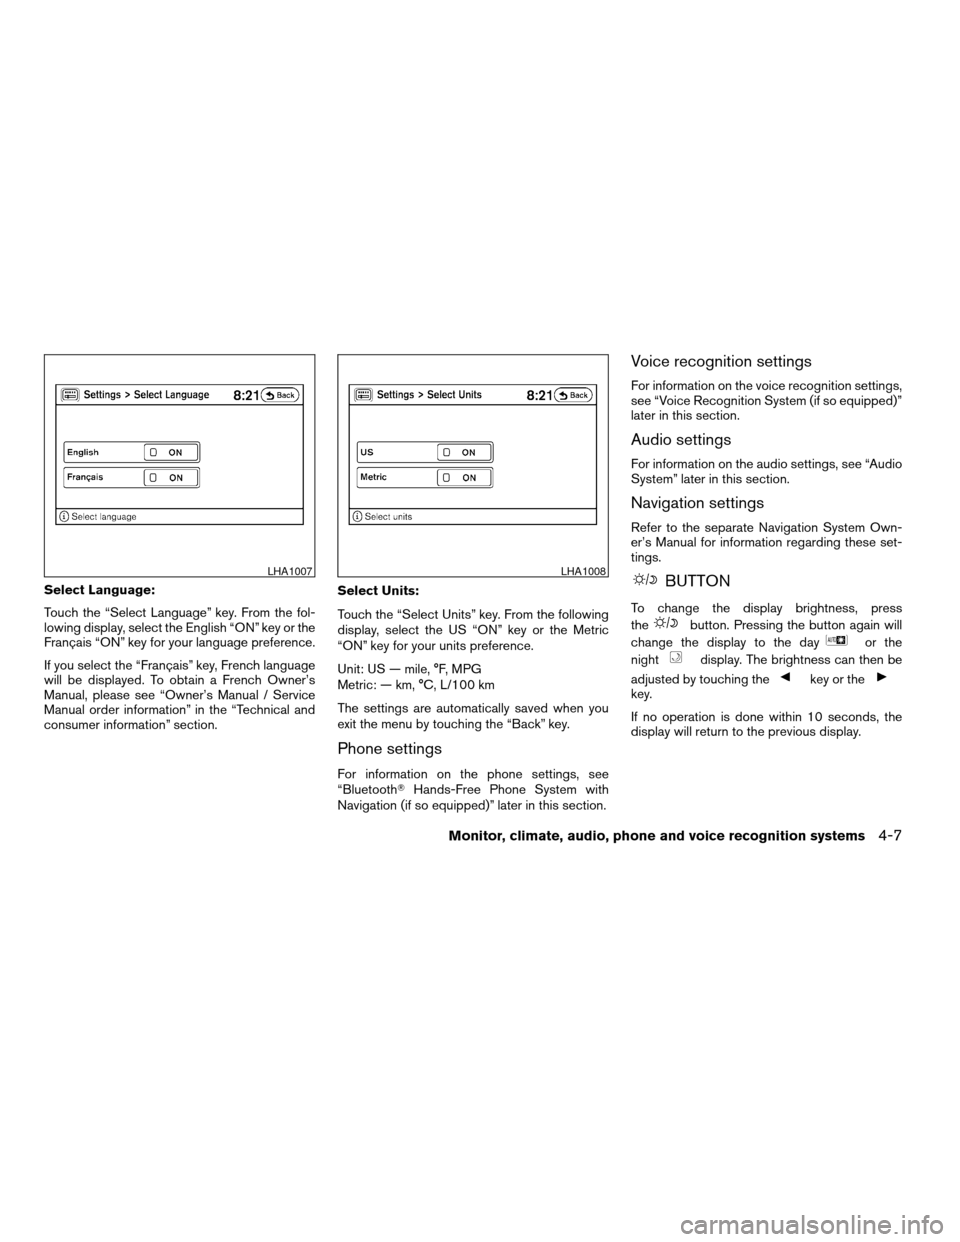
Select Language:
Touch the “Select Language” key. From the fol-
lowing display, select the English “ON” key or the
Français “ON” key for your language preference.
If you select the “Français” key, French language
will be displayed. To obtain a French Owner’s
Manual, please see “Owner’s Manual / Service
Manual order information” in the “Technical and
consumer information” section.Select Units:
Touch the “Select Units” key. From the following
display, select the US “ON” key or the Metric
“ON” key for your units preference.
Unit: US — mile, °F, MPG
Metric: — km, °C, L/100 km
The settings are automatically saved when you
exit the menu by touching the “Back” key.
Phone settings
For information on the phone settings, see
“BluetoothTHands-Free Phone System with
Navigation (if so equipped)” later in this section.
Voice recognition settings
For information on the voice recognition settings,
see “Voice Recognition System (if so equipped)”
later in this section.
Audio settings
For information on the audio settings, see “Audio
System” later in this section.
Navigation settings
Refer to the separate Navigation System Own-
er’s Manual for information regarding these set-
tings.
BUTTON
To change the display brightness, press
the
button. Pressing the button again will
change the display to the day
or the
night
display. The brightness can then be
adjusted by touching the
key or thekey.
If no operation is done within 10 seconds, the
display will return to the previous display.
LHA1007LHA1008
Monitor, climate, audio, phone and voice recognition systems4-7
ZREVIEW COPYÐ2009 Altima(alt)
Owners Manual(owners)ÐUSA_English(nna)
02/03/09Ðdebbie
X
Page 173 of 373
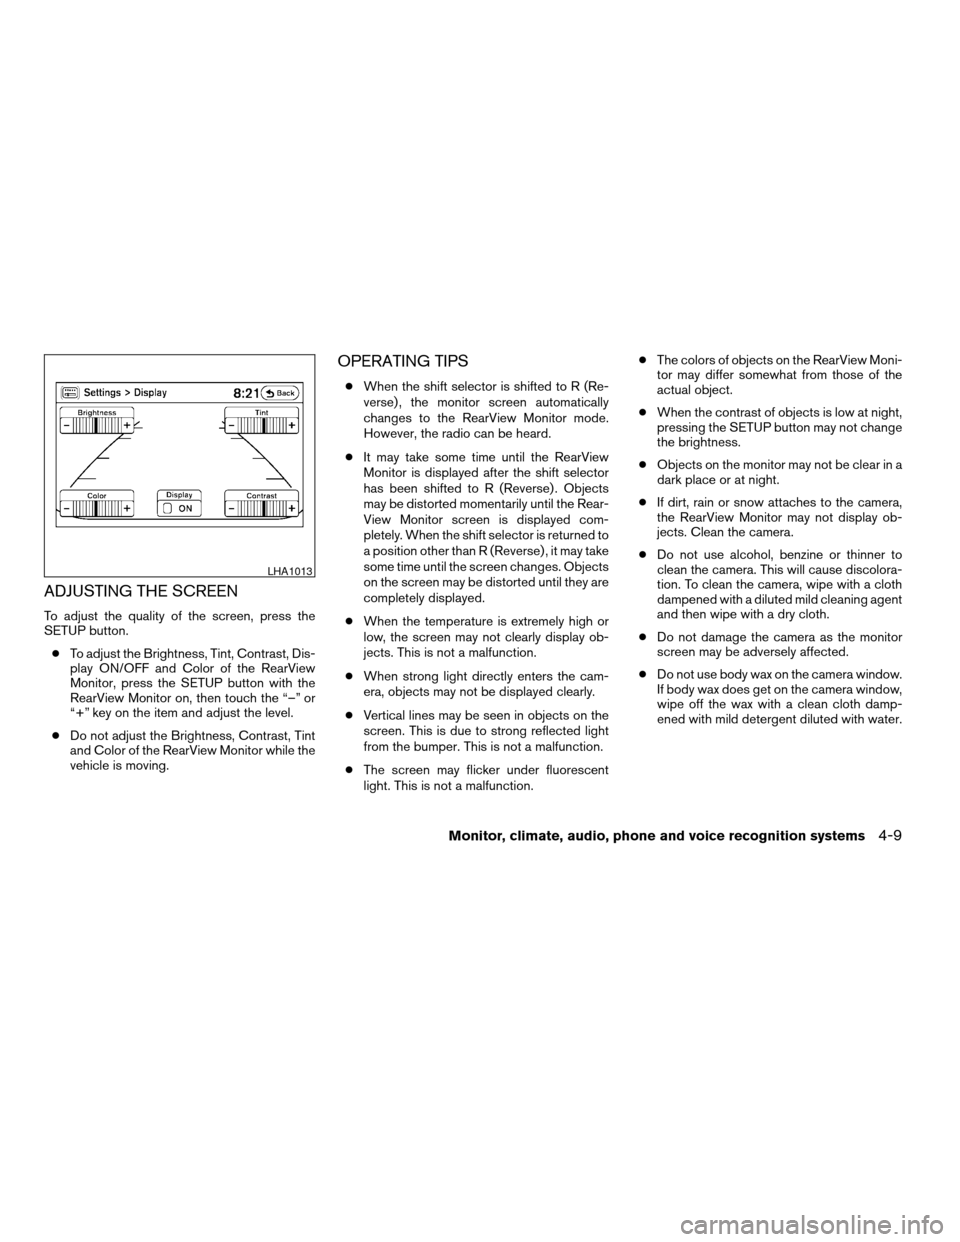
ADJUSTING THE SCREEN
To adjust the quality of the screen, press the
SETUP button.
cTo adjust the Brightness, Tint, Contrast, Dis-
play ON/OFF and Color of the RearView
Monitor, press the SETUP button with the
RearView Monitor on, then touch the “–” or
“+” key on the item and adjust the level.
cDo not adjust the Brightness, Contrast, Tint
and Color of the RearView Monitor while the
vehicle is moving.
OPERATING TIPS
cWhen the shift selector is shifted to R (Re-
verse) , the monitor screen automatically
changes to the RearView Monitor mode.
However, the radio can be heard.
cIt may take some time until the RearView
Monitor is displayed after the shift selector
has been shifted to R (Reverse) . Objects
may be distorted momentarily until the Rear-
View Monitor screen is displayed com-
pletely. When the shift selector is returned to
a position other than R (Reverse) , it may take
some time until the screen changes. Objects
on the screen may be distorted until they are
completely displayed.
cWhen the temperature is extremely high or
low, the screen may not clearly display ob-
jects. This is not a malfunction.
cWhen strong light directly enters the cam-
era, objects may not be displayed clearly.
cVertical lines may be seen in objects on the
screen. This is due to strong reflected light
from the bumper. This is not a malfunction.
cThe screen may flicker under fluorescent
light. This is not a malfunction.cThe colors of objects on the RearView Moni-
tor may differ somewhat from those of the
actual object.
cWhen the contrast of objects is low at night,
pressing the SETUP button may not change
the brightness.
cObjects on the monitor may not be clear in a
dark place or at night.
cIf dirt, rain or snow attaches to the camera,
the RearView Monitor may not display ob-
jects. Clean the camera.
cDo not use alcohol, benzine or thinner to
clean the camera. This will cause discolora-
tion. To clean the camera, wipe with a cloth
dampened with a diluted mild cleaning agent
and then wipe with a dry cloth.
cDo not damage the camera as the monitor
screen may be adversely affected.
cDo not use body wax on the camera window.
If body wax does get on the camera window,
wipe off the wax with a clean cloth damp-
ened with mild detergent diluted with water.
LHA1013
Monitor, climate, audio, phone and voice recognition systems4-9
ZREVIEW COPYÐ2009 Altima(alt)
Owners Manual(owners)ÐUSA_English(nna)
02/03/09Ðdebbie
X
Page 201 of 373
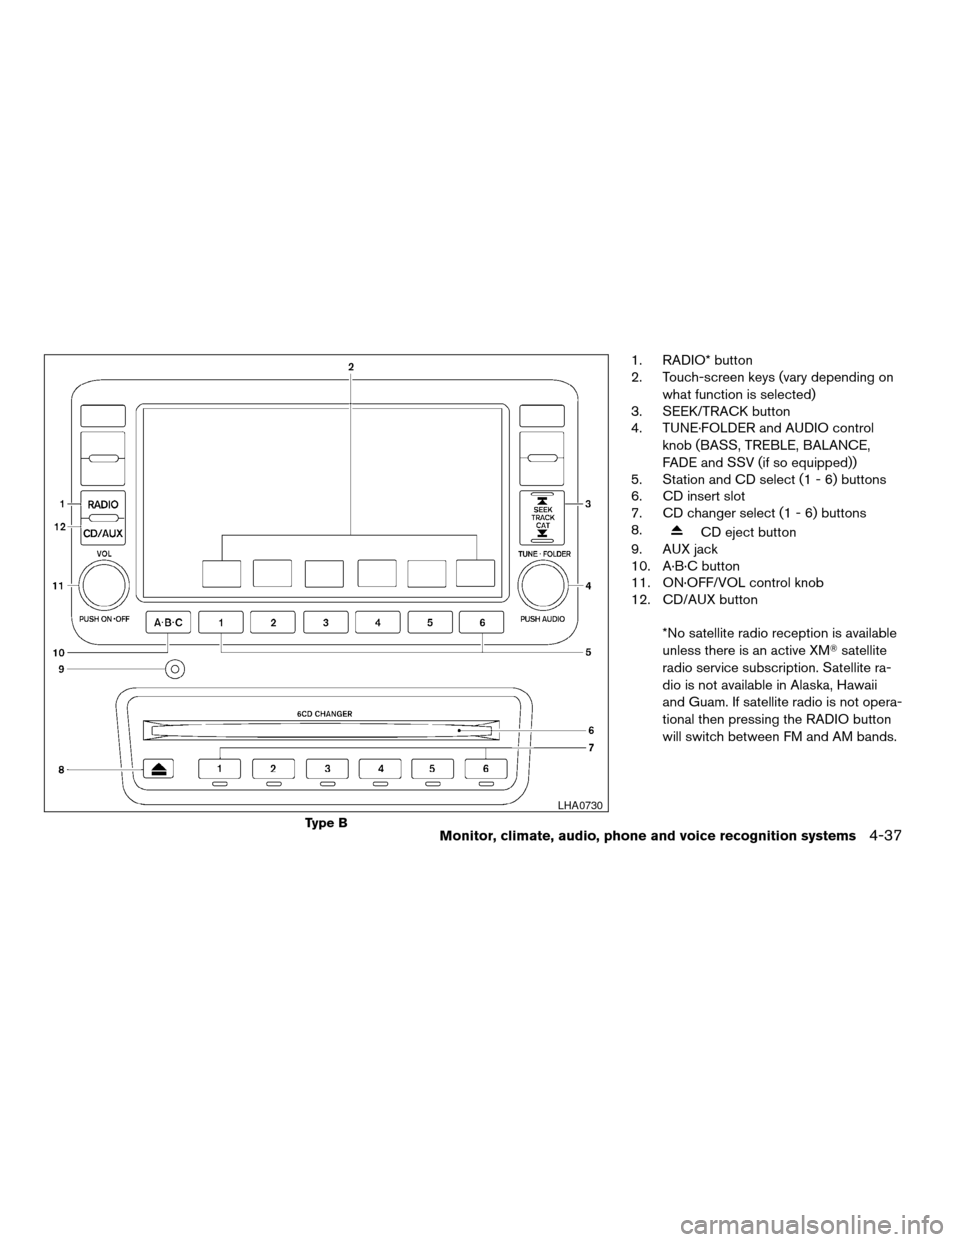
1. RADIO* button
2. Touch-screen keys (vary depending on
what function is selected)
3. SEEK/TRACK button
4. TUNE·FOLDER and AUDIO control
knob (BASS, TREBLE, BALANCE,
FADE and SSV (if so equipped))
5. Station and CD select (1 - 6) buttons
6. CD insert slot
7. CD changer select (1 - 6) buttons
8.
CD eject button
9. AUX jack
10. A·B·C button
11. ON·OFF/VOL control knob
12. CD/AUX button
*No satellite radio reception is available
unless there is an active XMTsatellite
radio service subscription. Satellite ra-
dio is not available in Alaska, Hawaii
and Guam. If satellite radio is not opera-
tional then pressing the RADIO button
will switch between FM and AM bands.
Type B
LHA0730
Monitor, climate, audio, phone and voice recognition systems4-37
ZREVIEW COPYÐ2009 Altima(alt)
Owners Manual(owners)ÐUSA_English(nna)
02/03/09Ðdebbie
X
Page 202 of 373
FM/AM/SAT RADIO WITH
COMPACT DISC (CD) CHANGER (if
so equipped)
For all operation precautions, see “Audio opera-
tion precautions” earlier in this section.
No satellite radio reception is available unless
there is an active XMTsatellite radio service
subscription. Satellite radio is not available in
Alaska, Hawaii and Guam. If satellite radio is not
operational then pressing the RADIO button will
switch between FM and AM bands.
Reference symbols:
RADIO button — This is a button on the radio. By
pressing this button you can select the item or
perform this action.
“Display” key — This is a select key on the touch-
screen. By touching this key you can proceed to
the next function.
Audio main operation
ON·OFF/VOL control:
Place the ignition switch to the ACC or ON
position, then press the ON·OFF/VOL control
knob while the audio system is off to call up the
mode (radio or CD) which was playing immedi-
ately before the system was turned off.To turn the system off, press the ON·OFF/VOL
control knob.
Turn the ON·OFF/VOL control knob to adjust the
volume.
This vehicle may be equipped with Speed Sen-
sitive Volume (SSV) for audio. The audio volume
changes as the driving speed changes.
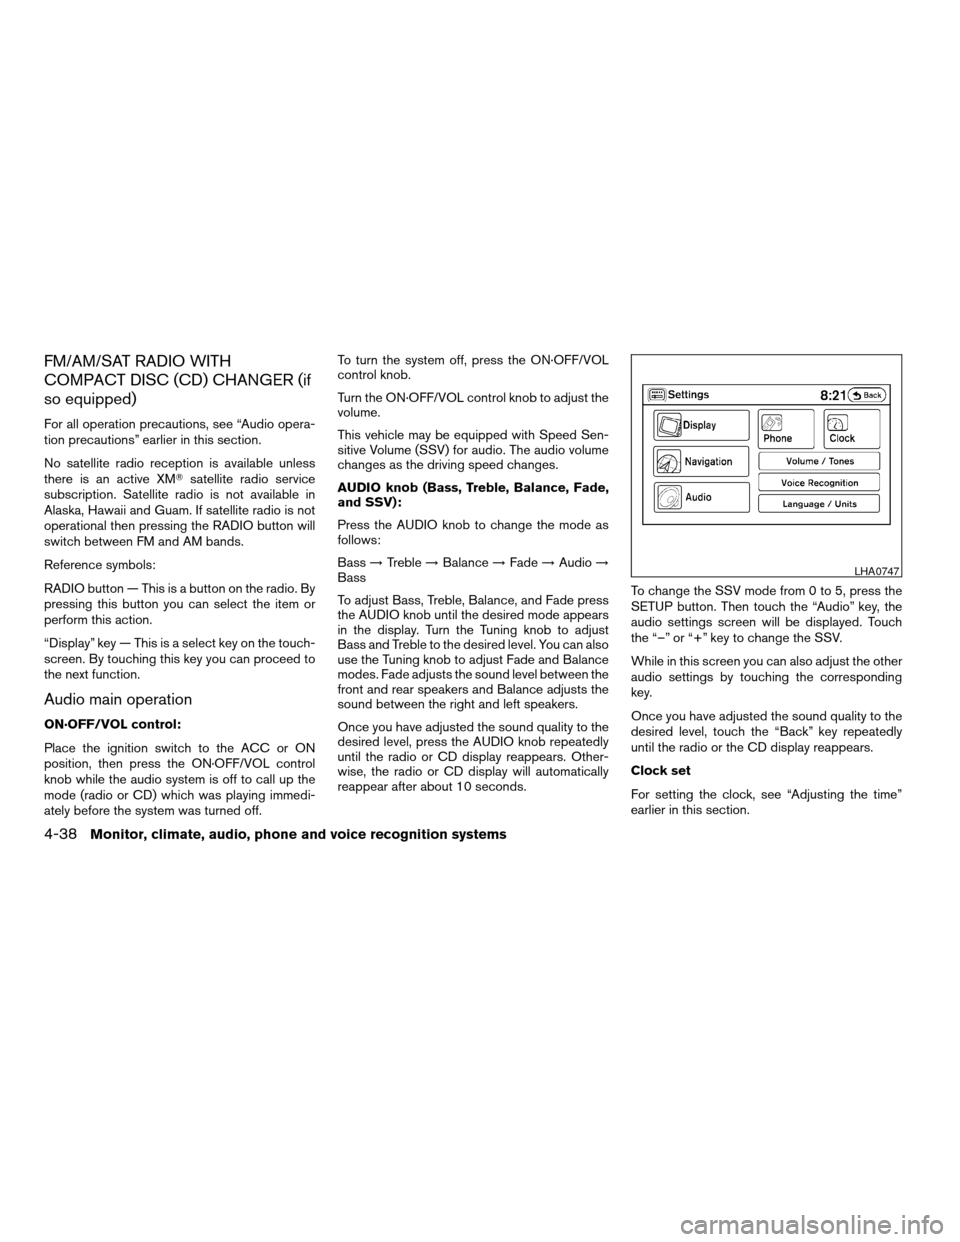
AUDIO knob (Bass, Treble, Balance, Fade,
and SSV):
Press the AUDIO knob to change the mode as
follows:
Bass!Treble!Balance!Fade!Audio!
Bass
To adjust Bass, Treble, Balance, and Fade press
the AUDIO knob until the desired mode appears
in the display. Turn the Tuning knob to adjust
Bass and Treble to the desired level. You can also
use the Tuning knob to adjust Fade and Balance
modes. Fade adjusts the sound level between the
front and rear speakers and Balance adjusts the
sound between the right and left speakers.
Once you have adjusted the sound quality to the
desired level, press the AUDIO knob repeatedly
until the radio or CD display reappears. Other-
wise, the radio or CD display will automatically
reappear after about 10 seconds.To change the SSV mode from 0 to 5, press the
SETUP button. Then touch the “Audio” key, the
audio settings screen will be displayed. Touch
the “–” or “+” key to change the SSV.
While in this screen you can also adjust the other
audio settings by touching the corresponding
key.
Once you have adjusted the sound quality to the
desired level, touch the “Back” key repeatedly
until the radio or the CD display reappears.
Clock set
For setting the clock, see “Adjusting the time”
earlier in this section.
LHA0747
4-38Monitor, climate, audio, phone and voice recognition systems
ZREVIEW COPYÐ2009 Altima(alt)
Owners Manual(owners)ÐUSA_English(nna)
02/03/09Ðdebbie
X
Page 204 of 373
SEEK/TRACK (tuning)
button:
Press the SEEK/TRACK button
orfor less than 1.5 seconds to tune from high to low
or low to high frequencies and stop at the next
broadcasting station.
“Scan” (tuning) key:
Touch the “Scan” key. SCAN illuminates in the
display window. Scan tuning begins from low to
high frequencies. Scan tuning stops for 5 sec-
onds at each broadcasting station that has suffi-
cient signal strength. Touching the “Scan” key
again during this 5 second period stops scan
tuning and the radio remains tuned to that station.
Station memory operations:
18 stations can be set for the FM, AM or SAT
(Satellite if so equipped) radio to the A, B and C
preset button in any combination of FM, AM or
SAT stations.
1. Press the A·B·C button or the “Preset” key to
select preset channel A, B or C.
2. Press the RADIO button to select the de-
sired FM, AM or SAT station band.
3. Tune to the desired station using manual
tuning, seek tuning or scan tuning. Press
and hold any of the desired station memory(1 – 6) buttons until a beep sound is heard
(the station will now appear in one of the 1 –
6 keys on the screen)
4. The channel indicator will then come on and
the sound will resume. Memorizing is now
complete.
5. Other buttons can be set in the same man-
ner.
If the battery cable is disconnected, or if the fuse
blows, the radio memory will be canceled. In that
case, reset the desired stations.
Radio data system (RDS):
RDS stands for Radio Data System, and is a data
information service transmitted by some radio
stations on the FM band (not AM band) . Cur-
rently, most RDS stations are in large cities, but
many stations are now considering broadcasting
RDS data.
RDS can display:
cStation call sign, such as “WHFR 98.3”.
cStation name, such as “The Groove”.
cMusic or programming type such as “Clas-
sical”, “Country” or “Rock”.
If the station broadcasts RDS information, the
RDS icon is displayed.
Compact disc (CD) changer operation
With the ignition switch in the ACC or ON posi-
tion, press one of the CD changer (1 – 6) but-
tons. Once the CD slot has open insert the
compact disc into the slot with the label side
facing up. The compact disc will be guided auto-
matically into the slot and start playing.
If the radio is already operating, it will automati-
cally turn off and the compact disc will play.
If the system has been turned off while the com-
pact disc was playing, pressing the
ON·OFF/VOL control knob will start the compact
disc.
Loading buttons:
1 Disc Load:
cPress one of the CD changer (1 – 6) select
buttons for less than 1.5 seconds, then in-
sert the CD.
cWhile in CD mode press one of the station
and CD select (1 – 6) buttons on the radio,
then insert the CD.
cWhile in CD mode press one of the CD (1 –
6) keys on the screen, then insert the CD.
All Disc Load:
cPress and hold one of the CD changer (1 –
6) buttons for more than 1.5 seconds.
4-40Monitor, climate, audio, phone and voice recognition systems
ZREVIEW COPYÐ2009 Altima(alt)
Owners Manual(owners)ÐUSA_English(nna)
02/03/09Ðdebbie
X
Page 205 of 373
The slot numbers (1 – 6) will illuminate on the
display when CDs are loaded into the changer.
When one of the CD changer (1 – 6) buttons is
pressed with the compact disc loaded but the
radio playing, the radio will automatically be
turned off and the compact disc will start to play.
DISC button:
When the DISC button is pressed with the sys-
tem off and a compact disc loaded, the system
will turn on and the compact disc will start to play.
When the DISC button is pressed with a com-
pact disc loaded with the radio playing, the radio
will automatically be turned off and the compact
disc will start to play.
TUNE·FOLDER knob:
While playing an MP3 CD to skip through folders
turn the TUNE·FOLDER knob right or left to skip
forward or backward through the available fold-
ers.
This function will only operate on an MP3 CD with
multiple folders.
“Folder” key:
While playing an MP3 CD you can select a track
inside a folder. Touch the “Folder” key; a list
screen displays. Touch one of the folder select
keys; another list screen displays. Touch one ofthe file select keys; the system will start playing
that track in the selected folder.
SEEK/TRACK button:
When the SEEK/TRACK
button is
pressed for less than 1.5 seconds while a com-
pact disc is playing, the track being played re-
turns to its beginning. Press several times to skip
back through tracks. The compact disc will go
back the number of times the button is pressed.
When the SEEK/TRACK
button is
pressed for less than 1.5 seconds while the
compact disc is playing, the next track will start to
play from its beginning. Press several times to
skip through tracks. The compact disc will ad-
vance the number of times the button is pressed.
(When the last track on the compact disc is
skipped through, the first track will be played.)
When pressing the SEEK/TRACK
(fast
forward) or
(rewind) button for more than
1.5 seconds, the CD being played will fast for-
ward or rewind. When the button is released, the
CD will return to normal play speed.
“Track” key:
While playing a CD or an MP3 CD you can select
a track or file on the disc. Touch the “Track” key, alist screen displays. Touch one of the track or file
select keys, the system will start playing that track
or file.
CD select buttons:
To play another CD that has been loaded:
cTouch one of the CD select (1–6) keys on
the touch-screen or
cPress one of the station and CD select (1 –
6) buttons on the radio or
cPress one of the CD changer (1 – 6) select
buttons.
“Scan” key:
While listening to a CD, touch the “Scan” key to
preview the first 10 seconds of each track on the
current CD playing. Touching the “Scan” key
during this 10 second period stops the scan and
the CD remains on that track.
“Repeat” key:
When the “Repeat” key is touched while a com-
pact disc is played, the play pattern can be
changed as follows:
CD:
1 DISC RPT!1 TRACK RPT
Monitor, climate, audio, phone and voice recognition systems4-41
ZREVIEW COPYÐ2009 Altima(alt)
Owners Manual(owners)ÐUSA_English(nna)
02/03/09Ðdebbie
X