NISSAN ARMADA 2017 2.G Owners Manual
Manufacturer: NISSAN, Model Year: 2017, Model line: ARMADA, Model: NISSAN ARMADA 2017 2.GPages: 614, PDF Size: 2.87 MB
Page 201 of 614
4-4Monitor, heater, air conditioner, audio, phone and voice recognition systems
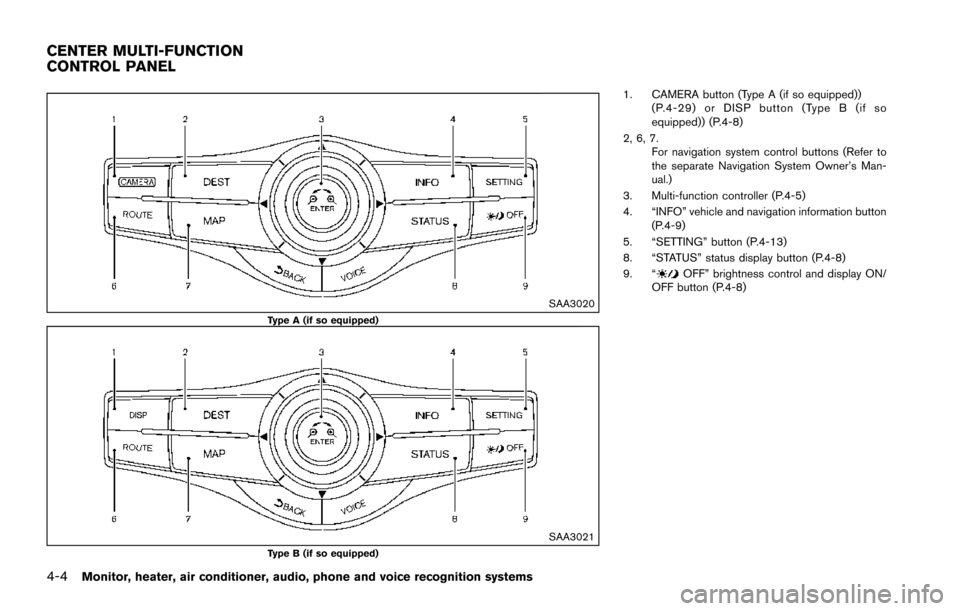
SAA3020Type A (if so equipped)
SAA3021Type B (if so equipped)
1. CAMERA button (Type A (if so equipped))(P.4-29) or DISP button (Type B (if so
equipped)) (P.4-8)
2, 6, 7. For navigation system control buttons (Refer to
the separate Navigation System Owner’s Man-
ual.)
3. Multi-function controller (P.4-5)
4. “INFO” vehicle and navigation information button (P.4-9)
5. “SETTING” button (P.4-13)
8. “STATUS” status display button (P.4-8)
9. “
OFF” brightness control and display ON/
OFF button (P.4-8)
CENTER MULTI-FUNCTION
CONTROL PANEL
Page 202 of 614
SAA3025
HOW TO USE MULTI-FUNCTION
CONTROLLER
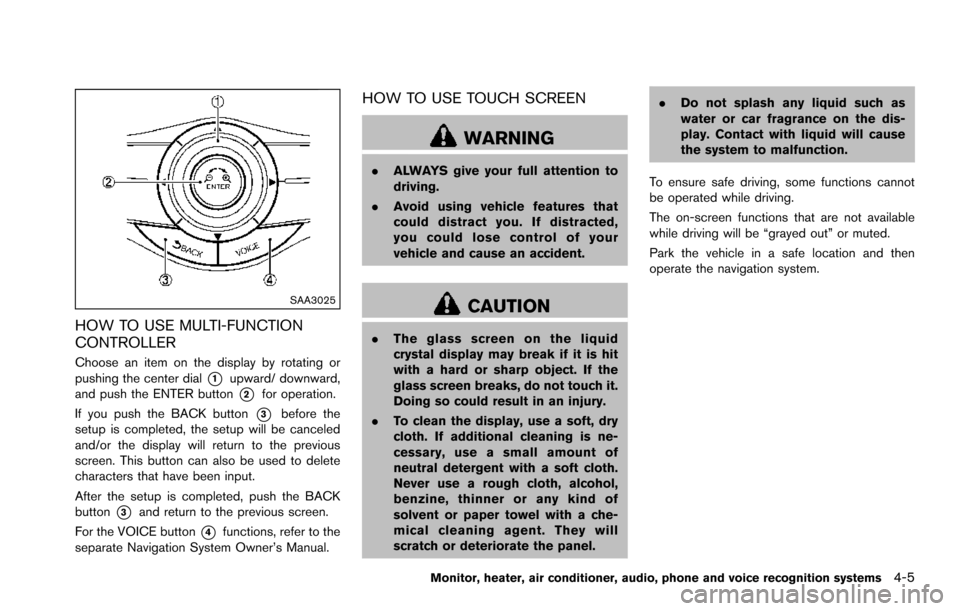
Choose an item on the display by rotating or
pushing the center dial
*1upward/ downward,
and push the ENTER button
*2for operation.
If you push the BACK button
*3before the
setup is completed, the setup will be canceled
and/or the display will return to the previous
screen. This button can also be used to delete
characters that have been input.
After the setup is completed, push the BACK
button
*3and return to the previous screen.
For the VOICE button
*4functions, refer to the
separate Navigation System Owner’s Manual.
HOW TO USE TOUCH SCREEN
WARNING
. ALWAYS give your full attention to
driving.
. Avoid using vehicle features that
could distract you. If distracted,
you could lose control of your
vehicle and cause an accident.
CAUTION
.The glass screen on the liquid
crystal display may break if it is hit
with a hard or sharp object. If the
glass screen breaks, do not touch it.
Doing so could result in an injury.
. To clean the display, use a soft, dry
cloth. If additional cleaning is ne-
cessary, use a small amount of
neutral detergent with a soft cloth.
Never use a rough cloth, alcohol,
benzine, thinner or any kind of
solvent or paper towel with a che-
mical cleaning agent. They will
scratch or deteriorate the panel. .
Do not splash any liquid such as
water or car fragrance on the dis-
play. Contact with liquid will cause
the system to malfunction.
To ensure safe driving, some functions cannot
be operated while driving.
The on-screen functions that are not available
while driving will be “grayed out” or muted.
Park the vehicle in a safe location and then
operate the navigation system.
Monitor, heater, air conditioner, audio, phone and voice recognition systems4-5
Page 203 of 614
4-6Monitor, heater, air conditioner, audio, phone and voice recognition systems
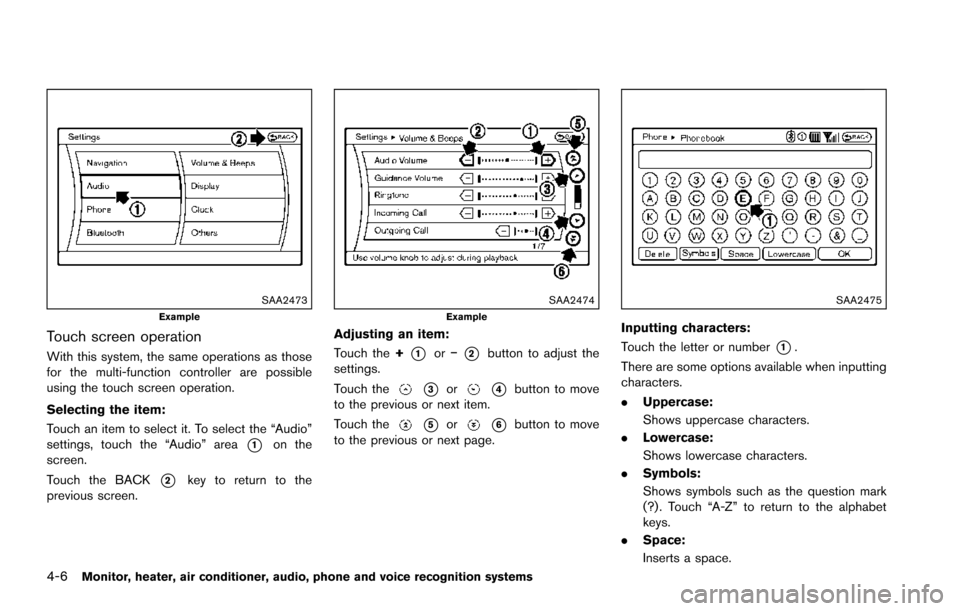
SAA2473Example
Touch screen operation
With this system, the same operations as those
for the multi-function controller are possible
using the touch screen operation.
Selecting the item:
Touch an item to select it. To select the “Audio”
settings, touch the “Audio” area
*1on the
screen.
Touch the BACK
*2key to return to the
previous screen.
SAA2474Example
Adjusting an item:
Touch the +
*1or�í*2button to adjust the
settings.
Touch the
*3or*4button to move
to the previous or next item.
Touch the
*5or*6button to move
to the previous or next page.
SAA2475
Inputting characters:
Touch the letter or number
*1.
There are some options available when inputting
characters.
. Uppercase:
Shows uppercase characters.
. Lowercase:
Shows lowercase characters.
. Symbols:
Shows symbols such as the question mark
(?) . Touch “A-Z” to return to the alphabet
keys.
. Space:
Inserts a space.
Page 204 of 614
.Delete:
Deletes the last character that has been
input with one touch. Push and hold the
button to delete all of the characters.
. OK:
Completes character inputs.
Touch screen maintenance
If you clean the display screen, use a dry, soft
cloth. If additional cleaning is necessary, use a
small amount of neutral detergent with a soft
cloth. Never spray the screen with water or
detergent. Dampen the cloth first, and then wipe
the screen.
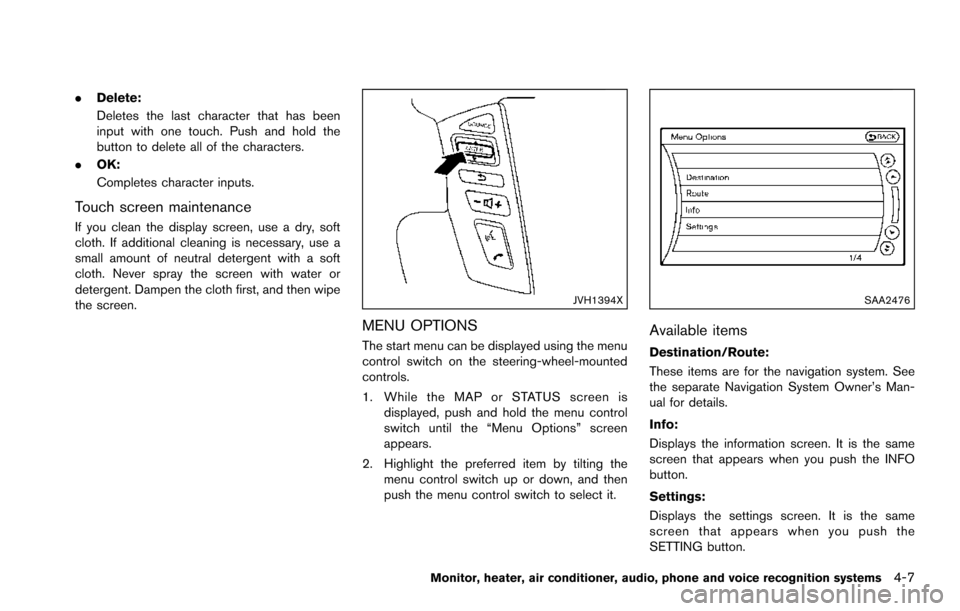
JVH1394X
MENU OPTIONS
The start menu can be displayed using the menu
control switch on the steering-wheel-mounted
controls.
1. While the MAP or STATUS screen is
displayed, push and hold the menu control
switch until the “Menu Options” screen
appears.
2. Highlight the preferred item by tilting the menu control switch up or down, and then
push the menu control switch to select it.
SAA2476
Available items
Destination/Route:
These items are for the navigation system. See
the separate Navigation System Owner’s Man-
ual for details.
Info:
Displays the information screen. It is the same
screen that appears when you push the INFO
button.
Settings:
Displays the settings screen. It is the same
screen that appears when you push the
SETTING button.
Monitor, heater, air conditioner, audio, phone and voice recognition systems4-7
Page 205 of 614
4-8Monitor, heater, air conditioner, audio, phone and voice recognition systems
SAA2477
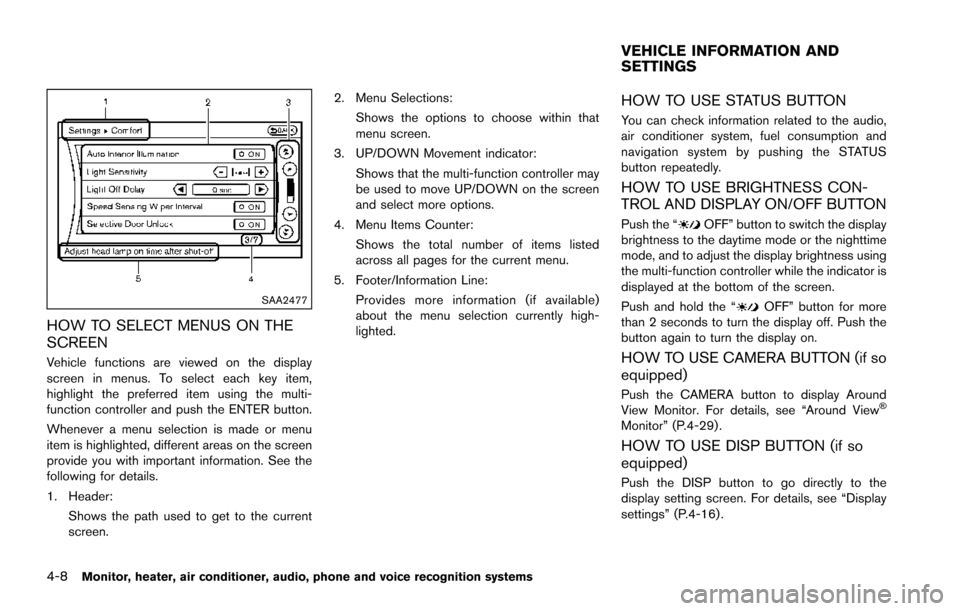
HOW TO SELECT MENUS ON THE
SCREEN
Vehicle functions are viewed on the display
screen in menus. To select each key item,
highlight the preferred item using the multi-
function controller and push the ENTER button.
Whenever a menu selection is made or menu
item is highlighted, different areas on the screen
provide you with important information. See the
following for details.
1. Header:Shows the path used to get to the current
screen. 2. Menu Selections:
Shows the options to choose within that
menu screen.
3. UP/DOWN Movement indicator: Shows that the multi-function controller may
be used to move UP/DOWN on the screen
and select more options.
4. Menu Items Counter: Shows the total number of items listed
across all pages for the current menu.
5. Footer/Information Line: Provides more information (if available)
about the menu selection currently high-
lighted.
HOW TO USE STATUS BUTTON
You can check information related to the audio,
air conditioner system, fuel consumption and
navigation system by pushing the STATUS
button repeatedly.
HOW TO USE BRIGHTNESS CON-
TROL AND DISPLAY ON/OFF BUTTON
Push the “OFF” button to switch the display
brightness to the daytime mode or the nighttime
mode, and to adjust the display brightness using
the multi-function controller while the indicator is
displayed at the bottom of the screen.
Push and hold the “
OFF” button for more
than 2 seconds to turn the display off. Push the
button again to turn the display on.
HOW TO USE CAMERA BUTTON (if so
equipped)
Push the CAMERA button to display Around
View Monitor. For details, see “Around View�Š
Monitor” (P.4-29) .
HOW TO USE DISP BUTTON (if so
equipped)
Push the DISP button to go directly to the
display setting screen. For details, see “Display
settings” (P.4-16) .
VEHICLE INFORMATION AND
SETTINGS
Page 206 of 614
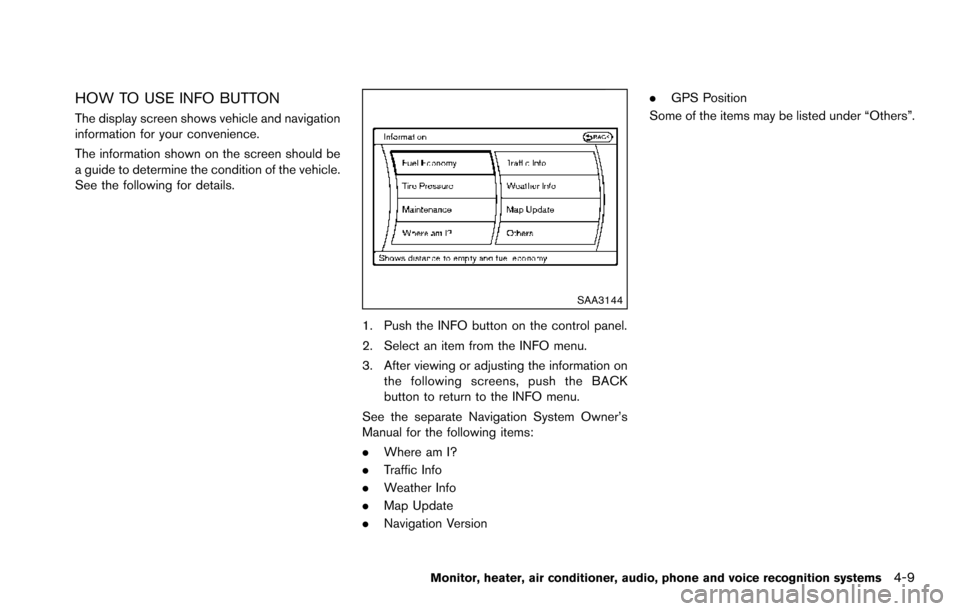
HOW TO USE INFO BUTTON
The display screen shows vehicle and navigation
information for your convenience.
The information shown on the screen should be
a guide to determine the condition of the vehicle.
See the following for details.
SAA3144
1. Push the INFO button on the control panel.
2. Select an item from the INFO menu.
3. After viewing or adjusting the information onthe following screens, push the BACK
button to return to the INFO menu.
See the separate Navigation System Owner’s
Manual for the following items:
. Where am I?
. Traffic Info
. Weather Info
. Map Update
. Navigation Version .
GPS Position
Some of the items may be listed under “Others”.
Monitor, heater, air conditioner, audio, phone and voice recognition systems4-9
Page 207 of 614
4-10Monitor, heater, air conditioner, audio, phone and voice recognition systems
SAA2479
SAA2480
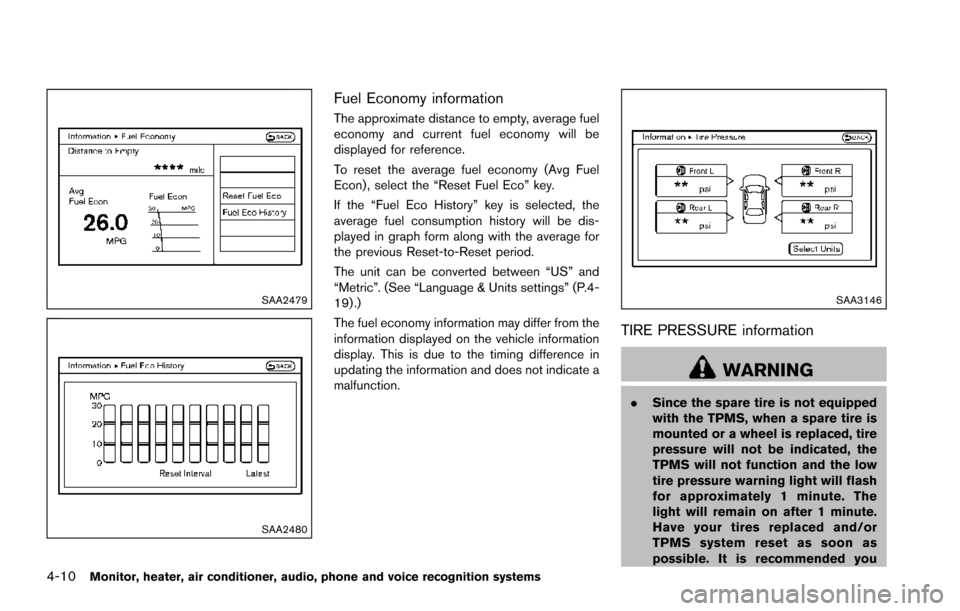
Fuel Economy information
The approximate distance to empty, average fuel
economy and current fuel economy will be
displayed for reference.
To reset the average fuel economy (Avg Fuel
Econ) , select the “Reset Fuel Eco” key.
If the “Fuel Eco History” key is selected, the
average fuel consumption history will be dis-
played in graph form along with the average for
the previous Reset-to-Reset period.
The unit can be converted between “US” and
“Metric”. (See “Language & Units settings” (P.4-
19) .)
The fuel economy information may differ from the
information displayed on the vehicle information
display. This is due to the timing difference in
updating the information and does not indicate a
malfunction.
SAA3146
TIRE PRESSURE information
WARNING
.Since the spare tire is not equipped
with the TPMS, when a spare tire is
mounted or a wheel is replaced, tire
pressure will not be indicated, the
TPMS will not function and the low
tire pressure warning light will flash
for approximately 1 minute. The
light will remain on after 1 minute.
Have your tires replaced and/or
TPMS system reset as soon as
possible. It is recommended you
Page 208 of 614
visit a NISSAN dealer for these
services.
. Replacing tires with those not ori-
ginally specified by NISSAN could
affect the proper operation of the
TPMS.
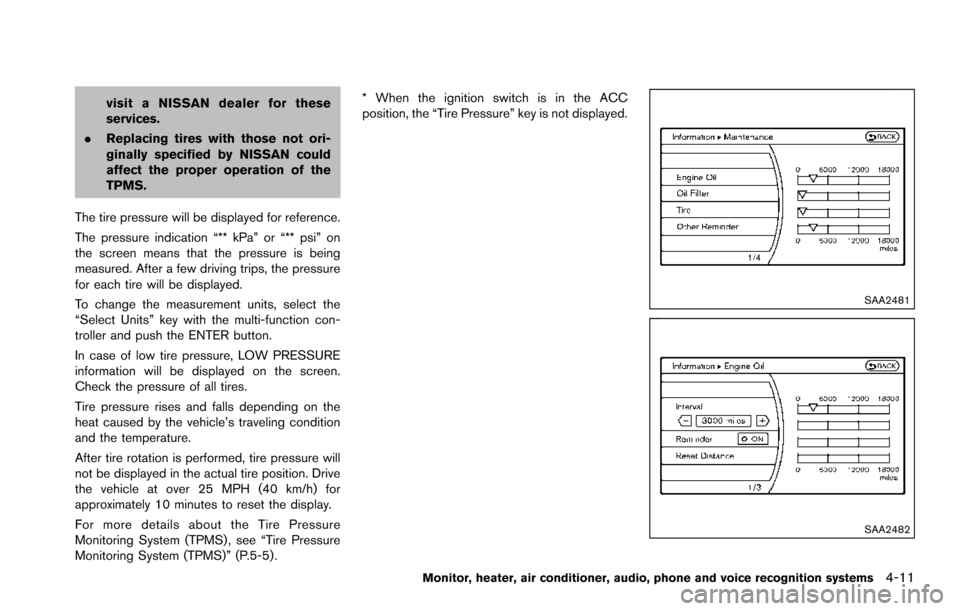
The tire pressure will be displayed for reference.
The pressure indication “** kPa” or “** psi” on
the screen means that the pressure is being
measured. After a few driving trips, the pressure
for each tire will be displayed.
To change the measurement units, select the
“Select Units” key with the multi-function con-
troller and push the ENTER button.
In case of low tire pressure, LOW PRESSURE
information will be displayed on the screen.
Check the pressure of all tires.
Tire pressure rises and falls depending on the
heat caused by the vehicle’s traveling condition
and the temperature.
After tire rotation is performed, tire pressure will
not be displayed in the actual tire position. Drive
the vehicle at over 25 MPH (40 km/h) for
approximately 10 minutes to reset the display.
For more details about the Tire Pressure
Monitoring System (TPMS) , see “Tire Pressure
Monitoring System (TPMS)” (P.5-5) . * When the ignition switch is in the ACC
position, the “Tire Pressure” key is not displayed.
SAA2481
SAA2482
Monitor, heater, air conditioner, audio, phone and voice recognition systems4-11
Page 209 of 614
4-12Monitor, heater, air conditioner, audio, phone and voice recognition systems
Maintenance information
The maintenance intervals can be displayed for
the engine oil, oil filter, tire and other reminders.
To set a maintenance interval, select a preferred
item from the list.
You can also set to display a message to remind
you that the maintenance needs to be per-
formed.
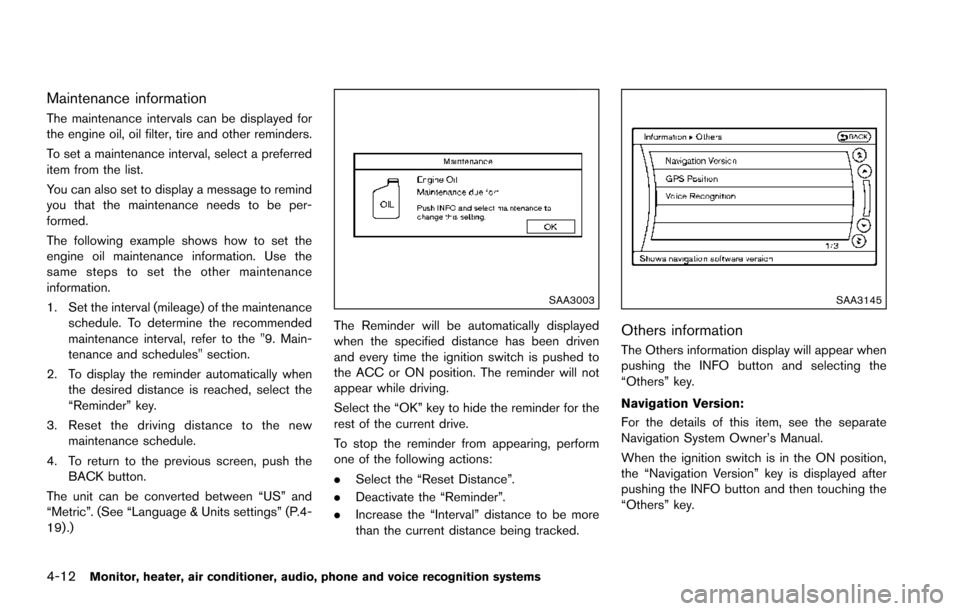
The following example shows how to set the
engine oil maintenance information. Use the
same steps to set the other maintenance
information.
1. Set the interval (mileage) of the maintenanceschedule. To determine the recommended
maintenance interval, refer to the "9. Main-
tenance and schedules" section.
2. To display the reminder automatically when the desired distance is reached, select the
“Reminder” key.
3. Reset the driving distance to the new maintenance schedule.
4. To return to the previous screen, push the BACK button.
The unit can be converted between “US” and
“Metric”. (See “Language & Units settings” (P.4-
19) .)
SAA3003
The Reminder will be automatically displayed
when the specified distance has been driven
and every time the ignition switch is pushed to
the ACC or ON position. The reminder will not
appear while driving.
Select the “OK” key to hide the reminder for the
rest of the current drive.
To stop the reminder from appearing, perform
one of the following actions:
. Select the “Reset Distance”.
. Deactivate the “Reminder”.
. Increase the “Interval” distance to be more
than the current distance being tracked.
SAA3145
Others information
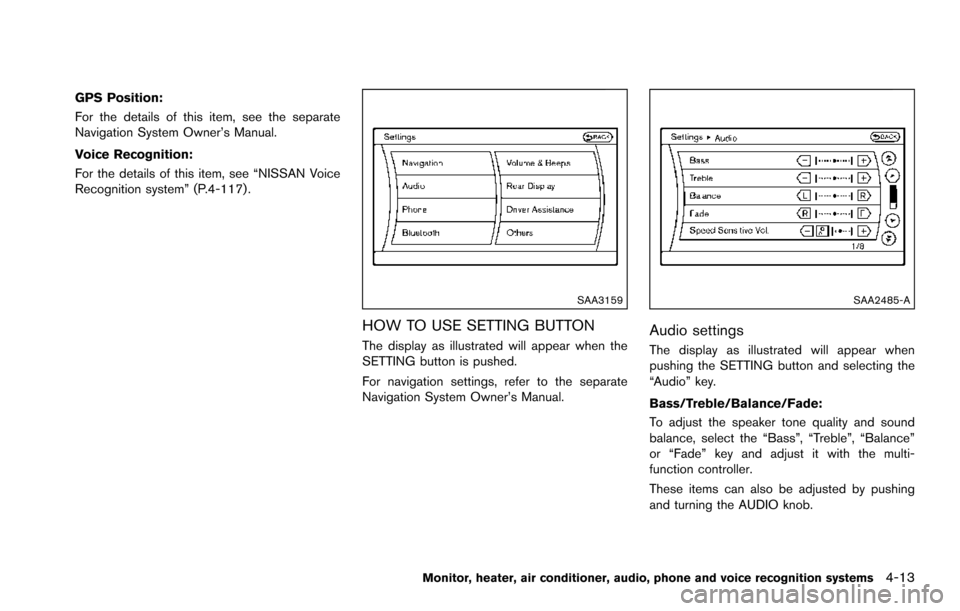
The Others information display will appear when
pushing the INFO button and selecting the
“Others” key.
Navigation Version:
For the details of this item, see the separate
Navigation System Owner’s Manual.
When the ignition switch is in the ON position,
the “Navigation Version” key is displayed after
pushing the INFO button and then touching the
“Others” key.
Page 210 of 614
GPS Position:
For the details of this item, see the separate
Navigation System Owner’s Manual.
Voice Recognition:
For the details of this item, see “NISSAN Voice
Recognition system” (P.4-117) .
SAA3159
HOW TO USE SETTING BUTTON
The display as illustrated will appear when the
SETTING button is pushed.
For navigation settings, refer to the separate
Navigation System Owner’s Manual.
SAA2485-A
Audio settings
The display as illustrated will appear when
pushing the SETTING button and selecting the
“Audio” key.
Bass/Treble/Balance/Fade:
To adjust the speaker tone quality and sound
balance, select the “Bass”, “Treble”, “Balance”
or “Fade” key and adjust it with the multi-
function controller.
These items can also be adjusted by pushing
and turning the AUDIO knob.
Monitor, heater, air conditioner, audio, phone and voice recognition systems4-13