display NISSAN CUBE 2010 3.G Owner's Guide
[x] Cancel search | Manufacturer: NISSAN, Model Year: 2010, Model line: CUBE, Model: NISSAN CUBE 2010 3.GPages: 329, PDF Size: 2.86 MB
Page 176 of 329
Black plate (180,1)
Model "Z12-D" EDITED: 2009/ 9/ 30
For more information about each item, see the
iPod
®Owner’s Manual.
BACK, ENTER button:
. When the ENTER button is pushed while
the top menu is displayed, program details
are shown on the audio display.
. To select the program, push to search using
the SEEK
or
and ENTER button.
. When the BACK button is pushed, it returns
to the previous display.
iPod
®play information:
When the DISP button is pushed while a
program is being played, the program informa-
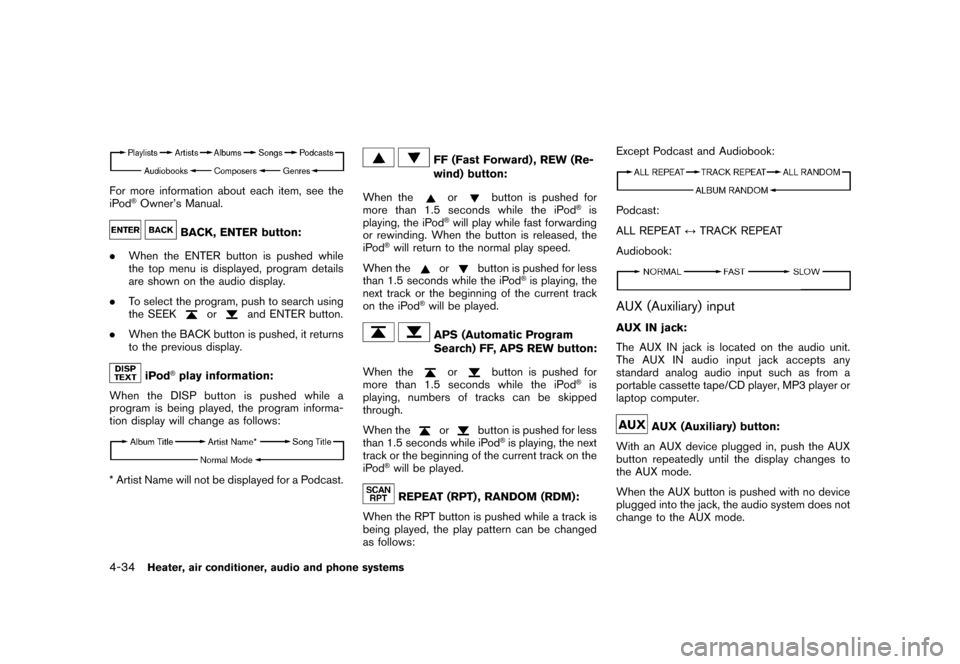
tion display will change as follows:
* Artist Name will not be displayed for a Podcast.
FF (Fast Forward) , REW (Re-
wind) button:
When the
or
button is pushed for
more than 1.5 seconds while the iPod
®is
playing, the iPod
®will play while fast forwarding
or rewinding. When the button is released, the
iPod
®will return to the normal play speed.
When the
or
button is pushed for less
than 1.5 seconds while the iPod
®is playing, the
next track or the beginning of the current track
on the iPod
®will be played.APS (Automatic Program
Search) FF, APS REW button:
When the
or
button is pushed for
more than 1.5 seconds while the iPod
®is
playing, numbers of tracks can be skipped
through.
When the
or
button is pushed for less
than 1.5 seconds while iPod
®is playing, the next
track or the beginning of the current track on the
iPod
®will be played.REPEAT (RPT) , RANDOM (RDM):
When the RPT button is pushed while a track is
being played, the play pattern can be changed
as follows: Except Podcast and Audiobook:
Podcast:
ALL REPEAT
↔TRACK REPEAT
Audiobook:AUX (Auxiliary) inputAUX IN jack:
The AUX IN jack is located on the audio unit.
The AUX IN audio input jack accepts any
standard analog audio input such as from a
portable cassette tape/CD player, MP3 player or
laptop computer.
AUX (Auxiliary) button:
With an AUX device plugged in, push the AUX
button repeatedly until the display changes to
the AUX mode.
When the AUX button is pushed with no device
plugged into the jack, the audio system does not
change to the AUX mode.
4-34
Heater, air conditioner, audio and phone systems
Page 178 of 329
Black plate (182,1)
Model "Z12-D" EDITED: 2009/ 9/ 17
ON·OFF/Volume control:
Push the ignition switch to the ACC or ON
position, and then push the ON·OFF button
while the system is off to turn on the last audio
source (i.e. FM or CD) , which was playing
immediately before the system was turned off.
While the system is on, pushing the ON·OFF
button turns the system off.
Turn the VOL control knob to adjust the volume.
SETTING button:
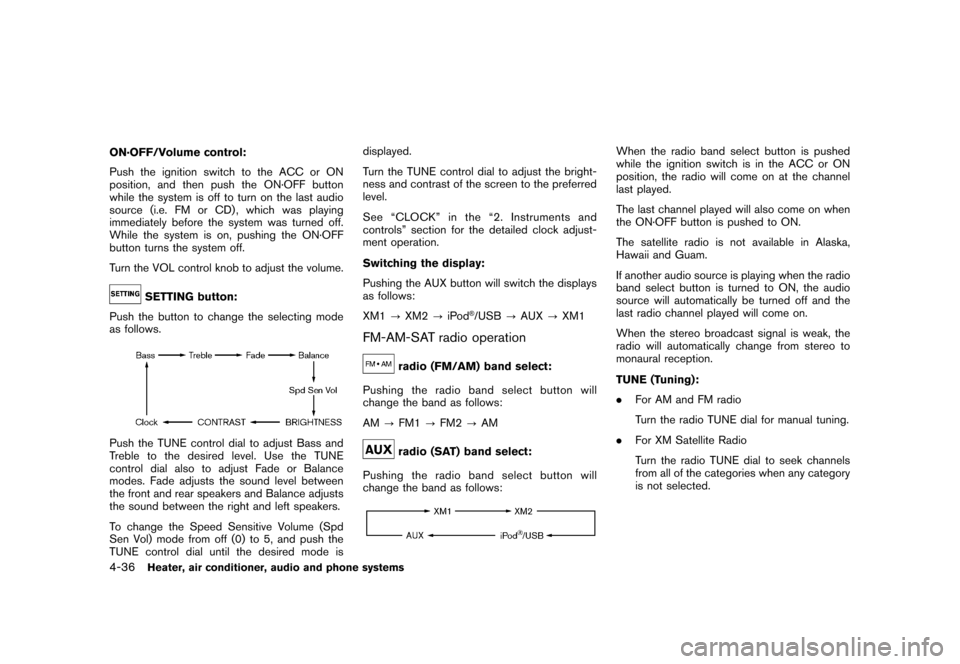
Push the button to change the selecting mode
as follows.
Push the TUNE control dial to adjust Bass and
Treble to the desired level. Use the TUNE
control dial also to adjust Fade or Balance
modes. Fade adjusts the sound level between
the front and rear speakers and Balance adjusts
the sound between the right and left speakers.
To change the Speed Sensitive Volume (Spd
Sen Vol) mode from off (0) to 5, and push the
TUNE control dial until the desired mode is displayed.
Turn the TUNE control dial to adjust the bright-
ness and contrast of the screen to the preferred
level.
See “CLOCK” in the “2. Instruments and
controls” section for the detailed clock adjust-
ment operation.
Switching the display:
Pushing the AUX button will switch the displays
as follows:
XM1
?XM2 ?iPod
®/USB ?AUX ?XM1
FM-AM-SAT radio operation
radio (FM/AM) band select:
Pushing the radio band select button will
change the band as follows:
AM ?FM1 ?FM2 ?AMradio (SAT) band select:
Pushing the radio band select button will
change the band as follows:
When the radio band select button is pushed
while the ignition switch is in the ACC or ON
position, the radio will come on at the channel
last played.
The last channel played will also come on when
the ON·OFF button is pushed to ON.
The satellite radio is not available in Alaska,
Hawaii and Guam.
If another audio source is playing when the radio
band select button is turned to ON, the audio
source will automatically be turned off and the
last radio channel played will come on.
When the stereo broadcast signal is weak, the
radio will automatically change from stereo to
monaural reception.
TUNE (Tuning):
. For AM and FM radio
Turn the radio TUNE dial for manual tuning.
. For XM Satellite Radio
Turn the radio TUNE dial to seek channels
from all of the categories when any category
is not selected.
4-36
Heater, air conditioner, audio and phone systems
Page 179 of 329

Black plate (183,1)
Model "Z12-D" EDITED: 2009/ 9/ 17
SEEK tuning/CATEGORY
(CAT):
. For AM and FM radio
Push the SEEK button
or
to tune
from low to high or high to low frequencies
and to stop at the next broadcasting station.
. For XM Satellite Radio
Push the SEEK button
or
to tune
to the first channel of the next or previous
category.
SCAN tuning:
Push the SCAN tuning button to tune from low
to high frequencies and stop at each broad-
casting station/channel for 5 seconds. Pushing
the button again during this 5 seconds period
will stop SCAN tuning and the radio will remain
tuned to that station/channel.
If the SCAN tuning button is not pushed within 5
seconds, SCAN tuning moves to the next
station/channel.
*1
to
*6
Station memory operations:
12 stations/channels can be set for the FM band
(6 each for FM1 and FM2) , 12 for XM radio (6
each for XM1 and XM2) and 6 stations can be
set for the AM band. 1. Choose the radio band using the radio band
select button.
2. Tune to the desired station/channel using the SEEK/CAT, SCAN button or the radio
TUNE dial.
3. Push and hold the desired station preset button
*1
to*6
until the radio mutes.
4. The station indicator will then come on and the sound will resume. Memorizing is now
complete.
5. Other buttons can be set in the same manner.
If the battery cable is disconnected, or if the fuse
opens, the radio memory will be erased. In that
case, reset the desired stations/channels.
Compact Disc (CD) player operationPush the ignition switch to the ACC or ON
position and insert the Compact Disc (CD) into
the slot with the label side facing up. The CD will
be guided automatically into the slot and start
playing.
After loading the CD, the number of tracks on
the CD and the play time will appear on the
display.
If the radio is already operating, it will auto-
matically turn off and the CD will play. If the system has been turned off while the CD
was playing, pushing the ON·OFF button will
start the CD.
Do not use 3.1 in (8 cm) discs.
PLAY:
When the CD button is pushed with the system
off and the CD loaded, the system will turn on
and the CD will start to play.
When the CD button is pushed with the CD
loaded and the radio playing, the radio will
automatically be turned off and the CD will start
to play.
Next/Previous Track and Fast
Forward/Rewind:
When the(fast forward) or
(rewind)
button is pushed for more than 1.5 seconds
while the CD is being played, the CD will play
while fast forwarding or rewinding. When the
button is released, the CD will return to normal
play speed.
When the
or
button is pushed for less
than 1.5 seconds while the CD is being played,
the next track or the beginning of the current
track on the CD will be played.
Heater, air conditioner, audio and phone systems
4-37
Page 181 of 329
Black plate (185,1)
Model "Z12-D" EDITED: 2009/ 9/ 17
If another audio source is playing and a USB
memory is inserted, push the AUX button
repeatedly until the center display changes to
the USB memory mode.
Next/Previous File and Fast
Forward/Rewind:
When the(Rewind) or
(Fast Forward)
button is pushed for more than 1.5 seconds
while a USB memory is being played, the USB
memory will play while forwarding or rewinding.
When the button is released, the USB memory
will return to normal play speed.
When the
or
button is pushed for less
than 1.5 seconds while the USB memory is
being played, the next track or the beginning of
the current track on the USB memory will be
played.
The multi-function controller can also be used to
select tracks when the USB memory is being
played.
Folder selection:
To change to another folder in the USB memory,
turn the folder selector or choose a folder
displayed on the screen using the multi-function
controller.
REPEAT (RPT):
When the RPT button is pushed while the USB
memory is played, the play pattern can be
change as follows.
To change the play mode, push the RPT button
repeatedly and the mode will change as follows.
Normal ?1 Folder Repeat ?1 Track Repeat ?
NormalRANDOM (RDM):
When the RDM button is pushed while a USB
memory is being played, the play pattern can be
changed as follows.
To change the play mode, push the RDM button
repeatedly, and the mode will change as follows.
Normal ?All Random ?1 Folder Random ?
Normal
SAA2781
iPod
®player operation
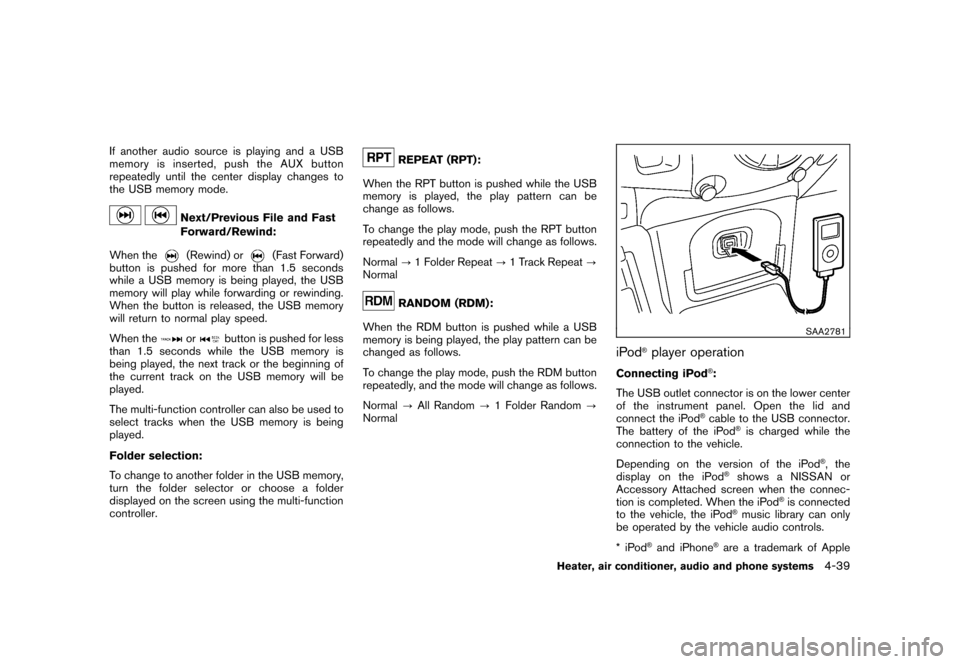
Connecting iPod
®:
The USB outlet connector is on the lower center
of the instrument panel. Open the lid and
connect the iPod®cable to the USB connector.
The battery of the iPod
®is charged while the
connection to the vehicle.
Depending on the version of the iPod
®, the
display on the iPod
®shows a NISSAN or
Accessory Attached screen when the connec-
tion is completed. When the iPod
®is connected
to the vehicle, the iPod
®music library can only
be operated by the vehicle audio controls.
*iPod
®and iPhone
®are a trademark of Apple
Heater, air conditioner, audio and phone systems
4-39
Page 182 of 329

Black plate (186,1)
Model "Z12-D" EDITED: 2009/ 9/ 17
Inc., registered in the U.S. and other countries.
Compatibility:
The following models are available:
. Fifth generation iPod
®(version 1.2.1 or later)
. iPod Classic
®(version 1.1 or later)
. First generation iPod touch
®(version 2.1 or
later)
. First generation iPod nano
®(version 1.3.1 or
later)
. Second generation iPod nano
®(version
1.1.3 or later)
. Third generation iPod nano
®(version 1.1 or
later)
Make sure that the iPod
®version is updated.
Audio main operation:
Push the ignition switch to the ACC or ON
position. Then, push the DISC·AUX button
repeatedly to switch to the iPod
®mode.
If the system has been turned off while the iPod
®
was playing, pushing the ON·OFF button will
start the iPod
®.
iPod
®MENU button:
Place the ignition switch in the ACC or ON
position. Then, push the iPod
®button to switch
to the iPod
®mode.
If another audio source is playing and the iPod
®
is connected, pushing the iPod
®button changes
to the iPod
®mode.
If the system has been turned off while the iPod
®
was playing, pushing the PWR button will start
the iPod
®.
When the iPod
®MENU button is pushed while
the iPod
®is connected, the interface for iPod
®
operation is shown on the audio display. The
items on the menu list can be scrolled by
pushing the
or
while the iPod
®is
operational. To select an item, push ENTER. The
display can be changed as follows:
For more information about each item, see the
iPod
®Owner’s Manual.
Next/Previous Track and Fast
Forward/Rewind:
When the
or
button is pushed for
more than 1.5 seconds while the iPod
®is
playing, the iPod
®will play while fast forwarding
or rewinding. When the button is released, the
iPod
®will return to the normal play speed.
When the
or
button is pushed for less
than 1.5 seconds while the iPod
®is playing, the
next track or the beginning of the current track
on the iPod
®will be played.
The multi-function controller can also be used to
select tracks when the iPod
®is playing.
REPEAT (RPT):
When the RPT button is pushed while a track is
being played, the play pattern can be changed
as follows:
Repeat Off ?Repeat One ?Repeat All ?
Repeat OffRandom (RDM):
When the RDM button is pushed while a track is
being played, the play pattern can be changed
as follows:
Shuffle Off ?Shuffle Songs ?Shuffle Albums
4-40
Heater, air conditioner, audio and phone systems
Page 190 of 329
Black plate (194,1)
Model "Z12-D" EDITED: 2009/ 9/ 17
prompts you to enter more.
— “six six two” The system repeats the numbers and
prompts you to enter more.
— “six two zero zero”
. You can say “Star” for “*” and “Pound” for
“#” at any time in any position of the phone
number. (Available only when using the
“Special Dialing” command.)
Example: 1-555-1212 *123
— “One five five five one two one two star one two three”
. Say “pound” for “#”. Say “star” for “*”
(available when using the “Special Dialing”
command and the “Send” command during
a call) .
. Say “plus” for “+” (available only when using
the “Special Dialing” command) .
. Say “pause” for a 2 second pause (available
only when storing a phone book number) .
See “Making a call by entering a phone
number” later in this section and “LIST OF
VOICE COMMANDS” later in this section
for more information. NOTE:
For best results, say phone numbers as
single digits.
The voice command “Help” is available at any
time. Please say the “Help” command to get
information about how to use the system.
INFO
.
If you are controlling the telephone system
by voice command for the first time or do not
know the appropriate voice command,
speak “Help”. The system announces the
available commands.
. When you speak numbers, you can speak
both “zero” or “oh” for “0”.
Manual command selectionCommands can be selected manually. While the
commands are displayed on the audio screen,
select a command by operating the audio tuning
switch, and then push the
switch. Once a
command is manually selected, the voice
command function is cancelled. To return to
voice command mode, push the
switch to
cancel the current operation, and then perform
the first procedure of voice command.
SAA2351
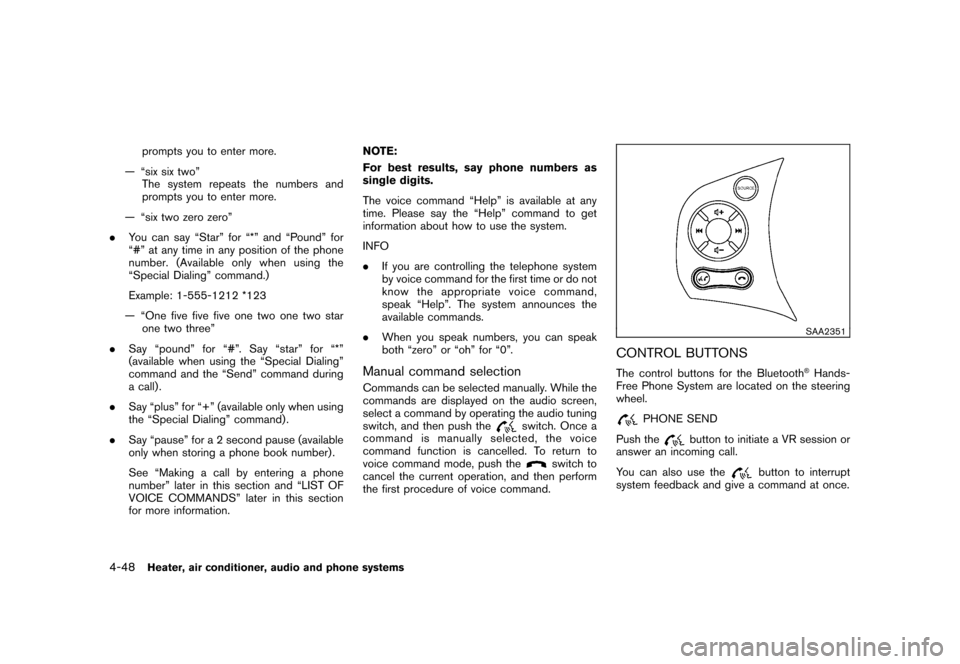
CONTROL BUTTONSThe control buttons for the Bluetooth
®Hands-
Free Phone System are located on the steering
wheel.
PHONE SEND
Push the
button to initiate a VR session or
answer an incoming call.
You can also use the
button to interrupt
system feedback and give a command at once.
4-48
Heater, air conditioner, audio and phone systems
Page 192 of 329
Black plate (196,1)
Model "Z12-D" EDITED: 2009/ 9/ 17
If the name is too long or too short, the
system tells you, then prompts you for a
name again.
Also, if more than one phone is connected
and the name sounds too much like a name
already used, the system tells you, then
prompts you for a name again.
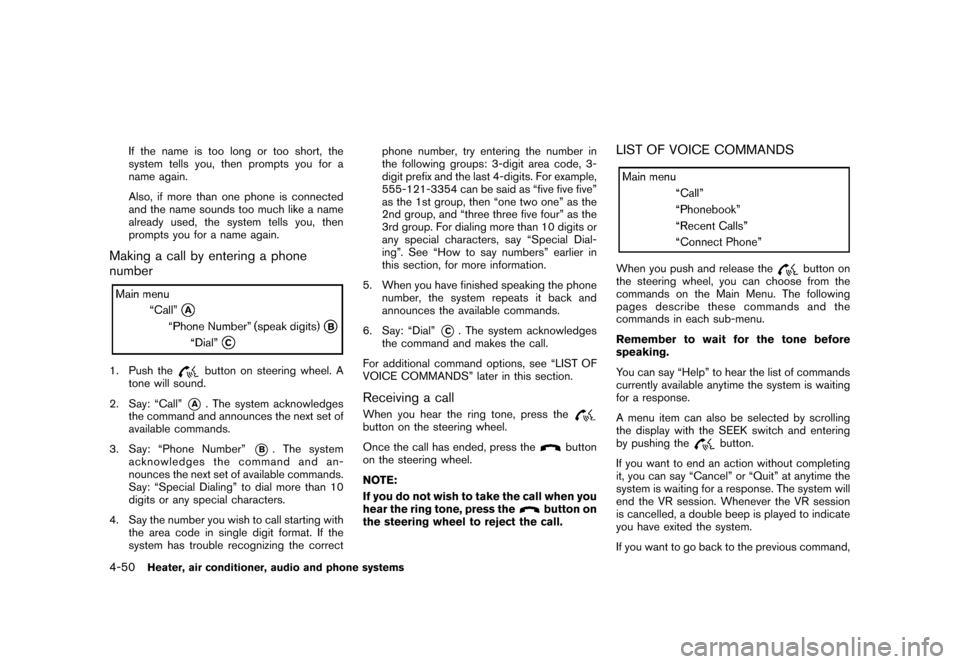
Making a call by entering a phone
number1. Push the
button on steering wheel. A
tone will sound.
2. Say: “Call”
*A
. The system acknowledges
the command and announces the next set of
available commands.
3. Say: “Phone Number”
*B
. The system
acknowledges the command and an-
nounces the next set of available commands.
Say: “Special Dialing” to dial more than 10
digits or any special characters.
4. Say the number you wish to call starting with the area code in single digit format. If the
system has trouble recognizing the correct phone number, try entering the number in
the following groups: 3-digit area code, 3-
digit prefix and the last 4-digits. For example,
555-121-3354 can be said as “five five five”
as the 1st group, then “one two one” as the
2nd group, and “three three five four” as the
3rd group. For dialing more than 10 digits or
any special characters, say “Special Dial-
ing”. See “How to say numbers” earlier in
this section, for more information.
5. When you have finished speaking the phone number, the system repeats it back and
announces the available commands.
6. Say: “Dial”
*C. The system acknowledges
the command and makes the call.
For additional command options, see “LIST OF
VOICE COMMANDS” later in this section.
Receiving a callWhen you hear the ring tone, press thebutton on the steering wheel.
Once the call has ended, press the
button
on the steering wheel.
NOTE:
If you do not wish to take the call when you
hear the ring tone, press the
button on
the steering wheel to reject the call.
LIST OF VOICE COMMANDSWhen you push and release the
button on
the steering wheel, you can choose from the
commands on the Main Menu. The following
pages describe these commands and the
commands in each sub-menu.
Remember to wait for the tone before
speaking.
You can say “Help” to hear the list of commands
currently available anytime the system is waiting
for a response.
A menu item can also be selected by scrolling
the display with the SEEK switch and entering
by pushing the
button.
If you want to end an action without completing
it, you can say “Cancel” or “Quit” at anytime the
system is waiting for a response. The system will
end the VR session. Whenever the VR session
is cancelled, a double beep is played to indicate
you have exited the system.
If you want to go back to the previous command,
4-50
Heater, air conditioner, audio and phone systems
Page 210 of 329
Black plate (214,1)
Model "Z12-D" EDITED: 2009/ 9/ 17
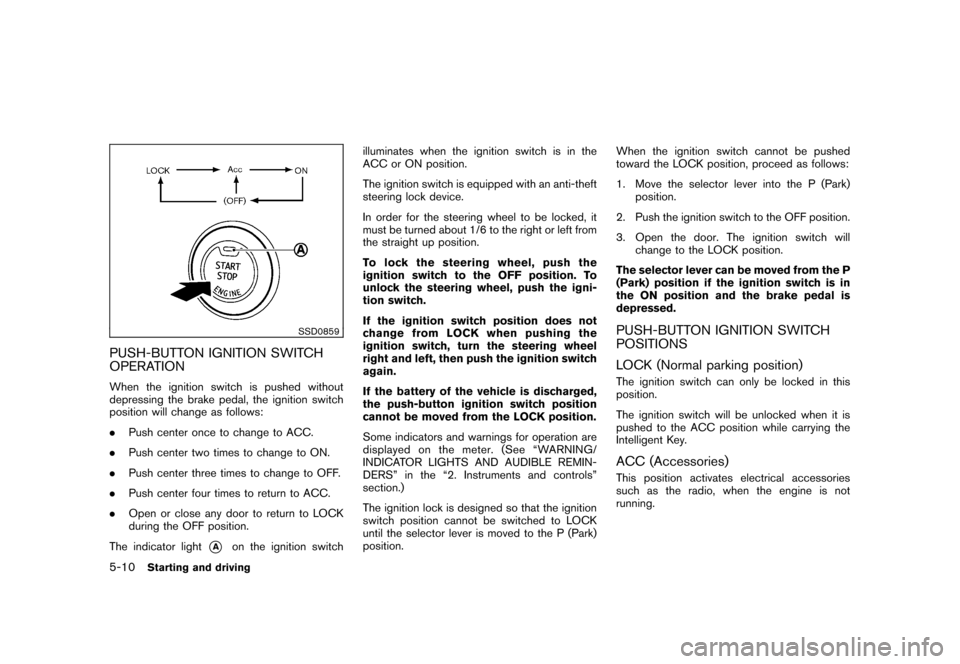
SSD0859
PUSH-BUTTON IGNITION SWITCH
OPERATIONWhen the ignition switch is pushed without
depressing the brake pedal, the ignition switch
position will change as follows:
.Push center once to change to ACC.
. Push center two times to change to ON.
. Push center three times to change to OFF.
. Push center four times to return to ACC.
. Open or close any door to return to LOCK
during the OFF position.
The indicator light
*A
on the ignition switch illuminates when the ignition switch is in the
ACC or ON position.
The ignition switch is equipped with an anti-theft
steering lock device.
In order for the steering wheel to be locked, it
must be turned about 1/6 to the right or left from
the straight up position.
To lock the steering wheel, push the
ignition switch to the OFF position. To
unlock the steering wheel, push the igni-
tion switch.
If the ignition switch position does not
change from LOCK when pushing the
ignition switch, turn the steering wheel
right and left, then push the ignition switch
again.
If the battery of the vehicle is discharged,
the push-button ignition switch position
cannot be moved from the LOCK position.
Some indicators and warnings for operation are
displayed on the meter. (See “WARNING/
INDICATOR LIGHTS AND AUDIBLE REMIN-
DERS” in the “2. Instruments and controls”
section.)
The ignition lock is designed so that the ignition
switch position cannot be switched to LOCK
until the selector lever is moved to the P (Park)
position.
When the ignition switch cannot be pushed
toward the LOCK position, proceed as follows:
1. Move the selector lever into the P (Park)
position.
2. Push the ignition switch to the OFF position.
3. Open the door. The ignition switch will change to the LOCK position.
The selector lever can be moved from the P
(Park) position if the ignition switch is in
the ON position and the brake pedal is
depressed.
PUSH-BUTTON IGNITION SWITCH
POSITIONS
LOCK (Normal parking position)The ignition switch can only be locked in this
position.
The ignition switch will be unlocked when it is
pushed to the ACC position while carrying the
Intelligent Key.ACC (Accessories)This position activates electrical accessories
such as the radio, when the engine is not
running.
5-10
Starting and driving
Page 324 of 329
Black plate (4,1)
10-4
Maintenance requirements...................... 8-2
Outside the vehicle .............................. 8-2
Seat belt maintenance ......................... 1-22
Malfunction indicator light (MIL) .................. 2-15
Manual air conditioner ............................... 4-6
Manual front seat adjustment ....................... 1-3
Map lights .......................................... 2-38
Mechanical key (Intelligent Key system) ............ 3-4
Meter Trip computer .................................... 2-8
Meters and gauges .................................. 2-4
Instrument brightness control ................. 2-26
Mirror Inside mirror .................................... 3-26
Outside mirrors ................................ 3-27
Monitor, Rearview monitor .......................... 4-2
N
New vehicle break-in .............................. 5-22
NISSAN Vehicle Immobilizer System ............. 2-19
O
Odometer ............................................. 2-5
Off-road recovery .................................... 5-5
Oil Capacities and recommended fuel/
lubricants ......................................... 9-2
Changing engine oil and filter ................... 8-9
Checking engine oil level ........................ 8-9
Engine oil ......................................... 8-9
Engine oil viscosity .............................. 9-5
Outside air temperature display .................... 2-7
Outside mirrors .................................... 3-27 Overdrive OFF switch
............................. 5-16
Overheat, If your vehicle overheats ............... 6-11
Owner’s Manual/Service Manual order
information .......................................... 9-22
P
Panic alarm .................................... 3-8, 3-18
Parking Parking brake operation ....................... 5-20
Parking on hills ................................. 5-24
Phone Bluetooth
®Hands-Free Phone System ...... 4-44
Car phone or CB radio ........................ 4-44
Power Electric power steering system ............... 5-25
Power door lock ................................. 3-4
Power outlet .................................... 2-31
Power windows ................................ 2-36
Precautions Audio operation ................................ 4-13
Braking precautions ........................... 5-26
Child restraints ................................. 1-23
Cruise control .................................. 5-20
Maintenance ...................................... 8-5
Seat belt usage ................................ 1-12
Supplemental restraint system ................ 1-44
When starting and driving ....................... 5-2
Push starting ....................................... 6-10
Push-button ignition switch .................. 5-9, 5-10
R
Radio ............................................... 4-13
Car phone or CB radio ........................ 4-44 FM-AM-SAT radio with Compact Disc
(CD) player
..................................... 4-35
Steering wheel audio controls ................ 4-41
Rapid air pressure loss .............................. 5-6
Readiness for inspection/maintenance (I/M)
test .................................................. 9-21
Rear center seat belt .............................. 1-20
Rear door lock, Child safety rear door lock ........ 3-6
Rear seats ............................................ 1-4
Rear window and outside mirror defroster
switch ............................................... 2-23
Rear window wiper and washer switch .......... 2-22
Rearview monitor .................................... 4-2
Recorders, Event data ............................. 9-21
Registering your vehicle in another country ........ 9-8
Remote keyless entry function, For Intelligent
Key system ......................................... 3-17
Remote keyless entry system ....................... 3-6
Reporting safety defects (US only) ............... 9-20
Rollover ............................................... 5-5
S
Safety Child seat belts ................................ 1-15
Reporting safety defects (US only) ........... 9-20
Satellite radio operation ........................... 4-36
Seat adjustment Front manual seat adjustment. .................. 1-3
Front seats ....................................... 1-3
Seat belt(s) Child safety ..................................... 1-15
Infants ........................................... 1-15
Injured persons ................................. 1-16
Larger children ................................. 1-15
Model "Z12-D" EDITED: 2010/ 4/ 14
Page 325 of 329
Black plate (5,1)
Precautions on seat belt usage............... 1-12
Pregnant women ............................... 1-16
Rear center seat belt .......................... 1-20
Seat belt cleaning ............................... 7-6
Seat belt extenders ............................ 1-22
Seat belt hooks ................................ 1-19
Seat belt maintenance ......................... 1-22
Seat belt warning light ........................ 2-14
Seat belts ...................................... 1-12
Seat belts with pretensioners ................. 1-56
Shoulder belt height adjustment .............. 1-19
Small children .................................. 1-15
Three-point type ............................... 1-16
Seat(s) , Seats ........................................ 1-2
Security system, Vehicle security system ........ 2-17
Security system
(NISSAN Vehicle Immobilizer System) ,
Engine start ........................................ 2-19
Selector lever Shift lock release .............................. 5-17
Servicing air conditioner ........................... 4-12
Shift lock release Transmission ................................... 5-17
Shifting CVT
(Continuously Variable Transmission) .... 5-7, 5-14
Manual transmission ...................... 5-8, 5-18
Shoulder belt height adjustment, For front
seats ................................................ 1-19
Spare tire ...................................... 8-37, 9-7
Spark plugs ........................................ 8-16
Speedometer ......................................... 2-5
Starting Before starting the engine .................... 5-12
Jump starting ..................................... 6-8 Precautions when starting and driving
......... 5-2
Push starting ................................... 6-10
Starting the engine ............................ 5-12
Status light, Front passenger air bag ............ 1-51
Steering Electric power steering system ............... 5-25
Steering wheel switch for audio controls .... 4-41
Tilting steering column ........................ 3-25
Storage ............................................. 2-31
Sun visors .......................................... 3-26
Supplemental air bag warning labels ............. 1-57
Supplemental air bag warning light ....... 1-57, 2-14
Supplemental restraint system .................... 1-44
Precautions on supplemental restraint
system .......................................... 1-44
Switch Audio control steering wheel switch ......... 4-41
Autolight switch ................................ 2-24
Fog light switch ................................ 2-27
Hazard warning flasher switch ................ 2-27
Headlight switch ............................... 2-23
Overdrive OFF switch ......................... 5-16
Power door lock switch ......................... 3-5
Rear window and outside mirror defroster
switch ........................................... 2-23
Turn signal switch .............................. 2-26
Vehicle dynamic control (VDC) off switch . . . 2-28
T
Tachometer ........................................... 2-6
Temperature display ................................. 2-7
Temperature gauge, Engine coolant
temperature gauge ................................... 2-6 Theft (NISSAN Vehicle Immobilizer System) ,
Engine start
........................................ 2-19
Three-way catalyst ................................... 5-2
Tilt steering column ................................ 3-25
Tire pressure, Low tire pressure warning
light ................................................. 2-13
Tires Flat tire ............................................ 6-2
Low tire pressure warning system .............. 5-3
Tire and Loading information label .... 8-30, 9-10
Tire chains ...................................... 8-34
Tire dressing ..................................... 7-4
Tire pressure ................................... 8-28
Tire pressure monitoring system
(TPMS) ..................................... 5-3, 6-2
Tire rotation .................................... 8-35
Types of tires ................................... 8-33
Uniform tire quality grading ................... 9-19
Wheel/tire size ................................... 9-7
Wheels and tires ............................... 8-28
To p Tether strap child restraints ................... 1-26
Towing Flat towing ...................................... 9-18
Tow truck towing ............................... 6-12
Towing a trailer ................................. 9-18
TPMS, Tire pressure monitoring system ........... 5-3
TPMS, Tire pressure warning system .............. 6-2
Trailer towing ....................................... 9-18
Transmission Continuously Variable Transmission (CVT)
fluid ............................................. 8-11
Driving with CVT
(Continuously Variable Transmission) .... 5-7, 5-14
Driving with manual transmission ........ 5-8, 5-18
10-5
Model "Z12-D" EDITED: 2009/ 9/ 17