buttons NISSAN FRONTIER 2008 D22 / 1.G 06IT Navigation Manual
[x] Cancel search | Manufacturer: NISSAN, Model Year: 2008, Model line: FRONTIER, Model: NISSAN FRONTIER 2008 D22 / 1.GPages: 217, PDF Size: 6.62 MB
Page 28 of 217
![NISSAN FRONTIER 2008 D22 / 1.G 06IT Navigation Manual Black plate (31,1)
Model "NAV2-N" EDITED: 2007/ 3/ 9
Example: Displaying the navigation command list
1. Push<INFO>.
2. Highlight [Others] and push<ENTER>.
3. Highlight [Voice Recognition] and push
<EN NISSAN FRONTIER 2008 D22 / 1.G 06IT Navigation Manual Black plate (31,1)
Model "NAV2-N" EDITED: 2007/ 3/ 9
Example: Displaying the navigation command list
1. Push<INFO>.
2. Highlight [Others] and push<ENTER>.
3. Highlight [Voice Recognition] and push
<EN](/img/5/795/w960_795-27.png)
Black plate (31,1)
Model "NAV2-N" EDITED: 2007/ 3/ 9
Example: Displaying the navigation command list
1. Push
2. Highlight [Others] and push
3. Highlight [Voice Recognition] and push
4. Highlight [Command List] and push
5. Highlight [Navigation] and push
6. Highlight the preferred item and push
Available items:
.Destination:
Allows you to set a destination.
.Search:
Allows you to search for a location.
.Map:
Allows you to change the map settings.
.Route:
Allows you to set a route in detail.
.Others:
Allows you to store locations or set the
route guidance.
7. You can confirm the list by scrolling the
screen using the up and down switches of
the main directional buttons or the center
dial.
8. Press
screen.
For further details about the displayed command
list, refer to section 9.
“Command List” (page 9-3)
BEFORE STARTING
To get the best recognition performance out of
NISSAN Voice Recognition, observe the follow-
ing:
.The interior of the vehicle should be as quiet
as possible. Close the windows to eliminate
the surrounding noises (traffic noise and
vibration sounds, etc.) , which may prevent
the system from correctly recognizing the
voice commands.
Getting started2-23
Page 34 of 217
Black plate (7,1)
3 Map settings
Model "NAV2-N" EDITED: 2007/ 3/ 8
Map types........................................................ 3-2
Plan view..................................................... 3-2
Birdview
TM.................................................... 3-3
Building graphics........................................... 3-3
Returning to the current vehicle location.................. 3-4
Operating with the touch operation.................... 3-5
Moving a map................................................... 3-5
Plan view..................................................... 3-5
Birdview
TM.................................................... 3-7
Changing the scale of a map................................ 3-9
Operating with the buttons on the control panel.... 3-9
Operating with the center dial.........................3-10Operating with the touch operation..................3-10
Map scale..................................................3-11
Other settings for the map screen........................3-12
Switching the map view.................................3-12
Settings of heading/long range map view...........3-14
Changing the Birdview
TMangle.......................3-16
Operation with split screen display...................3-18
Looking at information on the map.......................3-19
Displaying landmark icons..............................3-19
Map scrolling information...............................3-20
Map symbols...............................................3-22
Page 38 of 217
![NISSAN FRONTIER 2008 D22 / 1.G 06IT Navigation Manual Black plate (41,1)
Model "NAV2-N" EDITED: 2007/ 3/ 9
OPERATING WITH THE TOUCH OP-
ERATION
Touch [BACK] on the map screen to display the
current location map screen.
The operations for moving across th NISSAN FRONTIER 2008 D22 / 1.G 06IT Navigation Manual Black plate (41,1)
Model "NAV2-N" EDITED: 2007/ 3/ 9
OPERATING WITH THE TOUCH OP-
ERATION
Touch [BACK] on the map screen to display the
current location map screen.
The operations for moving across th](/img/5/795/w960_795-37.png)
Black plate (41,1)
Model "NAV2-N" EDITED: 2007/ 3/ 9
OPERATING WITH THE TOUCH OP-
ERATION
Touch [BACK] on the map screen to display the
current location map screen.
The operations for moving across the map are
different between Plan View and BirdviewTM.
PLAN VIEW
Operating with the multi-function con-
troller
Push one of the main directional buttons or
additional directional buttons corresponding to
the direction that you want to move across the
map. Hold down the button to continuously
move across the map in that direction.
Once you start moving across the map, thecross pointer appears.
If the map scale is set to 1/8 mile (200 m) or
less, the cross pointer will blink in pink when
positioned on a street, and the street name will
be displayed.
Screen information:&1Cross pointer
&2Distance from the current location to the
cross pointer
MOVING A MAP
Map settings3-5
Page 40 of 217
Black plate (43,1)
Model "NAV2-N" EDITED: 2007/ 3/ 9
BirdviewTM
Operating with the multi-function con-
troller
The main directional buttons and additional
directional buttons allow movement in the
following ways.
Hold down one of the main directional buttons
or additional directional buttons to continue to
rotate or move across the map in that direction.
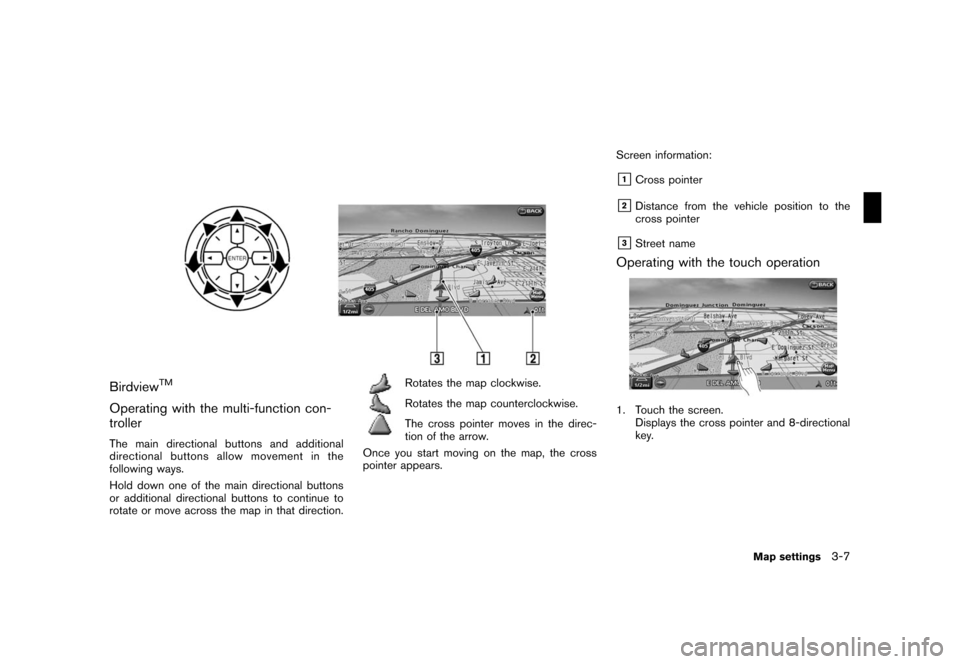
Rotates the map clockwise.
Rotates the map counterclockwise.
The cross pointer moves in the direc-
tion of the arrow.
Once you start moving on the map, the cross
pointer appears.Screen information:
&1Cross pointer
&2Distance from the vehicle position to the
cross pointer
&3Street name
Operating with the touch operation
1. Touch the screen.
Displays the cross pointer and 8-directional
key.
Map settings3-7
Page 42 of 217
Black plate (45,1)
Model "NAV2-N" EDITED: 2007/ 3/ 9
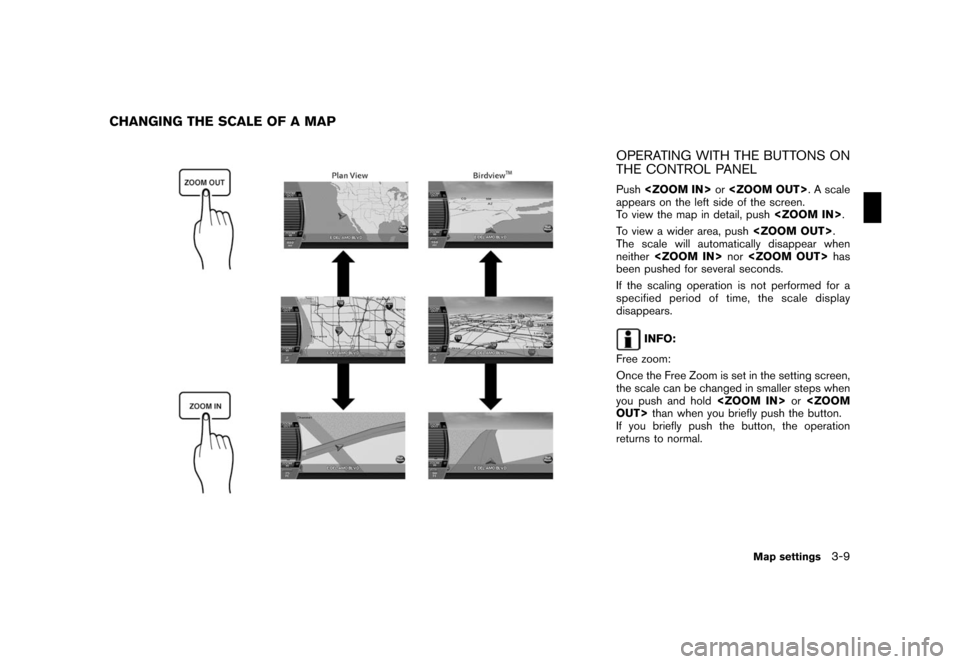
OPERATING WITH THE BUTTONS ON
THE CONTROL PANEL
Push
appears on the left side of the screen.
To view the map in detail, push
To view a wider area, push
The scale will automatically disappear when
neither
been pushed for several seconds.
If the scaling operation is not performed for a
specified period of time, the scale display
disappears.
INFO:
Free zoom:
Once the Free Zoom is set in the setting screen,
the scale can be changed in smaller steps when
you push and hold
If you briefly push the button, the operation
returns to normal.
CHANGING THE SCALE OF A MAP
Map settings3-9
Page 46 of 217
![NISSAN FRONTIER 2008 D22 / 1.G 06IT Navigation Manual Black plate (49,1)
Model "NAV2-N" EDITED: 2007/ 3/ 9
2. Highlight [Map Settings] and push
<ENTER>.
3. Highlight [Change View] and push the right
button of the directional buttons.
4. Highlight the pre NISSAN FRONTIER 2008 D22 / 1.G 06IT Navigation Manual Black plate (49,1)
Model "NAV2-N" EDITED: 2007/ 3/ 9
2. Highlight [Map Settings] and push
<ENTER>.
3. Highlight [Change View] and push the right
button of the directional buttons.
4. Highlight the pre](/img/5/795/w960_795-45.png)
Black plate (49,1)
Model "NAV2-N" EDITED: 2007/ 3/ 9
2. Highlight [Map Settings] and push
3. Highlight [Change View] and push the right
button of the directional buttons.
4. Highlight the preferred map view and push
map view illuminates.
5. Push
Page 82 of 217
Black plate (85,1)
Model "NAV2-N" EDITED: 2007/ 3/ 9
AVAILABLE SETTING ITEMS
.Start:
Sets the destination. If the route is already
set, the location becomes the new destina-
tion, and the route is recalculated.
.Route Details:
Allows you to change the route search
conditions or to check the route information.
“PROCEDURES AFTER SETTING A
DESTINATION” (page 5-2)
.Move Dest.:
Displays a map screen where you can adjust
the location of the destination.
.Add to Route:
Allows you to add a waypoint to the route
already set.
.Store Dest.:
Allows you to store the location in the
Address Book.
.POI Info.:
Allows you to view information about the
facility that you have set as the destination if
it is included in the map data.
ADJUSTING THE LOCATION OF THE
DESTINATION
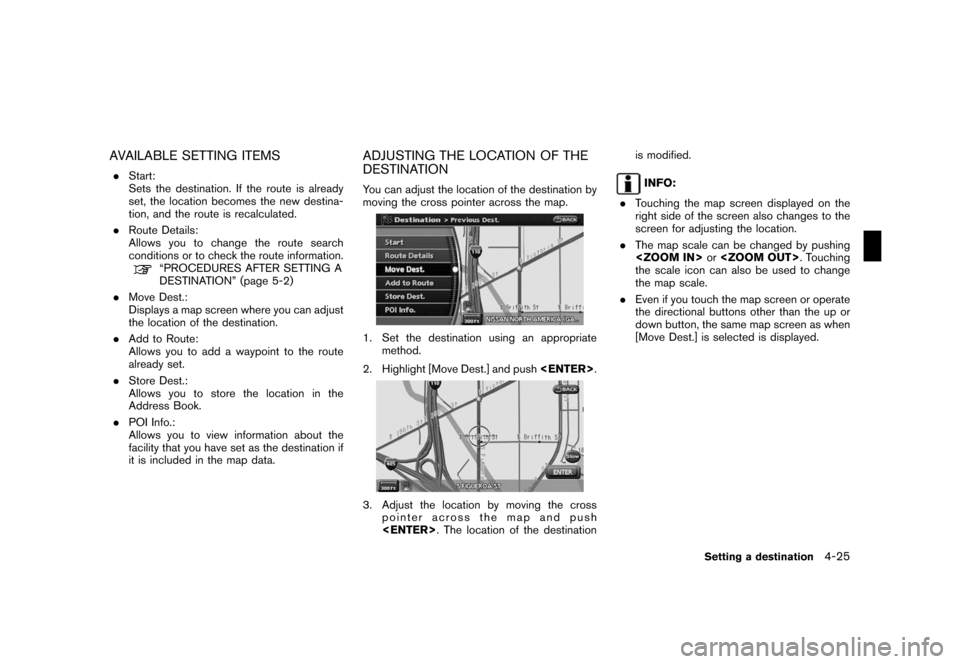
You can adjust the location of the destination by
moving the cross pointer across the map.
1. Set the destination using an appropriate
method.
2. Highlight [Move Dest.] and push
3. Adjust the location by moving the cross
pointer across the map and push
INFO:
.Touching the map screen displayed on the
right side of the screen also changes to the
screen for adjusting the location.
.The map scale can be changed by pushing
the scale icon can also be used to change
the map scale.
.Even if you touch the map screen or operate
the directional buttons other than the up or
down button, the same map screen as when
[Move Dest.] is selected is displayed.
Setting a destination4-25
Page 87 of 217
Black plate (90,1)
Model "NAV2-N" EDITED: 2007/ 3/ 9
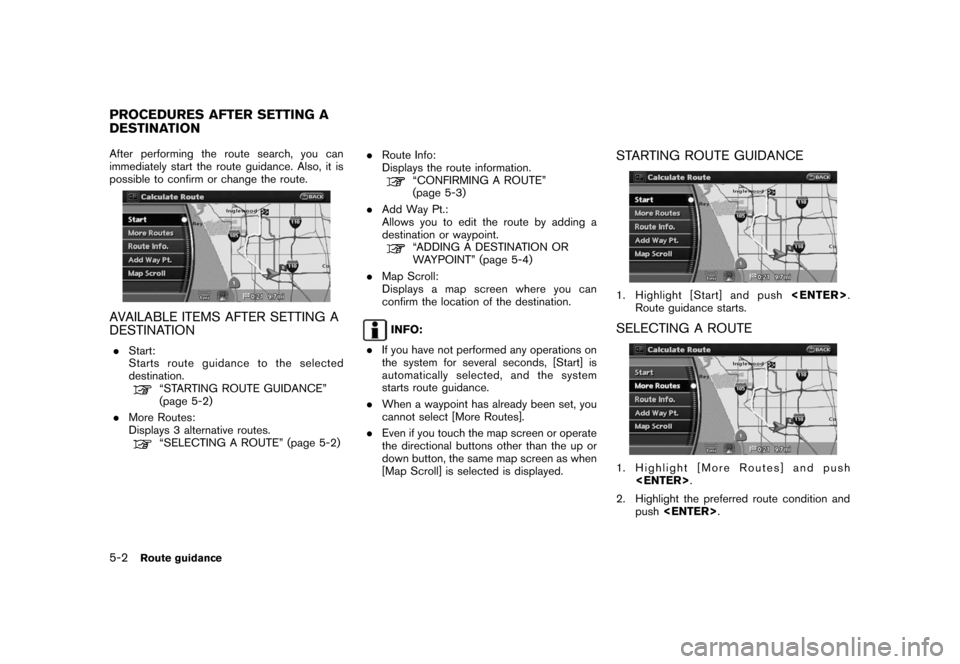
After performing the route search, you can
immediately start the route guidance. Also, it is
possible to confirm or change the route.
AVAILABLE ITEMS AFTER SETTING A
DESTINATION
.Start:
Starts route guidance to the selected
destination.
“STARTING ROUTE GUIDANCE”
(page 5-2)
.More Routes:
Displays 3 alternative routes.
“SELECTING A ROUTE” (page 5-2).Route Info:
Displays the route information.
“CONFIRMING A ROUTE”
(page 5-3)
.Add Way Pt.:
Allows you to edit the route by adding a
destination or waypoint.
“ADDING A DESTINATION OR
WAYPOINT” (page 5-4)
.Map Scroll:
Displays a map screen where you can
confirm the location of the destination.
INFO:
.If you have not performed any operations on
the system for several seconds, [Start] is
automatically selected, and the system
starts route guidance.
.When a waypoint has already been set, you
cannot select [More Routes].
.Even if you touch the map screen or operate
the directional buttons other than the up or
down button, the same map screen as when
[Map Scroll] is selected is displayed.
STARTING ROUTE GUIDANCE
1. Highlight [Start] and push
Route guidance starts.
SELECTING A ROUTE
1. Highlight [More Routes] and push
2. Highlight the preferred route condition and
push
PROCEDURES AFTER SETTING A
DESTINATION
5-2Route guidance
Page 88 of 217
Black plate (91,1)
Model "NAV2-N" EDITED: 2007/ 3/ 9
3. Push
screen.
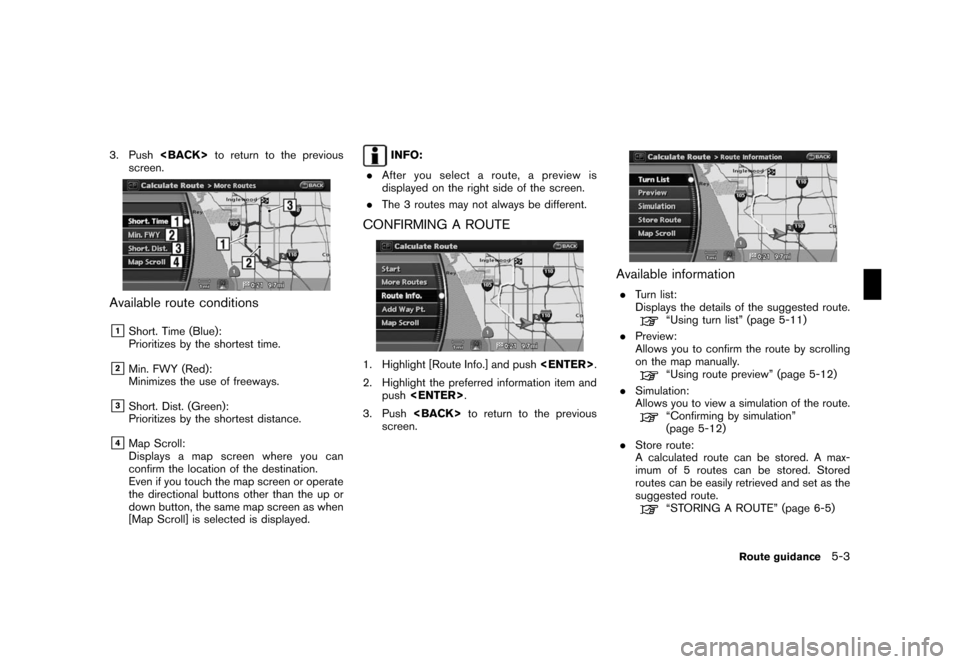
Available route conditions
&1Short. Time (Blue):
Prioritizes by the shortest time.
&2Min. FWY (Red):
Minimizes the use of freeways.
&3Short. Dist. (Green):
Prioritizes by the shortest distance.
&4Map Scroll:
Displays a map screen where you can
confirm the location of the destination.
Even if you touch the map screen or operate
the directional buttons other than the up or
down button, the same map screen as when
[Map Scroll] is selected is displayed.
INFO:
.After you select a route, a preview is
displayed on the right side of the screen.
.The 3 routes may not always be different.
CONFIRMING A ROUTE
1. Highlight [Route Info.] and push
2. Highlight the preferred information item and
push
3. Push
screen.
Available information
.Turn list:
Displays the details of the suggested route.
“Using turn list” (page 5-11)
.Preview:
Allows you to confirm the route by scrolling
on the map manually.
“Using route preview” (page 5-12)
.Simulation:
Allows you to view a simulation of the route.
“Confirming by simulation”
(page 5-12)
.Store route:
A calculated route can be stored. A max-
imum of 5 routes can be stored. Stored
routes can be easily retrieved and set as the
suggested route.
“STORING A ROUTE” (page 6-5)
Route guidance5-3
Page 89 of 217
Black plate (92,1)
Model "NAV2-N" EDITED: 2007/ 3/ 9
.Map Scroll:
Displays a map screen where you can
confirm the location of the destination.
Even if you touch the map screen or operate
the directional buttons other than the up or
down button, the same map screen as when
[Map Scroll] is selected is displayed.
ADDING A DESTINATION OR WAY-
POINT
Before starting route guidance, you can add
destinations and/or waypoints. A total of 6
destinations or waypoints can be set.
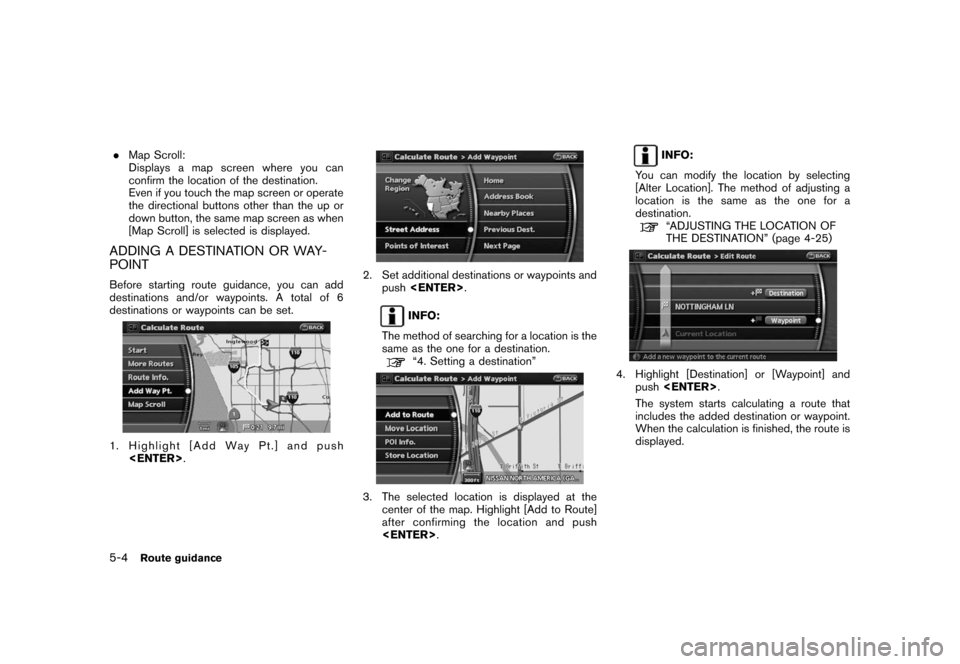
1. Highlight [Add Way Pt.] and push
2. Set additional destinations or waypoints and
push
INFO:
The method of searching for a location is the
same as the one for a destination.
“4. Setting a destination”
3. The selected location is displayed at the
center of the map. Highlight [Add to Route]
after confirming the location and push
INFO:
You can modify the location by selecting
[Alter Location]. The method of adjusting a
location is the same as the one for a
destination.
“ADJUSTING THE LOCATION OF
THE DESTINATION” (page 4-25)
4. Highlight [Destination] or [Waypoint] and
push
The system starts calculating a route that
includes the added destination or waypoint.
When the calculation is finished, the route is
displayed.
5-4Route guidance