buttons NISSAN FRONTIER 2008 D22 / 1.G 06IT Navigation Manual
[x] Cancel search | Manufacturer: NISSAN, Model Year: 2008, Model line: FRONTIER, Model: NISSAN FRONTIER 2008 D22 / 1.GPages: 217, PDF Size: 6.62 MB
Page 148 of 217
Black plate (153,1)
Model "NAV2-N" EDITED: 2007/ 3/ 9
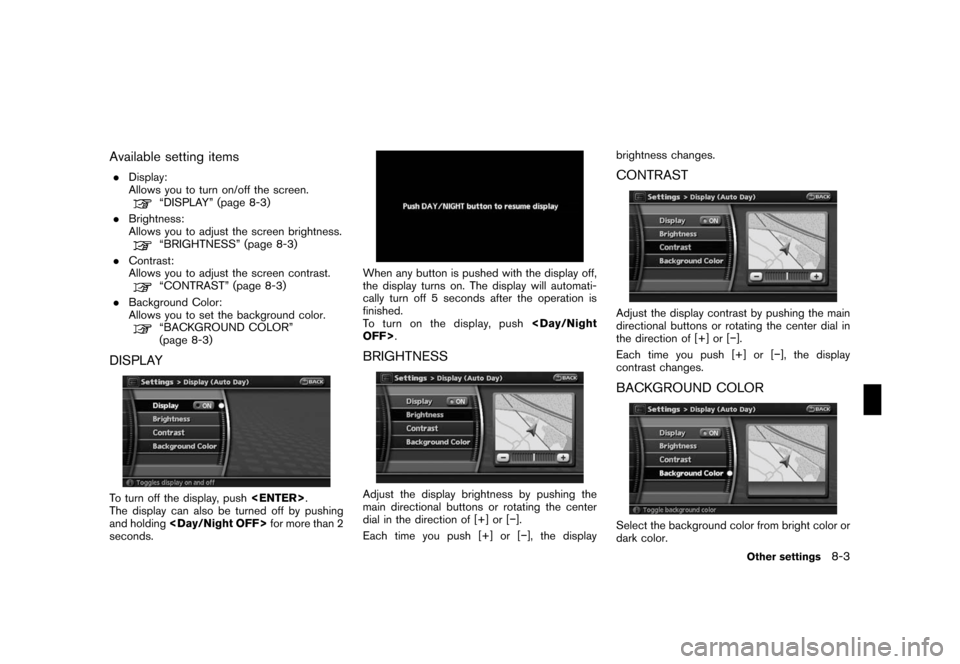
Available setting items
.Display:
Allows you to turn on/off the screen.
“DISPLAY” (page 8-3)
.Brightness:
Allows you to adjust the screen brightness.
“BRIGHTNESS” (page 8-3)
.Contrast:
Allows you to adjust the screen contrast.
“CONTRAST” (page 8-3)
.Background Color:
Allows you to set the background color.
“BACKGROUND COLOR”
(page 8-3)
DISPLAY
To turn off the display, push
The display can also be turned off by pushing
and holding
seconds.
When any button is pushed with the display off,
the display turns on. The display will automati-
cally turn off 5 seconds after the operation is
finished.
To t u r n o n t h e d i s p l a y, p u s h
BRIGHTNESS
Adjust the display brightness by pushing the
main directional buttons or rotating the center
dial in the direction of [+] or [−].
Each time you push [+] or [−], the displaybrightness changes.
CONTRAST
Adjust the display contrast by pushing the main
directional buttons or rotating the center dial in
the direction of [+] or [−].
Each time you push [+] or [−], the display
contrast changes.
BACKGROUND COLOR
Select the background color from bright color or
dark color.
Other settings8-3
Page 152 of 217
![NISSAN FRONTIER 2008 D22 / 1.G 06IT Navigation Manual Black plate (157,1)
Model "NAV2-N" EDITED: 2007/ 3/ 9
2. Highlight [Audio Display on Map] and push
<ENTER>. The indicator illuminates when
the item is set.
3. Push<MAP>to return to the current
locatio NISSAN FRONTIER 2008 D22 / 1.G 06IT Navigation Manual Black plate (157,1)
Model "NAV2-N" EDITED: 2007/ 3/ 9
2. Highlight [Audio Display on Map] and push
<ENTER>. The indicator illuminates when
the item is set.
3. Push<MAP>to return to the current
locatio](/img/5/795/w960_795-151.png)
Black plate (157,1)
Model "NAV2-N" EDITED: 2007/ 3/ 9
2. Highlight [Audio Display on Map] and push
the item is set.
3. Push
Page 154 of 217
![NISSAN FRONTIER 2008 D22 / 1.G 06IT Navigation Manual Black plate (159,1)
Model "NAV2-N" EDITED: 2007/ 3/ 9
1. Highlight [Navigation] and push<ENTER>.
2. Highlight [Reset ALL navigation settings to
default] and push<ENTER>.
3. A confirmation message is d NISSAN FRONTIER 2008 D22 / 1.G 06IT Navigation Manual Black plate (159,1)
Model "NAV2-N" EDITED: 2007/ 3/ 9
1. Highlight [Navigation] and push<ENTER>.
2. Highlight [Reset ALL navigation settings to
default] and push<ENTER>.
3. A confirmation message is d](/img/5/795/w960_795-153.png)
Black plate (159,1)
Model "NAV2-N" EDITED: 2007/ 3/ 9
1. Highlight [Navigation] and push
2. Highlight [Reset ALL navigation settings to
default] and push
3. A confirmation message is displayed. Con-
firm the contents of the message, highlight
[Yes] and push
adjust, the phone function (ringer, incoming and
outgoing volume) , the voice guide function and
the beep function.
BASIC OPERATION
1. Push
2. Highlight [Volume and Beeps] and push
3. Highlight the preferred adjustment item and
push
4. Use the main directional buttons or the
center dial to adjust the volume.
Push
5. After setting, push
to apply the setting.
6. Push
screen. Push
current location map screen.
Setting items
.Guidance Vol.:
Adjust the volume level of voice guidance by
pushing the main directional buttons or
rotating the center dial in the direction of
[+] or [−].
.Guidance Voice:
Select to toggle the voice guidance function
between on and off. The indicator light
illuminates when the voice guidance func-
tion is set to on.
.Ringer Vol.:
Adjust the volume level of the phone ringer
by pushing the main directional buttons or
rotating the center dial in the direction of [+]
or [−].
.Incoming Call:
Adjust the phone incoming volume by
pushing the main directional buttons or
rotating the center dial in the direction of
[+] or [−].
.Outgoing Call:
Adjust the phone outgoing volume by
pushing the main directional buttons or
rotating the center dial in the direction of
[+] or [−].
.Button Beeps:
Select to toggle the beep function between
on and off. The indicator light illuminates
VOLUME ADJUSTMENT
Other settings8-9
Page 155 of 217
Black plate (160,1)
Model "NAV2-N" EDITED: 2007/ 3/ 9
when the beep function is set to on. The
beep that sounds when pushing and holding
a button or when a prohibited operation is
performed cannot be set to off.
INFO:
For more details about [Ringer Vol.], [Incoming
Call] and [Outgoing Call], refer to the vehicle
Owner’s Manual.This allows you to change the clock settings.
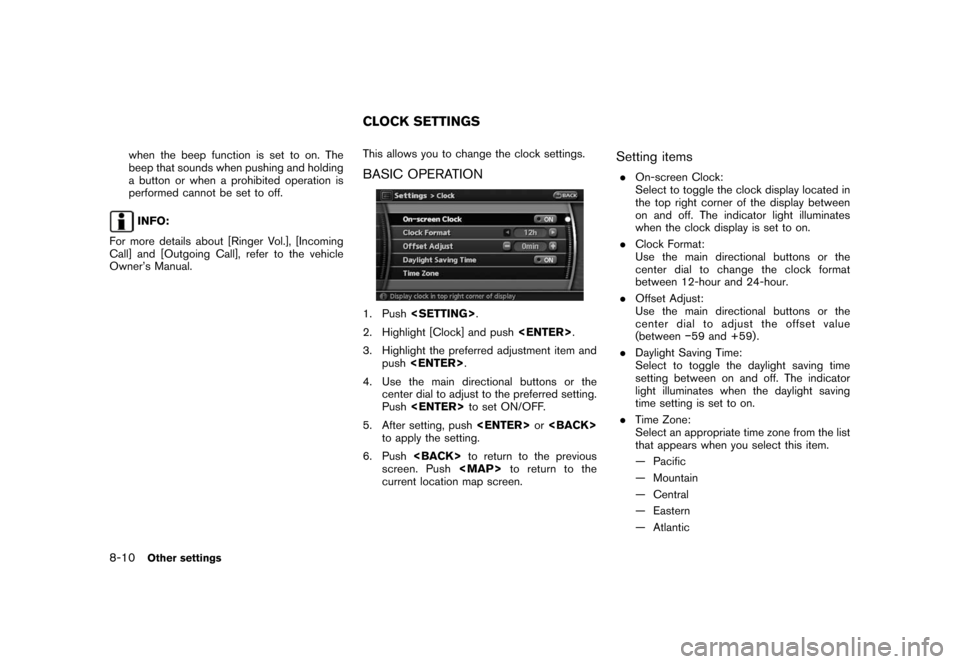
BASIC OPERATION
1. Push
2. Highlight [Clock] and push
3. Highlight the preferred adjustment item and
push
4. Use the main directional buttons or the
center dial to adjust to the preferred setting.
Push
5. After setting, push
to apply the setting.
6. Push
screen. Push
current location map screen.
Setting items
.On-screen Clock:
Select to toggle the clock display located in
the top right corner of the display between
on and off. The indicator light illuminates
when the clock display is set to on.
.Clock Format:
Use the main directional buttons or the
center dial to change the clock format
between 12-hour and 24-hour.
.Offset Adjust:
Use the main directional buttons or the
center dial to adjust the offset value
(between−59 and +59) .
.Daylight Saving Time:
Select to toggle the daylight saving time
setting between on and off. The indicator
light illuminates when the daylight saving
time setting is set to on.
.Time Zone:
Select an appropriate time zone from the list
that appears when you select this item.
— Pacific
— Mountain
— Central
— Eastern
— Atlantic
CLOCK SETTINGS
8-10Other settings
Page 160 of 217
![NISSAN FRONTIER 2008 D22 / 1.G 06IT Navigation Manual Black plate (167,1)
Model "NAV2-N" EDITED: 2007/ 3/ 9
<ENTER>.
5. Highlight [Navigation] and push<ENTER>.
6. Highlight the preferred item and push
<ENTER>.
Available items:
.Destination:
Allows you to NISSAN FRONTIER 2008 D22 / 1.G 06IT Navigation Manual Black plate (167,1)
Model "NAV2-N" EDITED: 2007/ 3/ 9
<ENTER>.
5. Highlight [Navigation] and push<ENTER>.
6. Highlight the preferred item and push
<ENTER>.
Available items:
.Destination:
Allows you to](/img/5/795/w960_795-159.png)
Black plate (167,1)
Model "NAV2-N" EDITED: 2007/ 3/ 9
5. Highlight [Navigation] and push
6. Highlight the preferred item and push
Available items:
.Destination:
Allows you to set a destination.
.Search:
Allows you to search for a location.
.Map:
Allows you to operate on the map.
.Route:
Allows you to set a route in detail.
.Others:
Allows you to store locations or set the
route guidance.
7. You can confirm the list by scrolling the
screen using the up and down switches of
the main directional buttons or the center
dial.
8. Press
screen.
Command List
INFO:
The voice command description in this manual
can be expressed in various ways. Different
phrases are available depending on the condi-
tions of each command.
Words that are not in brackets or parenthesis
must be spoken. Words identified by a slash
inside parenthesis ( / ) indicate alternatives, one
of which must be spoken.
Variable items, such as phone numbers, are
indicated in
italicswith < >.
Voice recognition9-3
Page 164 of 217
Black plate (171,1)
Model "NAV2-N" EDITED: 2007/ 3/ 9
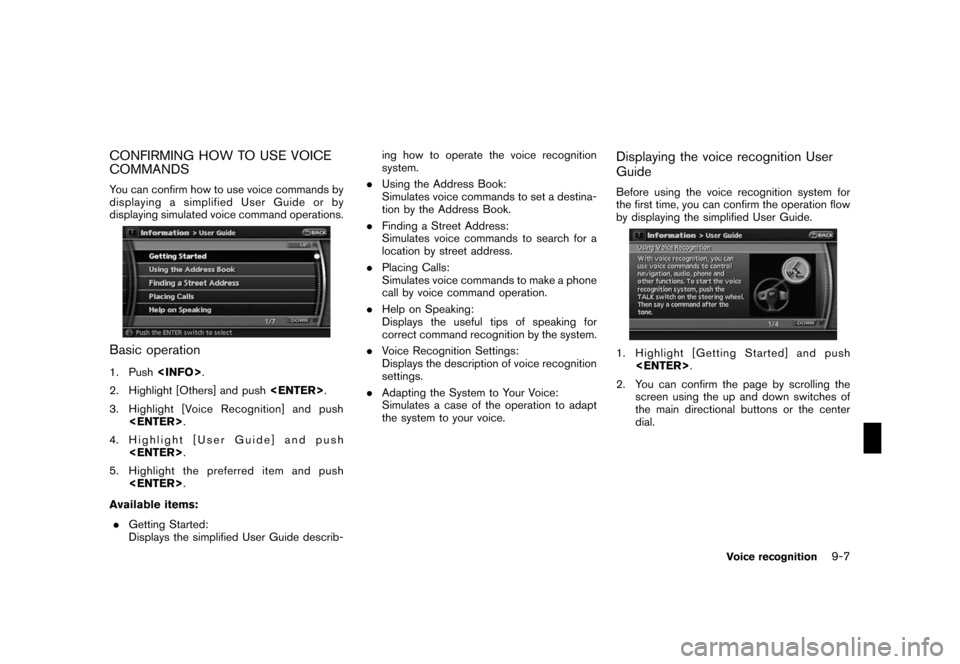
CONFIRMING HOW TO USE VOICE
COMMANDS
You can confirm how to use voice commands by
displaying a simplified User Guide or by
displaying simulated voice command operations.
Basic operation
1. Push
2. Highlight [Others] and push
3. Highlight [Voice Recognition] and push
4. Highlight [User Guide] and push
5. Highlight the preferred item and push
Available items:
.Getting Started:
Displays the simplified User Guide describ-ing how to operate the voice recognition
system.
.Using the Address Book:
Simulates voice commands to set a destina-
tion by the Address Book.
.Finding a Street Address:
Simulates voice commands to search for a
location by street address.
.Placing Calls:
Simulates voice commands to make a phone
call by voice command operation.
.Help on Speaking:
Displays the useful tips of speaking for
correct command recognition by the system.
.Voice Recognition Settings:
Displays the description of voice recognition
settings.
.Adapting the System to Your Voice:
Simulates a case of the operation to adapt
the system to your voice.
Displaying the voice recognition User
Guide
Before using the voice recognition system for
the first time, you can confirm the operation flow
by displaying the simplified User Guide.
1. Highlight [Getting Started] and push
2. You can confirm the page by scrolling the
screen using the up and down switches of
the main directional buttons or the center
dial.
Voice recognition9-7
Page 165 of 217
![NISSAN FRONTIER 2008 D22 / 1.G 06IT Navigation Manual Black plate (172,1)
Model "NAV2-N" EDITED: 2007/ 3/ 9
Simulating the operation of voice recog-
nition system
If you choose [Using the Address Book],
[Finding a Street Address] or [Placing Calls],
you NISSAN FRONTIER 2008 D22 / 1.G 06IT Navigation Manual Black plate (172,1)
Model "NAV2-N" EDITED: 2007/ 3/ 9
Simulating the operation of voice recog-
nition system
If you choose [Using the Address Book],
[Finding a Street Address] or [Placing Calls],
you](/img/5/795/w960_795-164.png)
Black plate (172,1)
Model "NAV2-N" EDITED: 2007/ 3/ 9
Simulating the operation of voice recog-
nition system
If you choose [Using the Address Book],
[Finding a Street Address] or [Placing Calls],
you can simulate and confirm the voice com-
mands necessary for the voice recognition and
the operation flow.
Example: With [Using the Address Book]
selected
1. Highlight [Using the Address Book] and
push
2. The voice guide informs you about how to
speak to give commands in an actual case.
3. When the simulation is completed, the
system automatically switches to the Menu
screen.
Confirming useful tips for correct opera-
tion
You can display useful tips in speaking to the
system to help the system recognize your voice
commands more correctly.
1. Highlight [Help on Speaking] and push
2. You can confirm the page by scrolling the
screen using the up and down switches of
the main directional buttons or the center
dial.
Confirming voice recognition settings
The settings for easy operation of the voice
recognition system are displayed.
1. Highlight [Voice Recognition Settings] and
push
2. You can confirm the page by scrolling the
screen using the up and down switches of
the main directional buttons or the center
dial.
9-8Voice recognition
Page 167 of 217
Black plate (174,1)
Model "NAV2-N" EDITED: 2007/ 3/ 9
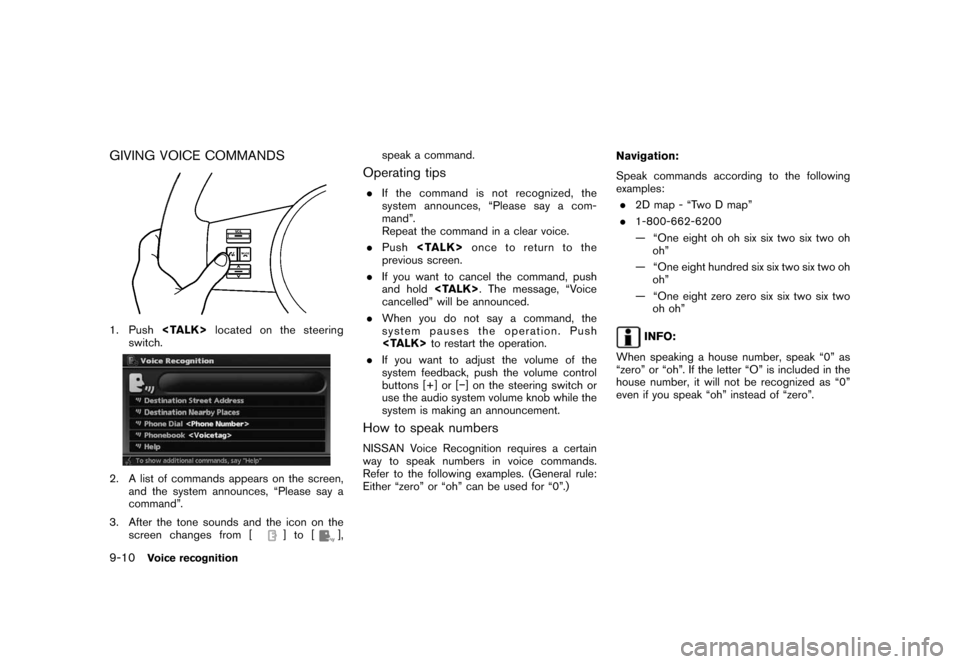
GIVING VOICE COMMANDS
1. Push
switch.
2. A list of commands appears on the screen,
and the system announces, “Please say a
command”.
3. After the tone sounds and the icon on the
screen changes from [
]to[],speak a command.
Operating tips
.If the command is not recognized, the
system announces, “Please say a com-
mand”.
Repeat the command in a clear voice.
.Push
previous screen.
.If you want to cancel the command, push
and hold
cancelled” will be announced.
.When you do not say a command, the
system pauses the operation. Push
.If you want to adjust the volume of the
system feedback, push the volume control
buttons [+] or [−] on the steering switch or
use the audio system volume knob while the
system is making an announcement.
How to speak numbers
NISSAN Voice Recognition requires a certain
way to speak numbers in voice commands.
Refer to the following examples. (General rule:
Either “zero” or “oh” can be used for “0”.)Navigation:
Speak commands according to the following
examples:
.2D map - “Two D map”
.1-800-662-6200
— “One eight oh oh six six two six two oh
oh”
— “One eight hundred six six two six two oh
oh”
— “One eight zero zero six six two six two
oh oh”
INFO:
When speaking a house number, speak “0” as
“zero” or “oh”. If the letter “O” is included in the
house number, it will not be recognized as “0”
even if you speak “oh” instead of “zero”.
9-10Voice recognition
Page 183 of 217
Black plate (190,1)
Model "NAV2-N" EDITED: 2007/ 3/ 9
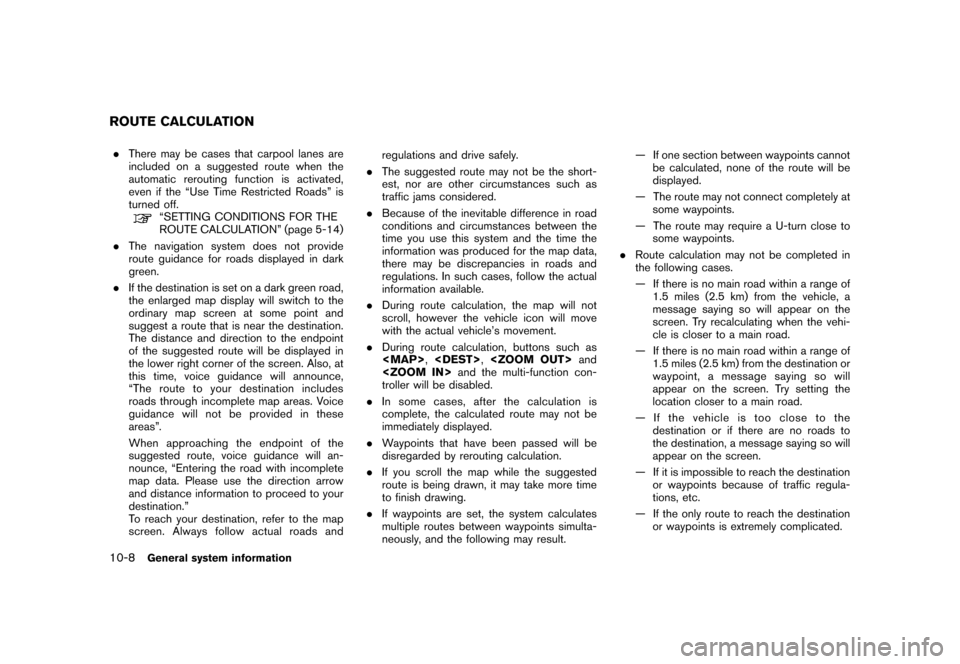
.There may be cases that carpool lanes are
included on a suggested route when the
automatic rerouting function is activated,
even if the “Use Time Restricted Roads” is
turned off.
“SETTING CONDITIONS FOR THE
ROUTE CALCULATION” (page 5-14)
.The navigation system does not provide
route guidance for roads displayed in dark
green.
.If the destination is set on a dark green road,
the enlarged map display will switch to the
ordinary map screen at some point and
suggest a route that is near the destination.
The distance and direction to the endpoint
of the suggested route will be displayed in
the lower right corner of the screen. Also, at
this time, voice guidance will announce,
“The route to your destination includes
roads through incomplete map areas. Voice
guidance will not be provided in these
areas”.
When approaching the endpoint of the
suggested route, voice guidance will an-
nounce, “Entering the road with incomplete
map data. Please use the direction arrow
and distance information to proceed to your
destination.”
To reach your destination, refer to the map
screen. Always follow actual roads andregulations and drive safely.
.The suggested route may not be the short-
est, nor are other circumstances such as
traffic jams considered.
.Because of the inevitable difference in road
conditions and circumstances between the
time you use this system and the time the
information was produced for the map data,
there may be discrepancies in roads and
regulations. In such cases, follow the actual
information available.
.During route calculation, the map will not
scroll, however the vehicle icon will move
with the actual vehicle’s movement.
.During route calculation, buttons such as
troller will be disabled.
.In some cases, after the calculation is
complete, the calculated route may not be
immediately displayed.
.Waypoints that have been passed will be
disregarded by rerouting calculation.
.If you scroll the map while the suggested
route is being drawn, it may take more time
to finish drawing.
.If waypoints are set, the system calculates
multiple routes between waypoints simulta-
neously, and the following may result.— If one section between waypoints cannot
be calculated, none of the route will be
displayed.
— The route may not connect completely at
some waypoints.
— The route may require a U-turn close to
some waypoints.
.Route calculation may not be completed in
the following cases.
— If there is no main road within a range of
1.5 miles (2.5 km) from the vehicle, a
message saying so will appear on the
screen. Try recalculating when the vehi-
cle is closer to a main road.
— If there is no main road within a range of
1.5 miles (2.5 km) from the destination or
waypoint, a message saying so will
appear on the screen. Try setting the
location closer to a main road.
— If the vehicle is too close to the
destination or if there are no roads to
the destination, a message saying so will
appear on the screen.
— If it is impossible to reach the destination
or waypoints because of traffic regula-
tions, etc.
— If the only route to reach the destination
or waypoints is extremely complicated.
ROUTE CALCULATION
10-8General system information
Page 214 of 217
Black plate (1,1)
A
About route guidance............................. 5-23
About the map data.............................. 10-14
Adding a destination or waypoint................... 5-4
Adding additional destinations to a route........ 4-26
Address book...................................... 10-2
Adjusting the current vehicle location.............. 8-7
Adjusting the location of the destination......... 4-25
Adjusting voice guidance volume................. 2-19
Automatic reroute.................................. 10-2
Avoid area.......................................... 10-2
B
Background color.................................... 8-3
Basics of voice guidance......................... 10-9
Birdview
TM............................... 3-3, 3-7, 10-3
Brightness............................................ 8-3
Building graphics.................................... 3-3
C
Changing the BirdviewTMangle.................. 3-16
Changing the region................................. 4-3
Changing the scale of a map....................... 3-9
Character (letter and number) input screen..... 2-20
Characteristics of a liquid crystal display....... 10-18
Clock settings...................................... 8-10
Confirming a route............................ 5-3, 5-11
Confirming by simulation.......................... 5-12
Confirming how to use voice commands.......... 9-7
Confirming voice commands................. 2-22, 9-2
Contrast.............................................. 8-3
Control buttons and functions...................... 2-2Control panel......................................... 2-2
Current location map screen...................... 2-11
Current vehicle location........................... 10-3
Customer assistance.............................. 11-2
Customizing nearby places......................... 8-5
D
Deleting a route.................................... 2-16
Deleting a stored item............................. 6-21
Deleting a stored item individually................ 6-21
Deleting all stored items.......................... 6-22
Deleting an individual item on the map.......... 6-22
Deleting/reactivating a route........................ 5-6
Destination screen................................... 4-2
Detailed Map Coverage Areas (MCA) for the
navigation system.................................. 10-7
Detour.............................................. 10-3
Directions provided and the distances to
guide points....................................... 10-10
Display................................................ 8-3
Display of current vehicle location................ 10-3
Display settings...................................... 8-2
Display urgent traffic information................... 7-6
Displaying how to operate the voice
recognition system................................... 9-2
Displaying landmark icons......................... 3-19
Displaying the AV information on the map
screen................................................ 8-6
E
Editing a route....................................... 5-7
Editing the address book........................... 6-9
Editing the avoid area............................. 6-19
Editing the stored home and location.............. 6-9Editing the stored route........................... 6-17
Editing the stored tracking........................ 6-17
End-user terms.................................... 10-16
Example of touch panel operation................ 2-10
F
Features of this navigation system............... 10-2
For safe operation................................... 1-2
Functions disabled while driving.................... 2-6
G
Giving voice commands........................... 9-10
Guidance screens and preview mode........... 5-24
H
How to handle the display....................... 10-18
How to input letters and numbers................ 2-20
How to order map data updates................ 10-14
How to store your home.......................... 2-12
How to use this manual............................. 1-2
How to view map screen.......................... 2-17
I
Incorrect display of vehicle position.............. 10-5
Info on route.......................................... 7-4
Information screen................................... 7-2
L
Language and unit settings....................... 8-11
Language settings................................. 8-11
Laser product........................................ 1-4
Model "NAV2-N" EDITED: 2007/ 3/ 8