window switch NISSAN FRONTIER 2022 Owner´s Manual
[x] Cancel search | Manufacturer: NISSAN, Model Year: 2022, Model line: FRONTIER, Model: NISSAN FRONTIER 2022Pages: 556, PDF Size: 6.11 MB
Page 19 of 556
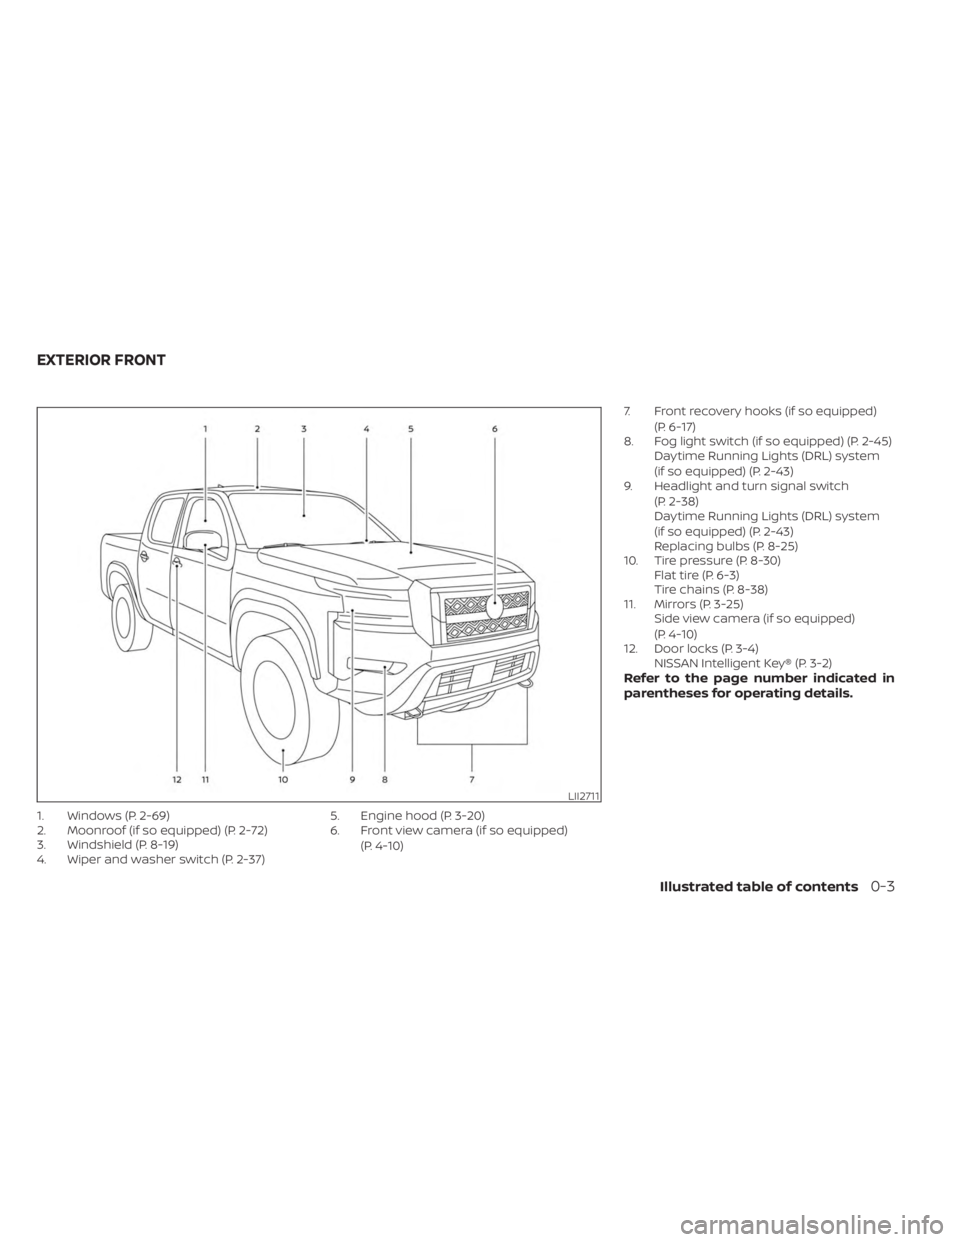
1. Windows (P. 2-69)
2. Moonroof (if so equipped) (P. 2-72)
3. Windshield (P. 8-19)
4. Wiper and washer switch (P. 2-37)5. Engine hood (P. 3-20)
6. Front view camera (if so equipped)
(P. 4-10) 7. Front recovery hooks (if so equipped)
(P. 6-17)
8. Fog light switch (if so equipped) (P. 2-45) Daytime Running Lights (DRL) system
(if so equipped) (P. 2-43)
9. Headlight and turn signal switch
(P. 2-38)
Daytime Running Lights (DRL) system
(if so equipped) (P. 2-43)
Replacing bulbs (P. 8-25)
10. Tire pressure (P. 8-30) Flat tire (P. 6-3)
Tire chains (P. 8-38)
11. Mirrors (P. 3-25) Side view camera (if so equipped)
(P. 4-10)
12. Door locks (P. 3-4) NISSAN Intelligent Key® (P. 3-2)
Refer to the page number indicated in
parentheses for operating details.
LII2711
EXTERIOR FRONT
Illustrated table of contents0-3
Page 119 of 556
Tow mode switch (if so equipped)..............2-53
Emergency call (SOS) button (if so equipped) . . . 2-53
Rear Door Alert ................................. 2-54
Power outlets .................................. 2-55
12v Outlets .................................. 2-55
120v outlets (if so equipped) .................2-56
USB charging ports (if so equipped) ............2-58
Wireless charger (if so equipped) ...............2-59
Wireless charger indicator ...................2-60
Wireless charger operation ..................2-60
Extended storage switch .......................2-61
Storage ........................................ 2-62
Front-door pockets ......................... 2-62
Rear-door pockets .......................... 2-62
Seatback pocket (if so equipped) ............2-63
Under-seat storage bins ....................2-64
Storagetrays................................ 2-65
Glovebox ................................... 2-66
Console box ................................. 2-66
Overhead sunglasses storage
(if so equipped) .............................. 2-67
Cup holders ................................. 2-67Ladder rack (if so equipped)
....................2-69
Windows ....................................... 2-69
Manual windows (if so equipped) ............2-69
Power windows (if so equipped) .............2-69
Rear sliding window (if so equipped) .........2-72
Moonroof (if so equipped) ......................2-72
Power moonroof ............................ 2-72
Interior lights ...................................2-74
Map lights ................................... 2-75
Cargo light .................................. 2-75
HomeLink® Universal Transceiver
(if so equipped) ................................. 2-76
Programming HomeLink® ...................2-77
Programming HomeLink® for Canadian
customers and gate openers ...............2-78
Operating the HomeLink® Universal
Transceiver .................................. 2-79
Programming trouble-diagnosis ............
2-79
Cle
aring the programmed information ......2-79
Reprogramming a single HomeLink®
button ...................................... 2-80
If your vehicle is stolen ......................2-80
Page 153 of 556
The system helps deter vehicle thef t but
cannot prevent it, nor can it prevent the
thef t of interior or exterior vehicle compo-
nents in all situations. Always secure your
vehicle even if parking for a brief period.
Never leave your keys in the vehicle, and
always lock the vehicle when unattended.
Be aware of your surroundings, and park in
secure, well-lit areas whenever possible.
Many devices offering additional protec-
tion, such as component locks, identifica-
tion markers, and tracking systems, are
available at auto supply stores and spe-
cialty shops. A NISSAN dealer may also offer
such equipment. Check with your insur-
ance company to see if you may be eligible
for discounts for various thef t protection
features.
How to arm the vehicle security
system
1. Close all windows.(The system can be
armed even if the windows are open.)
2. Remove the Intelligent Key from the vehicle. 3. Close all doors. Lock all doors. The doors
can be locked with the key, power door
lock switch (if the door is opened, locked
and then closed), or with the key fob.
Key fob operation:
• Press the
button on the key fob. All
doors lock. The hazard lights flash twice
and the horn beeps once to indicate all
doors are locked.
• When the
button is pressed with all
doors locked, the hazard lights flash twice
and the horn beeps once as a reminder
that the doors are already locked.
The horn may or may not beep.
4. Confirm that the
indicator light
comes on. Theindicator light
stays on for about 30 seconds. The ve-
hicle security system is now pre-armed.
Af ter about 30 seconds the vehicle se-
curity system automatically shif ts into
the armed phase. The
indicator
light begins to flash once every 3 sec-
onds. If, during the 30-second pre-arm
time period, the driver's door is unlocked
by the key or the key fob or the ignition
switch is placed in ACC or ON position,
the system will not arm. •
If the key is turned slowly when locking
the driver's door, the system may not
arm. Furthermore, if the key is turned
beyond the vertical position toward
the unlock position the system may be
disarmed when the key is removed. If
the indicator light fails to glow for a
period of time, unlock the door once
and lock it again.
• Even when the driver and/or passen-
gers are in the vehicle, the system will
arm with all doors closed and locked
with the ignition switch placed in the
OFF position.
Vehicle security system activation
The vehicle security system will give the
following alarm:
• The headlights blink and the horn sounds intermittently.
• The alarm automatically turns off af ter a period of time. However, the alarm reacti-
vates if the vehicle is tampered with
again. The alarm can be shut off by un-
locking the driver's door with the key or
by pressing the
button on the key
fob.
Instruments and controls2-35
Page 173 of 556
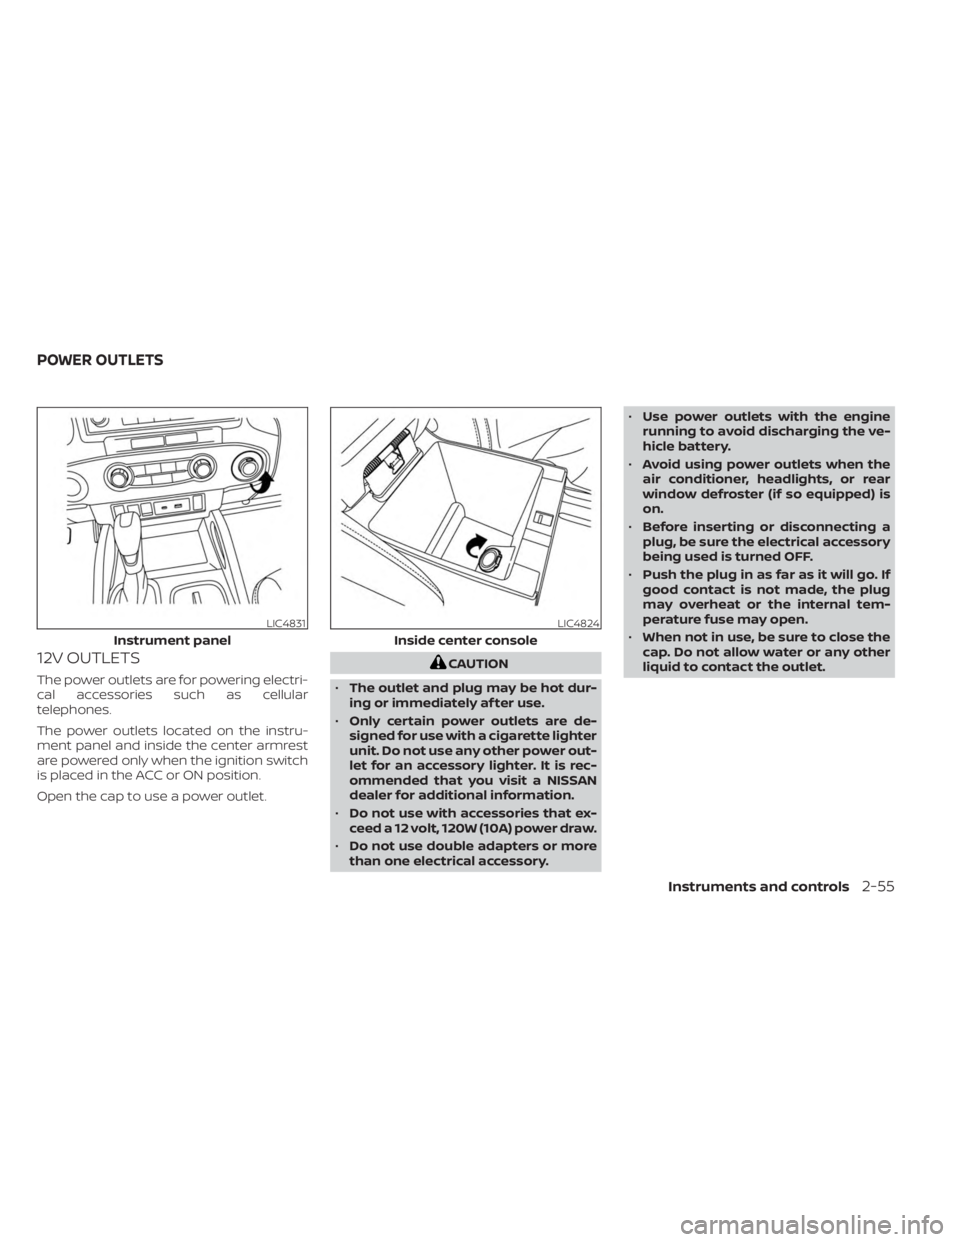
12V OUTLETS
The power outlets are for powering electri-
cal accessories such as cellular
telephones.
The power outlets located on the instru-
ment panel and inside the center armrest
are powered only when the ignition switch
is placed in the ACC or ON position.
Open the cap to use a power outlet.
CAUTION
• The outlet and plug may be hot dur-
ing or immediately af ter use.
• Only certain power outlets are de-
signed for use with a cigarette lighter
unit. Do not use any other power out-
let for an accessory lighter. It is rec-
ommended that you visit a NISSAN
dealer for additional information.
• Do not use with accessories that ex-
ceed a 12 volt, 120W (10A) power draw.
• Do not use double adapters or more
than one electrical accessory. •
Use power outlets with the engine
running to avoid discharging the ve-
hicle battery.
• Avoid using power outlets when the
air conditioner, headlights, or rear
window defroster (if so equipped) is
on.
• Before inserting or disconnecting a
plug, be sure the electrical accessory
being used is turned OFF.
• Push the plug in as far as it will go. If
good contact is not made, the plug
may overheat or the internal tem-
perature fuse may open.
• When not in use, be sure to close the
cap. Do not allow water or any other
liquid to contact the outlet.
LIC4831
Instrument panel
LIC4824
Inside center console
POWER OUTLETS
Instruments and controls2-55
Page 187 of 556
WARNING
• Do not exceed maximum ladder rack
load capacity.
• Exceeding the ladder rack capacity
can change the vehicle’s center of
gravity and adversely affect the han-
dling and stability of the vehicle re-
sulting in an accident causing death
or serious injury.
• When loading the ladder rack, evenly
distribute the load as well as main-
tain a low center of gravity.
• Do not use your rack off road, unless
otherwise noted as an “off road
rated” product.
• Do not allow the ladder rack or load
to obstruct the vehicle’s exterior
lighting.
• Be careful that your vehicle does not
exceed the Gross Vehicle Weight Rat-
ing (GVWR) or its Gross Axle Weight
Rating (GAWR front & rear).
• Properly secure all cargo with ropes
or straps to help it prevent from slid-
ing or shif ting. •
Take extra caution when the vehicle
has load on the Ladder rack as this
raises the center of gravity of the ve-
hicle and may cause the vehicle to
roll over when there is a loss of ve-
hicle control.
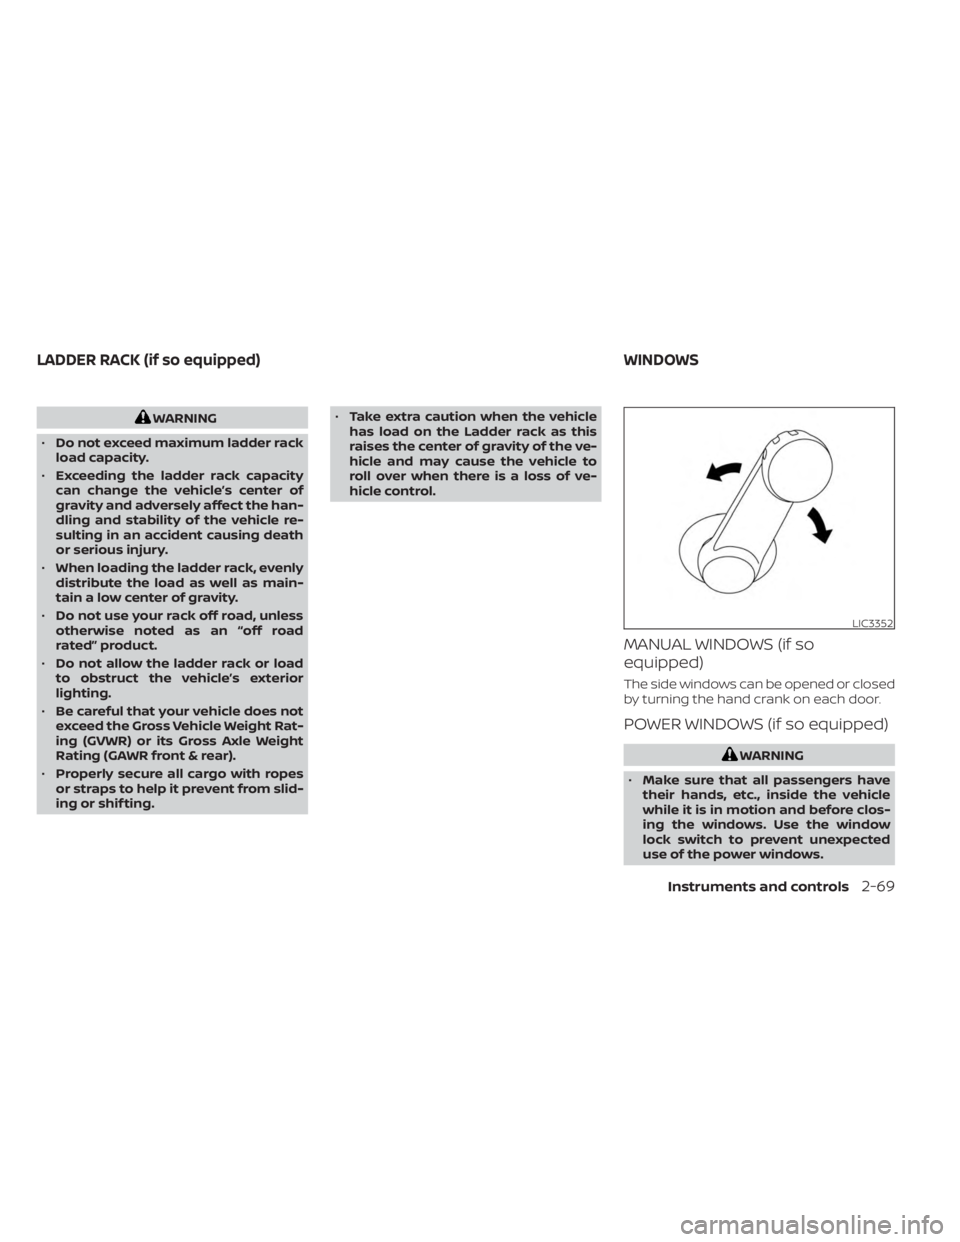
MANUAL WINDOWS (if so
equipped)
The side windows can be opened or closed
by turning the hand crank on each door.
POWER WINDOWS (if so equipped)
WARNING
• Make sure that all passengers have
their hands, etc., inside the vehicle
while it is in motion and before clos-
ing the windows. Use the window
lock switch to prevent unexpected
use of the power windows.
LIC3352
LADDER RACK (if so equipped) WINDOWS
Instruments and controls2-69
Page 188 of 556
•To help avoid risk of injury or death
through unintended operation of the
vehicle and/or its systems, including
entrapment in windows or inadver-
tent door lock activation, do not
leave children, people who require
the assistance of others or pets unat-
tended in your vehicle. Additionally,
the temperature inside a closed ve-
hicle on a warm day can quickly be-
come high enough to cause a signifi-
cant risk of injury or death to people
and pets.
The power windows operate when the ig-
nition switch is placed in the ON position or
for a period of time af ter the ignition switch
is placed in the ACC or OFF position. If the
driver's or passenger's door is opened dur-
ing this period of time, the power to the
windows is canceled.
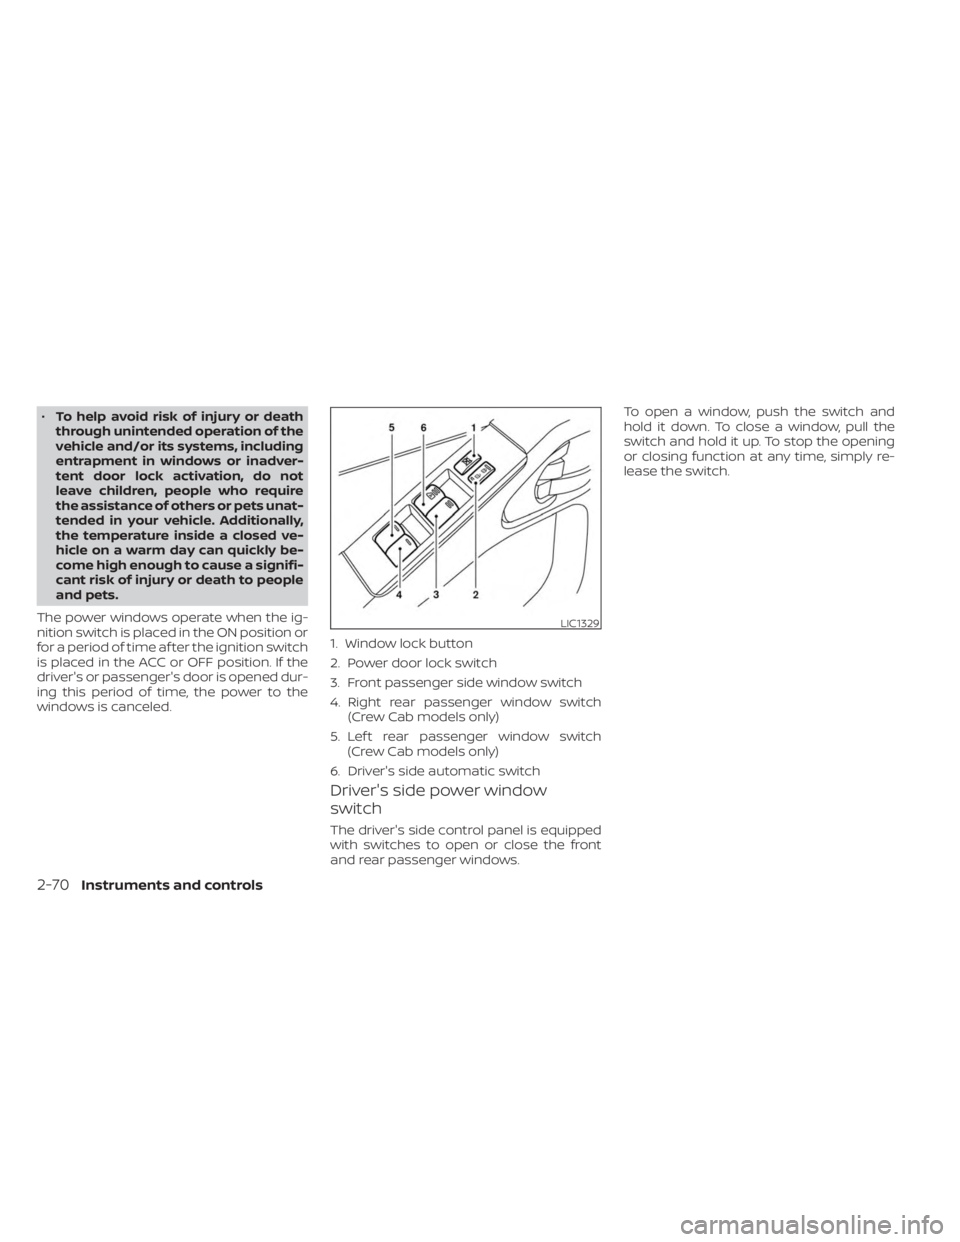
Driver's side power window
switch
The driver's side control panel is equipped
with switches to open or close the front
and rear passenger windows. To open a window, push the switch and
hold it down. To close a window, pull the
switch and hold it up. To stop the opening
or closing function at any time, simply re-
lease the switch.
LIC1329
1. Window lock button
2. Power door lock switch
3. Front passenger side window switch
4. Right rear passenger window switch
(Crew Cab models only)
5. Lef t rear passenger window switch (Crew Cab models only)
6. Driver's side automatic switch
2-70Instruments and controls
Page 189 of 556
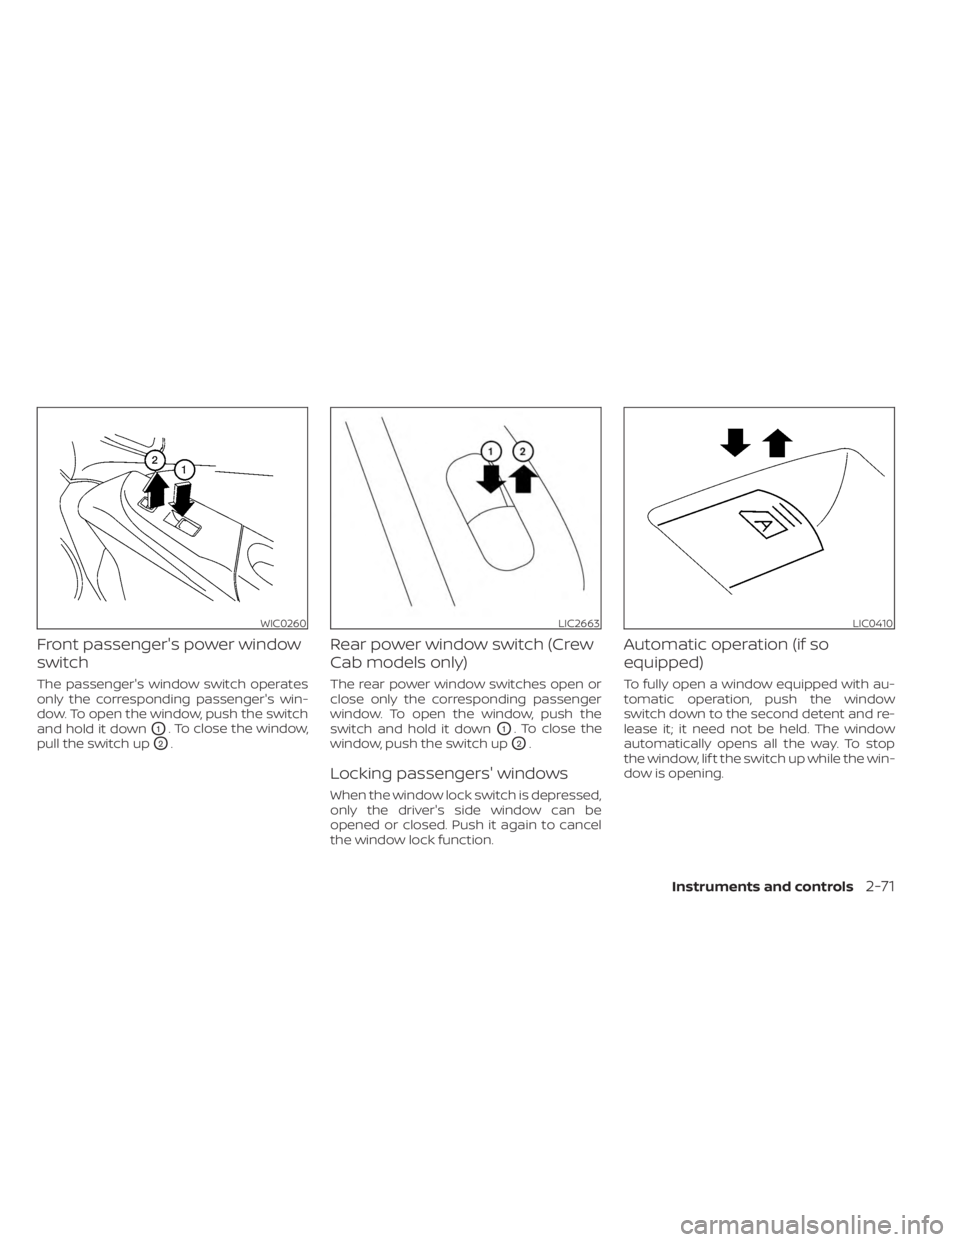
Front passenger's power window
switch
The passenger's window switch operates
only the corresponding passenger's win-
dow. To open the window, push the switch
and hold it down
O1. To close the window,
pull the switch up
O2.
Rear power window switch (Crew
Cab models only)
The rear power window switches open or
close only the corresponding passenger
window. To open the window, push the
switch and hold it down
O1. To close the
window, push the switch up
O2.
Locking passengers' windows
When the window lock switch is depressed,
only the driver's side window can be
opened or closed. Push it again to cancel
the window lock function.
Automatic operation (if so
equipped)
To fully open a window equipped with au-
tomatic operation, push the window
switch down to the second detent and re-
lease it; it need not be held. The window
automatically opens all the way. To stop
the window, lif t the switch up while the win-
dow is opening.
WIC0260LIC2663LIC0410
Instruments and controls2-71
Page 190 of 556
REAR SLIDING WINDOW (if so
equipped)
WARNING
• You must ensure all occupants and
objects are free of the rear window
area prior to and during operation.
Failure to do so may result in injury
and/or damage to the rear window
system.
• The rear window is not designed to
carry long items through it. •
Do not place objects through the
opened rear window. Do not use the
rear window as a cargo area pass-
through. This may result in damage
to the rear window system or per-
sonal injury.
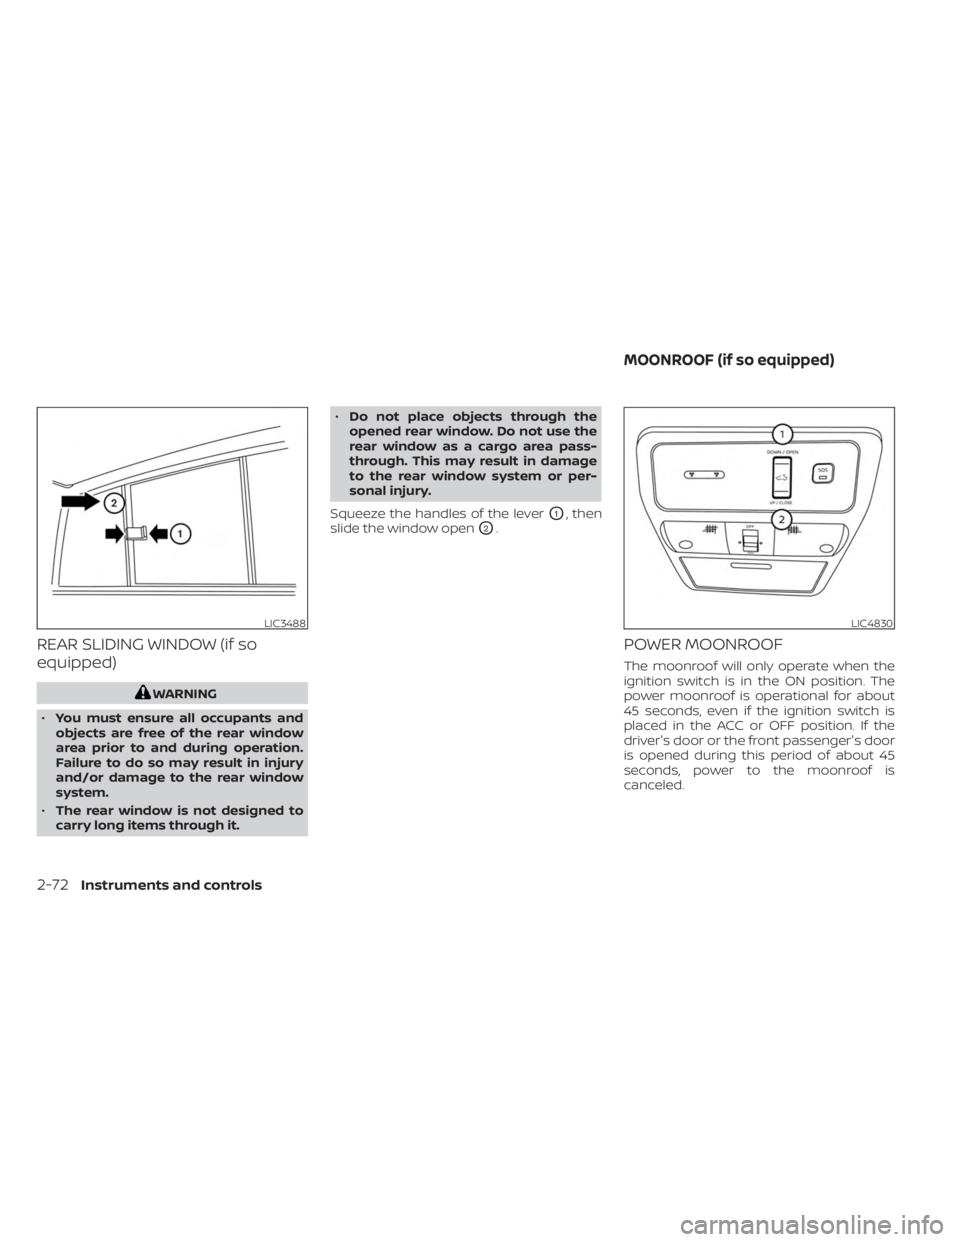
Squeeze the handles of the lever
O1, then
slide the window open
O2.
POWER MOONROOF
The moonroof will only operate when the
ignition switch is in the ON position. The
power moonroof is operational for about
45 seconds, even if the ignition switch is
placed in the ACC or OFF position. If the
driver's door or the front passenger's door
is opened during this period of about 45
seconds, power to the moonroof is
canceled.
LIC3488LIC4830
MOONROOF (if so equipped)
2-72Instruments and controls
Page 267 of 556
3. Turn the temperature dial to the lef t orright to set the desired temperature.
• To quickly remove ice from the outside of the windows, press the
fan speed
control button to the maximum position.
• As soon as possible af ter the windshield is clean, press the AUTO button to return
to the auto mode.
• When the
control is activated, the air
conditioner will automatically be turned
on at outside temperatures approxi-
mately at or below freezing. This dehu-
midifies the air which helps defog the
windshield. Under this condition, the indi-
cator light on the A/C button indicator will
not turn on if the user had selected A/C
off prior to entering this mode. Turning off
the air condition via the A/C button is not
allowed in this mode. If the A/C button
indicator was on when entering this
mode, and the A/C button is selected in
this mode, the A/C compressor will still be
automatically enabled. The air recircula-
tion mode automatically turns off, allow-
ing outside air to be drawn into the pas-
senger compartment to further improve
the defogging performance.
Remote Engine Start with
Intelligent Climate Control (if so
equipped)
Vehicles equipped with automatic climate
controls and Remote Engine Start function
may go into automatic heating or cooling
mode when Remote Engine Start is acti-
vated depending on outside and cabin
temperatures. During this period, the cli-
mate control display and buttons will be
inoperable until the ignition switch is
turned on. In Remote Engine Start defrost-
ing mode, the outside mirror defroster (if so
equipped) and heated steering wheel (if so
equipped) may be activated automatically.
Voice Recognition logic (if so
equipped)
When the climate control system is on, the
front and rear (if so equipped) fan speeds
may be automatically lowered so that
commands are more easily recognized.
Fan speed can be adjusted using the fan
speed
decrease andincrease
buttons, if desired.
MANUAL OPERATION
Fan speed control
Press thefan speed control buttons
to manually control the fan speed.
Press the AUTO button to return to auto-
matic control of the fan speed.
When adjusting the manual fan from auto
mode, the outlet direction (floor, floor/
defrost, vent, bi-level) will still automatically
change. To fix the outlet to a manual mode,
select the desired air flow location using
the MODE button.
Temperature control dial
The temperature control dial allows you to
adjust the temperature of the outlet air. To
lower the temperature, turn the dial to the
lef t. To increase the temperature, turn the
dial to the right. Temperature can be ad-
justed on the driver’s and passenger’s side.
Air recirculation
Press theair recirculation button to
recirculate interior air inside the vehicle
when:
• driving on a dusty road
• to prevent traffic fumes from entering passenger compartment.
Monitor, climate, audio, phone and voice recognition systems4-37
Page 269 of 556
To turn system off
Press the ON-OFF button.
Outside mirror defroster switch (if
so equipped)
For additional information, see “Outside
mirror defroster switch” (P. 2-38).
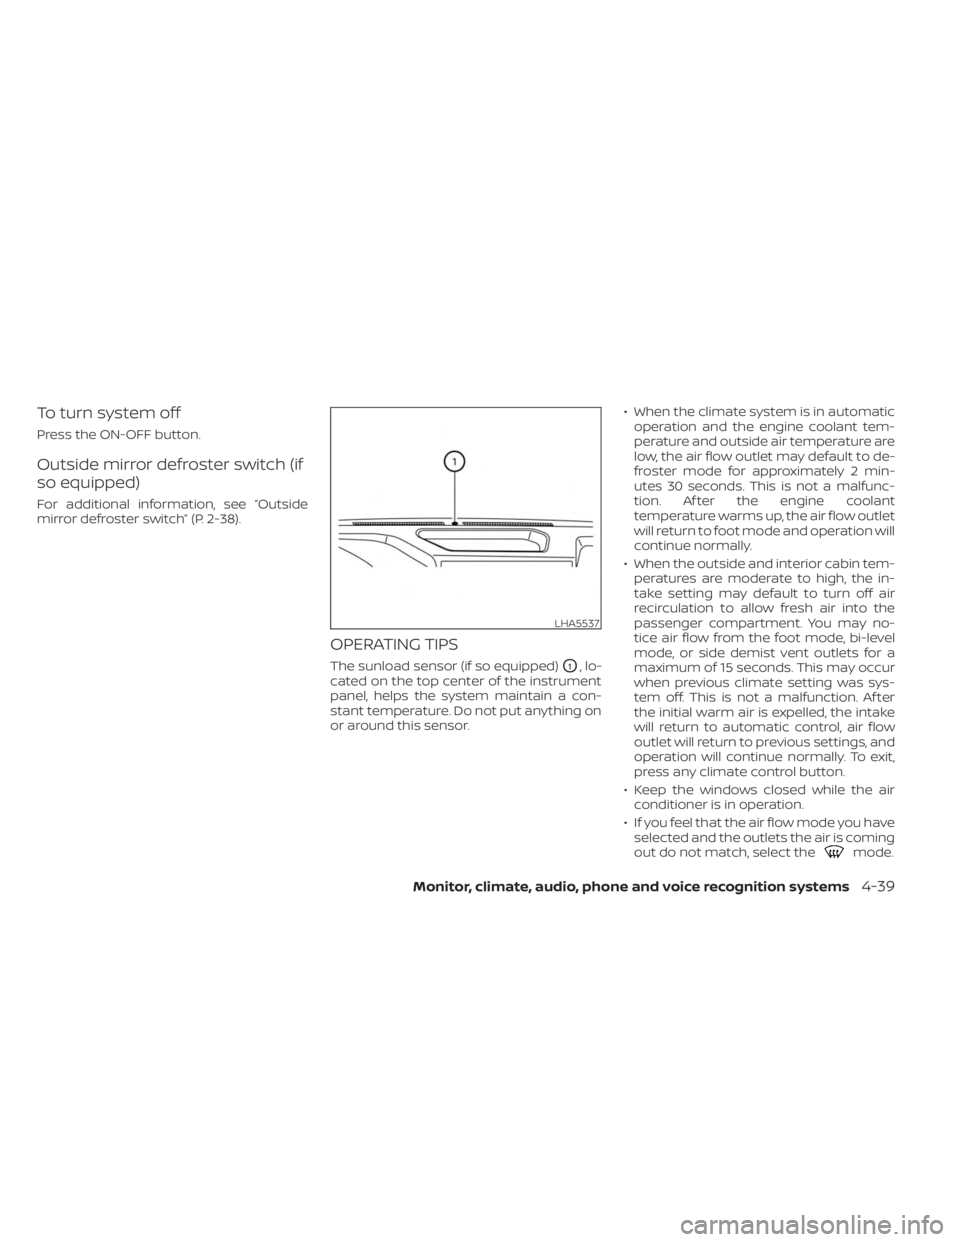
OPERATING TIPS
The sunload sensor (if so equipped)O1, lo-
cated on the top center of the instrument
panel, helps the system maintain a con-
stant temperature. Do not put anything on
or around this sensor. • When the climate system is in automatic
operation and the engine coolant tem-
perature and outside air temperature are
low, the air flow outlet may default to de-
froster mode for approximately 2 min-
utes 30 seconds. This is not a malfunc-
tion. Af ter the engine coolant
temperature warms up, the air flow outlet
will return to foot mode and operation will
continue normally.
• When the outside and interior cabin tem- peratures are moderate to high, the in-
take setting may default to turn off air
recirculation to allow fresh air into the
passenger compartment. You may no-
tice air flow from the foot mode, bi-level
mode, or side demist vent outlets for a
maximum of 15 seconds. This may occur
when previous climate setting was sys-
tem off. This is not a malfunction. Af ter
the initial warm air is expelled, the intake
will return to automatic control, air flow
outlet will return to previous settings, and
operation will continue normally. To exit,
press any climate control button.
• Keep the windows closed while the air conditioner is in operation.
• If you feel that the air flow mode you have selected and the outlets the air is coming
out do not match, select the
mode.
LHA5537
Monitor, climate, audio, phone and voice recognition systems4-39