warning NISSAN GT-R 2017 R35 Quick Reference Guide
[x] Cancel search | Manufacturer: NISSAN, Model Year: 2017, Model line: GT-R, Model: NISSAN GT-R 2017 R35Pages: 28, PDF Size: 2.12 MB
Page 2 of 28

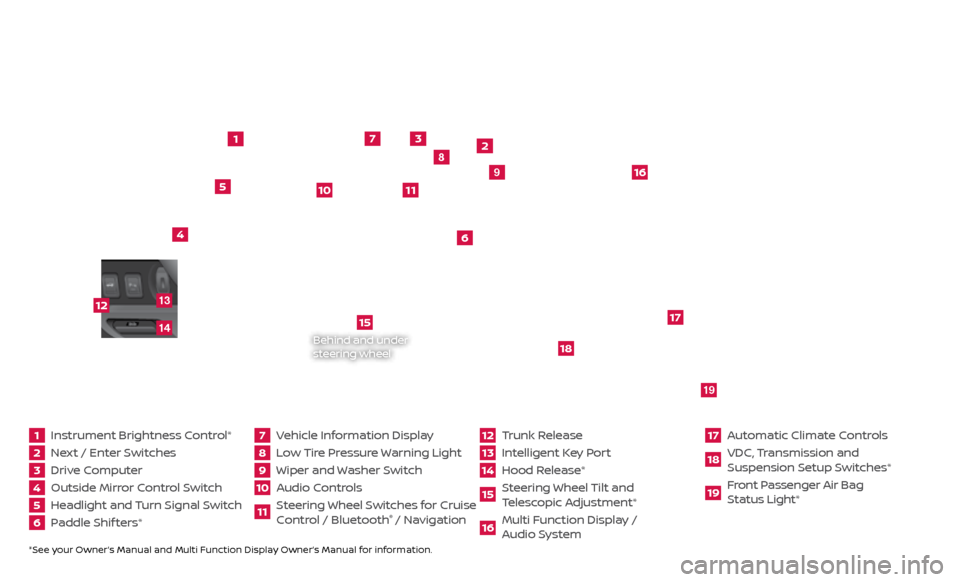
*See your Owner’s Manual and Multi Function Display Owner’s Manual for information.1 Instrument Brightness Control*2 Next / Enter Switches3 Drive Computer 4 Outside Mirror Control Switch5 Headlight and Turn Signal Switch6 Paddle Shif ters*
7 Vehicle Information Display8 Low Tire Pressure Warning Light9 Wiper and Washer Switch10 Audio Controls
11 Steering Wheel Switches for Cruise
Control / Bluetooth
® / Navigation
12 Trunk Release
13 Intelligent Key Port14 Hood Release*
15 Steering Wheel Tilt and
T elescopic Adjustment*16 Multi Function Display /
Audio System
17 Automatic Climate Controls18 VDC, Transmission and
Suspension Setup S witches*19 Front Passenger Air Bag
Status Light*
1
2
3
4
5
6
9
7
8
15
16
17
18
19
10
11
Behind and under
steering wheel
12
1413
Page 6 of 28

4
Remote Sound Horn and Flash Lights – Sound the horn and flash the li\
ghts remotely using the NissanConnect Services companion app or website.
Alarm Notification – This system will notify you when the factory-installed vehicle alarm system has been activated.
Maintenanc e Alert – Receive notifications via a selected method of a vehicle
system malfunction that triggers instrument panel warning lights.
Connected Search – Select “Connected Search” from the Destination menu on the vehicle’s Navigation System to conduct a Point Of Interest (POI) search
within a certain distance of the vehicle’s location.
Assisted Se arch – Allows the subscriber to verbally request POI destination data
from a live operator.
Destination Do wnload – Use the NissanConnect Services companion app or
website to search for and send destinations directly to the vehicle.
Journey Planner – Send a route with up to five waypoints and a destination directly to the vehicle.
Boundar y Alert – Monitor the movement of your vehicle within a specified
region. Set up boundaries in the Monitoring section of the NissanConnect
Services web portal.
Speed Alert – Set up a maximum speed on the NissanConnect Services web portal. You will receive notifications if your vehicle exceeds the maximum
speed setting.
Valet Alert – Use Valet Alert to set up a 0.2-mile radius around your vehicle.
•
A
ctivate alerts via the NissanConnect Services companion app or website.
Curfew Alert – Specify curfew limits via the NissanConnect Services companion app or website and be notified via a selected method if curfew is violated.
1 Only use NissanConnectSM Services powered by SiriusXM® and NissanConnectSM Mobile Apps when
safe to do so. NissanConnectSM Services and Mobile Apps availability is dependent on vehicle model,
trim level, packaging, and/or options. See www.NissanUSA.com/connect for complete product and
service availability details. Late availability for some features. Compatible smartphone required to
operate NissanConnect
SM Mobile Apps. Services require an operating vehicle device and cellular and
GPS coverage. Cellular network and GPS signals are not available in all areas and/or at all times. Neither
NISSAN nor SiriusXM are responsible for associated costs, if any, for continued operation due to
cellular network termination/changes. Cellular provider may terminate/restrict service without
notice. Certain services require a PIN for activation. Applicable Subscription Agreement required. See
www.NissanUSA.com/connect for details and service limitations. Enrollment is required to receive the
full suite of services. Text rates and/or data usage may apply.
For more information, refer to the “Information (section 5)” of your Multi Function Display Owner’s Manual .
NEW SYSTEM FEATURES
To view detailed instructional videos regarding these and other features, please go to www.nissanownersinfo.mobi.
Page 9 of 28

7
TIRE PRESSURE MONITORING SYSTEM (TPMS)
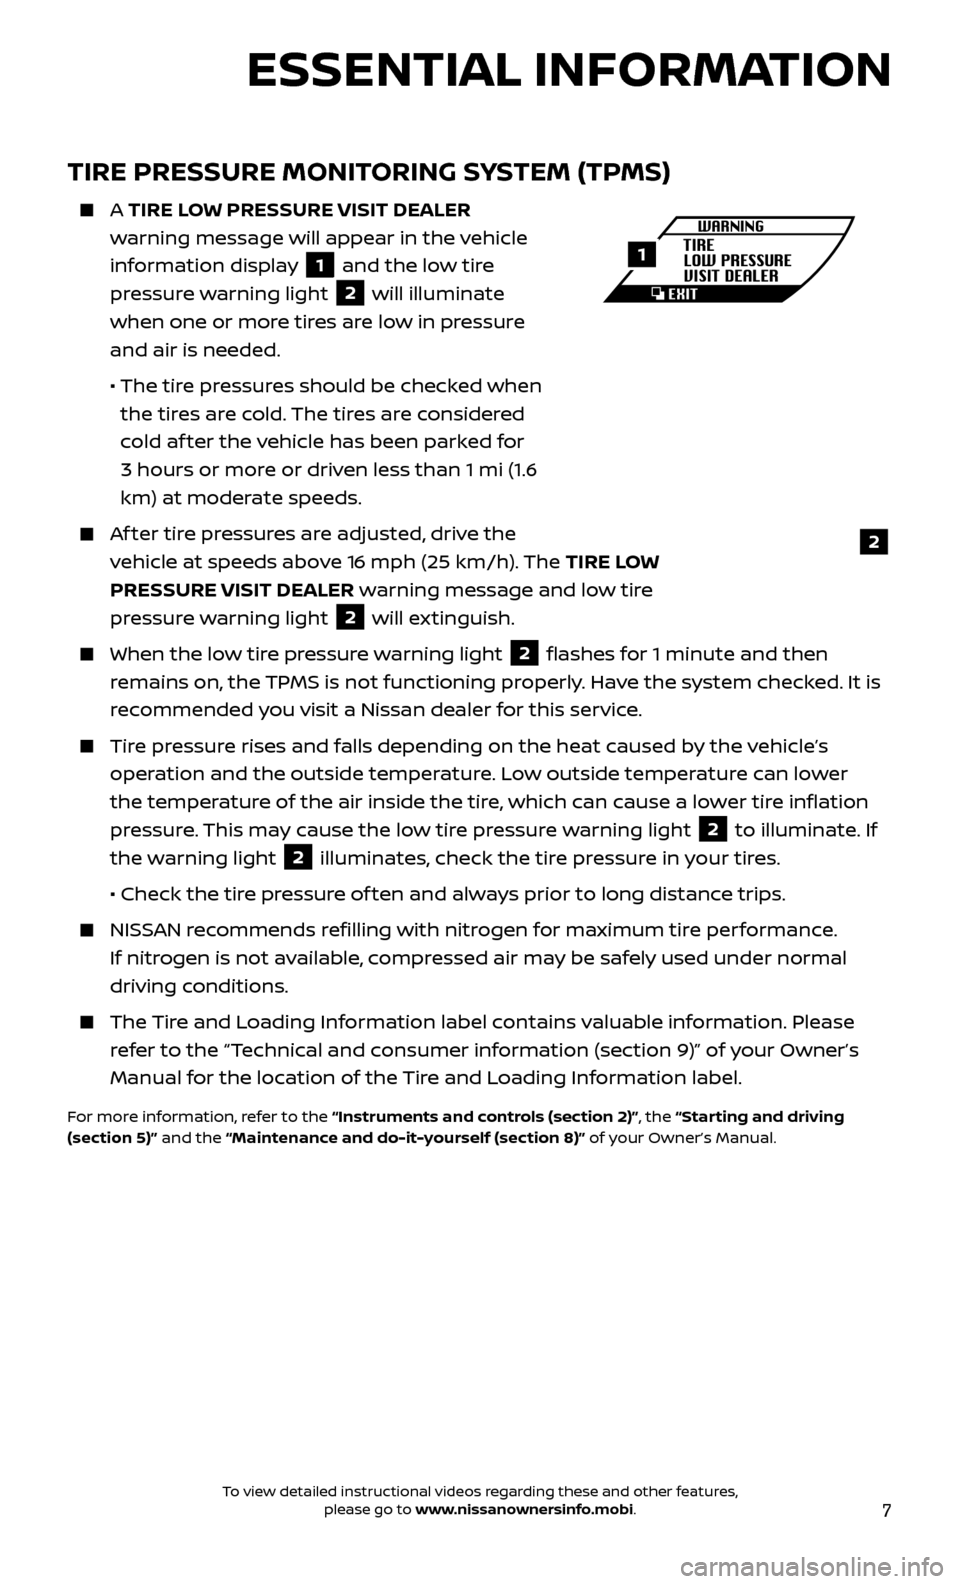
A TIRE LOW PRESSURE VISIT DEALER
w arning message will appear in the vehicle
information display
1 and the low tire
pressure warning light 2 will illuminate
when one or more tires are low in pressure
and air is needed.
• The tir
e pressures should be checked when
the tires are cold. The tires are considered
cold af ter the vehicle has been parked for
3 hours or more or driven less than 1 mi (1.6
km) at moderate speeds.
Af ter tire pressures are adjusted, drive the vehicle at speeds above 16 mph (25 km/h). The TIRE LOW
PRESSURE VISIT DEALER warning message and low tire
pressure warning light
2 will extinguish.
When the lo w tire pressure warning light 2 flashes for 1 minute and then
remains on, the TPMS is not functioning properly. Have the system checked. It is
recommended you visit a Nissan dealer for this service.
Tire pressure rises and falls depending on the heat caused by the vehicle’s operation and the outside temperature. Low outside temperature can lower
the temperature of the air inside the tire, which can cause a lower tire inflation
pressure. This may cause the low tire pressure warning light
2 to illuminate. If
the warning light 2 illuminates, check the tire pressure in your tires.
•
Check the tir
e pressure of ten and always prior to long distance trips.
NISSAN recommends refilling with nitrogen for maximum tire performance. If nitrogen is not available, compressed air may be safely used under normal
driving conditions.
The Tire and Loading Information label contains valuable information. Please refer to the “Technical and consumer information (section 9)” of your Owner’s
Manual for the location of the Tire and Loading Information label.
For more information, refer to the “Instruments and controls (section 2)”, the “Starting and driving
(section 5)” and the “Maintenance and do-it-yourself (section 8)” of your Owner’s Manual.
2
1
ESSENTIAL INFORMATION
To view detailed instructional videos regarding these and other features, please go to www.nissanownersinfo.mobi.
Page 12 of 28

10
NISSAN INTELLIGENT KEY® SYSTEM
The Nissan Intelligent Key® system allows you to
lock or unlock the vehicle and open the trunk. It is
important to make sure the Intelligent Key is with
you (that is, in your pocket or purse).
The operating range of the Intelligent Key is
within 31.5 in (80 cm) from each
request switch.
To lock the vehicle, push either door handle request switch 1
once or press the
button
2 on the key fob. To unlock the vehicle, perform one of the following procedures:
•
Push either door hand
le request switch
1 once; the
corresponding door will unlock. Push the door handle request
switch
1 again within 1 minute; all other doors will unlock, or
•
Pr
ess the
button
3 on the key fob to unlock the driver’s
side door. Press the button 3 again; all other
doors will unlock.
To release the trunk lid, press the button
4 for more
than 1 second. Lif t the trunk lid to access the trunk.
The Intel ligent Key can also be used to activate the panic alarm by pressing
and holding the
button
5 for more than 1 second. Once activated, the panic
alarm and headlights will stay on for a period of time.
NISSAN INTELLIGENT KEY® BATTERY DISCHARGE
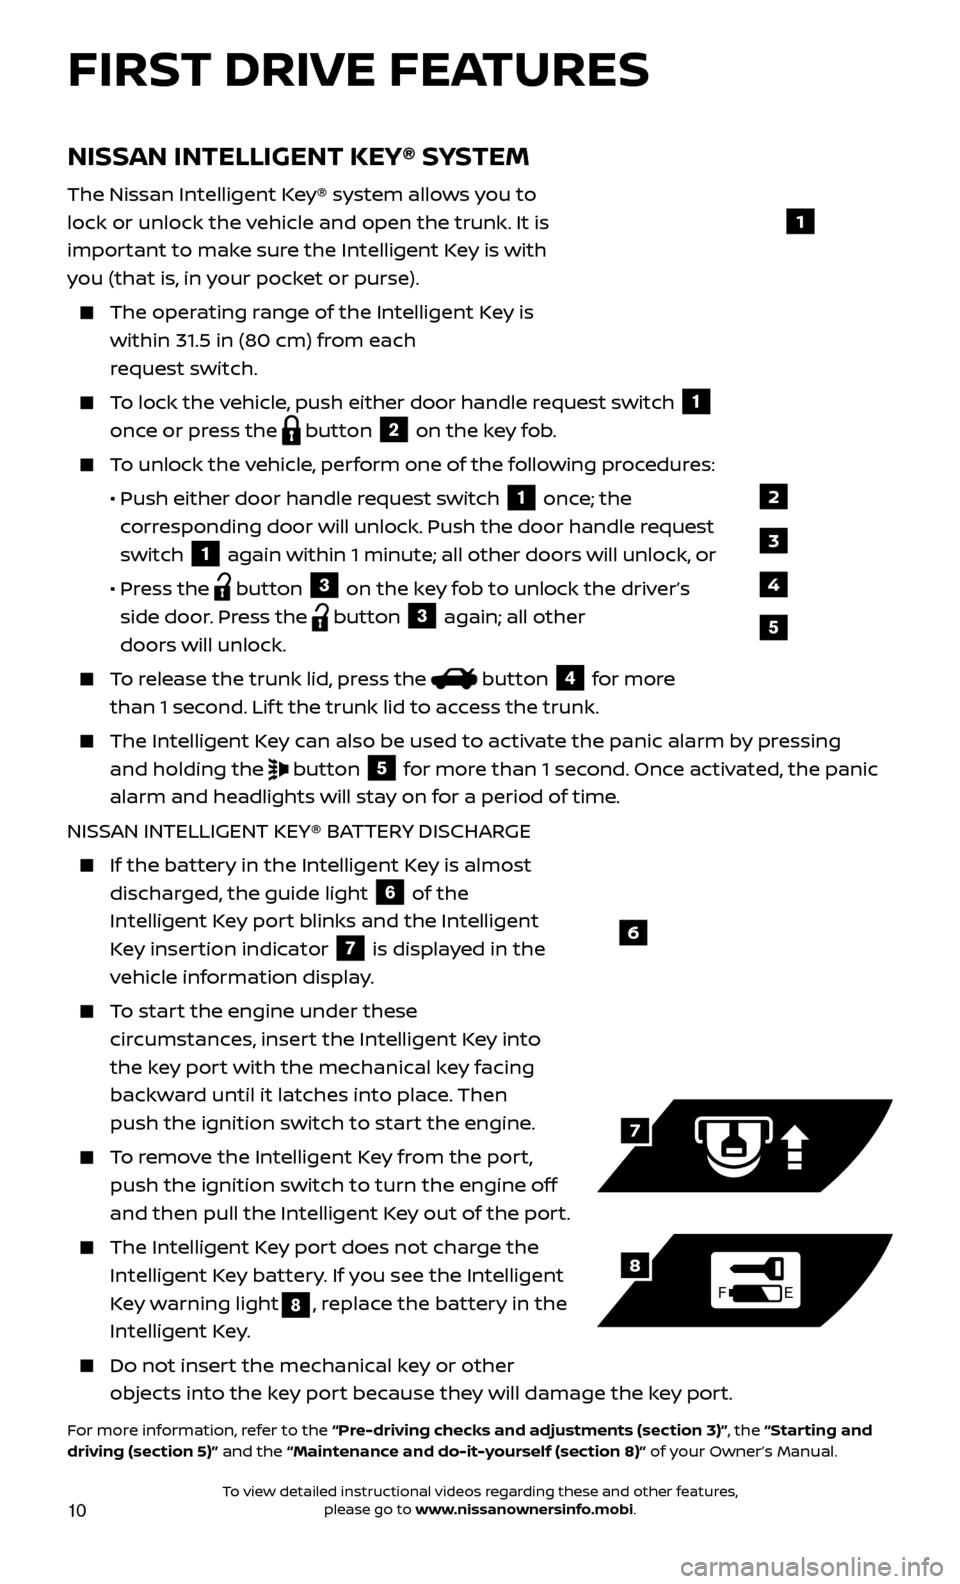
If the bat tery in the Intelligent Key is almost
discharged, the guide light
6 of the
Intelligent Key port blinks and the Intelligent
Key insertion indicator
7 is displayed in the
vehicle information display.
To start the engine under these circumstances, insert the Intelligent Key into
the key port with the mechanical key facing
backward until it latches into place. Then
push the ignition switch to start the engine.
To remove the Intelligent Key from the port, push the ignition switch to turn the engine off
and then pull the Intelligent Key out of the port.
The Intel ligent Key port does not charge the
Intelligent Key battery. If you see the Intelligent
Key warning light
8, replace the battery in the
Intelligent Key.
Do not inser t the mechanical key or other
objects into the key port because they will damage the key port.
For more information, refer to the “Pre-driving checks and adjustments (section 3)”, the “Starting and
driving (section 5)” and the “Maintenance and do-it-yourself (section 8)” of your Owner’s Manual.
6
FE
7
8
FIRST DRIVE FEATURES
1
2
3
4
5
To view detailed instructional videos regarding these and other features, please go to www.nissanownersinfo.mobi.
Page 20 of 28

18
DRIVE COMPUTER
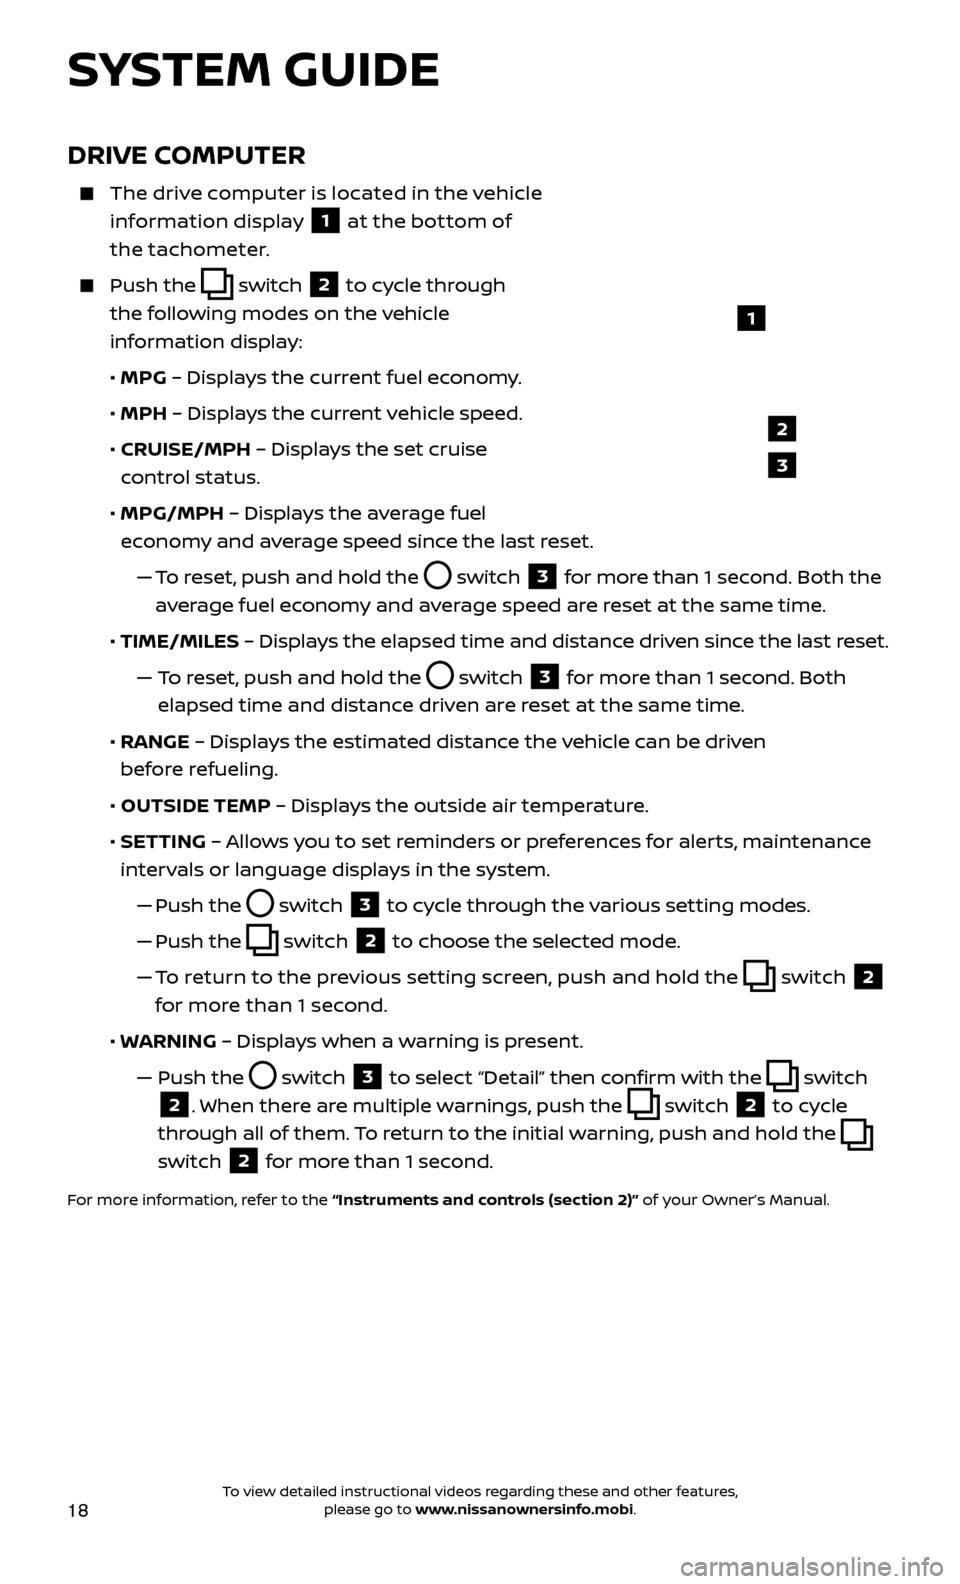
The drive computer is located in the vehicle information display
1 at the bottom of
the tachometer.
Push the switch
2 to cycle through
the following modes on the vehicle
information display:
• MPG
– Displays the current fuel economy.
• MPH
– Displays the current vehicle speed.
•
CRUISE/MPH
– Displays the set cruise
control status.
•
MPG/MPH
– Displays the average fuel
economy and average speed since the last reset.
—
T
o reset, push and hold the
switch 3 for more than 1 second. Both the
average fuel economy and average speed are reset at the same time.
•
TIME/MILES
– Displays the elapsed time and distance driven since the last reset.
— T
o reset, push and hold the
switch 3 for more than 1 second. Both
elapsed time and distance driven are reset at the same time.
•
RANGE
– Displays the estimated distance the vehicle can be driven
before refueling.
•
OUTSIDE TEMP
– Displays the outside air temperature.
•
SET
TING – Allows you to set reminders or preferences for alerts, maintenance
intervals or language displays in the system.
—
Push the
switch 3 to cycle through the various setting modes.
—
Push the
switch 2 to choose the selected mode.
—
T
o return to the previous setting screen, push and hold the
switch 2
for more than 1 second.
• W
ARNING – Displays when a warning is present.
—
Push the switch 3 to select “Detail” then confirm with the switch
2. When there are multiple warnings, push the switch 2 to cycle
through all of them. To return to the initial warning, push and hold the
switch
2 for more than 1 second.
For more information, refer to the “Instruments and controls (section 2)” of your Owner’s Manual.
1
2
3
SYSTEM GUIDE
To view detailed instructional videos regarding these and other features, please go to www.nissanownersinfo.mobi.
Page 26 of 28

24
SETTING A DESTINATION
You can set a destination with your Navigation System using the touch-screen
display or Voice Recognition.
Touch-screen Display
•
Touch the “
Navi” key on the Launch Bar.
• When a destination is set,
touch the “New Destination” key and then select one
of the displayed options for choosing your destination.
Voice Recognition
•
Pr
ess the
button on the steering wheel, and af ter the tone, say
“Navigation”. From here, the system will give you the options available for
setting a destination.
SETTING A DESTINATION USING POINTS OF INTEREST (POI)
Touch-screen Display
• T
ouch the “
Navi” key on the Launch Bar, and if a destination is already set,
touch the “New Destination” key.
• T
ouch the “Points of Interest” key and then select one of the displayed options
for choosing your destination.
Voice Recognition
•
Pr
ess the
button on the steering wheel, and af ter the tone, say “Navigation”
then say “Points of Interest”. From here, the system will give you the options
available for setting a POI.
NAVIGATION SWIPE TO METER
Turn-by-turn route guidance can also be viewed in the vehicle information display by
using Navigation Swipe to Meter. This can be done by programing a route, touching
the turn-by-turn route icon on the center display, and swiping toward the general
direction of the vehicle information display.
The turn-by-turn route icon will move across the center display and transfer the
route information to the vehicle information display when the vehicle is not moving.
The icon will not move across the screen if the vehicle speed is over 4 mph (7 km/h),
but the information will still transfer to the vehicle information display.
The turn-by-turn route guidance cannot be transferred to the vehicle information
display if the navigation screen is already shown or if a warning is present.
For more information, refer to your Navigation System Owner’s Manual.
SYSTEM GUIDE
To view detailed instructional videos regarding these and other features, please go to www.nissanownersinfo.mobi.