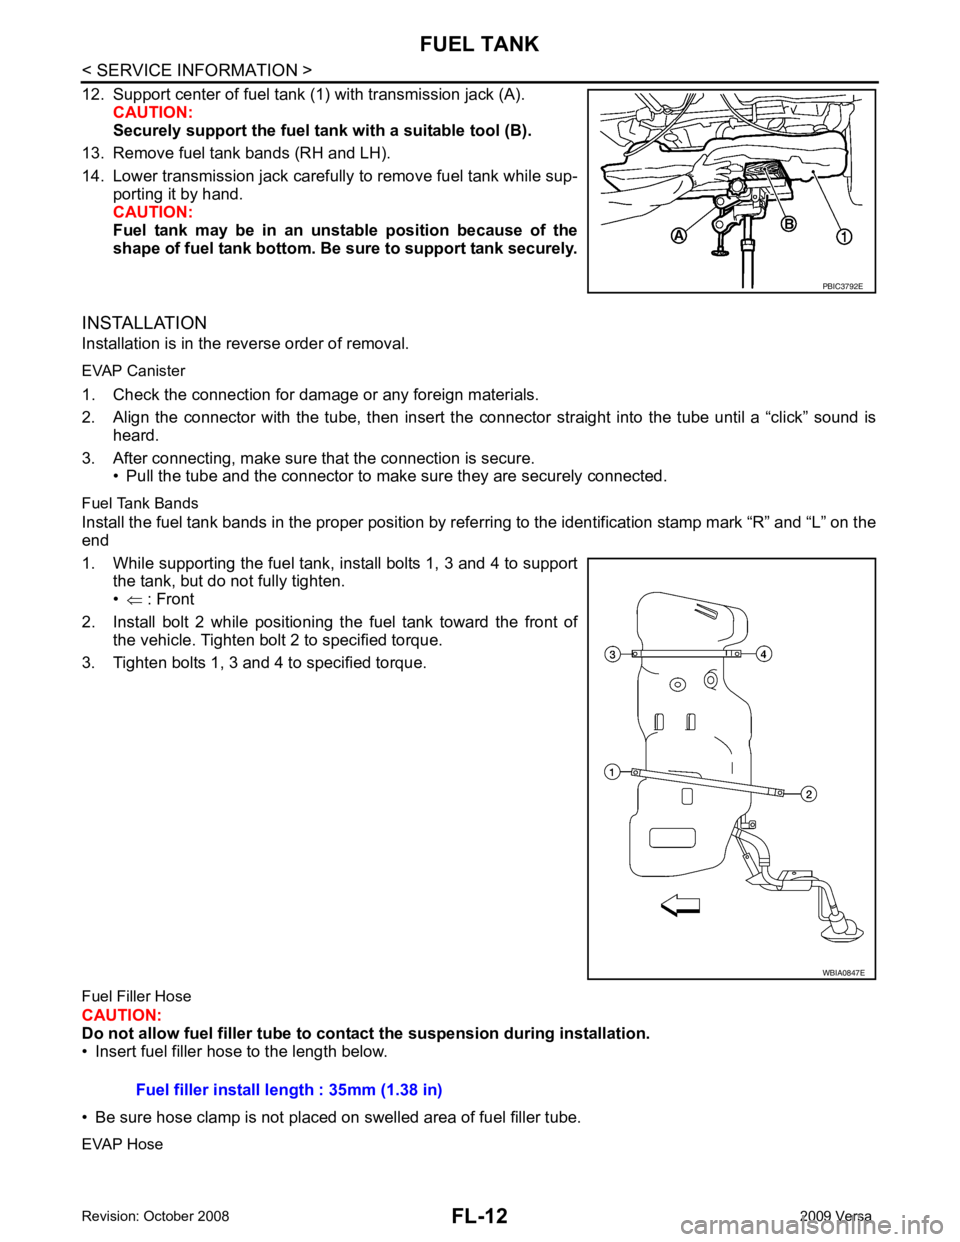
NISSAN LATIO 2009 Service Repair Manual
LATIO 2009
NISSAN
NISSAN
https://www.carmanualsonline.info/img/5/57359/w960_57359-0.png
NISSAN LATIO 2009 Service Repair Manual
Trending: ABS, torque, run flat, fuse diagram, check transmission fluid, engine, wheel
Page 3231 of 4331
FL
NP
O
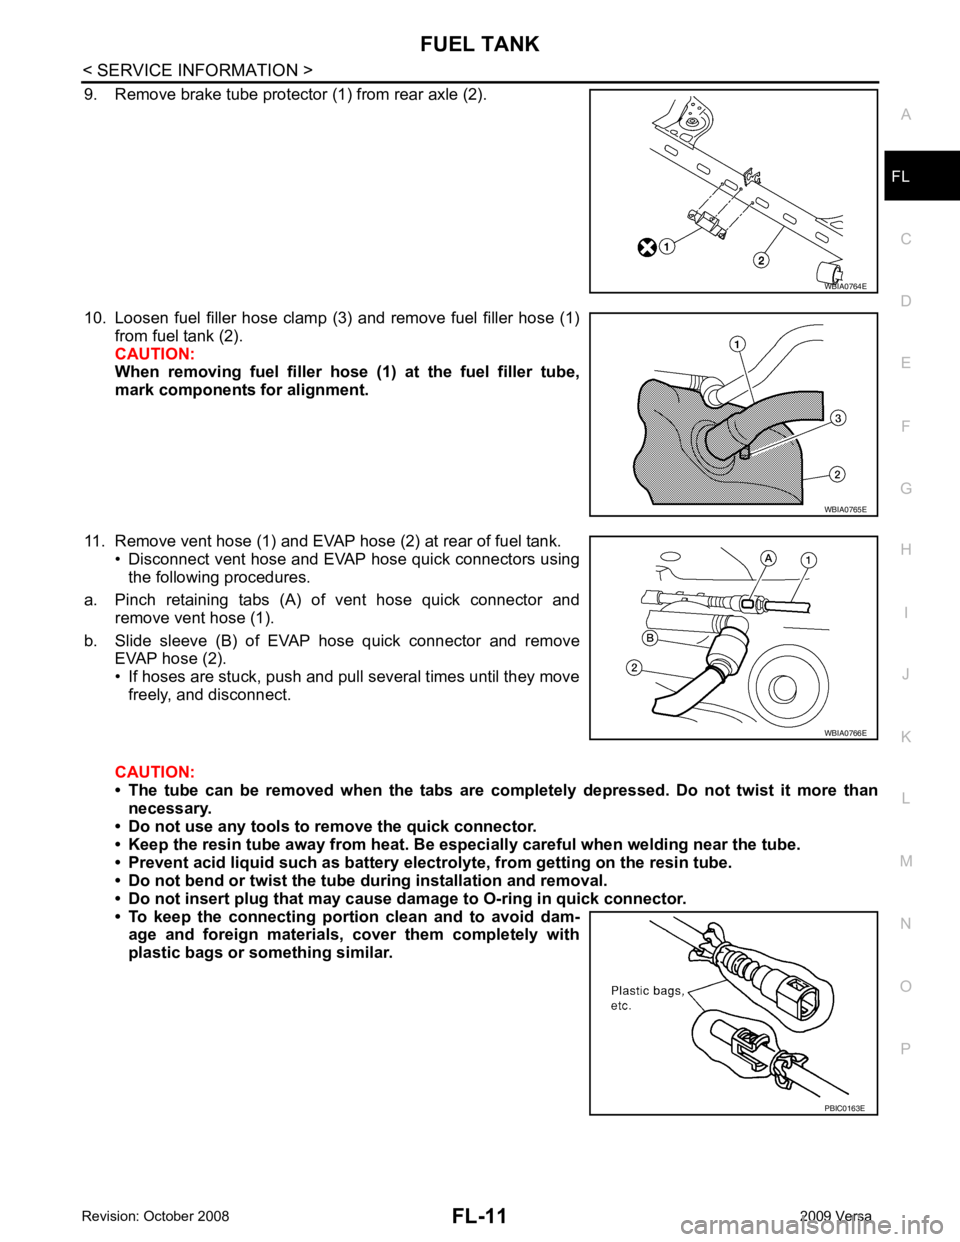
9. Remove brake tube protector (1) from rear axle (2).
10. Loosen fuel filler hose clamp (3) and remove fuel filler hose (1) from fuel tank (2).
CAUTION:
When removing fuel filler hose (1) at the fuel filler tube,
mark components for alignment.
11. Remove vent hose (1) and EVAP hose (2) at rear of fuel tank. • Disconnect vent hose and EVAP hose quick connectors usingthe following procedures.
a. Pinch retaining tabs (A) of vent hose quick connector and remove vent hose (1).
b. Slide sleeve (B) of EVAP hose quick connector and remove EVAP hose (2).
• If hoses are stuck, push and pull several times until they move freely, and disconnect.
CAUTION:
• The tube can be removed when the tabs are completely depressed. Do not twist it more than
necessary.
• Do not use any tools to remove the quick connector.
• Keep the resin tube away from heat. Be especi ally careful when welding near the tube.
• Prevent acid liquid such as battery elect rolyte, from getting on the resin tube.
• Do not bend or twist the tube during installation and removal.
• Do not insert plug that may cause dama ge to O-ring in quick connector.
• To keep the connecting portio n clean and to avoid dam-
age and foreign materials, cover them completely with
plastic bags or something similar. WBIA0765E
WBIA0766E
Page 3232 of 4331
Page 3233 of 4331
FL
NP
O
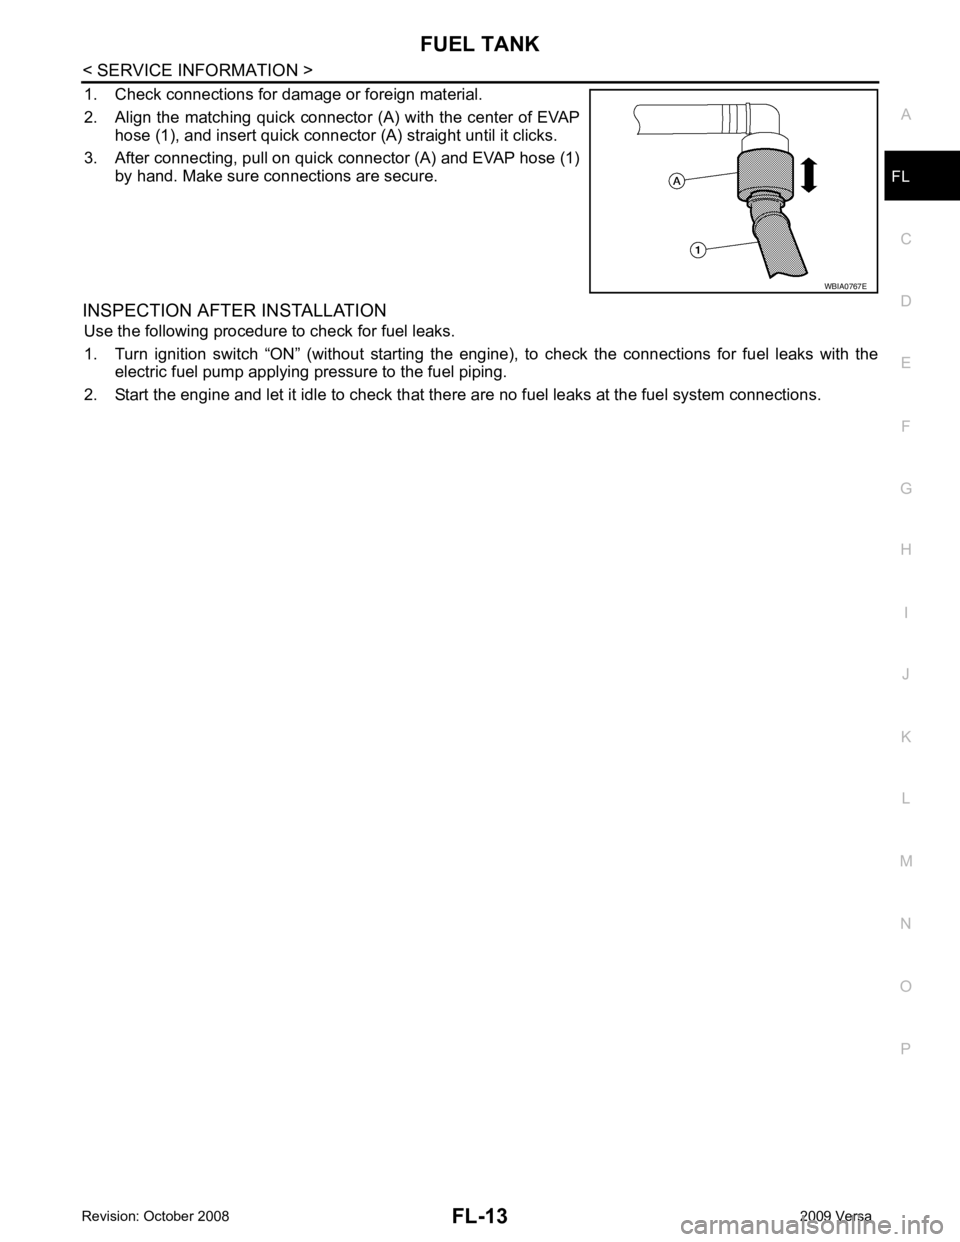
1. Check connections for damage or foreign material.
2. Align the matching quick connector (A) with the center of EVAP hose (1), and insert quick connector (A) straight until it clicks.
3. After connecting, pull on quick connector (A) and EVAP hose (1) by hand. Make sure connections are secure.
INSPECTION AFTER INSTALLATION Use the following procedure to check for fuel leaks.
1. Turn ignition switch “ON” (without starting the engi ne), to check the connections for fuel leaks with the
electric fuel pump applying pressure to the fuel piping.
2. Start the engine and let it idle to check that ther e are no fuel leaks at the fuel system connections.
Page 3234 of 4331
Page 3235 of 4331

FSU
N
O P
CONTENTS
FRONT SUSPENSION
SERVICE INFORMATION .. ..........................2
PRECAUTIONS .............................................. .....2
Precaution for Supplemental Restraint System
(SRS) "AIR BAG" and "SEAT BELT PRE-TEN-
SIONER" ............................................................. ......
2
Precaution Necessary fo r Steering Wheel Rota-
tion After Battery Disconnect ............................... ......
2
Precaution for Procedure without Cowl Top Cover ......3
Cautions .............................................................. ......3
PREPARATION .............................................. .....4
Special Service Tool ........................................... ......4
Commercial Service Tool .................................... ......4
NOISE, VIBRATION AND HARSHNESS
(NVH) TROUBLESHOOTING ........................ .....6
NVH Troubleshooting Chart ................................ ......6
FRONT SUSPENSION ASSEMBLY .............. .....7 On-Vehicle Inspection and Service .....................
.....7
Wheel Alignment Inspecti on .....................................7
Component .......................................................... ....10
Removal and Installation ..................................... ....11
COIL SPRING AND STRUT .............................. 12
Removal and Installation ..................................... ....12
Disassembly and Assembly ................................. ....12
TRANSVERSE LI NK ......................................... 15
Removal and Installation ..................................... ....15
STABILIZER BAR ............................................. 16
Removal and Installation ..................................... ....16
SERVICE DATA AND SPECIFICATIONS
(SDS) ................................................................. 17
Wheel Alignment (Unladen*) ............................... ....17
Ball Joint .............................................................. ....18
Wheelarch Height (Unladen*) .............................. ....19
Page 3236 of 4331
Page 3237 of 4331
PRECAUTIONS
FSU-3
< SERVICE INFORMATION >
C
D
F
G H
I
J
K L
M A
B FSU
N
O P
5. When the repair work is completed, return the ignition switch to the
″LOCK ″ position before connecting
the battery cables. (At this time, the steering lock mechanism will engage.)
6. Perform a self-diagnosis check of al l control units using CONSULT-III.
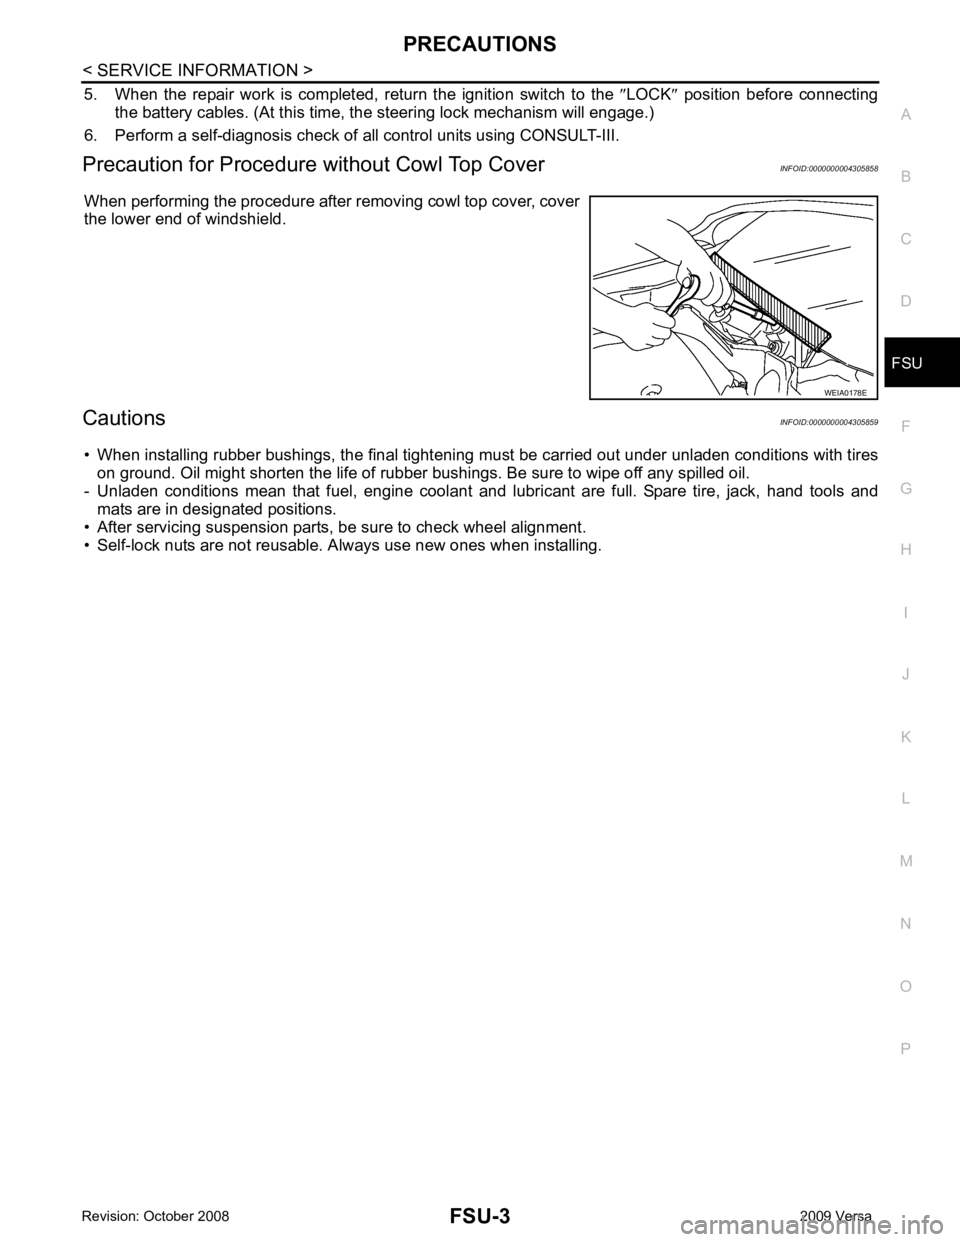
Precaution for Procedur e without Cowl Top Cover INFOID:0000000004305858
When performing the procedure after removing cowl top cover, cover
the lower end of windshield.
Cautions INFOID:0000000004305859
• When installing rubber bushings, the final tightening mu st be carried out under unladen conditions with tires
on ground. Oil might shorten the life of rubber bushings. Be sure to wipe off any spilled oil.
- Unladen conditions mean that fuel, engine coolant and l ubricant are full. Spare tire, jack, hand tools and
mats are in designated positions.
• After servicing suspension parts, be sure to check wheel alignment.
• Self-lock nuts are not reusable. A lways use new ones when installing. WEIA0178E
Page 3238 of 4331
Page 3239 of 4331
FSU
N
O P
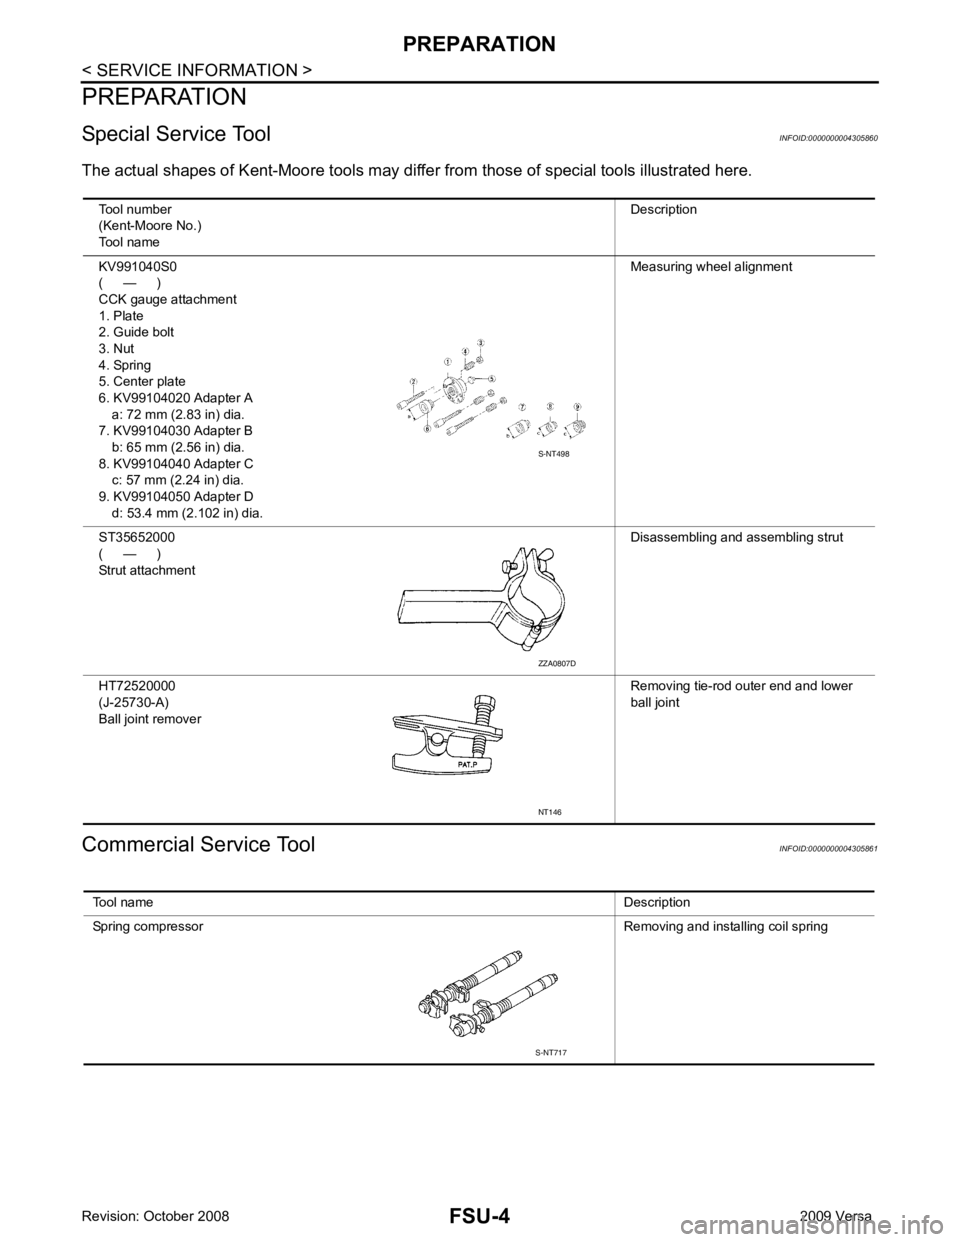
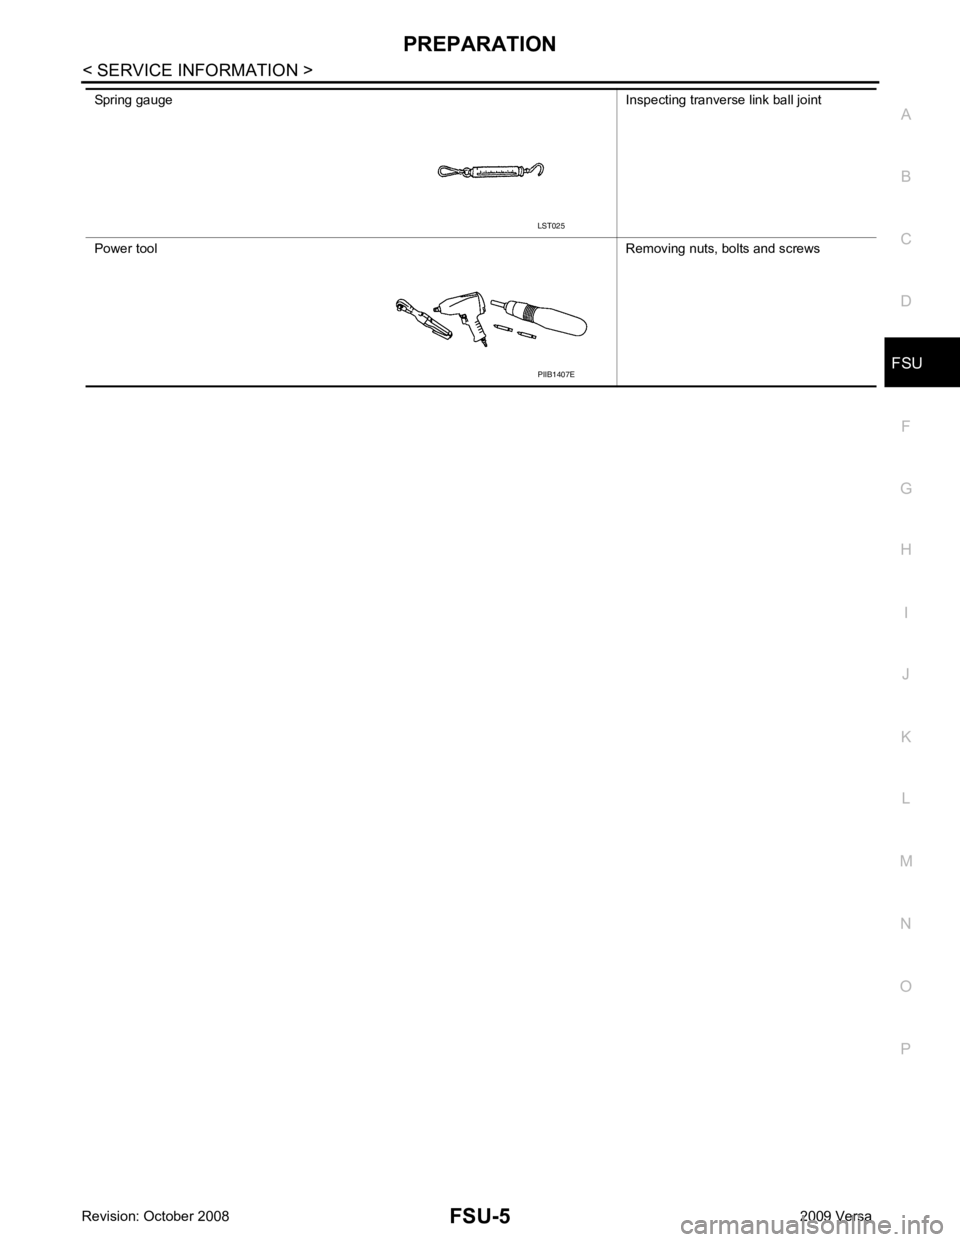
Spring gauge
Inspecting tranverse link ball joint
Power tool Removing nuts, bolts and screws PIIB1407E
Page 3240 of 4331
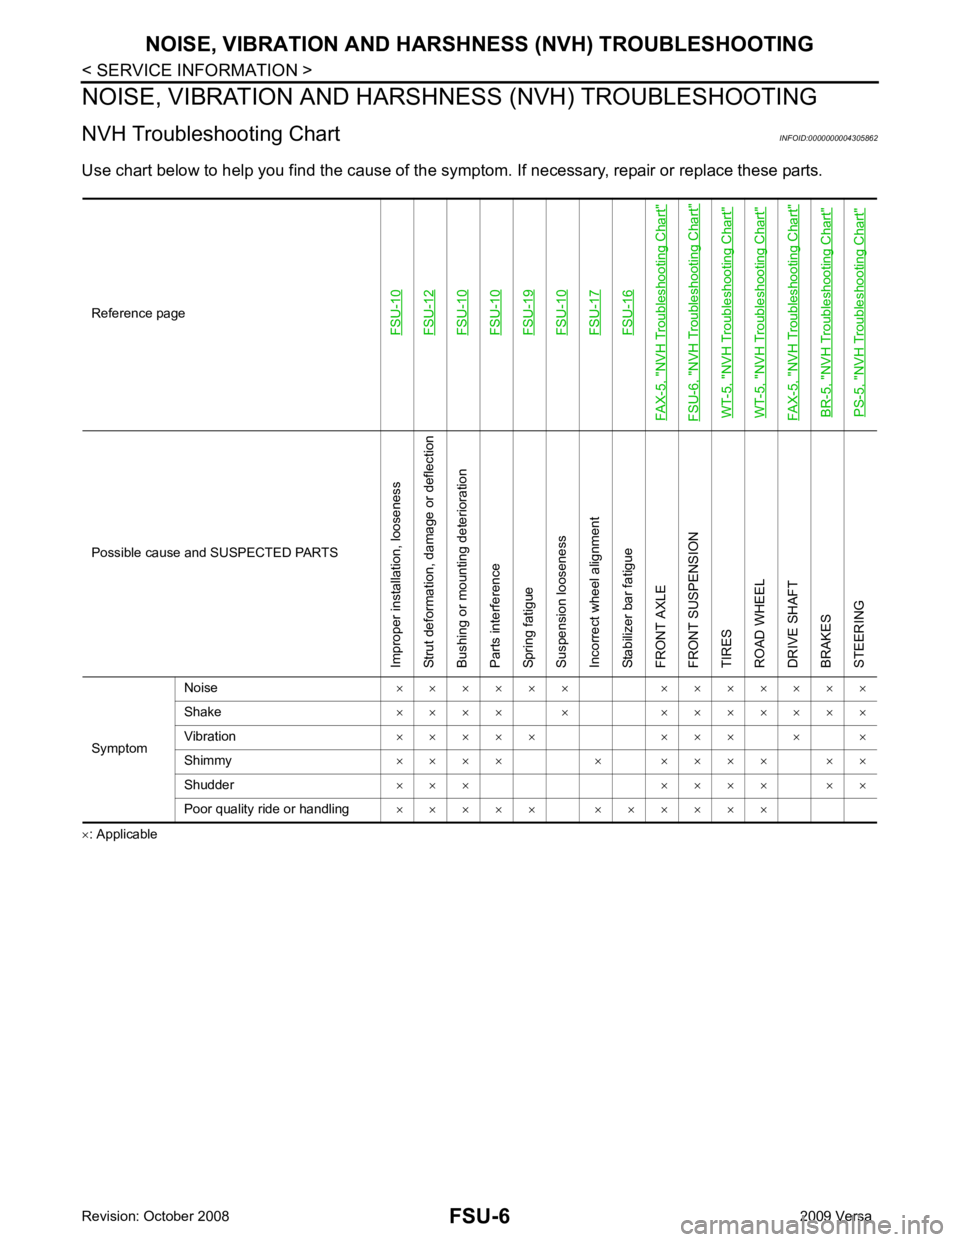
FSU-12FSU-10FSU-10FSU-19FSU-10FSU-17FSU-16
FAX-5, "
NVH Troubleshooting Chart
"
FSU-6, "
NVH Troubleshooting Chart
"
WT-5, "
NVH Troubleshooting Chart
"
WT-5, "
NVH Troubleshooting Chart
"
FAX-5, "
NVH Troubleshooting Chart
"
BR-5, "
NVH Troubleshooting Chart
"
PS-5, "
NVH Troubleshooting Chart
"Possible cause an
d SUSPECTED PARTS
Improper installation, looseness
Strut deformation, damage or deflection
Bushing or mounting deterioration
Parts interference
Spring fatigue
Suspension looseness
Incorrect wheel alignment
Stabilizer bar fatigue
FRONT AXLE
FRONT SUSPENSION
TIRES
ROAD WHEEL
DRIVE SHAFT
BRAKES
STEERING
Symptom Noise
× × × × × × × × × × × × ×
Shake × × × × × × × × × × × ×
Vibration × × × × × × × × × ×
Shimmy × × × × × × × × × × ×
Shudder × × × × × × × × ×
Poor quality ride or handling × × × × × × × × × × ×
Trending: fuse chart, navigation, service schedule, bulb, oil additives, coolant level, roof

