NISSAN LATIO 2009 Service Repair Manual
Manufacturer: NISSAN, Model Year: 2009, Model line: LATIO, Model: NISSAN LATIO 2009Pages: 4331, PDF Size: 58.04 MB
Page 3221 of 4331
FL
N
O P
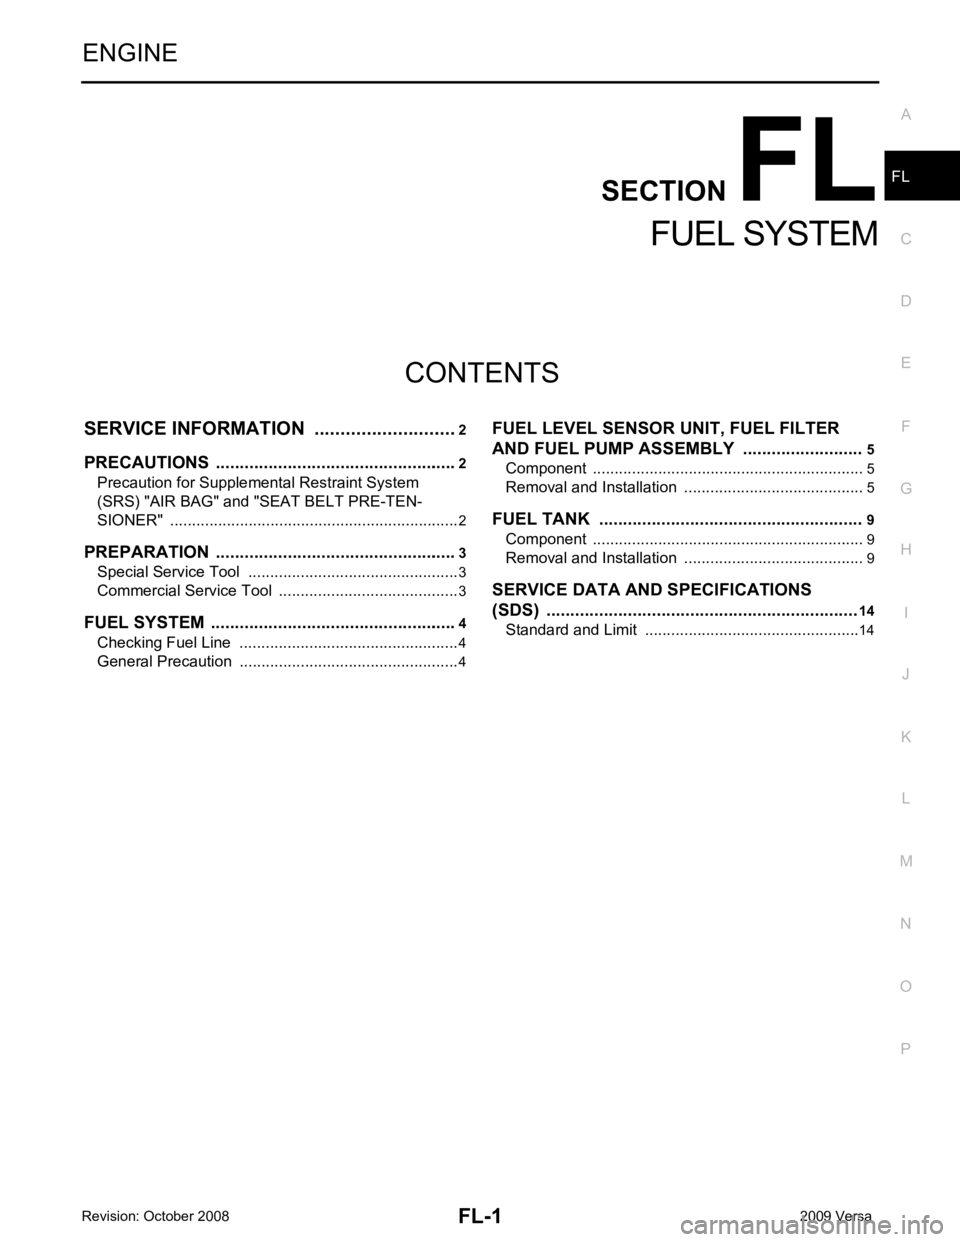
CONTENTS
FUEL SYSTEM
SERVICE INFORMATION .. ..........................2
PRECAUTIONS .............................................. .....2
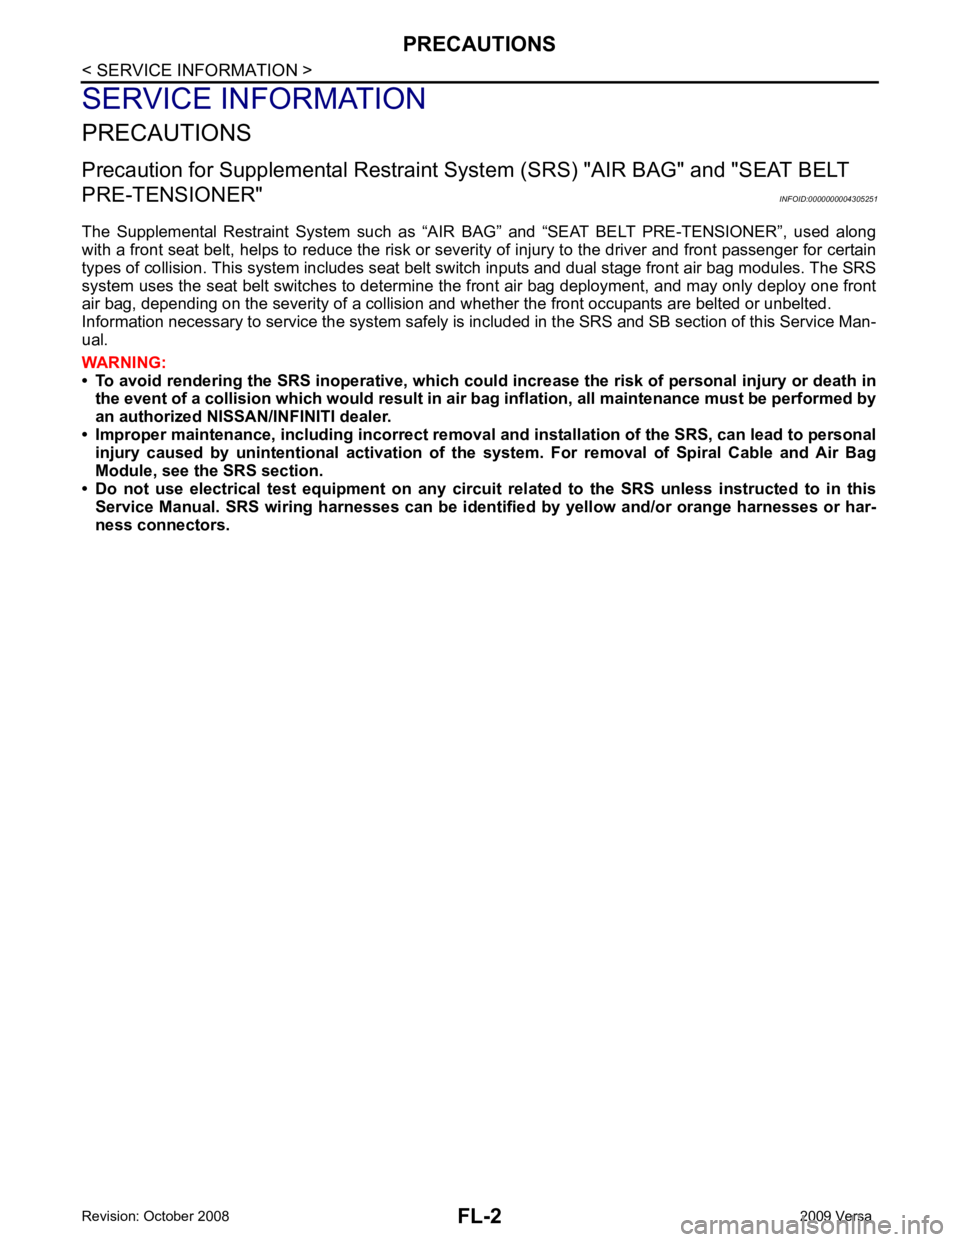
Precaution for Supplemental Restraint System
(SRS) "AIR BAG" and "SEAT BELT PRE-TEN-
SIONER" ............................................................. ......
2
PREPARATION .............................................. .....3
Special Service Tool ........................................... ......3
Commercial Service Tool .................................... ......3
FUEL SYSTEM ............................................... .....4
Checking Fuel Line ............................................. ......4
General Precaution ............................................. ......4 FUEL LEVEL SENSOR UNIT, FUEL FILTER
AND FUEL PUMP ASSEMBLY ......................... 5
Component .......................................................... .....5
Removal and Installation ..................................... .....5
FUEL TANK ..... ................................ ..................9
Component .......................................................... .....9
Removal and Installation ..................................... .....9
SERVICE DATA AND SPECIFICATIONS
(SDS) ................................................................. 14
Standard and Limit .............................................. ....14
Page 3222 of 4331
Page 3223 of 4331
PREPARATION
FL-3
< SERVICE INFORMATION >
C
D E
F
G H
I
J
K L
M A FL
NP
O
PREPARATION
Special Service Tool INFOID:0000000004305252
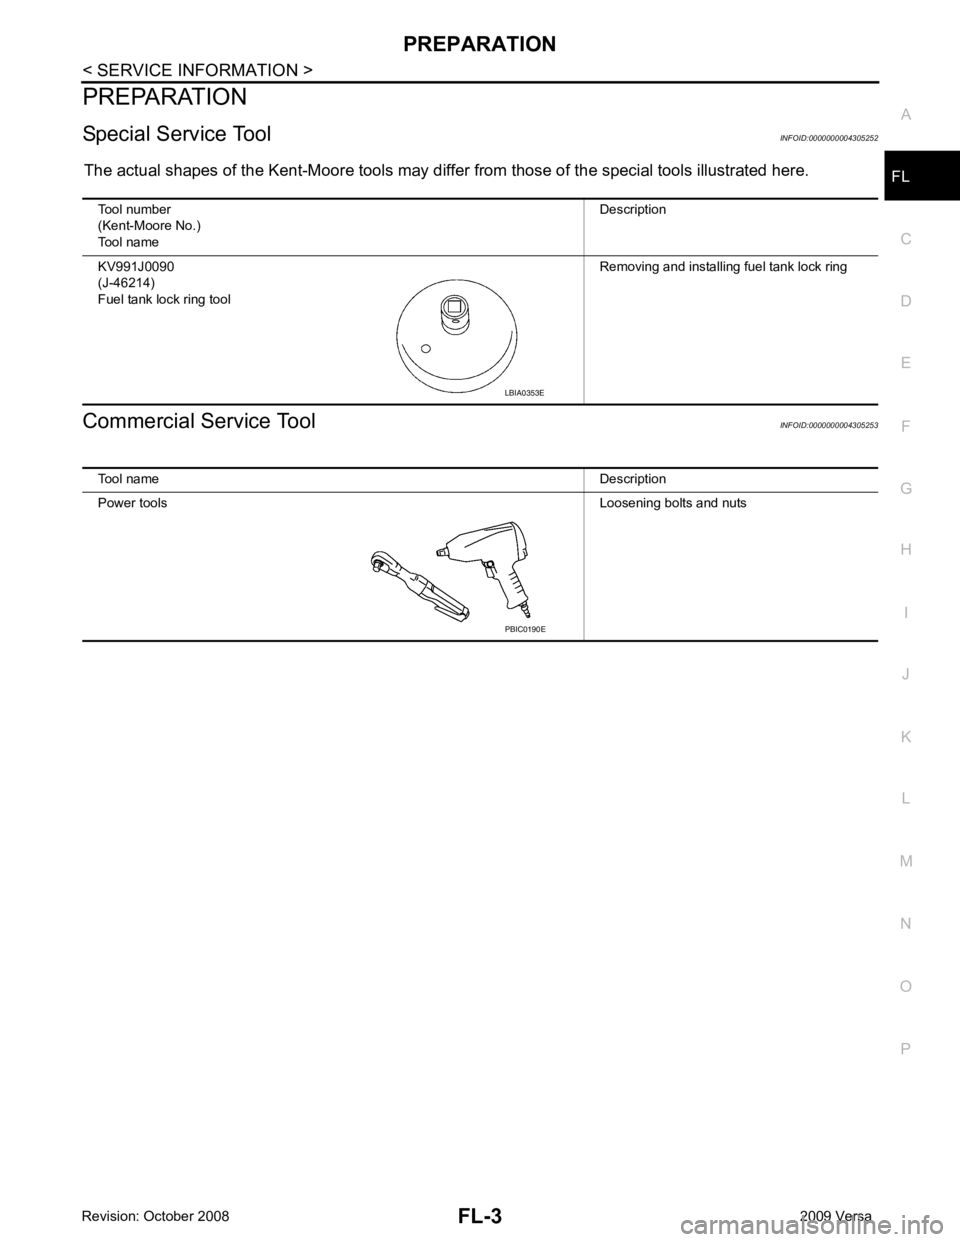
The actual shapes of the Kent-Moore tools may differ from those of the special tools illustrated here.
Commercial Service Tool INFOID:0000000004305253
Tool number
(Kent-Moore No.)
Tool name Description
KV991J0090
(J-46214)
Fuel tank lock ring tool Removing and installing fuel tank lock ring LBIA0353E
Tool name Description
Power tools Loosening bolts and nuts PBIC0190E
Page 3224 of 4331
Precaution for Fuel
(Unleaded Regular Gasoline Recommended) " .
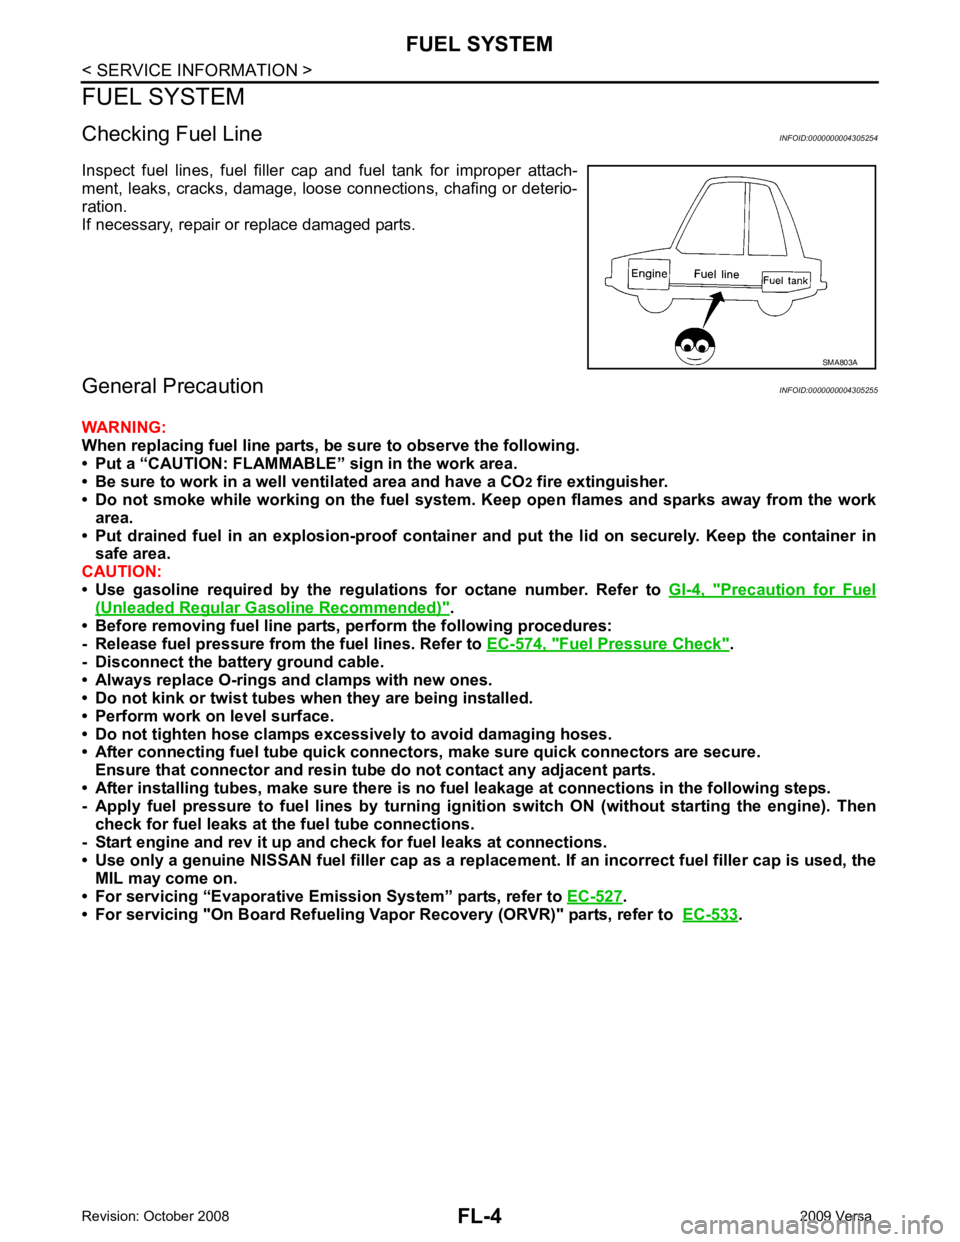
• Before removing fuel line parts, perform the following procedures:
- Release fuel pressure from the fuel lines. Refer to EC-574, " Fuel Pressure Check " .
- Disconnect the battery ground cable.
• Always replace O-rings and clamps with new ones.
• Do not kink or twist tubes when they are being installed.
• Perform work on level surface.
• Do not tighten hose clamps excessi vely to avoid damaging hoses.
• After connecting fuel tube quick connect ors, make sure quick connectors are secure.
Ensure that connector and resin tube do not contact any adjacent parts.
• After installing tubes, make sure there is no fuel leakage at connections in the following steps.
- Apply fuel pressure to fuel lines by turning ignition switch ON (without starting the engine). Then
check for fuel leaks at the fuel tube connections.
- Start engine and rev it up and check for fuel leaks at connections.
• Use only a genuine NISSAN fuel filler cap as a replacemen t. If an incorrect fuel filler cap is used, the
MIL may come on.
• For servicing “Evaporative Emi ssion System” parts, refer to EC-527 .
• For servicing "On Board Refueling Vapo r Recovery (ORVR)" parts, refer to EC-533 .
Page 3225 of 4331
FL
NP
O
FUEL LEVEL SENSOR UNIT, FUEL FI
LTER AND FUEL PUMP ASSEMBLY
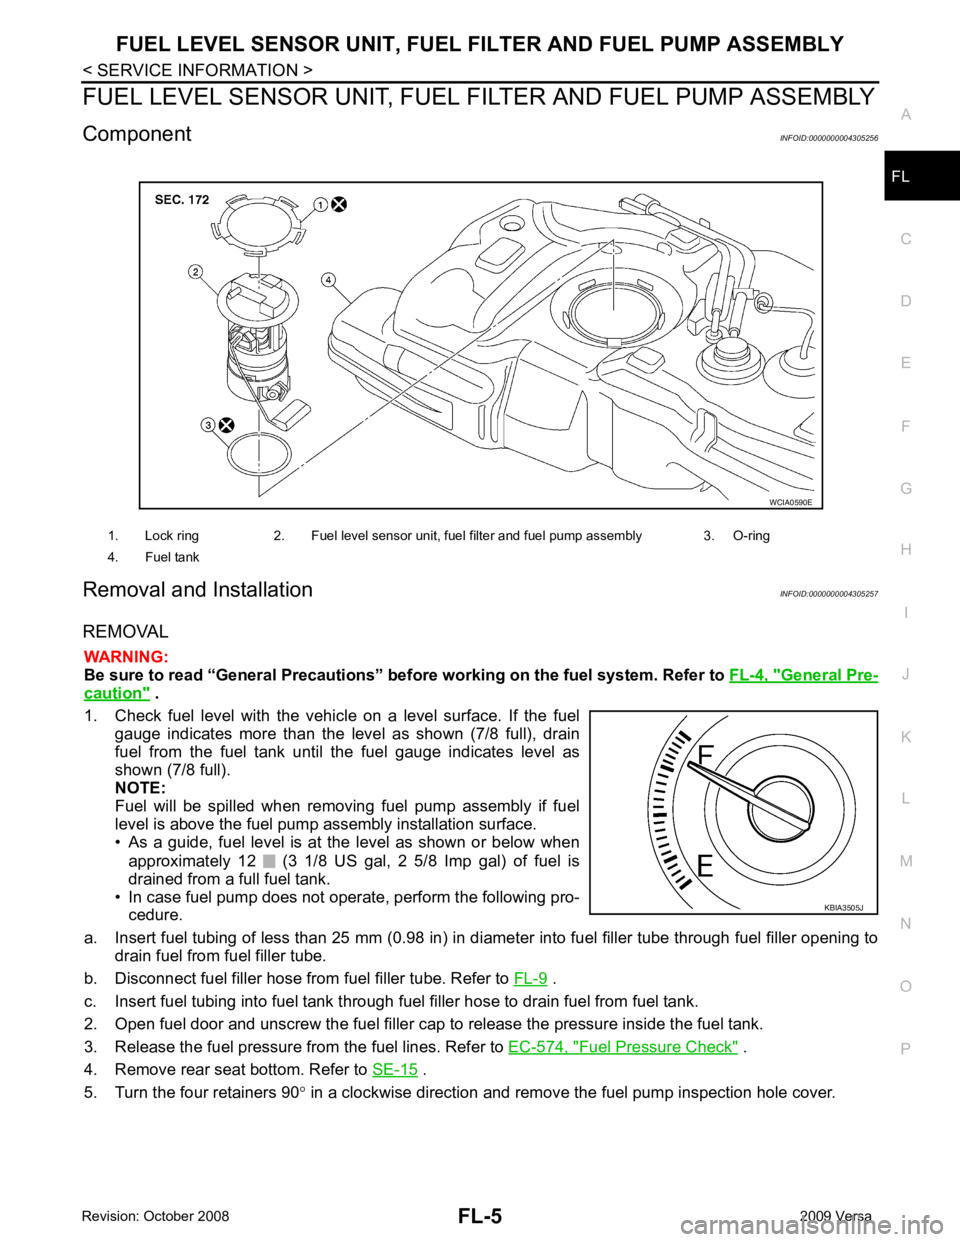
Component INFOID:0000000004305256
Removal and Installation INFOID:0000000004305257
REMOVAL WARNING:
Be sure to read “General Precautions” be fore working on the fuel system. Refer to FL-4, " General Pre-
caution " .
1. Check fuel level with the vehicle on a level surface. If the fuel gauge indicates more than the level as shown (7/8 full), drain
fuel from the fuel tank until the fuel gauge indicates level as
shown (7/8 full).
NOTE:
Fuel will be spilled when removing fuel pump assembly if fuel
level is above the fuel pump assembly installation surface.
• As a guide, fuel level is at the level as shown or below when
approximately 12 (3 1/8 US gal, 2 5/8 Imp gal) of fuel is
drained from a full fuel tank.
• In case fuel pump does not operate, perform the following pro- cedure.
a. Insert fuel tubing of less than 25 mm (0.98 in) in di ameter into fuel filler tube through fuel filler opening to
drain fuel from fuel filler tube.
b. Disconnect fuel filler hose from fuel filler tube. Refer to FL-9 .
c. Insert fuel tubing into fuel tank through fuel filler hose to drain fuel from fuel tank.
2. Open fuel door and unscrew the fuel filler cap to release the pressure inside the fuel tank.
3. Release the fuel pressure from the fuel lines. Refer to EC-574, " Fuel Pressure Check " .
4. Remove rear seat bottom. Refer to SE-15 .
5. Turn the four retainers 90 ° in a clockwise direction and remove the fuel pump inspection hole cover.
1. Lock ring 2. Fuel level sensor unit, fuel filter and fuel pump assembly 3. O-ring
4. Fuel tank
Page 3226 of 4331
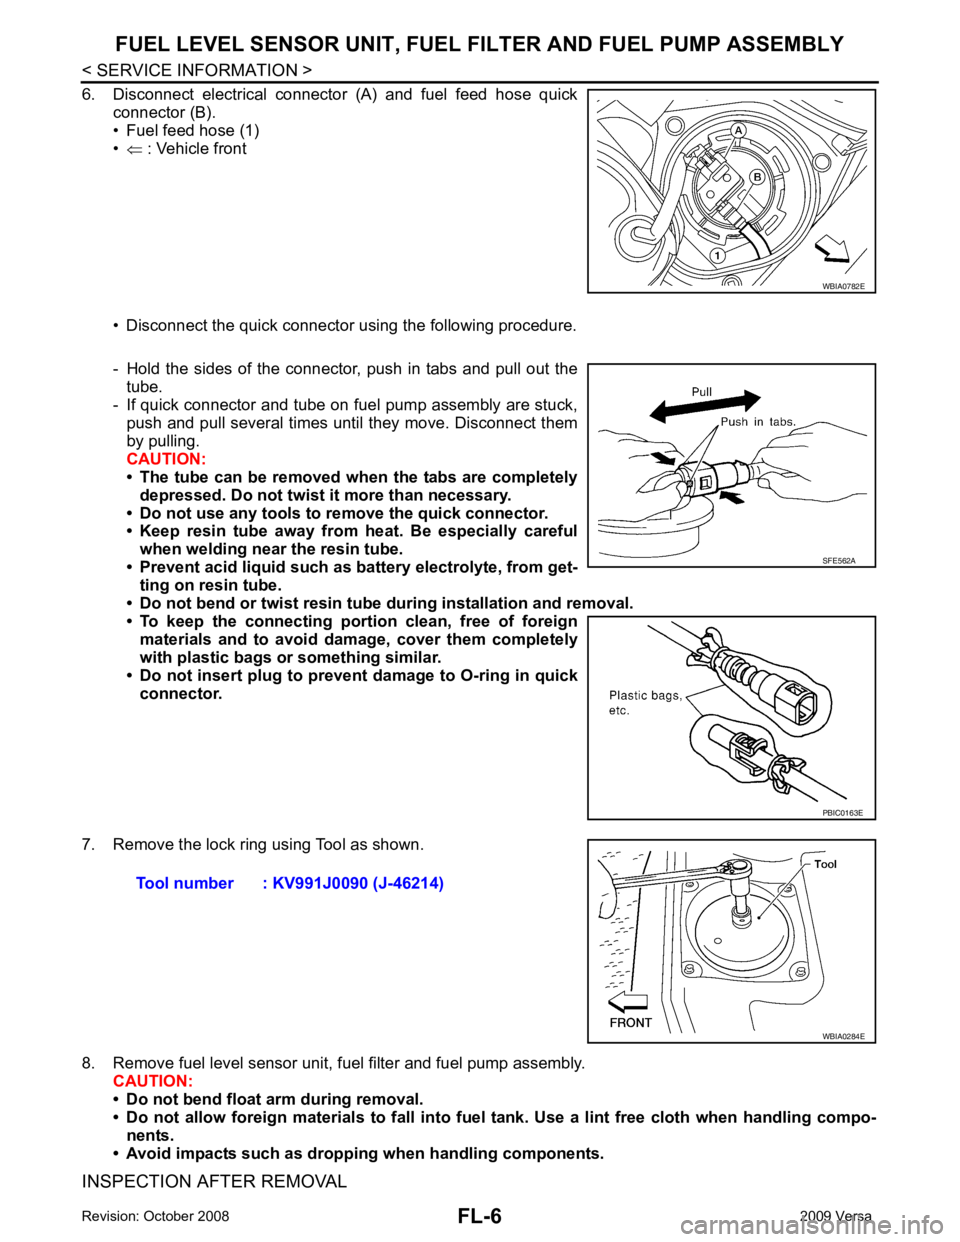
SFE562A
Page 3227 of 4331
FL
NP
O
Make sure that the fuel level sensor
unit, fuel filter and fuel pump is free from defects and foreign materials.
INSTALLATION Installation is in the reverse order of removal.
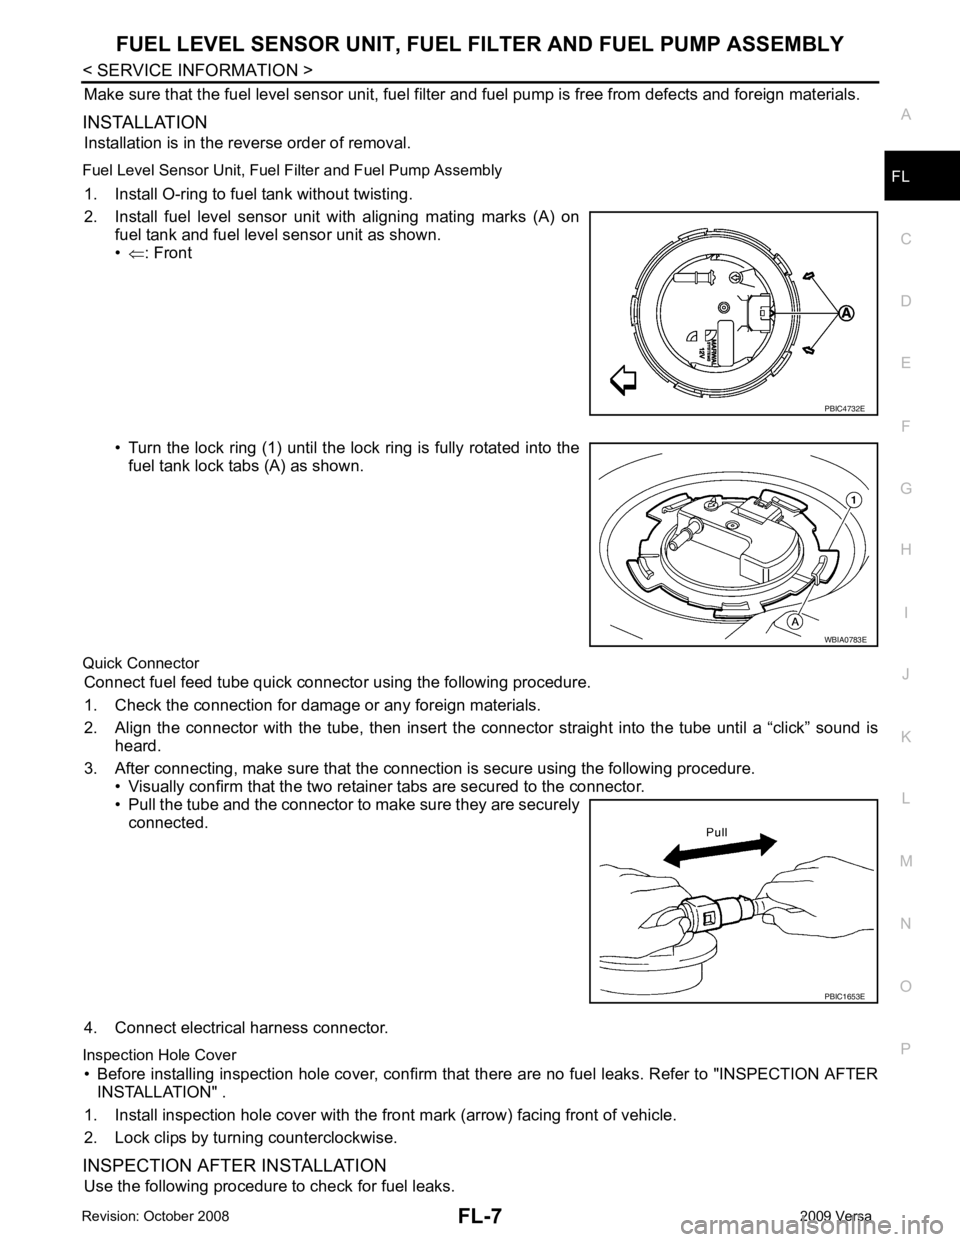
Fuel Level Sensor Unit, Fuel Filter and Fuel Pump Assembly 1. Install O-ring to fuel tank without twisting.
2. Install fuel level sensor unit with aligning mating marks (A) on fuel tank and fuel level sensor unit as shown.
• ⇐ : Front
• Turn the lock ring (1) until the lock ring is fully rotated into the fuel tank lock tabs (A) as shown.
Quick Connector Connect fuel feed tube qui ck connector using the following procedure.
1. Check the connection for damage or any foreign materials.
2. Align the connector with the tube, then insert the c onnector straight into the tube until a “click” sound is
heard.
3. After connecting, make sure that the connection is secure using the following procedure. • Visually confirm that the two retainer tabs are secured to the connector.
• Pull the tube and the connector to make sure they are securely connected.
4. Connect electrical harness connector.
Inspection Hole Cover • Before installing inspection hole cover, confirm that there are no fuel leaks. Refer to "INSPECTION AFTER
INSTALLATION" .
1. Install inspection hole cover with the front mark (arrow) facing front of vehicle.
2. Lock clips by turning counterclockwise.
INSPECTION AFTER INSTALLATION Use the following procedure to check for fuel leaks. WBIA0783E
PBIC1653E
Page 3228 of 4331

Page 3229 of 4331
FL
NP
O
FUEL TANK
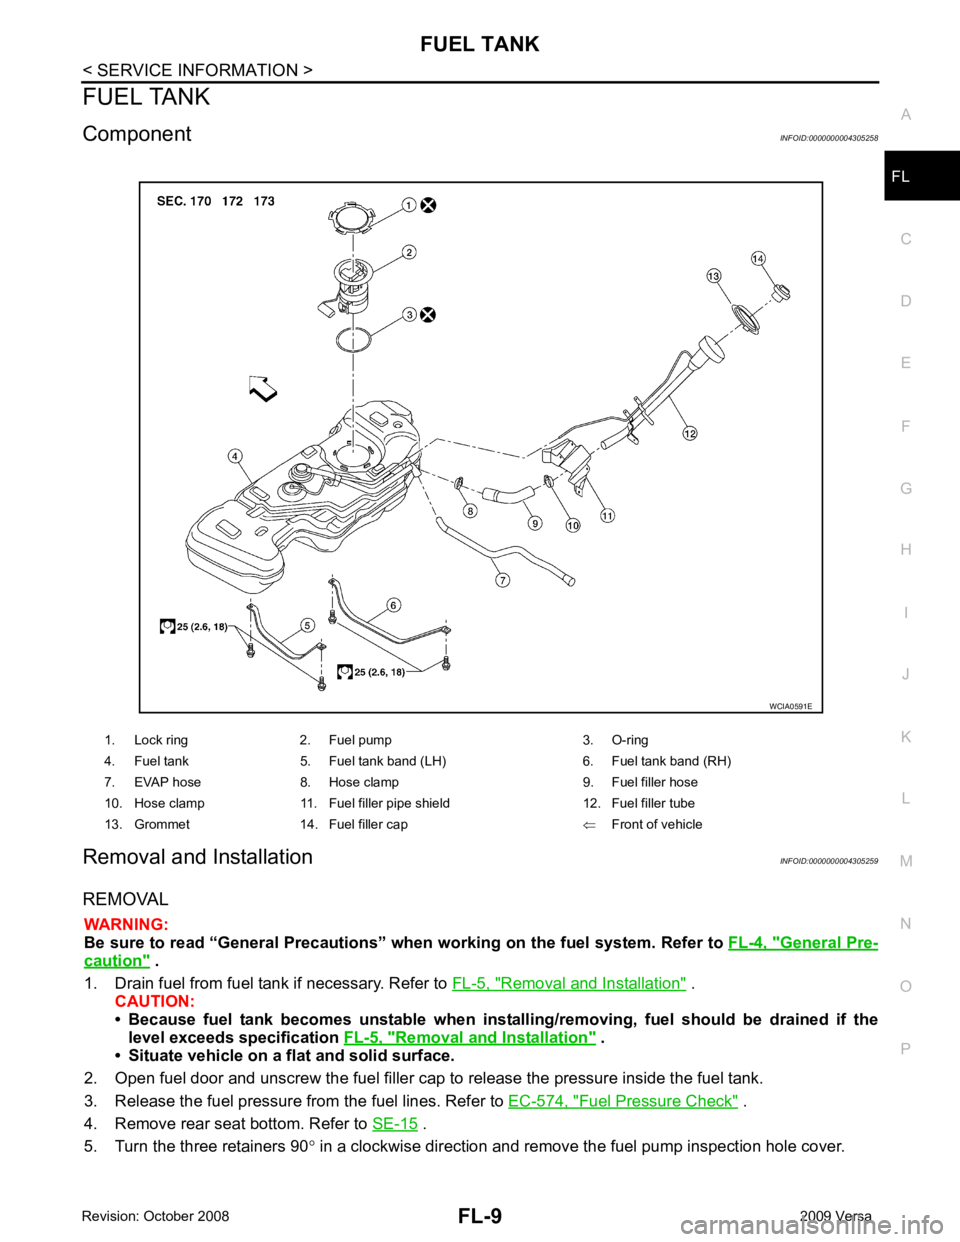
Component INFOID:0000000004305258
Removal and Installation INFOID:0000000004305259
REMOVAL WARNING:
Be sure to read “General Precautions” wh en working on the fuel system. Refer to FL-4, " General Pre-
caution " .
1. Drain fuel from fuel tank if necessary. Refer to FL-5, " Removal and Installation " .
CAUTION:
• Because fuel tank becomes unstable when instal ling/removing, fuel should be drained if the
level exceeds specification FL-5, " Removal and Installation " .
• Situate vehicle on a flat and solid surface.
2. Open fuel door and unscrew the fuel filler cap to release the pressure inside the fuel tank.
3. Release the fuel pressure from the fuel lines. Refer to EC-574, " Fuel Pressure Check " .
4. Remove rear seat bottom. Refer to SE-15 .
5. Turn the three retainers 90 ° in a clockwise direction and remove the fuel pump inspection hole cover.
1. Lock ring 2. Fuel pump 3. O-ring
4. Fuel tank 5. Fuel tank band (LH) 6. Fuel tank band (RH)
7. EVAP hose 8. Hose clamp 9. Fuel filler hose
10. Hose clamp 11. Fuel filler pipe shield 12. Fuel filler tube
13. Grommet 14. Fuel filler cap ⇐Front of vehicle
Page 3230 of 4331
FL-10< SERVICE INFORMATION >
FUEL TANK
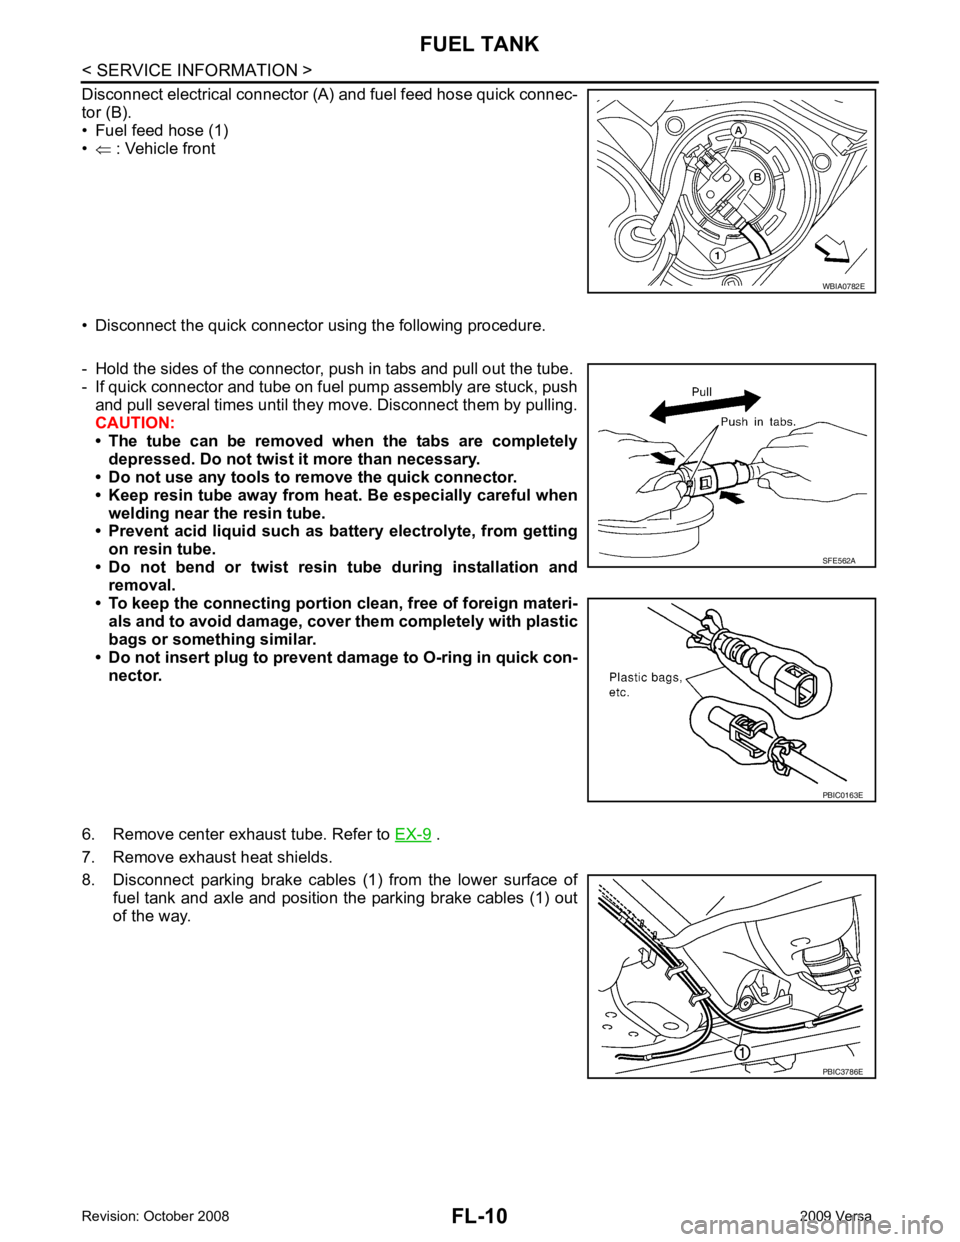
Disconnect electrical connector (A) and fuel feed hose quick connec-
tor (B).
• Fuel feed hose (1)
• ⇐ : Vehicle front
• Disconnect the quick connector using the following procedure.
- Hold the sides of the connector, push in tabs and pull out the tube.
- If quick connector and tube on fuel pump assembly are stuck, push
and pull several times until they move. Disconnect them by pulling.
CAUTION:
• The tube can be removed when the tabs are completely depressed. Do not twist it more than necessary.
• Do not use any tools to remove the quick connector.
• Keep resin tube away from h eat. Be especially careful when
welding near the resin tube.
• Prevent acid liquid such as ba ttery electrolyte, from getting
on resin tube.
• Do not bend or twist resin tube during installation and removal.
• To keep the connecting portion clean, free of foreign materi-
als and to avoid damage, cover them completely with plastic
bags or something similar.
• Do not insert plug to prevent damage to O-ring in quick con-
nector.
6. Remove center exhaust tube. Refer to EX-9 .
7. Remove exhaust heat shields.
8. Disconnect parking brake cables (1) from the lower surface of
fuel tank and axle and position the parking brake cables (1) out
of the way. WBIA0782E
SFE562A
PBIC0163E
PBIC3786E