change time NISSAN LEAF 2020 Owner´s Manual
[x] Cancel search | Manufacturer: NISSAN, Model Year: 2020, Model line: LEAF, Model: NISSAN LEAF 2020Pages: 596, PDF Size: 4.33 MB
Page 5 of 596
MODIFICATION OF YOUR VEHICLE
This vehicle should not be modified.
Modification could affect its perfor-
mance, safety or durability, and may
even violate governmental regulations.
In addition, damage or performance
problems resulting from modification
may not be covered under NISSAN
warranties.
WARNING
Installing an af termarket On-Board Di-
agnostic (OBD) plug-in device that uses
the port during normal driving, for ex-
ample remote insurance company
monitoring, remote vehicle diagnos-
tics, telematics or engine reprogram-
ming, may cause interference or dam-
age to vehicle systems. We do not
recommend or endorse the use of any
af termarket OBD plug-in devices, un-
less specifically approved by NISSAN.
The vehicle warranty may not cover
damage caused by any af termarket
plug-in device. This manual includes information for all
features and equipment available on this
model. Features and equipment in your ve-
hicle may vary depending on model, trim
level, options selected, order, date of pro-
duction, region or availability. Therefore,
you may find information about features or
equipment that are not included or in-
stalled on your vehicle.
All information, specifications and illustra-
tions in this manual are those in effect at
the time of printing. NISSAN reserves the
right to change specifications, perfor-
mance, design or component suppliers
without notice and without obligation.
From time to time, NISSAN may update or
revise this manual to provide Owners with
the most accurate information currently
available. Please carefully read and retain
with this manual all revision updates sent
to you by NISSAN to ensure you have ac-
cess to accurate and up-to-date informa-
tion regarding your vehicle. Current ver-
sions of vehicle Owner's Manuals and any
updates can also be found in the Owner
section of the NISSAN website at
https://
owners.nissanusa.com/nowners/
navigation/manualsGuide . If you have
questions concerning any information in
your Owner's Manual, contact NISSAN Con-
sumer Affairs. For contact information, re- fer to the NISSAN CUSTOMER CARE PRO-
GRAM page in this Owner’s Manual.
IMPORTANT INFORMATION ABOUT
THIS MANUAL
You will see various symbols in this manual.
They are used in the following ways:
WARNING
This is used to indicate the presence of
a hazard that could cause death or se-
rious personal injury. To avoid or re-
duce the risk, the procedures must be
followed precisely.
CAUTION
This is used to indicate the presence of
a hazard that could cause minor or
moderate personal injury or damage to
your vehicle. To avoid or reduce the risk,
the procedures must be followed care-
fully.
WHEN READING THE MANUAL
Page 27 of 596
NOTE:
•Connect the charger to the vehicle and
place the power switch in the OFF posi-
tion when parking the vehicle if tem-
peratures may go below -1°F (-17°C). This
provides external power to the Li-ion
battery warmer when it operates and
does not discharge the Li-ion battery.
• The charging status indicator lights il- luminate in a specific pattern when the
Li-ion battery warmer operates. The
charging status indicator lights use the
same pattern to indicate 12-volt bat-
tery charging, Climate Ctrl. Timer op-
eration or Remote Climate Control op-
eration (models with Navigation
System). The charging status indicator
lights do not change if the Li-ion bat-
tery warmer operates at the same time
as the above features. For additional
information, refer to “Charging status
indicator lights” in the “Charging” sec-
tion of this manual.
• The Li-ion battery warmer uses Li-ion battery power to operate, even if the
vehicle is connected to a charger when:– The vehicle's power switch is in the ON position.
– There is no electrical power being supplied to the charging equipment. • When the Li-ion battery warmer is al-
ready in operation using an external
power source, it will continue to use the
external power even if the power
switch is placed in the ON position.
• Vehicle driving range is reduced if the Li-ion battery warmer operates (Li-ion
battery temperature approximately
-1°F (-17°C) or colder) while driving the
vehicle. You may need to charge the
Li-ion battery sooner than in warmer
temperatures.
• The Li-ion battery requires more time to charge when the Li-ion battery
warmer operates.
• The predicted charging time displayed on the meter and navigation system (if
so equipped) increases when the Li-ion
battery warmer operates.
• Climate control performance is re- duced when using the Climate Ctrl.
Timer or Remote Climate Control
(models with Navigation System) while
the Li-ion battery warmer operates.
• The Li-ion battery may not charge to the expected level using the charging
timer while the Li-ion battery warmer
operates. For models with 62 kWh battery
CAUTION
The Li-ion battery warmer does not op-
erate if the normal charger is not con-
nected to the vehicle. To help prevent
the Li-ion battery from freezing, do not
leave the vehicle in an environment if
temperatures may go below -4°F
(-20°C) unless the vehicle is connected
to a charger.
The Li-ion battery warmer helps to prevent
the Li-ion battery from freezing when the
temperature is cold. The Li-ion battery
warmer automatically turns on when the
Li-ion battery temperature is approxi-
mately -4°F (-20°C) or colder and outside
temperature is approximately -11°F (-24°C)
or colder. The Li-ion battery warmer auto-
matically turns off when the Li-ion battery
temperature is approximately 0°F (-18°C) or
higher, or outside temperature is approxi-
mately -8°F (-22°C) or higher.
The Li-ion battery warmer operates when
the normal charger is connected to the
vehicle, and it automatically uses electrical
power from either the external source or
from the Li-ion battery.
EV-6EV Overview
Page 28 of 596
NOTE:
• Connect the charger to the vehicle andplace the power switch in the OFF po-
sition when parking the vehicle if tem-
peratures may go below -4°F (-20°C).
The Li-ion battery warmer automati-
cally uses electrical power from either
the external source or from the Li-ion
battery, based on the amount of re-
maining Li-ion battery.
• The charging status indicator lights il- luminate in a specific pattern when the
Li-ion battery warmer operates. The
charging status indicator lights use the
same pattern to indicate 12–volt bat-
tery charging, Climate Ctrl. Timer op-
eration or Remote Climate Control op-
eration (models with Navigation
System). The charging status indicator
lights do not change if the Li-ion bat-
tery warmer operates at the same time
as the above features. For additional
information, refer to “Charging status
indicator lights” in the “Charging” sec-
tion of this manual. • The automatic climate control auto-
matically turns on when the Li-ion bat-
tery warmer uses electrical power
from the Li-ion battery. This is not a
malfunction. When the Li-ion battery
warmer operates, the temperature in-
side the vehicle may be warmed up.
• The Li-ion battery will be automatically charged when the Li-ion battery
warmer uses electrical power from an
extended source. When outside tem-
perature goes below -4°F (-20°C) for
many days, frequent Li-ion battery
warmer operation may occur, and
more electric power will be charged
from an external source. Do not con-
nect the normal charger to the vehicle
if you do not want to turn on the Li-ion
battery warmer. In this case, do not
leave the vehicle in an environment if
temperatures may go below -4°F
(-20°C).
• When the Li-ion battery warmer is al- ready in operation using an external
source, it will continue to use the exter-
nal power even if the power switch is
placed in the ON position. • The Li-ion battery warmer will stop if
the power switch is placed in the ON
position while the Li-ion battery
warmer is using electrical power from
the Li-ion battery. To turn on the Li-ion
battery warmer again, place the power
switch in the OFF position.
• The Li-ion battery warmer will stop if the charging connector is removed
from the normal charger while the Li-
ion battery warmer is operating. To
turn on the Li-ion battery warmer
again, connect the charging connector
to the vehicle. The Li-ion battery
warmer will operate again af ter about
1 hour.
• The Li-ion battery warmer will stop if the charging connector of the quick
charger is connected to the vehicle
while the Li-ion battery warmer is op-
erating. To turn on the Li-ion battery
warmer again, remove the charging
connector of the quick charger from
the vehicle.
• The Li-ion battery requires more time to charge to the expected level when
the Li-ion battery warmer operates.
EV OverviewEV-7
Page 29 of 596

• The predicted charging time displayedon the meter increases when the Li-ion
battery warmer uses electrical power
from the Li-ion battery.
• The Climate Ctrl. Timer or Remote Cli- mate Control (models with Navigation
System) does not turn on while the Li-
ion battery warmer operates. This is
not a malfunction.
• The charging timer or remote charge (models with Navigation System) does
not turn on while the Li-ion battery
warmer operates. This is not a mal-
function.
• The Li-ion battery may not be charged to the expected level using the charg-
ing timer while the Li-ion battery
warmer operates.
• If the Li-ion battery warmer automati- cally stops because of the Li-ion bat-
tery temperature or outside tempera-
ture change, charging will continue
until the Li-ion battery is fully charged.HIGH-VOLTAGE COMPONENTS
WARNING
• The EV system uses high voltage up
to approximately DC 400 volt. The
system can be hot during and af ter
starting and when the vehicle is shut
off. Be careful of both the high volt-
age and the high temperature. Fol-
low the warning labels that are at-
tached to the vehicle.
• Never disassemble, remove or re-
place high-voltage parts and cables
as well as their connectors because
they can cause severe burns or elec-
tric shock that may result in serious
injury or death. High-voltage cables
are colored orange. The vehicle high
voltage system has no user service-
able parts. It is recommended that
you take your vehicle to a NISSAN
certified LEAF dealer for any neces-
sary maintenance.
HIGH VOLTAGE PRECAUTIONS
EV-8EV Overview
Page 59 of 596

• Normal charge uses the charging device(AC 220 - 240 volt, 16A or 32A) that can be
installed in your home to charge the Li-
ion battery.
• Immediate charge, charging timer and remote charge (models with Navigation
System) can be performed in the normal
charge mode. For additional information,
refer to “Charging methods” in this sec-
tion.
• The charging equipment communicates with the vehicle before Li-ion battery
charging starts. If this communication
does not occur because other equip-
ment is used, the Li-ion battery will not
charge.
• NISSAN recommends that you connect the charging device when getting out of
the vehicle, even if it is not going to be
used. By doing this, you can get the most
out of the remote climate control (mod-
els with Navigation System) and Climate
Ctrl. Timer functions the next time you
use the vehicle.To start normal charge:
1. Push the P (Park) position switch to place the vehicle in the P (Park) position and
apply the parking brake.
2. When charging the Li-ion battery, place the power switch in the OFF position.
When the power switch is in the ON po-
sition, the Li-ion battery will not start
charging.
3. Open the charge port lid and charge port cap. For additional information, re-
fer to “Charge port lid” and “Charge port
cap” in the “Pre-driving checks and ad-
justments” section of this manual.
4. Connect the charge connector to thecharge port. If it is connected normally, a
beep will sound once.
5. If charging has started or if the battery is waiting for the charging timer, a beep
will sound twice and the charging status
indicator light display will change. For
additional information, refer to “Charg-
ing status indicator lights” in this section.
LCH2104
CH-10Charging
Page 64 of 596
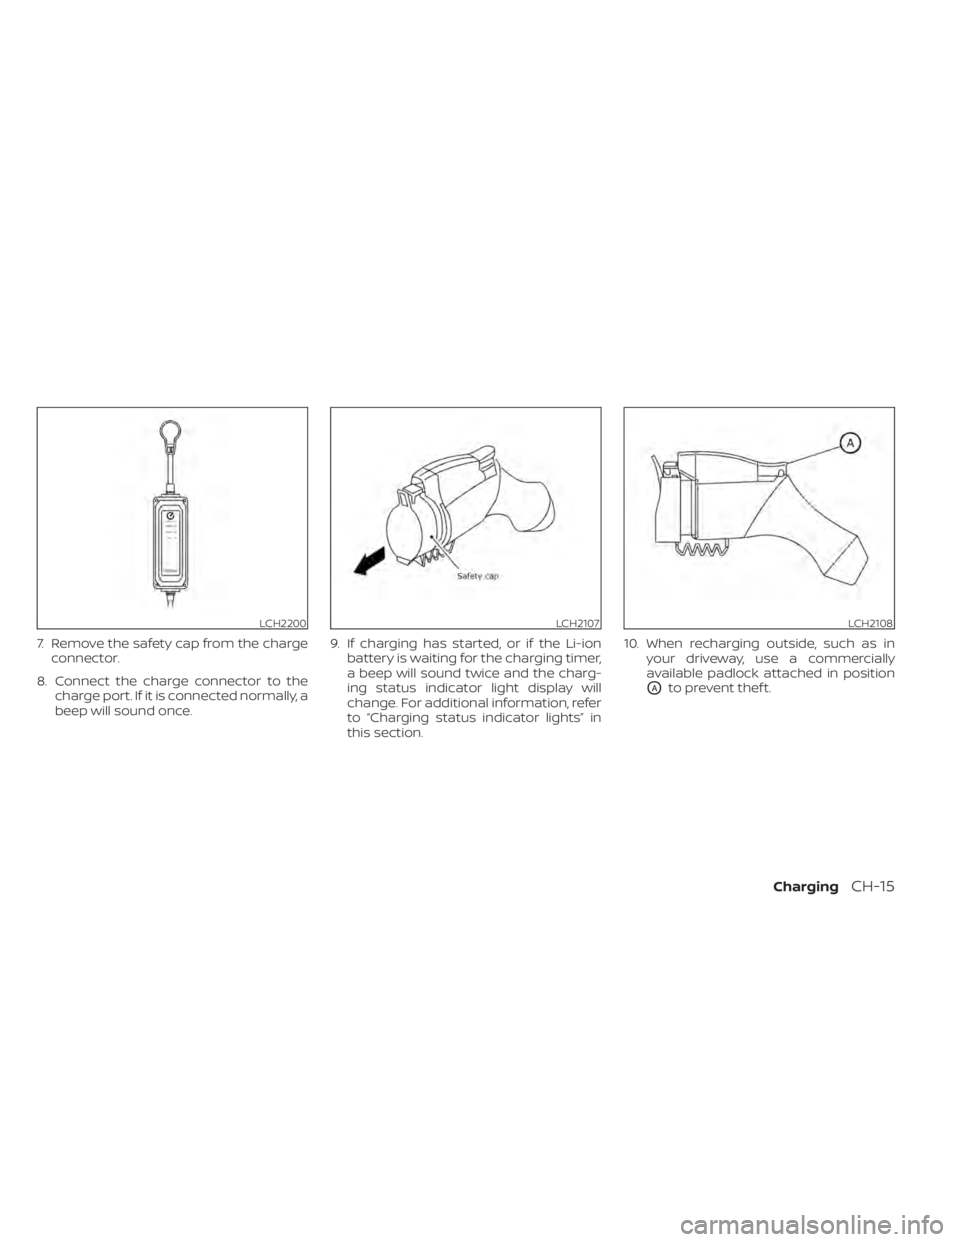
7. Remove the safety cap from the chargeconnector.
8. Connect the charge connector to the charge port. If it is connected normally, a
beep will sound once. 9. If charging has started, or if the Li-ion
battery is waiting for the charging timer,
a beep will sound twice and the charg-
ing status indicator light display will
change. For additional information, refer
to “Charging status indicator lights” in
this section. 10. When recharging outside, such as in
your driveway, use a commercially
available padlock attached in position
OAto prevent thef t.
LCH2200LCH2107LCH2108
ChargingCH-15
Page 72 of 596
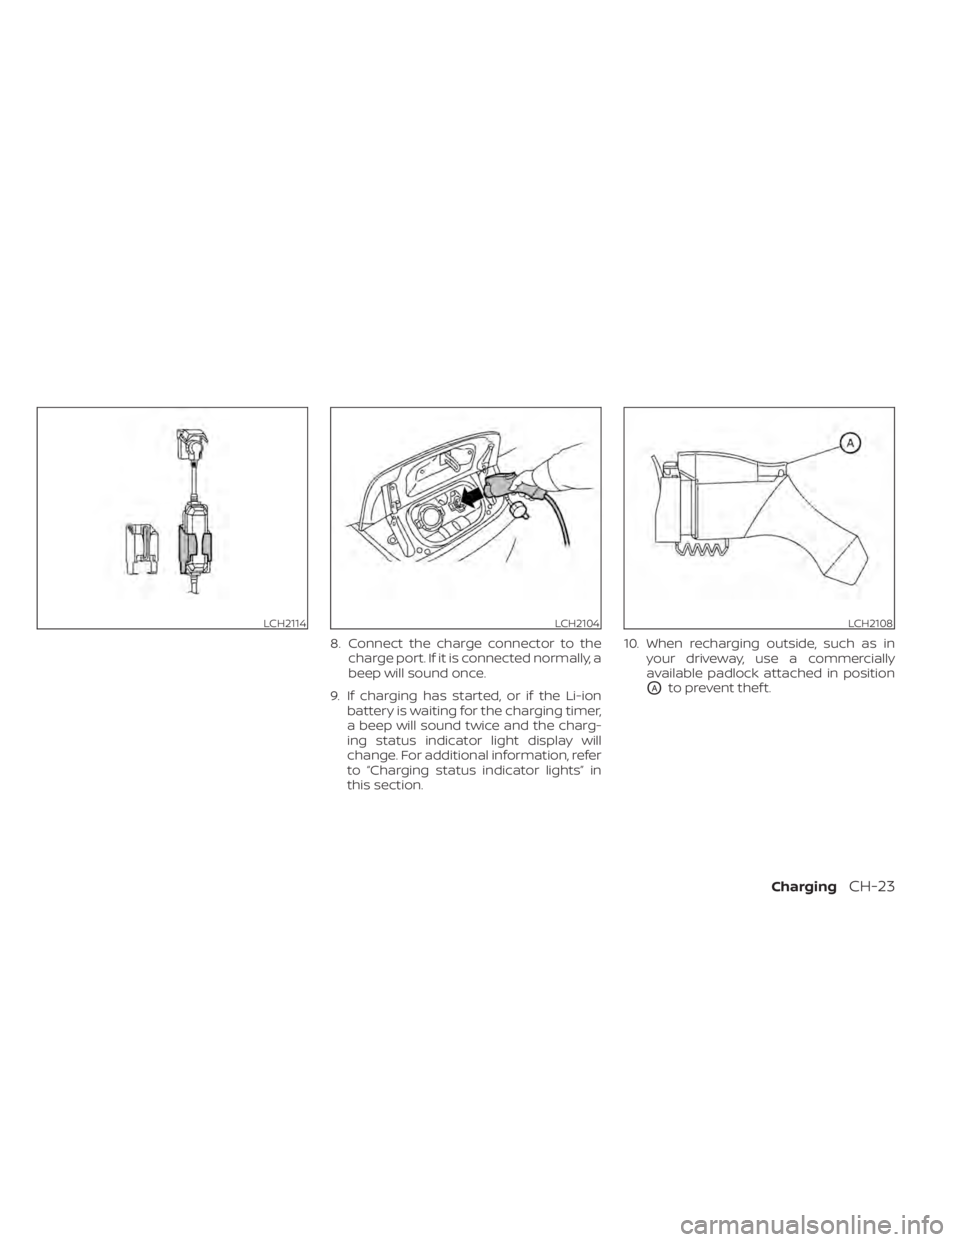
8. Connect the charge connector to thecharge port. If it is connected normally, a
beep will sound once.
9. If charging has started, or if the Li-ion battery is waiting for the charging timer,
a beep will sound twice and the charg-
ing status indicator light display will
change. For additional information, refer
to “Charging status indicator lights” in
this section. 10. When recharging outside, such as in
your driveway, use a commercially
available padlock attached in position
OAto prevent thef t.
LCH2114LCH2104LCH2108
ChargingCH-23
Page 81 of 596
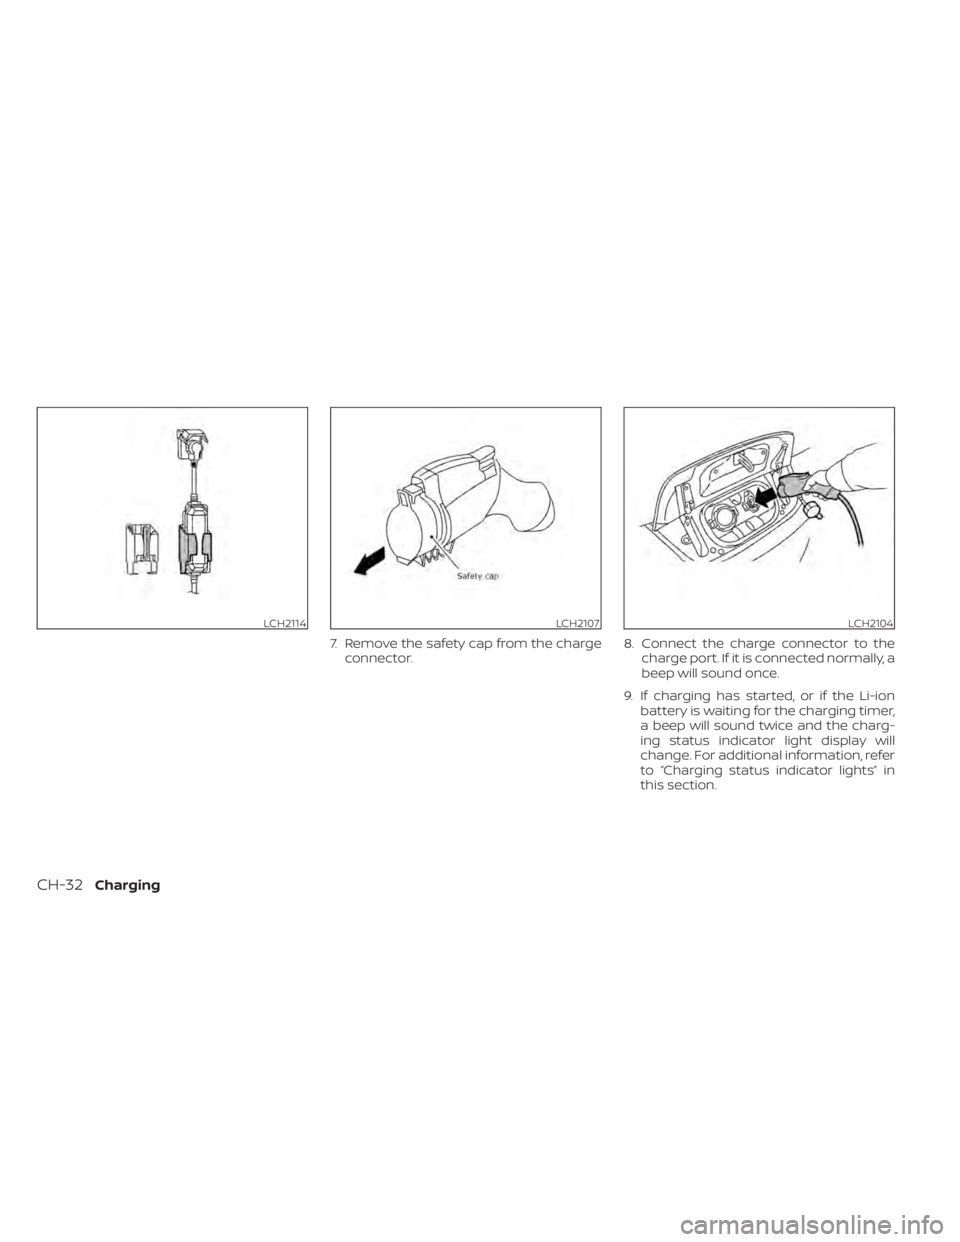
7. Remove the safety cap from the chargeconnector. 8. Connect the charge connector to the
charge port. If it is connected normally, a
beep will sound once.
9. If charging has started, or if the Li-ion battery is waiting for the charging timer,
a beep will sound twice and the charg-
ing status indicator light display will
change. For additional information, refer
to “Charging status indicator lights” in
this section.
LCH2114LCH2107LCH2104
CH-32Charging
Page 86 of 596
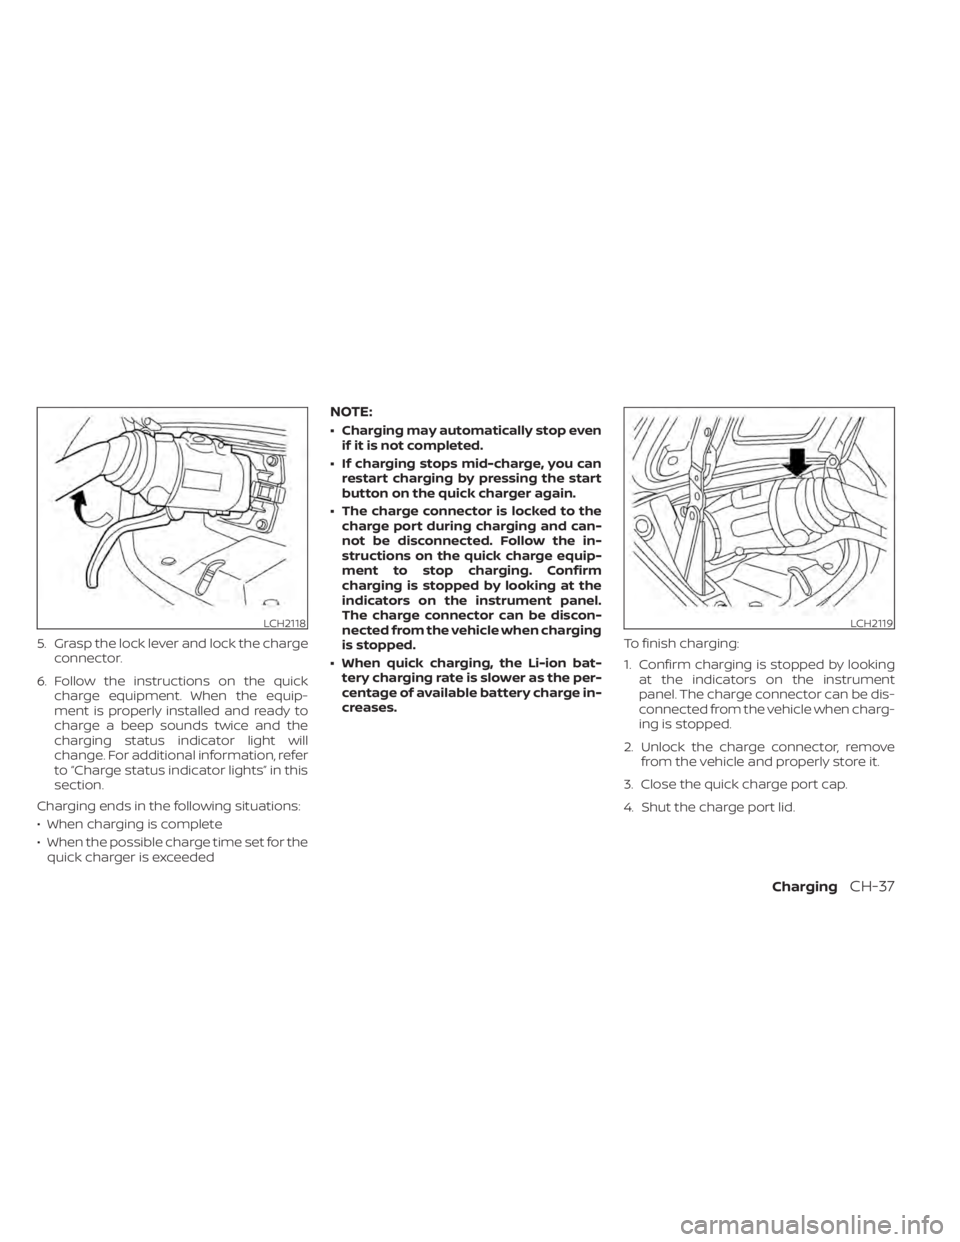
5. Grasp the lock lever and lock the chargeconnector.
6. Follow the instructions on the quick charge equipment. When the equip-
ment is properly installed and ready to
charge a beep sounds twice and the
charging status indicator light will
change. For additional information, refer
to “Charge status indicator lights” in this
section.
Charging ends in the following situations:
• When charging is complete
• When the possible charge time set for the quick charger is exceeded
NOTE:
• Charging may automatically stop even if it is not completed.
• If charging stops mid-charge, you can restart charging by pressing the start
button on the quick charger again.
• The charge connector is locked to the charge port during charging and can-
not be disconnected. Follow the in-
structions on the quick charge equip-
ment to stop charging. Confirm
charging is stopped by looking at the
indicators on the instrument panel.
The charge connector can be discon-
nected from the vehicle when charging
is stopped.
• When quick charging, the Li-ion bat- tery charging rate is slower as the per-
centage of available battery charge in-
creases. To finish charging:
1. Confirm charging is stopped by looking
at the indicators on the instrument
panel. The charge connector can be dis-
connected from the vehicle when charg-
ing is stopped.
2. Unlock the charge connector, remove from the vehicle and properly store it.
3. Close the quick charge port cap.
4. Shut the charge port lid.
LCH2118LCH2119
ChargingCH-37
Page 89 of 596
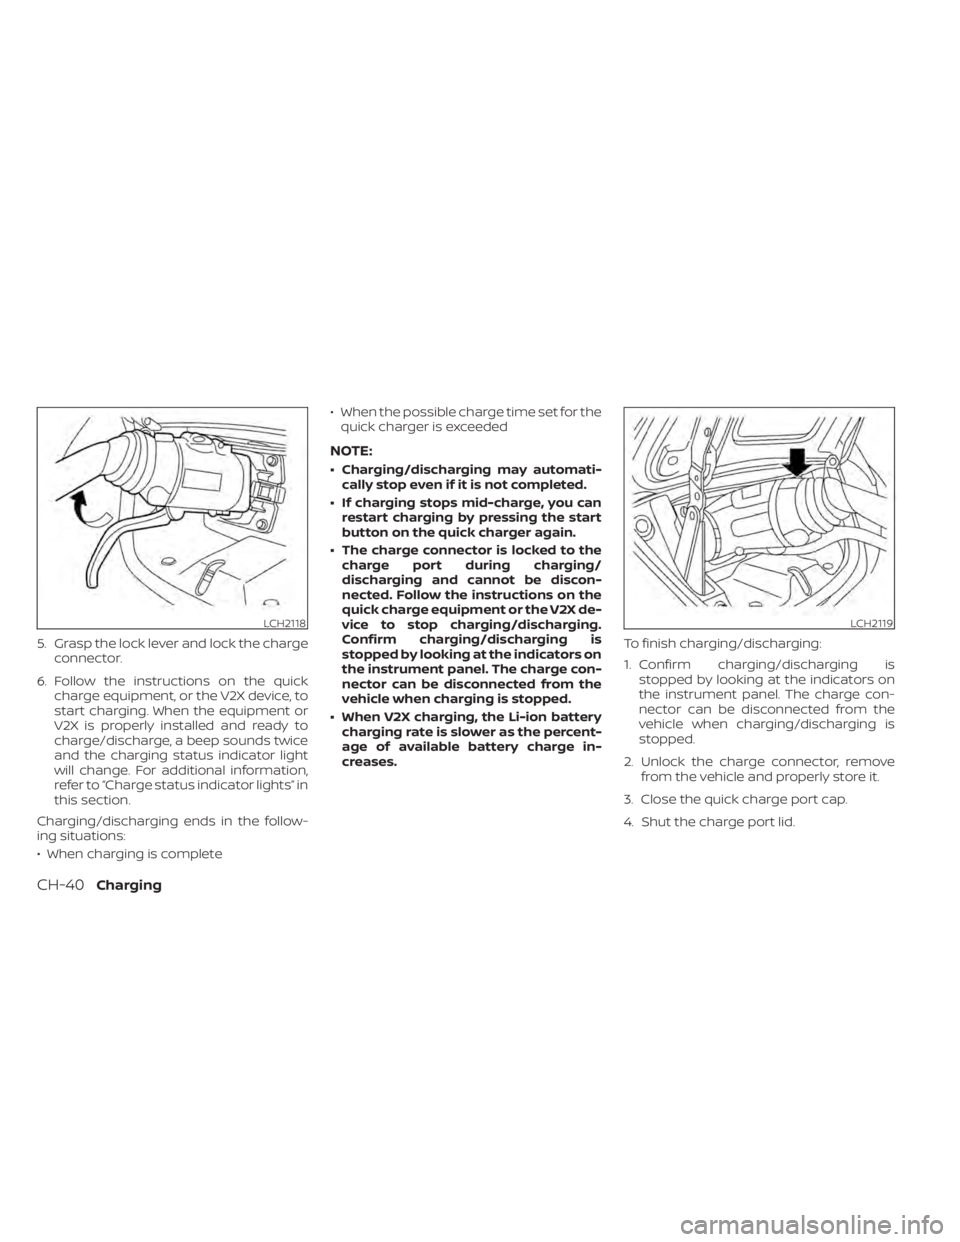
5. Grasp the lock lever and lock the chargeconnector.
6. Follow the instructions on the quick charge equipment, or the V2X device, to
start charging. When the equipment or
V2X is properly installed and ready to
charge/discharge, a beep sounds twice
and the charging status indicator light
will change. For additional information,
refer to “Charge status indicator lights” in
this section.
Charging/discharging ends in the follow-
ing situations:
• When charging is complete • When the possible charge time set for the
quick charger is exceeded
NOTE:
• Charging/discharging may automati- cally stop even if it is not completed.
• If charging stops mid-charge, you can restart charging by pressing the start
button on the quick charger again.
• The charge connector is locked to the charge port during charging/
discharging and cannot be discon-
nected. Follow the instructions on the
quick charge equipment or the V2X de-
vice to stop charging/discharging.
Confirm charging/discharging is
stopped by looking at the indicators on
the instrument panel. The charge con-
nector can be disconnected from the
vehicle when charging is stopped.
• When V2X charging, the Li-ion battery charging rate is slower as the percent-
age of available battery charge in-
creases. To finish charging/discharging:
1. Confirm charging/discharging is
stopped by looking at the indicators on
the instrument panel. The charge con-
nector can be disconnected from the
vehicle when charging/discharging is
stopped.
2. Unlock the charge connector, remove from the vehicle and properly store it.
3. Close the quick charge port cap.
4. Shut the charge port lid.
LCH2118LCH2119
CH-40Charging