warning NISSAN MAXIMA 2003 A33 / 5.G Owners Manual
[x] Cancel search | Manufacturer: NISSAN, Model Year: 2003, Model line: MAXIMA, Model: NISSAN MAXIMA 2003 A33 / 5.GPages: 247, PDF Size: 2.74 MB
Page 187 of 247
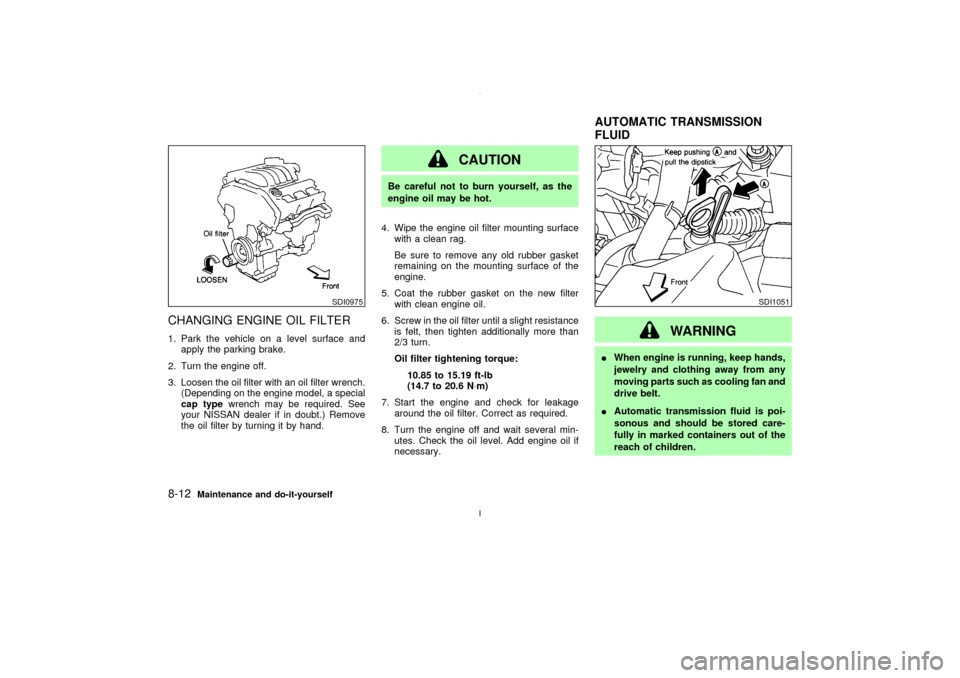
CHANGING ENGINE OIL FILTER1. Park the vehicle on a level surface and
apply the parking brake.
2. Turn the engine off.
3. Loosen the oil filter with an oil filter wrench.
(Depending on the engine model, a special
cap typewrench may be required. See
your NISSAN dealer if in doubt.) Remove
the oil filter by turning it by hand.
CAUTION
Be careful not to burn yourself, as the
engine oil may be hot.
4. Wipe the engine oil filter mounting surface
with a clean rag.
Be sure to remove any old rubber gasket
remaining on the mounting surface of the
engine.
5. Coat the rubber gasket on the new filter
with clean engine oil.
6. Screw in the oil filter until a slight resistance
is felt, then tighten additionally more than
2/3 turn.
Oil filter tightening torque:
10.85 to 15.19 ft-lb
(14.7 to 20.6 N×m)
7. Start the engine and check for leakage
around the oil filter. Correct as required.
8. Turn the engine off and wait several min-
utes. Check the oil level. Add engine oil if
necessary.
WARNING
IWhen engine is running, keep hands,
jewelry and clothing away from any
moving parts such as cooling fan and
drive belt.
IAutomatic transmission fluid is poi-
sonous and should be stored care-
fully in marked containers out of the
reach of children.
SDI0975
SDI1051
AUTOMATIC TRANSMISSION
FLUID
8-12
Maintenance and do-it-yourself
Z
02.7.12/A33-D/V5.0
X
Page 189 of 247
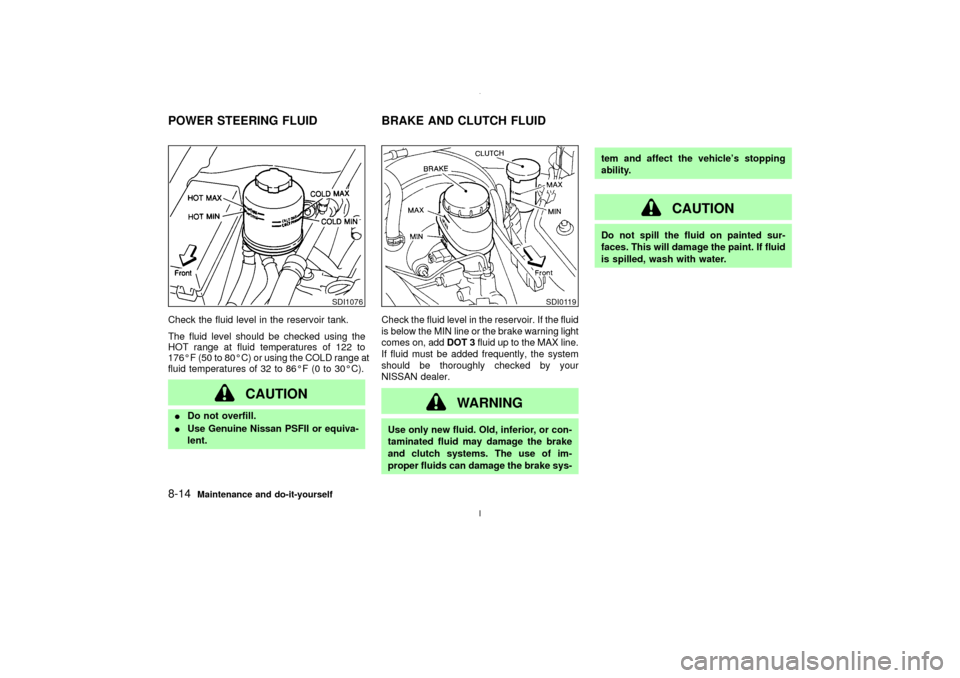
Check the fluid level in the reservoir tank.
The fluid level should be checked using the
HOT range at fluid temperatures of 122 to
176ÉF (50 to 80ÉC) or using the COLD range at
fluid temperatures of 32 to 86ÉF (0 to 30ÉC).
CAUTION
IDo not overfill.
IUse Genuine Nissan PSFII or equiva-
lent.Check the fluid level in the reservoir. If the fluid
is below the MIN line or the brake warning light
comes on, addDOT 3fluid up to the MAX line.
If fluid must be added frequently, the system
should be thoroughly checked by your
NISSAN dealer.
WARNING
Use only new fluid. Old, inferior, or con-
taminated fluid may damage the brake
and clutch systems. The use of im-
proper fluids can damage the brake sys-tem and affect the vehicle's stopping
ability.
CAUTION
Do not spill the fluid on painted sur-
faces. This will damage the paint. If fluid
is spilled, wash with water.
SDI1076
SDI0119
POWER STEERING FLUID BRAKE AND CLUTCH FLUID8-14
Maintenance and do-it-yourself
Z
02.7.12/A33-D/V5.0
X
Page 190 of 247
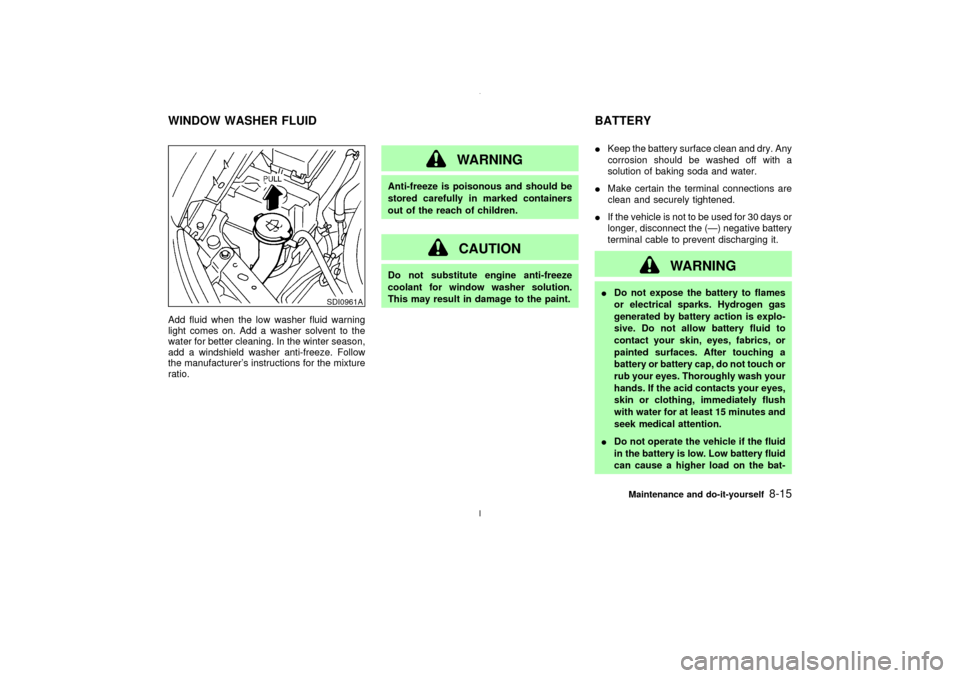
Add fluid when the low washer fluid warning
light comes on. Add a washer solvent to the
water for better cleaning. In the winter season,
add a windshield washer anti-freeze. Follow
the manufacturer's instructions for the mixture
ratio.
WARNING
Anti-freeze is poisonous and should be
stored carefully in marked containers
out of the reach of children.
CAUTION
Do not substitute engine anti-freeze
coolant for window washer solution.
This may result in damage to the paint.IKeep the battery surface clean and dry. Any
corrosion should be washed off with a
solution of baking soda and water.
IMake certain the terminal connections are
clean and securely tightened.
IIf the vehicle is not to be used for 30 days or
longer, disconnect the (Ð) negative battery
terminal cable to prevent discharging it.
WARNING
IDo not expose the battery to flames
or electrical sparks. Hydrogen gas
generated by battery action is explo-
sive. Do not allow battery fluid to
contact your skin, eyes, fabrics, or
painted surfaces. After touching a
battery or battery cap, do not touch or
rub your eyes. Thoroughly wash your
hands. If the acid contacts your eyes,
skin or clothing, immediately flush
with water for at least 15 minutes and
seek medical attention.
IDo not operate the vehicle if the fluid
in the battery is low. Low battery fluid
can cause a higher load on the bat-
SDI0961A
WINDOW WASHER FLUID BATTERY
Maintenance and do-it-yourself
8-15
Z
02.7.12/A33-D/V5.0
X
Page 192 of 247
WARNING
Be sure the ignition key is in the OFF or
LOCK position. The engine could rotate
unexpectedly.
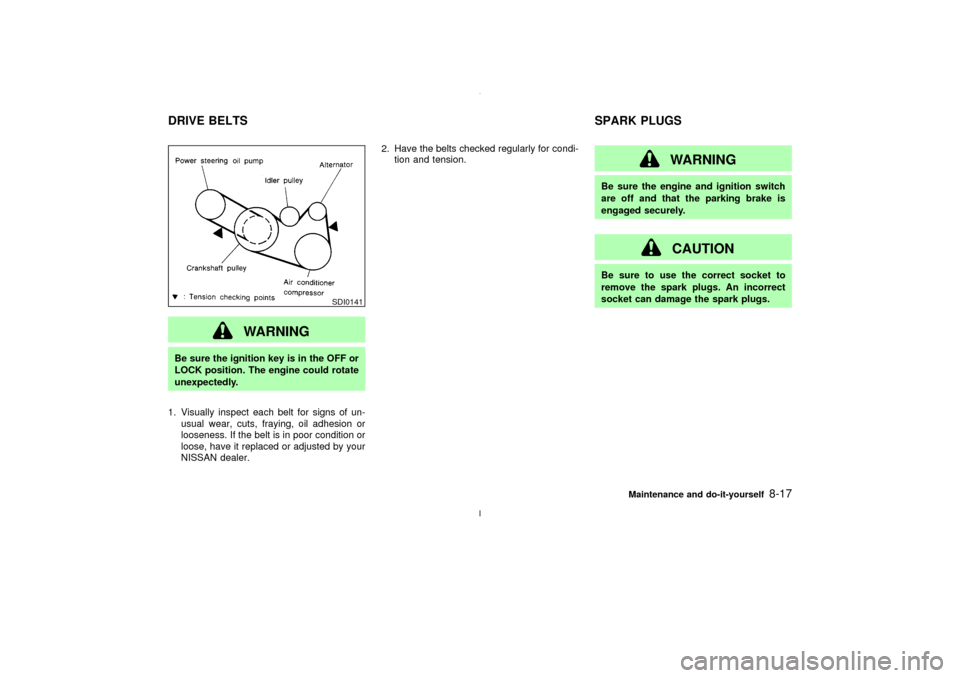
1. Visually inspect each belt for signs of un-
usual wear, cuts, fraying, oil adhesion or
looseness. If the belt is in poor condition or
loose, have it replaced or adjusted by your
NISSAN dealer.2. Have the belts checked regularly for condi-
tion and tension.
WARNING
Be sure the engine and ignition switch
are off and that the parking brake is
engaged securely.
CAUTION
Be sure to use the correct socket to
remove the spark plugs. An incorrect
socket can damage the spark plugs.
SDI0141
DRIVE BELTS SPARK PLUGS
Maintenance and do-it-yourself
8-17
Z
02.7.12/A33-D/V5.0
X
Page 193 of 247
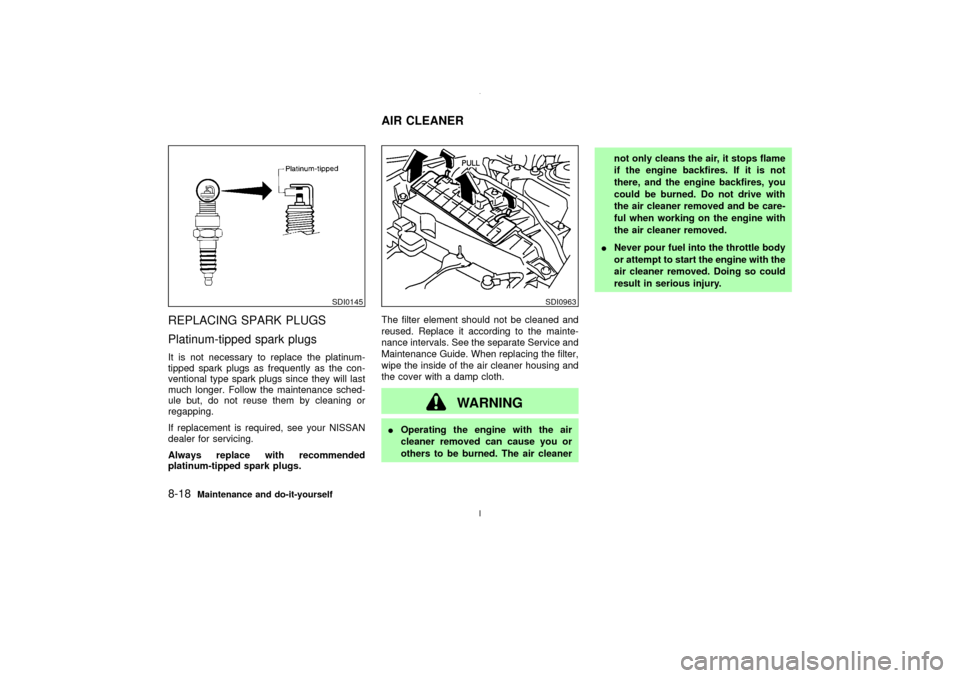
REPLACING SPARK PLUGS
Platinum-tipped spark plugsIt is not necessary to replace the platinum-
tipped spark plugs as frequently as the con-
ventional type spark plugs since they will last
much longer. Follow the maintenance sched-
ule but, do not reuse them by cleaning or
regapping.
If replacement is required, see your NISSAN
dealer for servicing.
Always replace with recommended
platinum-tipped spark plugs.The filter element should not be cleaned and
reused. Replace it according to the mainte-
nance intervals. See the separate Service and
Maintenance Guide. When replacing the filter,
wipe the inside of the air cleaner housing and
the cover with a damp cloth.
WARNING
IOperating the engine with the air
cleaner removed can cause you or
others to be burned. The air cleanernot only cleans the air, it stops flame
if the engine backfires. If it is not
there, and the engine backfires, you
could be burned. Do not drive with
the air cleaner removed and be care-
ful when working on the engine with
the air cleaner removed.
INever pour fuel into the throttle body
or attempt to start the engine with the
air cleaner removed. Doing so could
result in serious injury.
SDI0145
SDI0963
AIR CLEANER
8-18
Maintenance and do-it-yourself
Z
02.7.12/A33-D/V5.0
X
Page 196 of 247
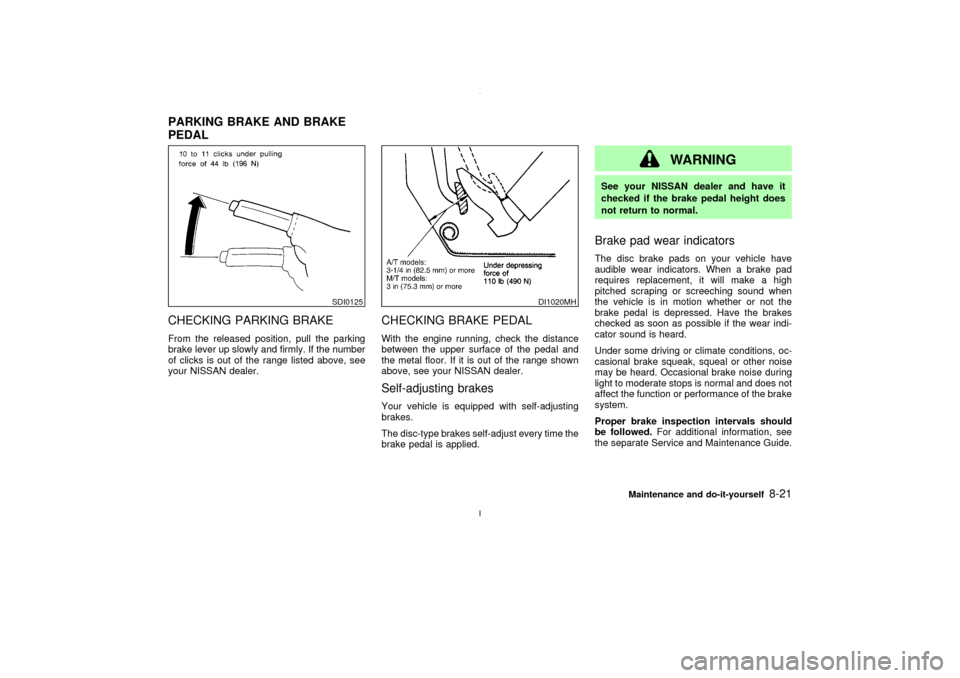
CHECKING PARKING BRAKEFrom the released position, pull the parking
brake lever up slowly and firmly. If the number
of clicks is out of the range listed above, see
your NISSAN dealer.
CHECKING BRAKE PEDALWith the engine running, check the distance
between the upper surface of the pedal and
the metal floor. If it is out of the range shown
above, see your NISSAN dealer.Self-adjusting brakesYour vehicle is equipped with self-adjusting
brakes.
The disc-type brakes self-adjust every time the
brake pedal is applied.
WARNING
See your NISSAN dealer and have it
checked if the brake pedal height does
not return to normal.Brake pad wear indicatorsThe disc brake pads on your vehicle have
audible wear indicators. When a brake pad
requires replacement, it will make a high
pitched scraping or screeching sound when
the vehicle is in motion whether or not the
brake pedal is depressed. Have the brakes
checked as soon as possible if the wear indi-
cator sound is heard.
Under some driving or climate conditions, oc-
casional brake squeak, squeal or other noise
may be heard. Occasional brake noise during
light to moderate stops is normal and does not
affect the function or performance of the brake
system.
Proper brake inspection intervals should
be followed.For additional information, see
the separate Service and Maintenance Guide.
SDI0125
DI1020MH
PARKING BRAKE AND BRAKE
PEDAL
Maintenance and do-it-yourself
8-21
Z
02.7.12/A33-D/V5.0
X
Page 202 of 247
HEADLIGHTS
Replacing the xenon headlight bulb
Ð low beam
WARNINGHIGH VOLTAGE
When xenon headlights are on, they
produce a high voltage. To prevent an
electric shock, never attempt to modify
or disassemble. Always have your xe-
non headlights replaced at an autho-
rized NISSAN dealer. For additional in-
formation, see ªHeadlight and turn
signal switchº in the ª2. Instruments and
controlsº section.
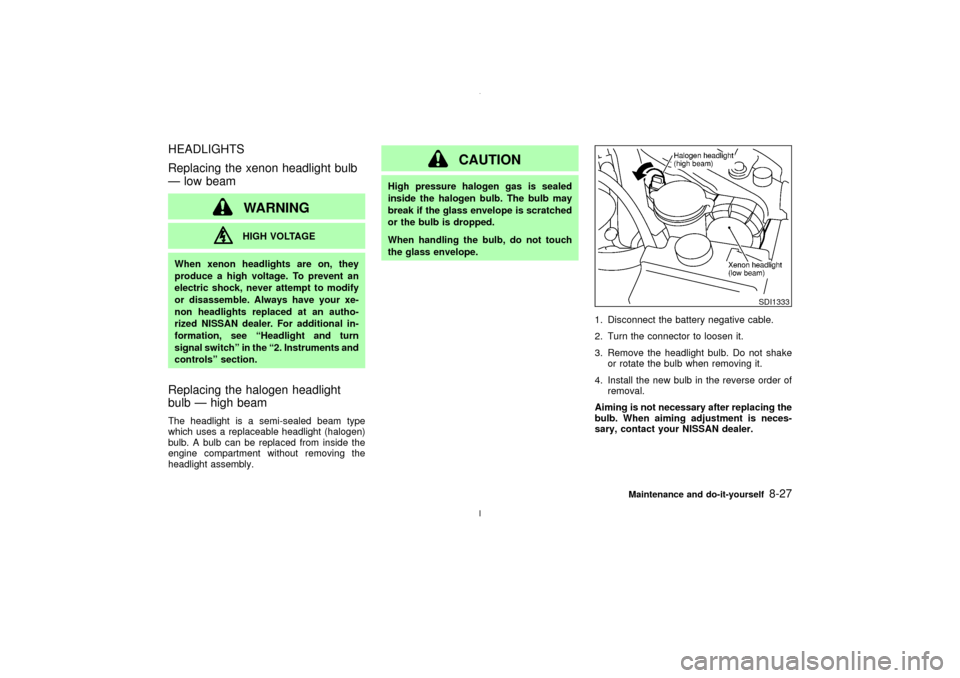
Replacing the halogen headlight
bulb Ð high beamThe headlight is a semi-sealed beam type
which uses a replaceable headlight (halogen)
bulb. A bulb can be replaced from inside the
engine compartment without removing the
headlight assembly.
CAUTION
High pressure halogen gas is sealed
inside the halogen bulb. The bulb may
break if the glass envelope is scratched
or the bulb is dropped.
When handling the bulb, do not touch
the glass envelope.
1. Disconnect the battery negative cable.
2. Turn the connector to loosen it.
3. Remove the headlight bulb. Do not shake
or rotate the bulb when removing it.
4. Install the new bulb in the reverse order of
removal.
Aiming is not necessary after replacing the
bulb. When aiming adjustment is neces-
sary, contact your NISSAN dealer.
SDI1333
Maintenance and do-it-yourself
8-27
Z
02.7.12/A33-D/V5.0
X
Page 208 of 247
If you have a flat tire, see ªFlat tireº in the
ª6. In case of emergencyº section.TIRE PRESSURE
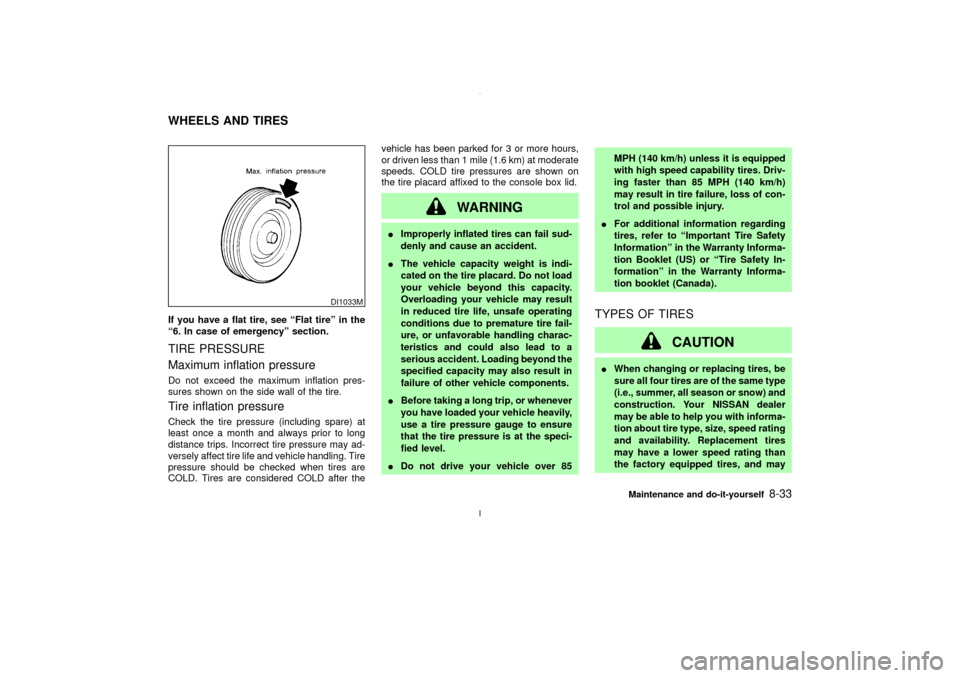
Maximum inflation pressureDo not exceed the maximum inflation pres-
sures shown on the side wall of the tire.Tire inflation pressureCheck the tire pressure (including spare) at
least once a month and always prior to long
distance trips. Incorrect tire pressure may ad-
versely affect tire life and vehicle handling. Tire
pressure should be checked when tires are
COLD. Tires are considered COLD after thevehicle has been parked for 3 or more hours,
or driven less than 1 mile (1.6 km) at moderate
speeds. COLD tire pressures are shown on
the tire placard affixed to the console box lid.
WARNING
IImproperly inflated tires can fail sud-
denly and cause an accident.
IThe vehicle capacity weight is indi-
cated on the tire placard. Do not load
your vehicle beyond this capacity.
Overloading your vehicle may result
in reduced tire life, unsafe operating
conditions due to premature tire fail-
ure, or unfavorable handling charac-
teristics and could also lead to a
serious accident. Loading beyond the
specified capacity may also result in
failure of other vehicle components.
IBefore taking a long trip, or whenever
you have loaded your vehicle heavily,
use a tire pressure gauge to ensure
that the tire pressure is at the speci-
fied level.
IDo not drive your vehicle over 85MPH (140 km/h) unless it is equipped
with high speed capability tires. Driv-
ing faster than 85 MPH (140 km/h)
may result in tire failure, loss of con-
trol and possible injury.
IFor additional information regarding
tires, refer to ªImportant Tire Safety
Informationº in the Warranty Informa-
tion Booklet (US) or ªTire Safety In-
formationº in the Warranty Informa-
tion booklet (Canada).
TYPES OF TIRES
CAUTION
IWhen changing or replacing tires, be
sure all four tires are of the same type
(i.e., summer, all season or snow) and
construction. Your NISSAN dealer
may be able to help you with informa-
tion about tire type, size, speed rating
and availability. Replacement tires
may have a lower speed rating than
the factory equipped tires, and may
DI1033M
WHEELS AND TIRES
Maintenance and do-it-yourself
8-33
Z
02.7.12/A33-D/V5.0
X
Page 210 of 247
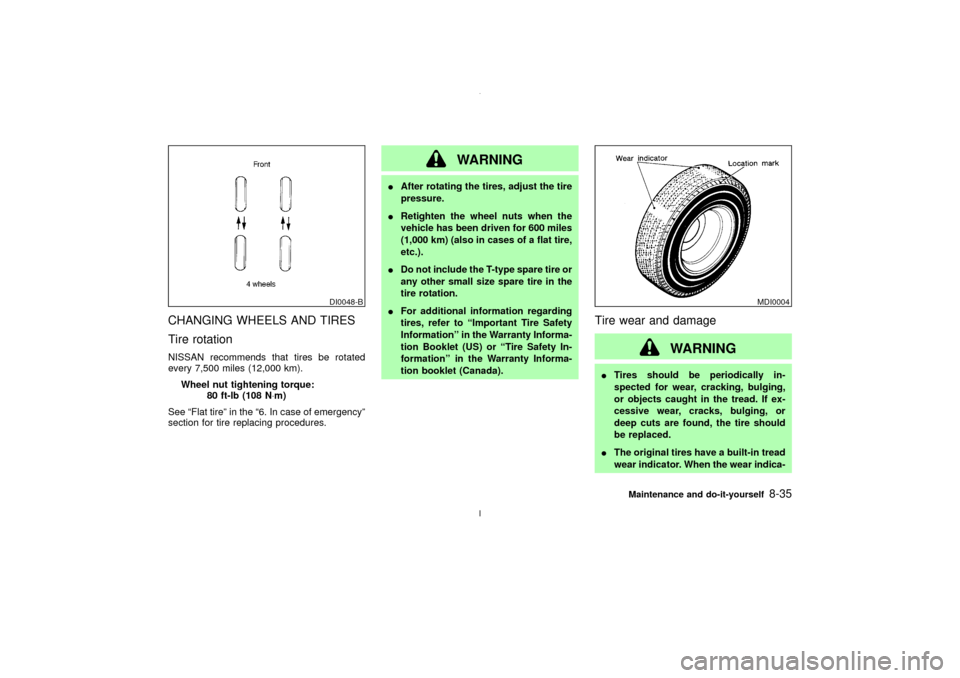
CHANGING WHEELS AND TIRES
Tire rotationNISSAN recommends that tires be rotated
every 7,500 miles (12,000 km).
Wheel nut tightening torque:
80 ft-lb (108 N×m)
See ªFlat tireº in the ª6. In case of emergencyº
section for tire replacing procedures.
WARNING
IAfter rotating the tires, adjust the tire
pressure.
IRetighten the wheel nuts when the
vehicle has been driven for 600 miles
(1,000 km) (also in cases of a flat tire,
etc.).
IDo not include the T-type spare tire or
any other small size spare tire in the
tire rotation.
IFor additional information regarding
tires, refer to ªImportant Tire Safety
Informationº in the Warranty Informa-
tion Booklet (US) or ªTire Safety In-
formationº in the Warranty Informa-
tion booklet (Canada).
Tire wear and damage
WARNING
ITires should be periodically in-
spected for wear, cracking, bulging,
or objects caught in the tread. If ex-
cessive wear, cracks, bulging, or
deep cuts are found, the tire should
be replaced.
IThe original tires have a built-in tread
wear indicator. When the wear indica-
DI0048-B
MDI0004
Maintenance and do-it-yourself
8-35
Z
02.7.12/A33-D/V5.0
X
Page 211 of 247
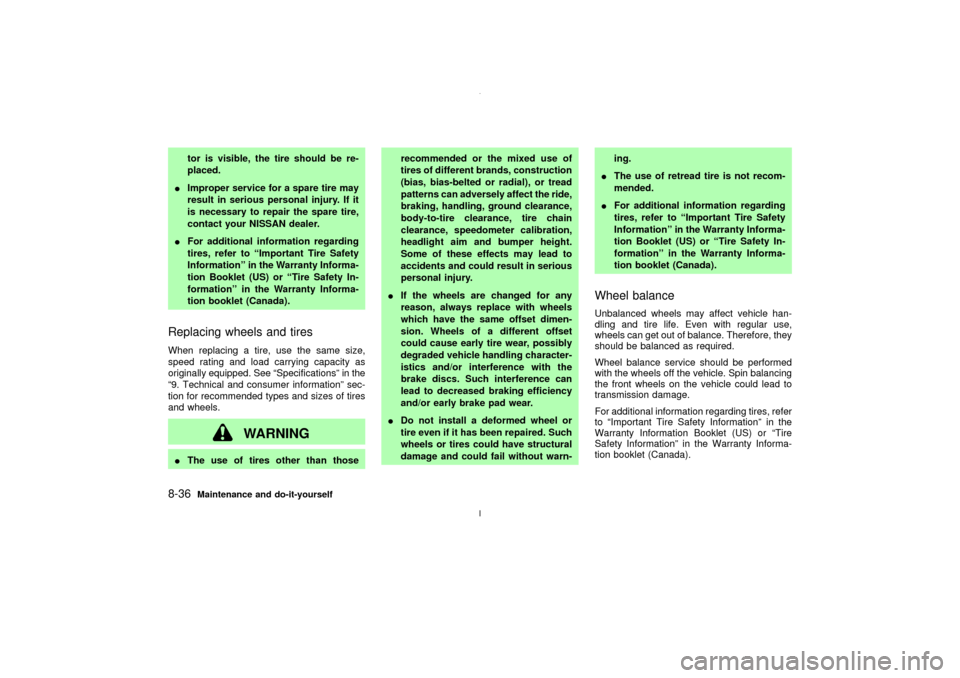
tor is visible, the tire should be re-
placed.
IImproper service for a spare tire may
result in serious personal injury. If it
is necessary to repair the spare tire,
contact your NISSAN dealer.
IFor additional information regarding
tires, refer to ªImportant Tire Safety
Informationº in the Warranty Informa-
tion Booklet (US) or ªTire Safety In-
formationº in the Warranty Informa-
tion booklet (Canada).
Replacing wheels and tiresWhen replacing a tire, use the same size,
speed rating and load carrying capacity as
originally equipped. See ªSpecificationsº in the
ª9. Technical and consumer informationº sec-
tion for recommended types and sizes of tires
and wheels.
WARNING
IThe use of tires other than thoserecommended or the mixed use of
tires of different brands, construction
(bias, bias-belted or radial), or tread
patterns can adversely affect the ride,
braking, handling, ground clearance,
body-to-tire clearance, tire chain
clearance, speedometer calibration,
headlight aim and bumper height.
Some of these effects may lead to
accidents and could result in serious
personal injury.
IIf the wheels are changed for any
reason, always replace with wheels
which have the same offset dimen-
sion. Wheels of a different offset
could cause early tire wear, possibly
degraded vehicle handling character-
istics and/or interference with the
brake discs. Such interference can
lead to decreased braking efficiency
and/or early brake pad wear.
IDo not install a deformed wheel or
tire even if it has been repaired. Such
wheels or tires could have structural
damage and could fail without warn-ing.
IThe use of retread tire is not recom-
mended.
IFor additional information regarding
tires, refer to ªImportant Tire Safety
Informationº in the Warranty Informa-
tion Booklet (US) or ªTire Safety In-
formationº in the Warranty Informa-
tion booklet (Canada).
Wheel balanceUnbalanced wheels may affect vehicle han-
dling and tire life. Even with regular use,
wheels can get out of balance. Therefore, they
should be balanced as required.
Wheel balance service should be performed
with the wheels off the vehicle. Spin balancing
the front wheels on the vehicle could lead to
transmission damage.
For additional information regarding tires, refer
to ªImportant Tire Safety Informationº in the
Warranty Information Booklet (US) or ªTire
Safety Informationº in the Warranty Informa-
tion booklet (Canada).
8-36
Maintenance and do-it-yourself
Z
02.7.12/A33-D/V5.0
X