lights NISSAN QASHQAI 2011 User Guide
[x] Cancel search | Manufacturer: NISSAN, Model Year: 2011, Model line: QASHQAI, Model: NISSAN QASHQAI 2011Pages: 297, PDF Size: 4.09 MB
Page 73 of 297
Downloaded from www.Manualslib.com manuals search engine OUTSIDE MIRROR DEFOGGER
(where fitted)
The outside rear-view mirrors will be defogged when
the defogger switch is activated.
XENON HEADLIGHTS (where fitted)
WARNING
HIGH VOLTAGE
When xenon headlights are on, they produce
a high voltage. To prevent an electric shock,
never attempt to modify or disassemble. Al-
ways have your xenon headlights replaced at
an authorised NISSAN dealer or qualified
workshop.
Xenon headlights provide considerably more
light than conventional headlights. If they are
not correctly aimed, they might temporarily
blind an oncoming driver or the driver ahead
of you and cause a serious accident. If head-
lights are not aimed correctly, immediately
take your vehicle to a NISSAN dealer or quali-
fied workshop and have the headlights ad-
justed correctly.
When the xenon headlight is initially turned on, its
brightness or colour varies slightly. However, the
colour and brightness will soon stabilise.
The life of xenon headlights will be shortened by
frequent on-off operation. It is generally desir-
able not to turn off the headlights for short inter-
vals (for example, when the vehicle stops at a
traffic signal).
If the xenon headlight bulb is close to burning
out, the brightness will drastically decrease, the
light will start blinking, or the colour of the light will become reddish. If one or more of the above
signs occur, contact a NISSAN dealer or quali-
fied workshop.
NISSAN recommends you to consult the local regu-
lations concerning the use of lights.
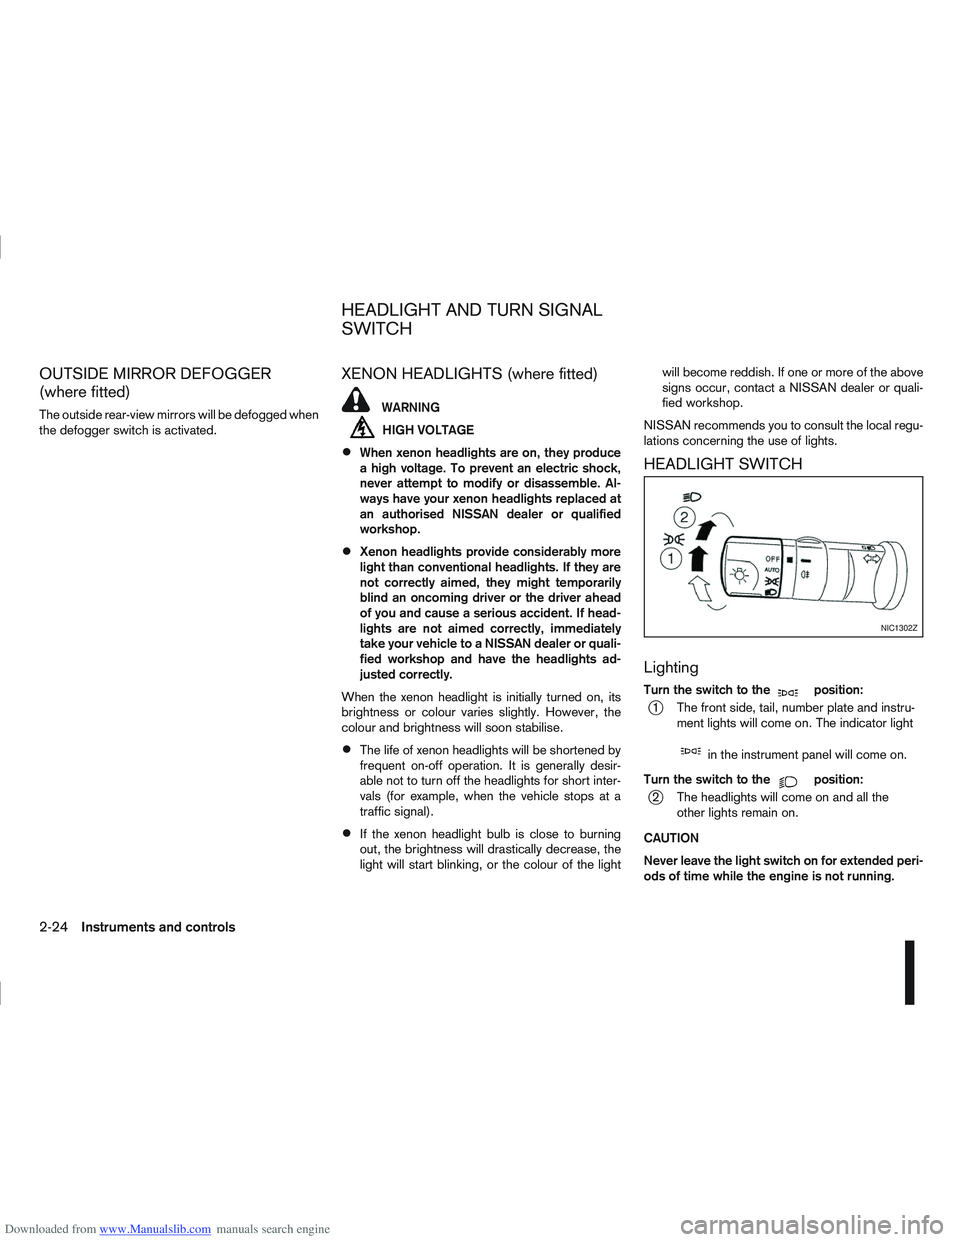
HEADLIGHT SWITCH
Lighting
Turn the switch to themposition:
j1 The front side, tail, number plate and instru- ment lights will come on. The indicator light
min the instrument panel will come on.
Turn the switch to the
mposition:
j2 The headlights will come on and all the other lights remain on.
CAUTION
Never leave the light switch on for extended peri-
ods of time while the engine is not running.
NIC1302Z
HEADLIGHT AND TURN SIGNAL
SWITCH
2-24Instruments and controls
Page 74 of 297
Downloaded from www.Manualslib.com manuals search engine Daytime light system (where fitted)
Even if the headlight switch is off, the headlight low
beam, front side, rear combination and number plate
lights will come on after starting the engine. How-
ever, you cannot change low beam to high beam
when the light switch is off.
When the light switch is turned to the
position,
the headlight low beam will turn off.
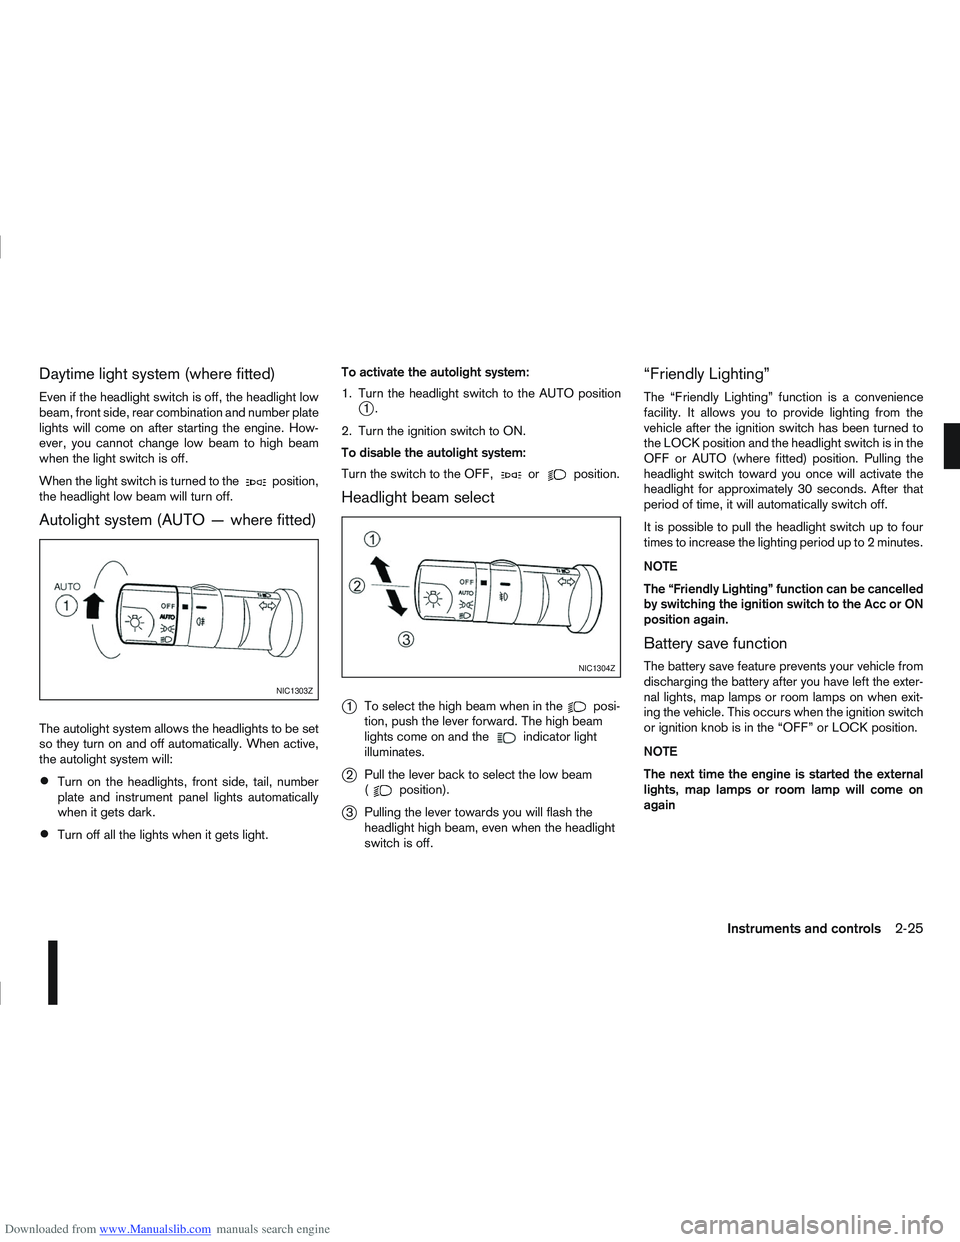
Autolight system (AUTO — where fitted)
The autolight system allows the headlights to be set
so they turn on and off automatically. When active,
the autolight system will:
Turn on the headlights, front side, tail, number
plate and instrument panel lights automatically
when it gets dark.
Turn off all the lights when it gets light. To activate the autolight system:
1. Turn the headlight switch to the AUTO position
j1.
2. Turn the ignition switch to ON.
To disable the autolight system:
Turn the switch to the OFF,
orposition.
Headlight beam select
j
1 To select the high beam when in theposi-
tion, push the lever forward. The high beam
lights come on and the
indicator light
illuminates.
j2 Pull the lever back to select the low beam
(position).
j3Pulling the lever towards you will flash the
headlight high beam, even when the headlight
switch is off.
“Friendly Lighting”
The “Friendly Lighting” function is a convenience
facility. It allows you to provide lighting from the
vehicle after the ignition switch has been turned to
the LOCK position and the headlight switch is in the
OFF or AUTO (where fitted) position. Pulling the
headlight switch toward you once will activate the
headlight for approximately 30 seconds. After that
period of time, it will automatically switch off.
It is possible to pull the headlight switch up to four
times to increase the lighting period up to 2 minutes.
NOTE
The “Friendly Lighting” function can be cancelled
by switching the ignition switch to the Acc or ON
position again.
Battery save function
The battery save feature prevents your vehicle from
discharging the battery after you have left the exter-
nal lights, map lamps or room lamps on when exit-
ing the vehicle. This occurs when the ignition switch
or ignition knob is in the “OFF” or LOCK position.
NOTE
The next time the engine is started the external
lights, map lamps or room lamp will come on
again
NIC1303Z
NIC1304Z
Instruments and controls2-25
Page 75 of 297
Downloaded from www.Manualslib.com manuals search engine Battery save function for external lights:
If the ignition switch is turned to the “OFF” position
but the external lights are accidentally left on, the
external lights will automatically be switched off as
soon as the driver’s door is opened.
It is possible to leave the external lights on perma-
nently by switching them back on using the head-
light switch while the ignition switch is still in the
LOCK or “OFF” position. In this case, the light re-
minder chime will sound when the driver’s door is
opened.
Battery save function for interior light:
The interior light will automatically be switched off
after approximately 15 minutes if it has been acci-
dentally left on.
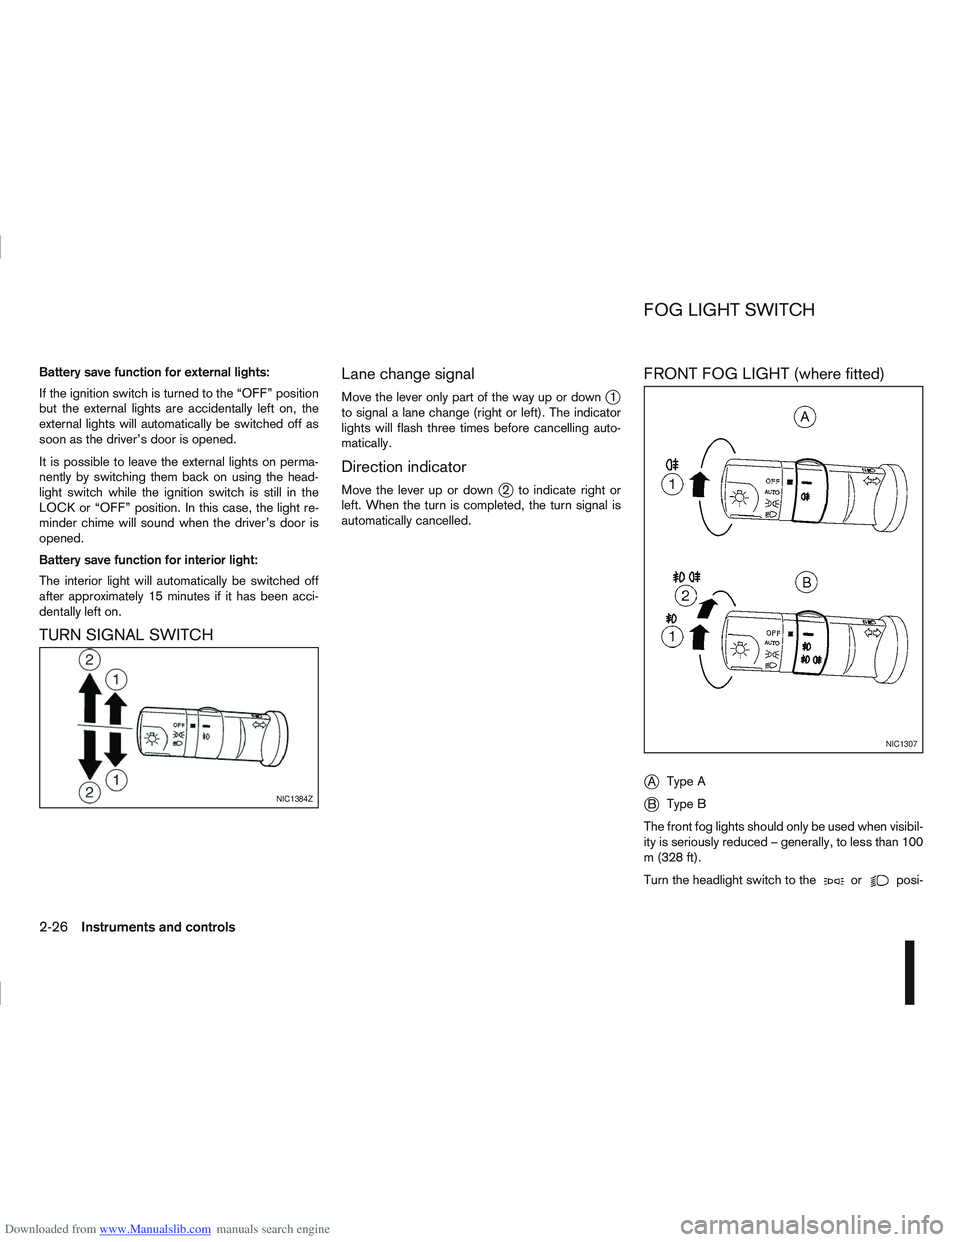
TURN SIGNAL SWITCHLane change signal
Move the lever only part of the way up or downj1
to signal a lane change (right or left). The indicator
lights will flash three times before cancelling auto-
matically.
Direction indicator
Move the lever up or downj2 to indicate right or
left. When the turn is completed, the turn signal is
automatically cancelled.
FRONT FOG LIGHT (where fitted)
j
A Type A
jB Type B
The front fog lights should only be used when visibil-
ity is seriously reduced – generally, to less than 100
m (328 ft).
Turn the headlight switch to the
orposi-
NIC1384Z
NIC1307
FOG LIGHT SWITCH
2-26Instruments and controls
Page 76 of 297
Downloaded from www.Manualslib.com manuals search engine tion and turn the fog light switch to thepositionj1 . The front fog lights and indicator light will come
on. For additional information, see “Warning/indica-
tor lights and audible reminders” earlier in this sec-
tion.
To turn the front fog lights off, turn the fog light
switch to the OFF position.
REAR FOG LIGHT
The rear fog light should only be used when visibility
is seriously reduced – generally, to less than 100 m
(328 ft).
TypejA (without front fog lights)
To turn the rear fog light on:
1. Turn the headlight switch to the
position.
2. Turn the fog light switch to the
positionj1:
– The rear fog light and indicator light will come on
– The fog light switch will return to the “OFF” posi- tion ( —)
To turn the rear fog light off:
Turn the fog light switch to the
positionj1 again:
– The rear fog light and indicator light will switch off
– The fog light switch will return to the “OFF” posi- tion ( —) NOTE
If the headlight switch is turned from the
position, the rear fog light will switch off auto-
matically.
TypejB (with front fog lights)
To turn the rear fog light on:
1. Turn the headlight switch to the
orposition.
2. Turn the fog light switch to the
positionj2:
– The rear and front fog lights and both indicator lights will come on
– The fog light switch will return to the
positionj1
To turn the rear fog light off:
Turn the fog light switch to the
positionj2
again:
– The rear fog light and indicator light will switch off
– The fog light switch will return to the
position
NOTE
If the headlight switch is turned to the OFF posi-
tion, the rear fog light will switch off automati-
cally.
For additional information, see “Warning/indicator
lights and audible reminders” earlier in this section.
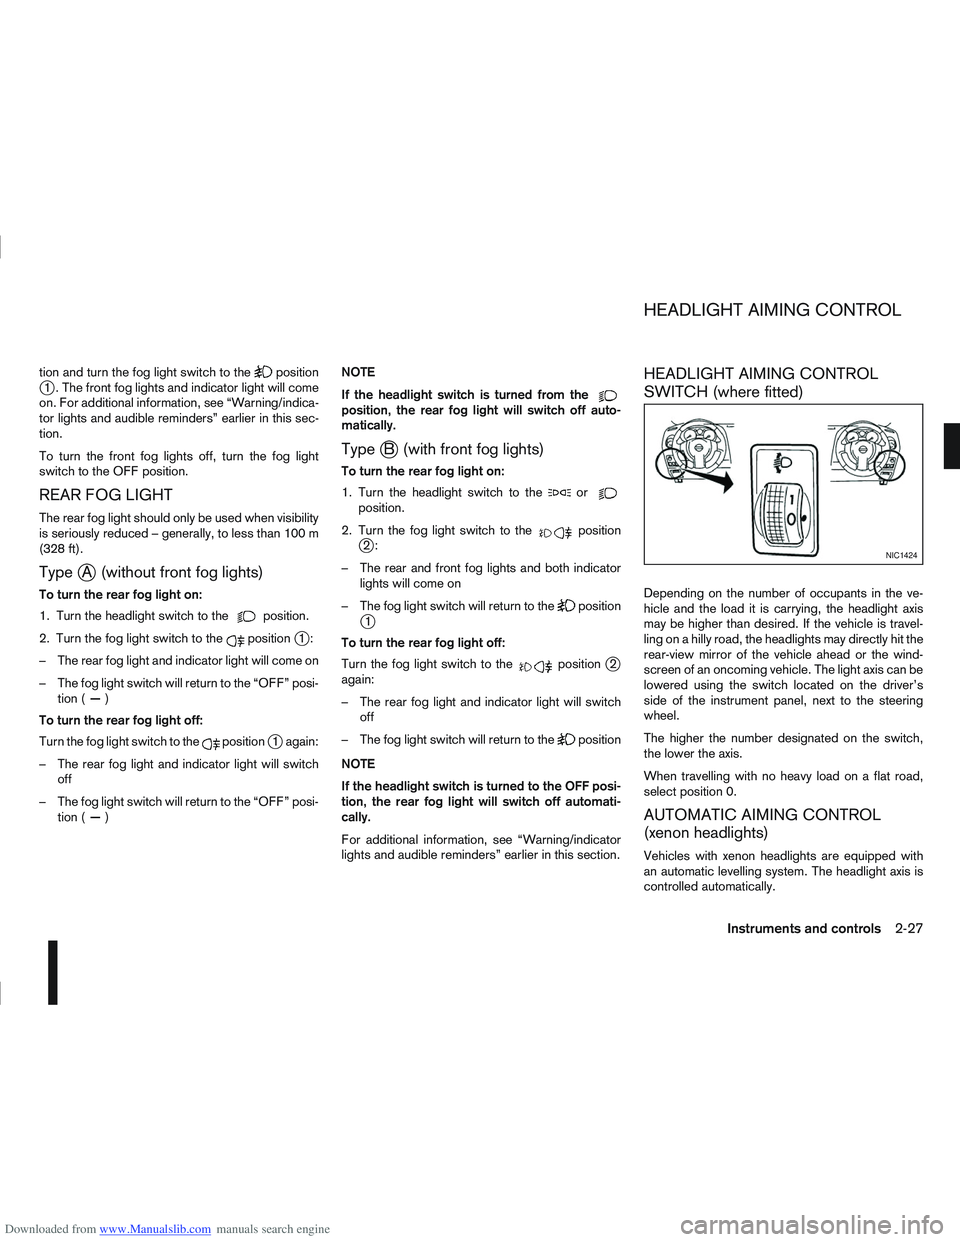
HEADLIGHT AIMING CONTROL
SWITCH (where fitted)
Depending on the number of occupants in the ve-
hicle and the load it is carrying, the headlight axis
may be higher than desired. If the vehicle is travel-
ling on a hilly road, the headlights may directly hit the
rear-view mirror of the vehicle ahead or the wind-
screen of an oncoming vehicle. The light axis can be
lowered using the switch located on the driver’s
side of the instrument panel, next to the steering
wheel.
The higher the number designated on the switch,
the lower the axis.
When travelling with no heavy load on a flat road,
select position 0.
AUTOMATIC AIMING CONTROL
(xenon headlights)
Vehicles with xenon headlights are equipped with
an automatic levelling system. The headlight axis is
controlled automatically.
NIC1424
HEADLIGHT AIMING CONTROL
Instruments and controls2-27
Page 77 of 297
Downloaded from www.Manualslib.com manuals search engine NISSAN recommends consulting local regulations
on the use of lights.To clean the headlights, pull the windscreen washer
switch towards you while the headlight switch is in
the
position and the ignition switch is in the ON
position.
NOTE
The headlight cleaner will automatically operate
every fifth operation of the wiper and washer
switch.
See “Wiper and washer switch” earlier in this sec-
tion
CAUTION
Do not operate the cleaner continuously for
more than 15 seconds.
Do not operate the cleaner if the washer fluid
reservoir is empty or frozen.
See “Window washer fluid/headlight cleaner fluid
(where fitted)” in the “8. Maintenance and
do-it-yourself” section for details on refilling the res-
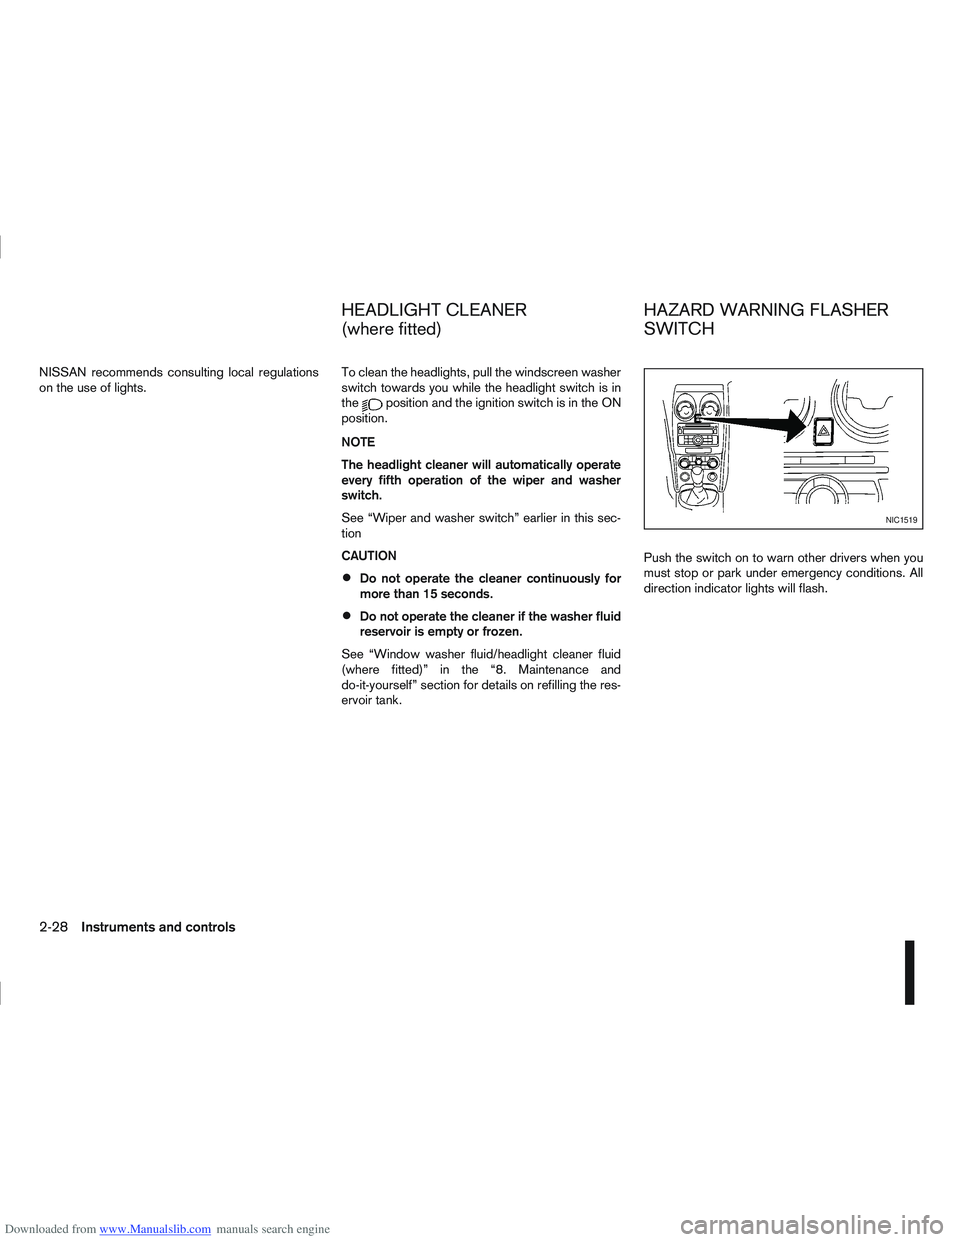
ervoir tank. Push the switch on to warn other drivers when you
must stop or park under emergency conditions. All
direction indicator lights will flash.
NIC1519
HEADLIGHT CLEANER
(where fitted)
HAZARD WARNING FLASHER
SWITCH
2-28Instruments and controls
Page 79 of 297
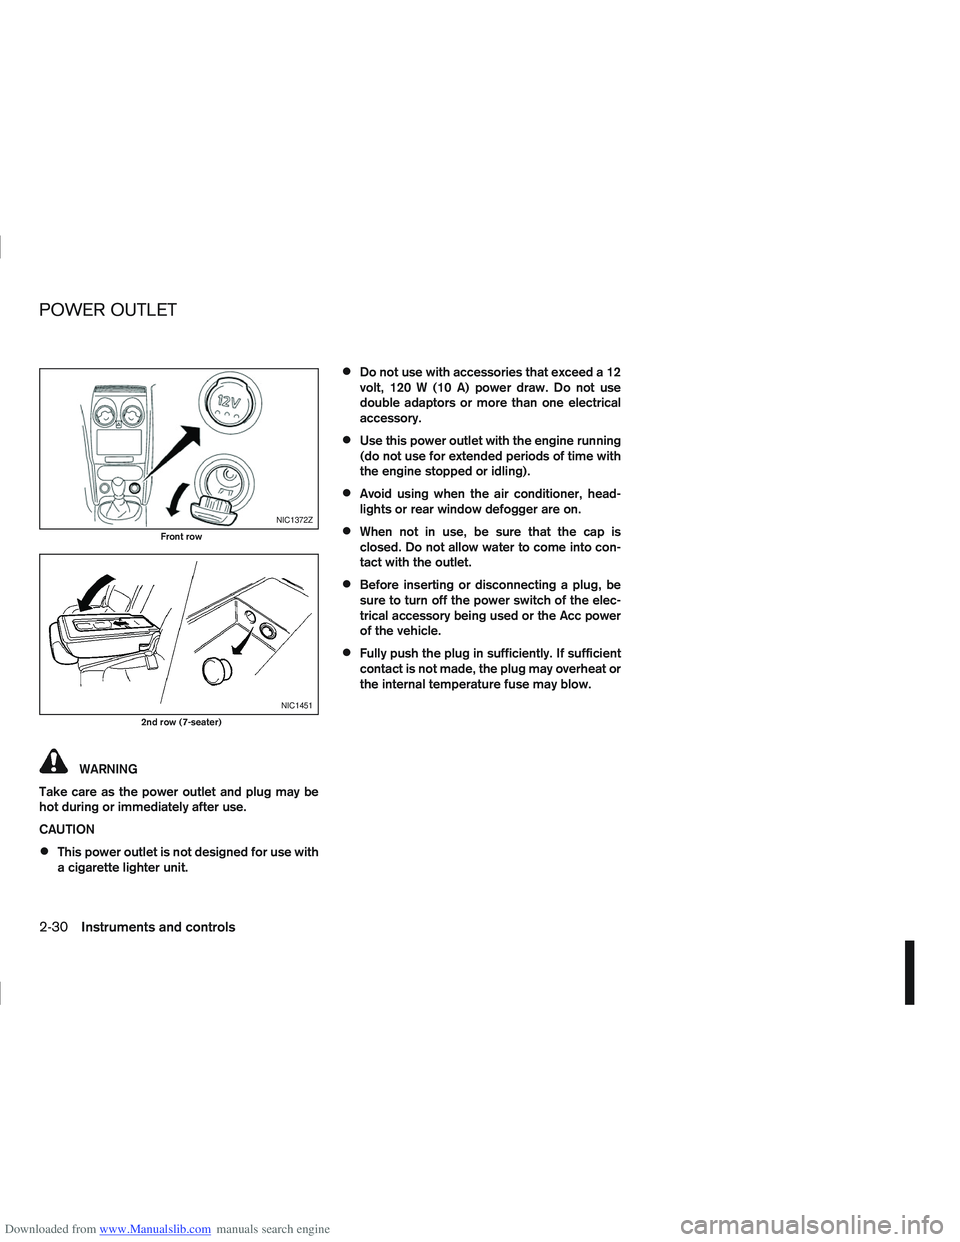
Downloaded from www.Manualslib.com manuals search engine WARNING
Take care as the power outlet and plug may be
hot during or immediately after use.
CAUTION
This power outlet is not designed for use with
a cigarette lighter unit.
Do not use with accessories that exceed a 12
volt, 120 W (10 A) power draw. Do not use
double adaptors or more than one electrical
accessory.
Use this power outlet with the engine running
(do not use for extended periods of time with
the engine stopped or idling).
Avoid using when the air conditioner, head-
lights or rear window defogger are on.
When not in use, be sure that the cap is
closed. Do not allow water to come into con-
tact with the outlet.
Before inserting or disconnecting a plug, be
sure to turn off the power switch of the elec-
trical accessory being used or the Acc power
of the vehicle.
Fully push the plug in sufficiently. If sufficient
contact is not made, the plug may overheat or
the internal temperature fuse may blow.
NIC1372Z
Front row
NIC1451
2nd row (7-seater)
POWER OUTLET
2-30Instruments and controls
Page 86 of 297
Downloaded from www.Manualslib.com manuals search engine SYSTEM REINITIALISATION
The C-View® sunshade will require reinitialisation
whenever:
The sunshade system does not function prop-
erly.
The battery cable is reconnected.
The fuse is replaced.
Perform the following procedure to initialise the sun-
shade system.
1. Make sure the vehicle battery is connected.
2. Turn the ignition switch to the ON position.
3. Press and hold the “CLOSE” side of the switch. The system will now proceed as follows:
a. If open, the sunshade will start moving to the closed position.
b. After a few seconds, the system will fully open the sunshade.
c. From the fully open position, it returns to the closed position.
4. After reaching the closed position, release the sunshade switch.
5. The sunshade system is now reinitialised. NOTE
Do not disconnect the power for at least 2
seconds. If the reinitialisation procedure cannot be performed
successfully, take your vehicle to a NISSAN dealer
or qualified workshop.
CAUTION
Do not use for extended periods of time with the
engine stopped. This could discharge the bat-
tery.
NOTE
The interior lights will go off after approximately
15 minutes unless the ignition switch is in the
Acc or ON position.
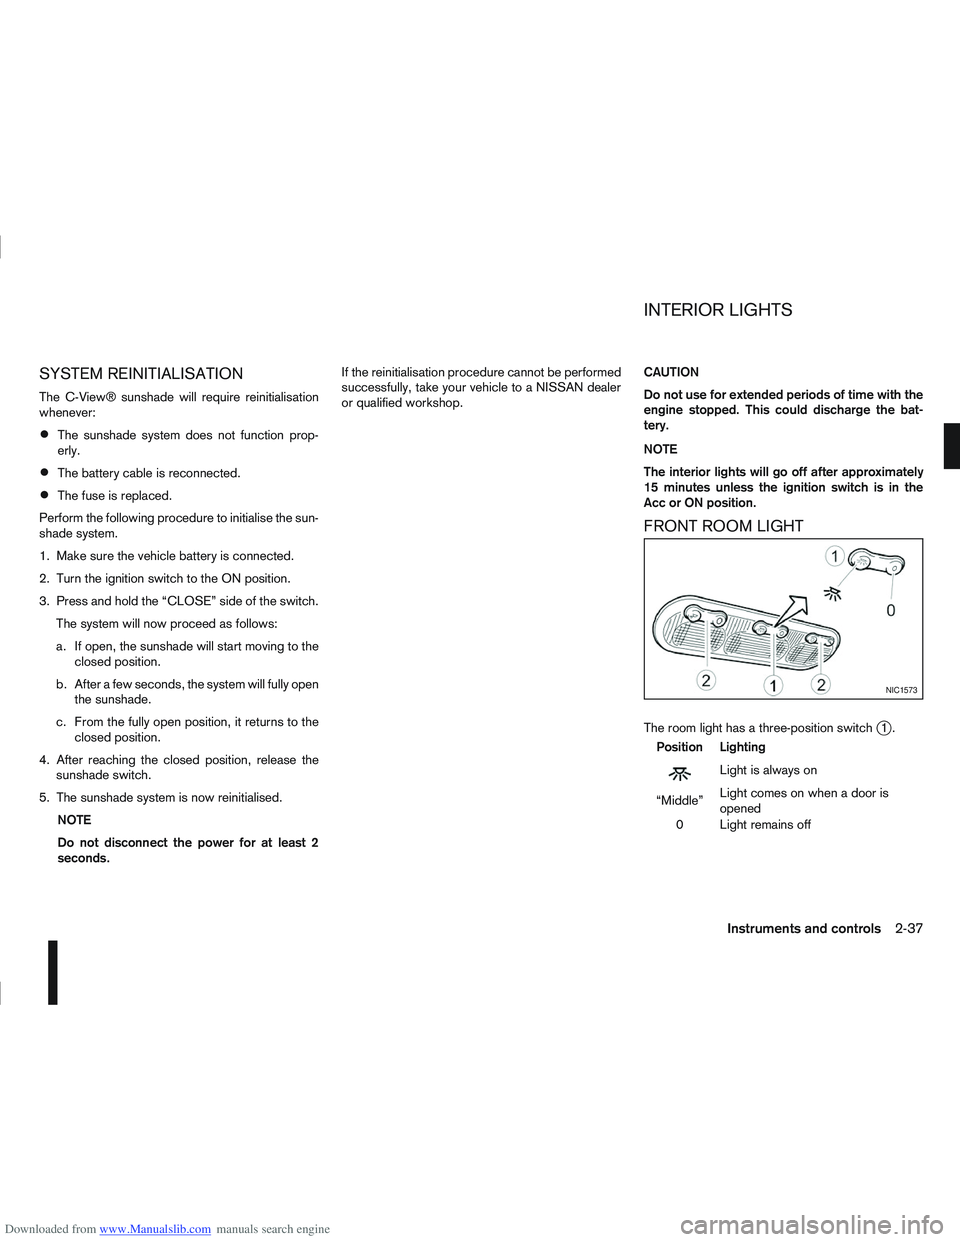
FRONT ROOM LIGHT
The room light has a three-position switchj1.
Position Lighting
mLightisalwayson
“Middle” Light comes on when a door is
opened
0 Light remains off
NIC1573
INTERIOR LIGHTS
Instruments and controls2-37
Page 87 of 297
Downloaded from www.Manualslib.com manuals search engine Room light timer (where fitted)
The room light will stay on for approximately 30 sec-
onds when:
The ignition is switched off.
The doors are unlocked.
Any door is opened and then closed.
The timer is cancelled, and the interior light will turn
off when:
The doors are locked.
The ignition switch is turned to the ON position.
MAP LIGHTS (where fitted)
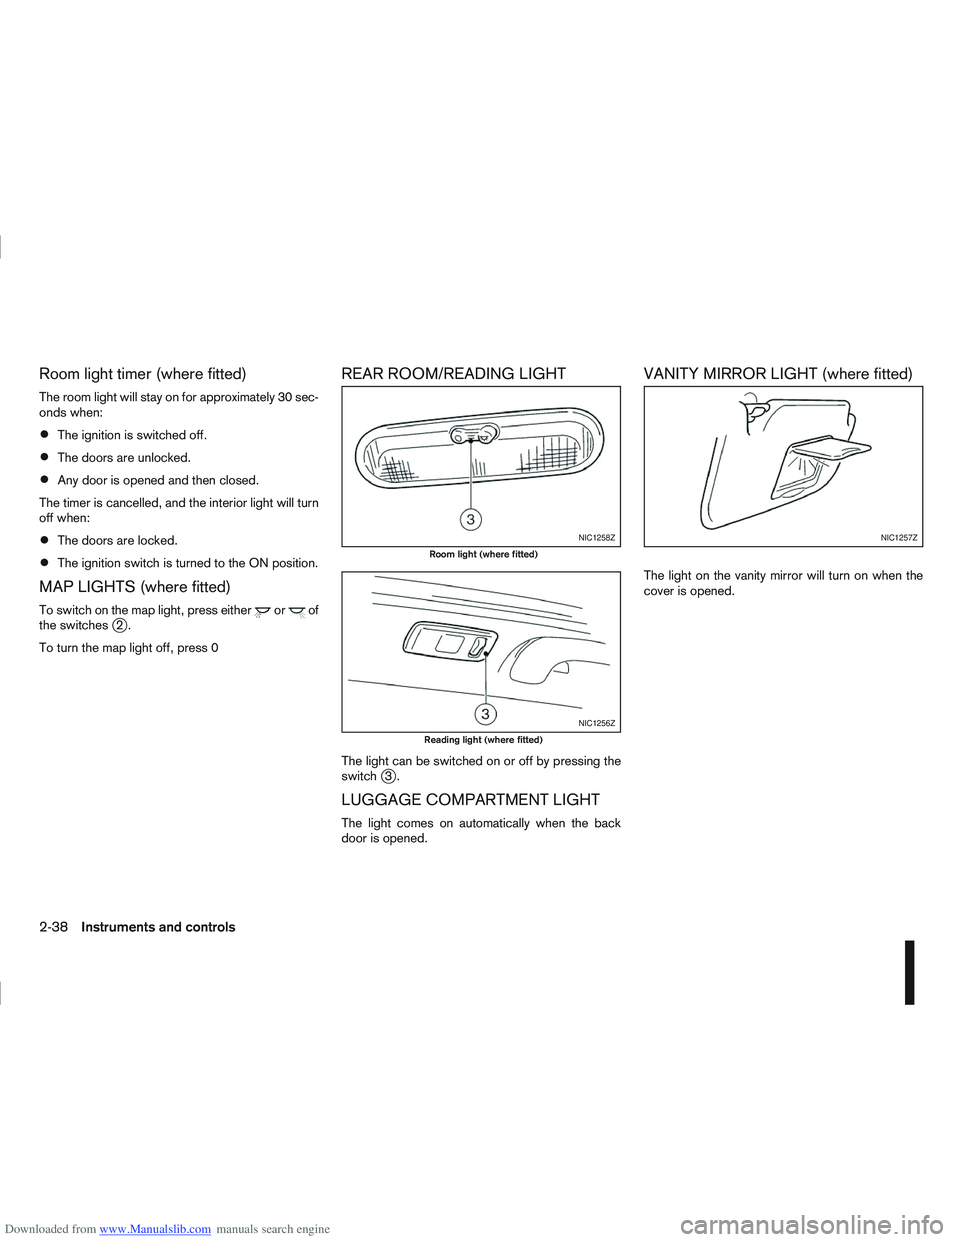
To switch on the map light, press eitherorof
the switchesj2.
To turn the map light off, press 0
REAR ROOM/READING LIGHT
The light can be switched on or off by pressing the
switchj3.
LUGGAGE COMPARTMENT LIGHT
The light comes on automatically when the back
door is opened.
VANITY MIRROR LIGHT (where fitted)
The light on the vanity mirror will turn on when the
cover is opened.
NIC1258Z
Room light (where fitted)
NIC1256Z
Reading light (where fitted)
NIC1257Z
2-38Instruments and controls
Page 92 of 297
Downloaded from www.Manualslib.com manuals search engine door outside lock switch until the direction indi-
cators flash to confirm the setting mode. Then
release the driver’s door outside lock switch.
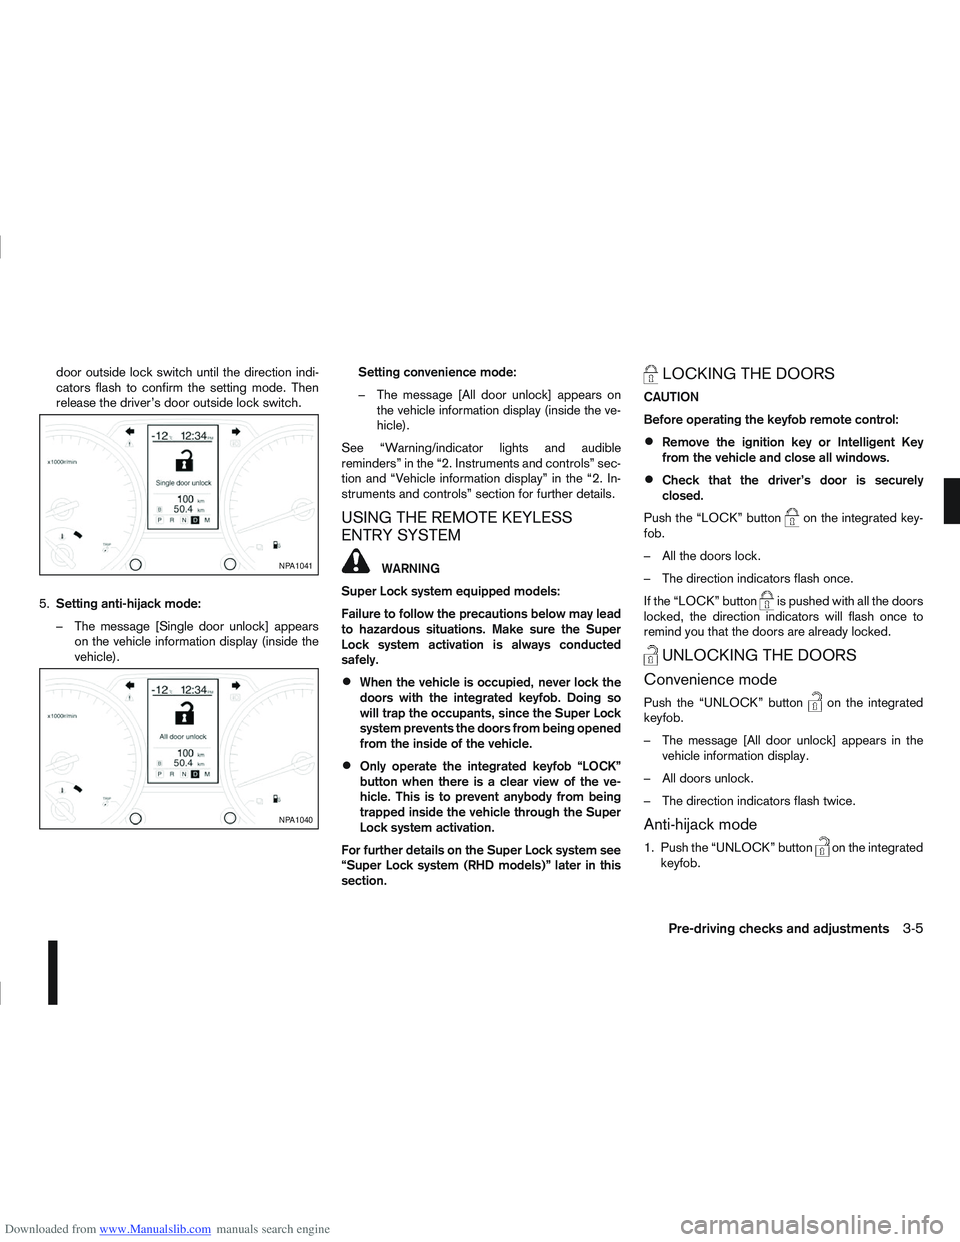
5. Setting anti-hijack mode:
– The message [Single door unlock] appears on the vehicle information display (inside the
vehicle). Setting convenience mode:
– The message [All door unlock] appears on
the vehicle information display (inside the ve-
hicle).
See “Warning/indicator lights and audible
reminders” in the “2. Instruments and controls” sec-
tion and “Vehicle information display” in the “2. In-
struments and controls” section for further details.
USING THE REMOTE KEYLESS
ENTRY SYSTEM
WARNING
Super Lock system equipped models:
Failure to follow the precautions below may lead
to hazardous situations. Make sure the Super
Lock system activation is always conducted
safely.
When the vehicle is occupied, never lock the
doors with the integrated keyfob. Doing so
will trap the occupants, since the Super Lock
system prevents the doors from being opened
from the inside of the vehicle.
Only operate the integrated keyfob “LOCK”
button when there is a clear view of the ve-
hicle. This is to prevent anybody from being
trapped inside the vehicle through the Super
Lock system activation.
For further details on the Super Lock system see
“Super Lock system (RHD models)” later in this
section.
LOCKING THE DOORS
CAUTION
Before operating the keyfob remote control:
Remove the ignition key or Intelligent Key
from the vehicle and close all windows.
Check that the driver’s door is securely
closed.
Push the “LOCK” button
on the integrated key-
fob.
– All the doors lock.
– The direction indicators flash once.
If the “LOCK” button
is pushed with all the doors
locked, the direction indicators will flash once to
remind you that the doors are already locked.
UNLOCKING THE DOORS
Convenience mode
Push the “UNLOCK” buttonon the integrated
keyfob.
– The message [All door unlock] appears in the vehicle information display.
– All doors unlock.
– The direction indicators flash twice.
Anti-hijack mode
1. Push the “UNLOCK” buttonon the integrated
keyfob.
NPA1041
NPA1040
Pre-driving checks and adjustments3-5
Page 103 of 297
Downloaded from www.Manualslib.com manuals search engine the fuel system and emission control system.
An incorrect cap can result in a serious mal-
function and possible injury.
CAUTION
If fuel is spilled on the vehicle body, flush it away
with water to avoid paint damage.
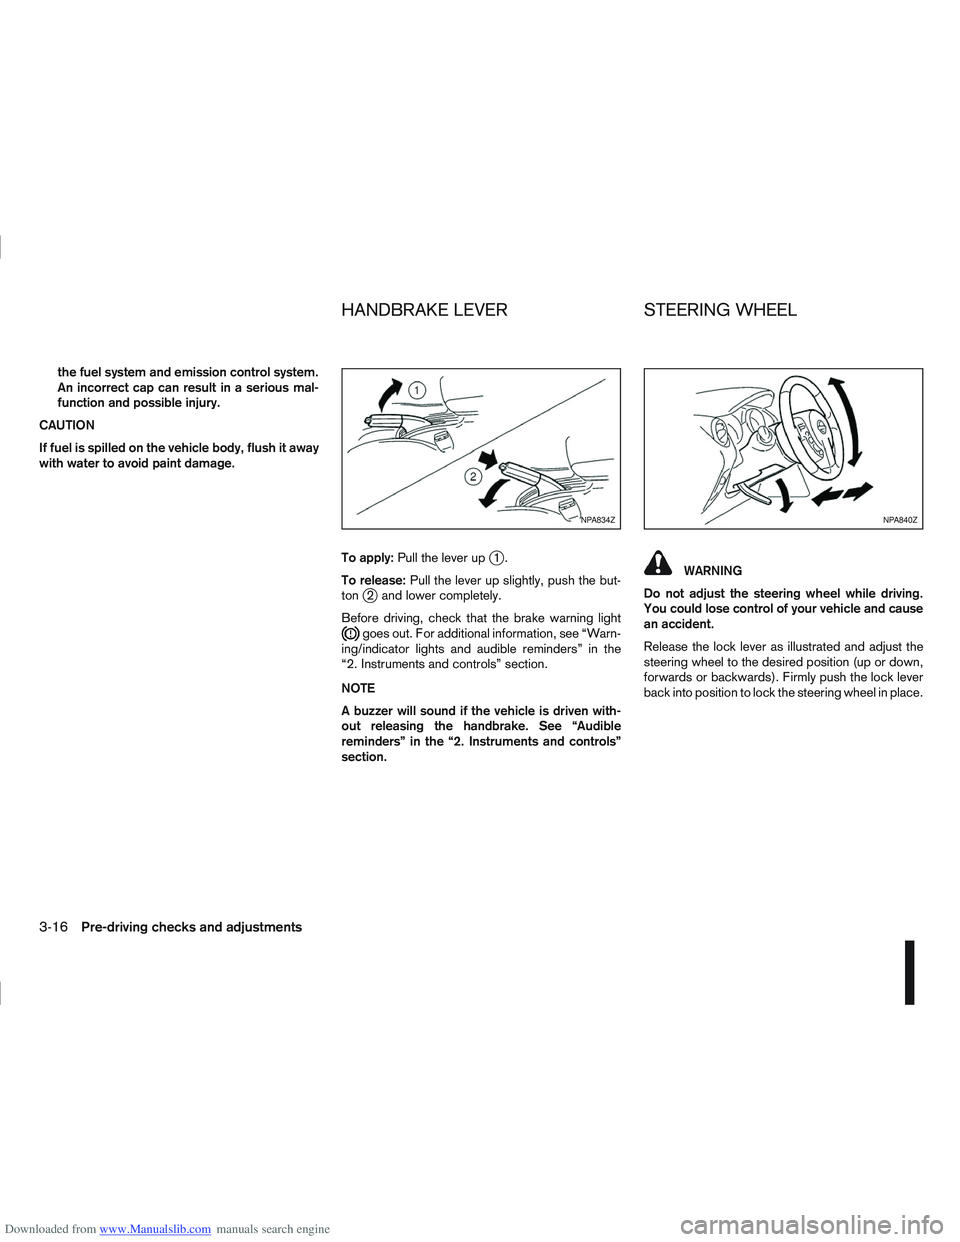
To apply:Pull the lever up
j1.
To release: Pull the lever up slightly, push the but-
ton
j2 and lower completely.
Before driving, check that the brake warning light
goes out. For additional information, see “Warn-
ing/indicator lights and audible reminders” in the
“2. Instruments and controls” section.
NOTE
A buzzer will sound if the vehicle is driven with-
out releasing the handbrake. See “Audible
reminders” in the “2. Instruments and controls”
section.
WARNING
Do not adjust the steering wheel while driving.
You could lose control of your vehicle and cause
an accident.
Release the lock lever as illustrated and adjust the
steering wheel to the desired position (up or down,
forwards or backwards). Firmly push the lock lever
back into position to lock the steering wheel in place.
NPA834ZNPA840Z
HANDBRAKE LEVER STEERING WHEEL
3-16Pre-driving checks and adjustments