maintenance NISSAN ROGUE 2021 Owner´s Manual
[x] Cancel search | Manufacturer: NISSAN, Model Year: 2021, Model line: ROGUE, Model: NISSAN ROGUE 2021Pages: 556, PDF Size: 2.7 MB
Page 1 of 556
For your safety, read carefully and keep in this vehicle.
2021 ROGUE
OWNER’S MANUAL
and MAINTENANCE INFORMATION
Page 2 of 556
WARNING
Operating, servicing and main-
taining a passenger vehicle or
off-highway motor vehicle can
expose you to chemicals in-
cluding engine exhaust, carbon
monoxide, phthalates, and
lead, which are known to the
State of California to cause
cancer and birth defects or
other reproductive harm. To
minimize exposure, avoid
breathing exhaust, do not idle
the engine except as neces-
sary, service your vehicle in a
well-ventilated area and wear
gloves or wash your hands
frequently when servicing your
vehicle. For more information
go to www.P65Warnings.ca.
gov/passenger-vehicle.
This manual was prepared to help you
understand the operation and mainte-
nance of your vehicle so that you may
enjoy many miles of driving pleasure.
Please read through this manual before
operating your vehicle.
A separate Warranty Information Book-
let explains details about the warranties
covering your vehicle. Additionally, a
separate Customer Care/Lemon Law
Booklet (U.S. only) will explain how to
resolve any concerns you may have
with your vehicle, as well as clarify your
rights under your state’s lemon law.
In addition to factory installed options,
your vehicle may also be equipped with
additional accessories installed by NISSAN
or by your NISSAN dealer prior to delivery.
It is important that you familiarize your-
self with all disclosures, warnings, cau-
tions and instructions concerning proper
use of such accessories prior to operating
the vehicle and/or accessory. It is recom-
mended you see a NISSAN dealer for
details concerning the particular acces-
sories with which your vehicle is
equipped.
Your NISSAN dealer knows your vehicle
best. When you require any service or
have any questions, we will be glad to
assist you with the extensive resources
available to us.READ FIRST — THEN DRIVE SAFELY
Before driving your vehicle, read your
Owner’s Manual carefully. This will ensure
familiarity with controls and maintenance
requirements, assisting you in the safe
operation of your vehicle.
WARNING
IMPORTANT SAFETY INFORMATION
REMINDERS!
Follow these important driving rules
to help ensure a safe and comforta-
ble trip for you and your passengers!
.NEVER drive under the influence
of alcohol or drugs.
. ALWAYS observe posted speed
limits and never drive too fast
for conditions.
. ALWAYS give your full attention to
driving and avoid using vehicle
features or taking other actions
that could distract you.
. ALWAYS use your seat belts and
appropriate child restraint sys-
tems. Pre-teen children should
be seated in the rear seat.
. ALWAYS provide information
about the proper use of vehicle
CALIFORNIA PROPOSITION
65 WARNINGForeword
Page 7 of 556
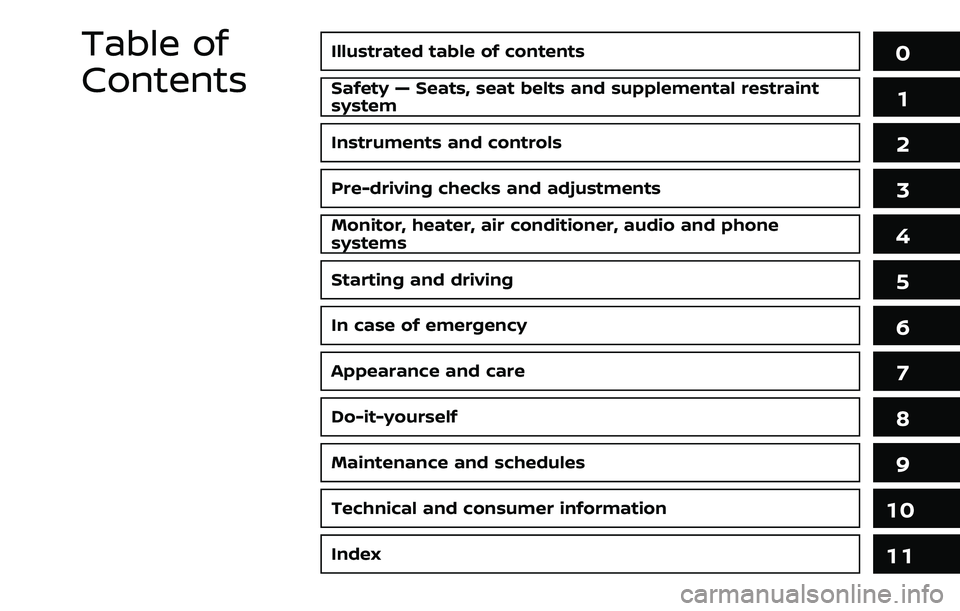
Illustrated table of contents0
Safety — Seats, seat belts and supplemental restraint
system1
Instruments and controls
Pre-driving checks and adjustments
Monitor, heater, air conditioner, audio and phone
systems
Starting and driving
In case of emergency
Appearance and care
Do-it-yourself
Maintenance and schedules
Technical and consumer information
2
3
4
5
6
7
8
9
10
Table of
Contents
Index11
Page 21 of 556
1 Safety — Seats, seat belts and supple-mental restraint system
Seats ........................................................................\
............................... 1-3
Front seats ........................................................................\
.......... 1-4
Rear seats ........................................................................\
............ 1-7
Armrest ........................................................................\
................. 1-9
Head restraints/headrests .................................................... 1-9 Adjustable head
restraint/headrest components ............................. 1-10
Non-adjustable head
restraint/headrest components ............................. 1-10
Remove ........................................................................\
............... 1-11
Install ........................................................................\
..................... 1-11
Adjust ........................................................................\
.................... 1-11
Seat belts ........................................................................\
................. 1-13
Precautions on seat belt usage .............................. 1-13
Seat belt warning light and chime ....................... 1-15
Pregnant women ................................................................ 1-16
Injured persons ..................................................................... 1-16
Three-point type seat belt with retractor ...... 1-16
Seat belt extenders ........................................................... 1-19
Seat belt maintenance ................................................... 1-20
Child safety ........................................................................\
............. 1-20 Infants ........................................................................\
.................. 1-21
Small children ........................................................................\
1-21
Larger children ...................................................................... 1-21 Child restraints ........................................................................\
... 1-23
Precautions on child restraints ............................. 1-23
Lower Anchors and Tethers for CHildren
(LATCH) system .................................................................. 1-25
Rear-facing child restraint installation
using LATCH ........................................................................\
. 1-30
Rear-facing child restraint installation
using the seat belts ........................................................ 1-32
Forward-facing child restraint installation
using LATCH ........................................................................\
. 1-35
Forward-facing child restraint installation
using the seat belts ........................................................ 1-38
Booster seats ....................................................................... 1-42
Supplemental Restraint System (SRS) ..................... 1-46 Precautions on SRS ........................................................ 1-46
NISSAN Advanced Air Bag System
(front seats) ........................................................................\
... 1-52
Driver and front passenger supplemental
knee air bag ........................................................................\
.. 1-61
Front, rear outboard and front central
seat-mounted side-impact supplemental
air bag and roof-mounted curtain
side-impact and rollover supplemental air
bag systems ........................................................................\
. 1-63
Seat belts with pretensioners (front and
rear outboard seats) ...................................................... 1-65
Page 40 of 556
1-20Safety — Seats, seat belts and supplemental restraint system
the child could be seriously in-
jured or killed in a collision or a
sudden stop.
SEAT BELT MAINTENANCE
.To clean the seat belt webbing, apply
a mild soap solution or any solution
recommended for cleaning upholstery
or carpets. Then wipe with a cloth and
allow the seat belts to dry in the
shade. Do not allow the seat belts to
retract until they are completely dry.
. If dirt builds up in the shoulder belt
guide of the seat belt anchors, the
seat belts may retract slowly. Wipe the
shoulder belt guide with a clean, dry
cloth.
. Periodically check to see that the
seat belt and the metal components,
such as buckles, tongues, retractors,
flexible wires and anchors, work prop-
erly. If loose parts, deterioration, cuts
or other damage on the webbing is
found, the entire seat belt assembly
should be replaced.
WARNING
Do not allow children to play with the
seat belts. Most seating positions are
equipped with Automatic Locking
Retractor (ALR) mode seat belts. If
the seat belt becomes wrapped
around a child’s neck with the ALR
mode activated, the child can be
seriously injured or killed if the seat
belt retracts and becomes tight. This
can occur even if the vehicle is
parked. Unbuckle the seat belt to
release the child. If the seat belt can
not be unbuckled or is already un-
buckled, release the child by cutting
the seat belt with a suitable tool
(such as a knife or scissors) to
release the seat belt.
Children need adults to help protect
them.
They need to be properly restrained.
In addition to the general information in
this manual, child safety information is
available from many other sources, in-
cluding doctors, teachers, government
traffic safety offices, and community or-
ganizations. Every child is different, so be
sure to learn the best way to transport
your child. There are three basic types of child
restraint systems:
.
Rear-facing child restraint
. Forward-facing child restraint
. Booster seat
The proper restraint depends on the
child’s size. Generally, infants up to about
1 year and less than 20 lbs (9 kg) should
be placed in rear-facing child restraints.
Forward-facing child restraints are avail-
able for children who outgrow rear-facing
child restraints and are at least 1 year old.
Booster seats are used to help position a
vehicle lap/shoulder belt on a child who
can no longer use a forward-facing child
restraint.
WARNING
Infants and children need special
protection. The vehicle’s seat belts
may not fit them properly. The
shoulder belt may come too close
to the face or neck. The lap belt may
not fit over their small hip bones. In
an accident, an improperly fitting
seat belt could cause serious or fatal
injury. Always use appropriate child
restraints.
All U.S. states and Canadian provinces or
CHILD SAFETY
Page 87 of 556
.The supplemental air bag warning
light remains on after approximately
7 seconds.
. The supplemental air bag warning
light flashes intermittently.
. The supplemental air bag warning
light does not come on at all.
Under these conditions, the air bag and/
or pretensioner systems may not operate
properly. They must be checked and
repaired. It is recommended you visit a
NISSAN dealer for this service.
WARNING
If the supplemental air bag warning
light is on, it could mean that the
front air bag, knee air bag, side air
bag, curtain air bag and/or preten-
sioner systems will not operate in an
accident. To help avoid injury to
yourself or others, have your vehicle
checked as soon as possible. It is
recommended you visit a NISSAN
dealer for this service.
REPAIR AND REPLACEMENT PRO-
CEDURE
The front air bags, knee air bags, side air
bags, curtain air bags and pretensioners
are designed to activate on a one-time-
only basis. As a reminder, unless it is
damaged, the supplemental air bag
warning light will remain illuminated after
inflation has occurred. These systems
should be repaired and/or replaced as
soon as possible. It is recommended you
visit a NISSAN dealer for this service.
When maintenance work is required on
the vehicle, the front air bags, knee air
bags, side air bags, curtain air bags and
pretensioners and related parts should be
pointed out to the person performing the
maintenance. The ignition switch should
always be in the OFF position when
working under the hood or inside the
vehicle.
WARNING
. Once a front air bag, knee air bag,
side air bag or curtain air bag has
inflated, the air bag module will
not function again and must be
replaced. Additionally, the acti-
vated pretensioners must also
be replaced. The air bag module and pretensioner should be re-
placed. It is recommended you
visit a NISSAN dealer for this
service. However, the air bag
modules and pretensioner sys-
tem cannot be repaired.
. The front air bag, knee air bag,
side air bag and curtain air bag
systems, and pretensioner sys-
tem should be inspected if there
is any damage to the front end or
side portion of the vehicle. It is
recommended you visit a NISSAN
dealer for this service.
. If you need to dispose of a sup-
plemental air bag or pretensioner
or scrap the vehicle, it is recom-
mended you visit a NISSAN deal-
er. Correct supplemental air bag
and pretensioner system dispo-
sal procedures are set forth in the
appropriate NISSAN Service Man-
ual. Incorrect disposal procedures
could cause personal injury.
. If there is an impact to your
vehicle from any direction, your
Occupant Classification Sensor
(OCS) should be checked to verify
it is still functioning correctly. It is
recommended that you visit a
NISSAN dealer for this service.
The OCS should be checked even
Safety — Seats, seat belts and supplemental restraint system1-67
Page 107 of 556
accident and could result in ser-
ious personal injury. Check the
tire pressure for all four tires.
Adjust the tire pressure to the
recommended COLD tire pressure
shown on the Tire and Loading
Information label to turn the low
tire pressure warning light OFF. If
the light still illuminates while
driving after adjusting the tire
pressure, a tire may be flat or
the TPMS may be malfunctioning.
If you have a flat tire, replace it
with a spare tire as soon as
possible. If no tire is flat and all
tires are properly inflated, it is
recommended you consult a
NISSAN dealer.
. Since the spare tire is not
equipped with the TPMS, when a
spare tire is mounted or a wheel
is replaced, the TPMS will not
function and the low tire pressure
warning light will flash for ap-
proximately 1 minute. The light
will remain on after 1 minute.
Have your tires replaced and/or
TPMS system reset as soon as
possible. It is recommended you
visit a NISSAN dealer for these
services. .
Replacing tires with those not
originally specified by NISSAN
could affect the proper operation
of the TPMS.
CAUTION
.The TPMS is not a substitute for
the regular tire pressure check.
Be sure to check the tire pressure
regularly.
. If the vehicle is being driven at
speeds of less than 16 MPH (25
km/h), the TPMS may not operate
correctly.
. Be sure to install the specified
size of tires to the four wheels
correctly.
Malfunction Indicator Light
(MIL)
If the malfunction indicator light comes
on steady or blinks while the engine is
running, it may indicate a potential emis-
sion control and/or Continuously Variable
Transmission (CVT) malfunction.
The malfunction indicator light may also
illuminate steady if the vehicle runs out of
fuel. Check to make sure that the vehicle
has at least 3 US gallons (11.4 liters) of fuel
in the fuel tank.
After a few driving trips, the
light
should turn off if no other potential
emission control system malfunction ex-
ists.
If this indicator light remains on for 20
seconds and then blinks for 10 seconds
when the engine is not running, it indi-
cates that the vehicle is not ready for an
emission control system inspection/
maintenance test. (See “Readiness for
Inspection/Maintenance (I/M) test” (P.10-
29).)
Operation:
The malfunction indicator light will come
on in one of two ways:
. Malfunction indicator light on steady
— An emission control system and/or
CVT malfunction has been detected. It
Instruments and controls2-19
Page 112 of 556
2-24Instruments and controls
SETTINGS
The setting mode allows user to change
the information displayed in the vehicle
information display and some settings:
.VDC Setting
. Driver Assistance
. Personal Display (if so equipped)
. Head-Up Display (if so equipped)
. ECO Mode Setting
. TPMS Setting
. Clock
. Vehicle Settings
. Maintenance
. Customize Display
. Unit/Language
. Key-Linked Settings (if so equipped)
. Factory Reset
VDC Setting
To change the setting, use the scroll dialto select and push it.
. System
Allows user to turn the Vehicle Dy-
namic Control (VDC) system ON or
OFF. By default the VDC system will be
turned ON. If the VDC system is turned
off, the VDC OFF indicator light will
illuminate. NOTE:
The vehicle should be driven with the
Vehicle Dynamic Control (VDC) system
ON for most driving conditions. (See
“Vehicle Dynamic Control (VDC) system”
(P.5-157).)
Driver Assistance
To change the status, warnings or turn on
or off any of the systems/warnings dis-
played in the “Driver Assistance” menu,
use the scroll dial
to select and change
a menu item:
. Steering Assist (if so equipped)
. Lane
. Blind Spot
. Emergency Brake
. Speed Limit Sign (if so equipped)
. Speed Adjust by Route (if so equipped)
. Spd. Limit Assist (if so equipped)
. Parking Aids
. Cross Traffic Alert
. Driver Attention Alert
. Timer Alert
. Low Temp. Alert
Steering Assist (if so equipped):
. Allows user to turn the Steering Assist
ON/OFF.
(See “ProPILOT Assist” (P.5-84).) Lane:
. Warning(LDW)
Allows user to turn the Lane Depar-
ture Warning (LDW) system ON/OFF.
. Prevention(LDP)
Allows user to turn the Intelligent Lane
Intervention (I-LI) system ON/OFF.
(See “Lane Departure Warning (LDW)” (P.5-
46) and “Intelligent Lane Intervention (I-
LI)” (P.5-115).)
Blind Spot:
. Warning(BSW)
Allows user to turn the Blind Spot
Warning (BSW) system ON/OFF.
. Intervention(BSI) (if so equipped)
Allows user to turn the Intelligent
Blind Spot Intervention (I-BSI) system
ON/OFF.
(See “Blind Spot Warning (BSW)” (P.5-57)
and “Intelligent Blind Spot Intervention (I-
BSI)” (P.5-65).)
Emergency Brake:
. Front
Allows user to turn the Automatic
Emergency Braking (AEB) with pedes-
trian detection system and Intelligent
Forward Collision Warning (I-FCW) sys-
tem ON/OFF.
Page 117 of 556
.Alert Only
When selected, only the alert is dis-
played.
. OFF
When selected, no alert or horn will be
active.
(See “Rear Door Alert” (P.2-65).)
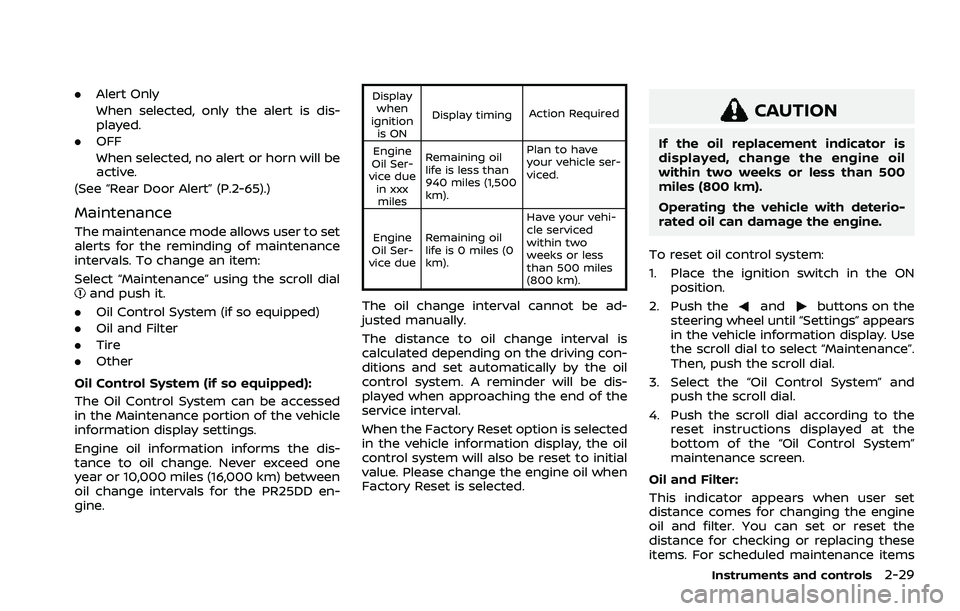
Maintenance
The maintenance mode allows user to set
alerts for the reminding of maintenance
intervals. To change an item:
Select “Maintenance” using the scroll dial
and push it.
. Oil Control System (if so equipped)
. Oil and Filter
. Tire
. Other
Oil Control System (if so equipped):
The Oil Control System can be accessed
in the Maintenance portion of the vehicle
information display settings.
Engine oil information informs the dis-
tance to oil change. Never exceed one
year or 10,000 miles (16,000 km) between
oil change intervals for the PR25DD en-
gine.
Display when
ignition is ON Display timing
Action Required
Engine
Oil Ser-
vice due in xxxmiles Remaining oil
life is less than
940 miles (1,500
km). Plan to have
your vehicle ser-
viced.
Engine
Oil Ser-
vice due Remaining oil
life is 0 miles (0
km). Have your vehi-
cle serviced
within two
weeks or less
than 500 miles
(800 km).
The oil change interval cannot be ad-
justed manually.
The distance to oil change interval is
calculated depending on the driving con-
ditions and set automatically by the oil
control system. A reminder will be dis-
played when approaching the end of the
service interval.
When the Factory Reset option is selected
in the vehicle information display, the oil
control system will also be reset to initial
value. Please change the engine oil when
Factory Reset is selected.
CAUTION
If the oil replacement indicator is
displayed, change the engine oil
within two weeks or less than 500
miles (800 km).
Operating the vehicle with deterio-
rated oil can damage the engine.
To reset oil control system:
1. Place the ignition switch in the ON position.
2. Push the
andbuttons on the
steering wheel until “Settings” appears
in the vehicle information display. Use
the scroll dial to select “Maintenance”.
Then, push the scroll dial.
3. Select the “Oil Control System” and push the scroll dial.
4. Push the scroll dial according to the reset instructions displayed at the
bottom of the “Oil Control System”
maintenance screen.
Oil and Filter:
This indicator appears when user set
distance comes for changing the engine
oil and filter. You can set or reset the
distance for checking or replacing these
items. For scheduled maintenance items
Instruments and controls2-29
Page 118 of 556
2-30Instruments and controls
and intervals, refer to the “9. Maintenance
and schedules” section.
Tire:
This indicator appears when the user set
distance comes for replacing tires. You
can set or reset the distance for replacing
tires.
WARNING
The tire replacement indicator is not
a substitute for regular tire checks,
including tire pressure checks. (See
“Changing wheels and tires” (P.8-
33).) Many factors including tire in-
flation, alignment, driving habits and
road conditions affect tire wear and
when tires should be replaced.
Setting the tire replacement indica-
tor for a certain driving distance
does not mean your tires will last
that long. Use the tire replacement
indicator as a guide only and always
perform regular tire checks. Failure
to perform regular tire checks, in-
cluding tire pressure checks could
result in tire failure. Serious vehicle
damage could occur and may lead to
a collision, which could result in
serious personal injury or death.Other:
This indicator appears when the user set
distance comes for checking or replacing
maintenance items other than the engine
oil, oil filter and tires. Other maintenance
items can include such things as air filter
or tire rotation. You can set or reset the
distance for checking or replacing the
items.
Customize Display
The display settings allows user to
choose from the various meter selections.
The display settings can be changed
using the scroll dial
.
Main Menu Selection:
Displays available screens that can be
shown in the vehicle information display.
Route Guidance (if so equipped):
To change the setting, use the scroll dial
to select and push it.
. Alerts
The “Alerts” allows user to turn the
Navigation Settings alerts on or off.
Transition (Cruise) (if so equipped):
The ”Transition (Cruise)” allows user to
turn the cruise screen transition on or off. Welcome Effect:
The “Welcome Effect” displays the avail-
able welcome effect settings.
. Gauges (if so equipped)
. Animation
Operation guidance:
The “Operation guidance” displays the
available operation guidance settings.
. Lights
. Wiper
. Seat Memory (if so equipped)
. Cruise Control (if so equipped)
Unit/Language
The units that are shown in the vehicle
information display can be changed:
.Mileage/Fuel
. Tire Pressure
. Temperature
. Language
Use the scroll dial
to select and change
the units of the vehicle information dis-
play.
Mileage/Fuel:
The unit for the mileage that is shown in
the vehicle information display can be
changed.