buttons NISSAN SENTRA 2017 B17 / 7.G Quick Reference Guide
[x] Cancel search | Manufacturer: NISSAN, Model Year: 2017, Model line: SENTRA, Model: NISSAN SENTRA 2017 B17 / 7.GPages: 36, PDF Size: 2.99 MB
Page 18 of 36
16
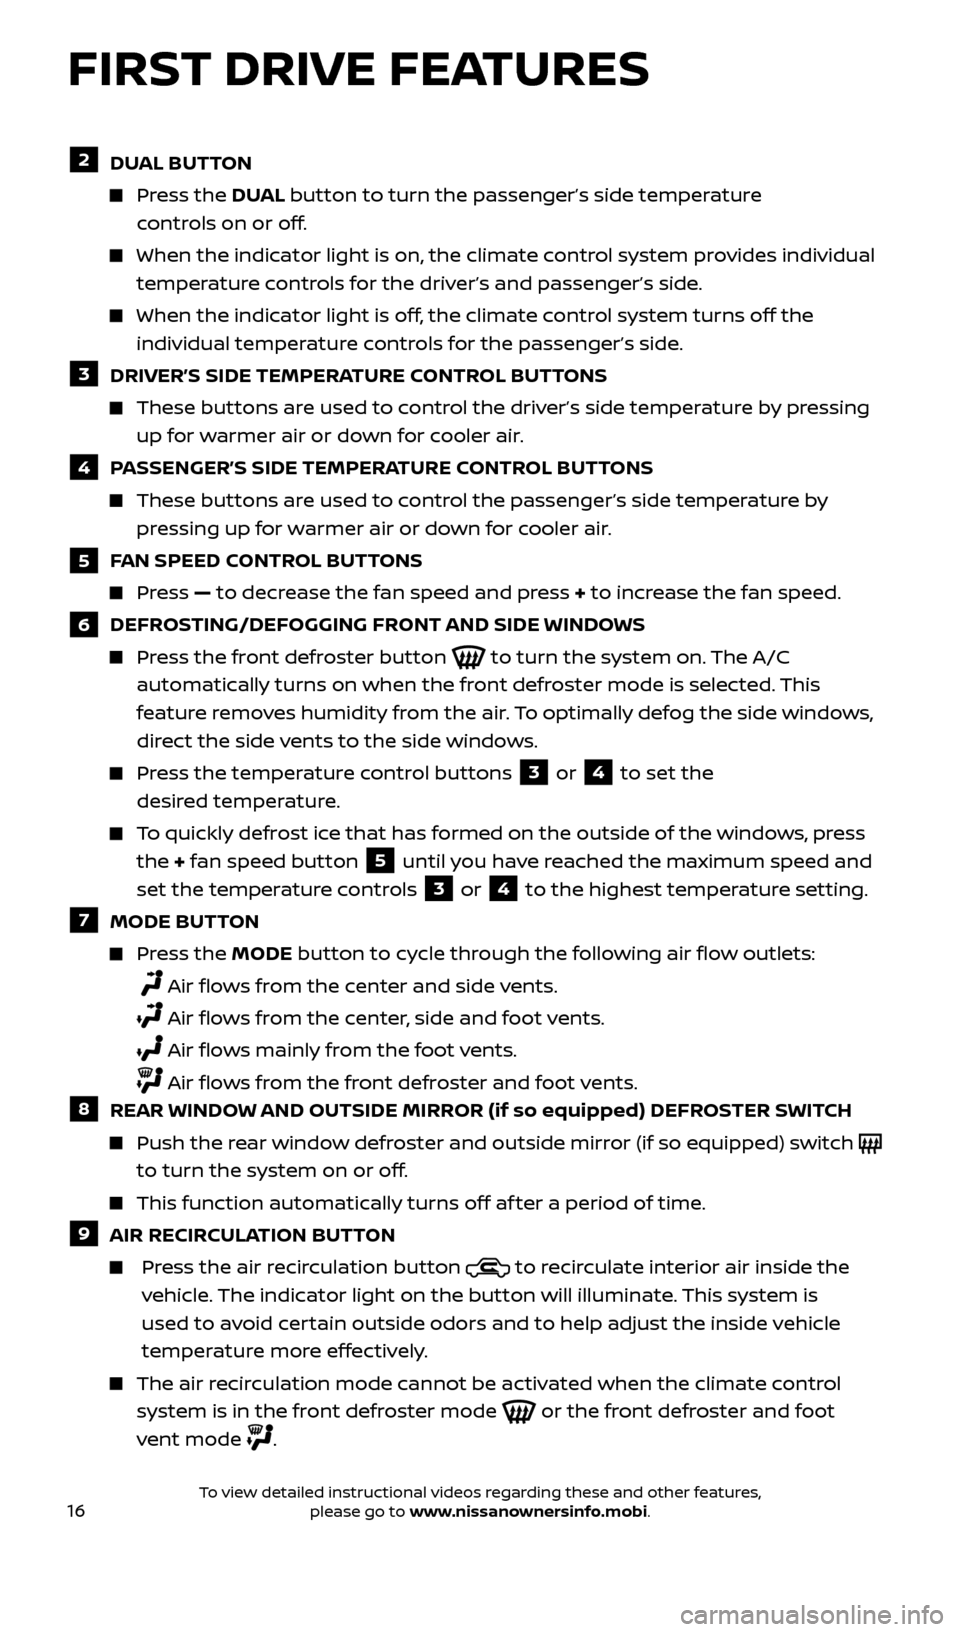
2 DUAL BUTTON
Press the DUAL button to turn the passenger’s side temperature
controls on or off.
When the indicator light is on, the climate control system provides individual
temperature controls for the driver’s and passenger’s side.
When the indicator light is off, the climate control system turns off the
individual temperature controls for the passenger’s side.
3 DRIVER’S SIDE TEMPERATURE CONTROL BUTTONS
These buttons are used to control the driver’s side temperature by pressing
up for warmer air or down for cooler air.
4 PASSENGER’S SIDE TEMPERATURE CONTROL BUTTONS
These buttons are used to control the passenger’s side temperature by
pressing up for warmer air or down for cooler air.
5 FAN SPEED CONTROL BUTTONS
Press — to decrease the fan speed and press + to increase the fan speed.
6 DEFROSTING/DEFOGGING FRONT AND SIDE WINDOWS
Press the front defroster button to turn the system on. The A/C
automatically turns on when the front defroster mode is selected. This
feature removes humidity from the air. To optimally defog the side windows,
direct the side vents to the side windows.
Press the temperature control buttons 3 or 4 to set the
desired temperature.
To quickly defrost ice that has formed on the outside of the windows, press
the + fan speed button
5 until you have reached the maximum speed and
set the temperature controls
3 or 4 to the highest temperature setting.
7 MODE BUTTON
Press the MODE button to cycle through the following air flow outlets:
Air flows from the center and side vents.
Air flows from the center, side and foot vents.
Air flows mainly from the foot vents.
Air flows from the front defroster and foot vents. 8 REAR WINDOW AND OUTSIDE MIRROR (if so equipped) DEFROSTER SWITCH
Push the rear window defroster and outside mirror (if so equipped) switch
to turn the system on or off.
This function automatically turns off af ter a period of time.
9 AIR RECIRCULATION BUTTON
Press the air recirculation button to recirculate interior air inside the
vehicle. The indicator light on the button will illuminate. This system is
used to avoid certain outside odors and to help adjust the inside vehicle
temperature more effectively.
The air recirculation mode cannot be activated when the climate control
system is in the front defroster mode
or the front defroster and foot
vent mode
.
FIRST DRIVE FEATURES
2434454_17b_Sentra_US_pQRG_101416.indd 1610/14/16 11:00 AM
To view detailed instructional videos regarding these and other features, please go to www.nissanownersinfo.mobi.
Page 19 of 36
17
10 FRESH AIR INTAKE BUTTON
Press the fresh air intake button to draw outside air into the passenger
compartment. The indicator light on the button will illuminate.
11 A/C BUTTON
Press the A/C button to turn the air conditioner system on or off.
12 ONOFF BUTTON
Press the ONOFF button to turn the system on or off.
Please see your Owner’s Manual for important safety information, system limitations, and additional
operating and feature information.
For more information, refer to the “Monitor, climate, audio, phone and voice recognition systems
(section 4)” of your Owner’s Manual.
56
3
1
4
2
FM/AM/SiriusXM® SATELLITE RADIO (if so equipped)
WITH CD PLAYER
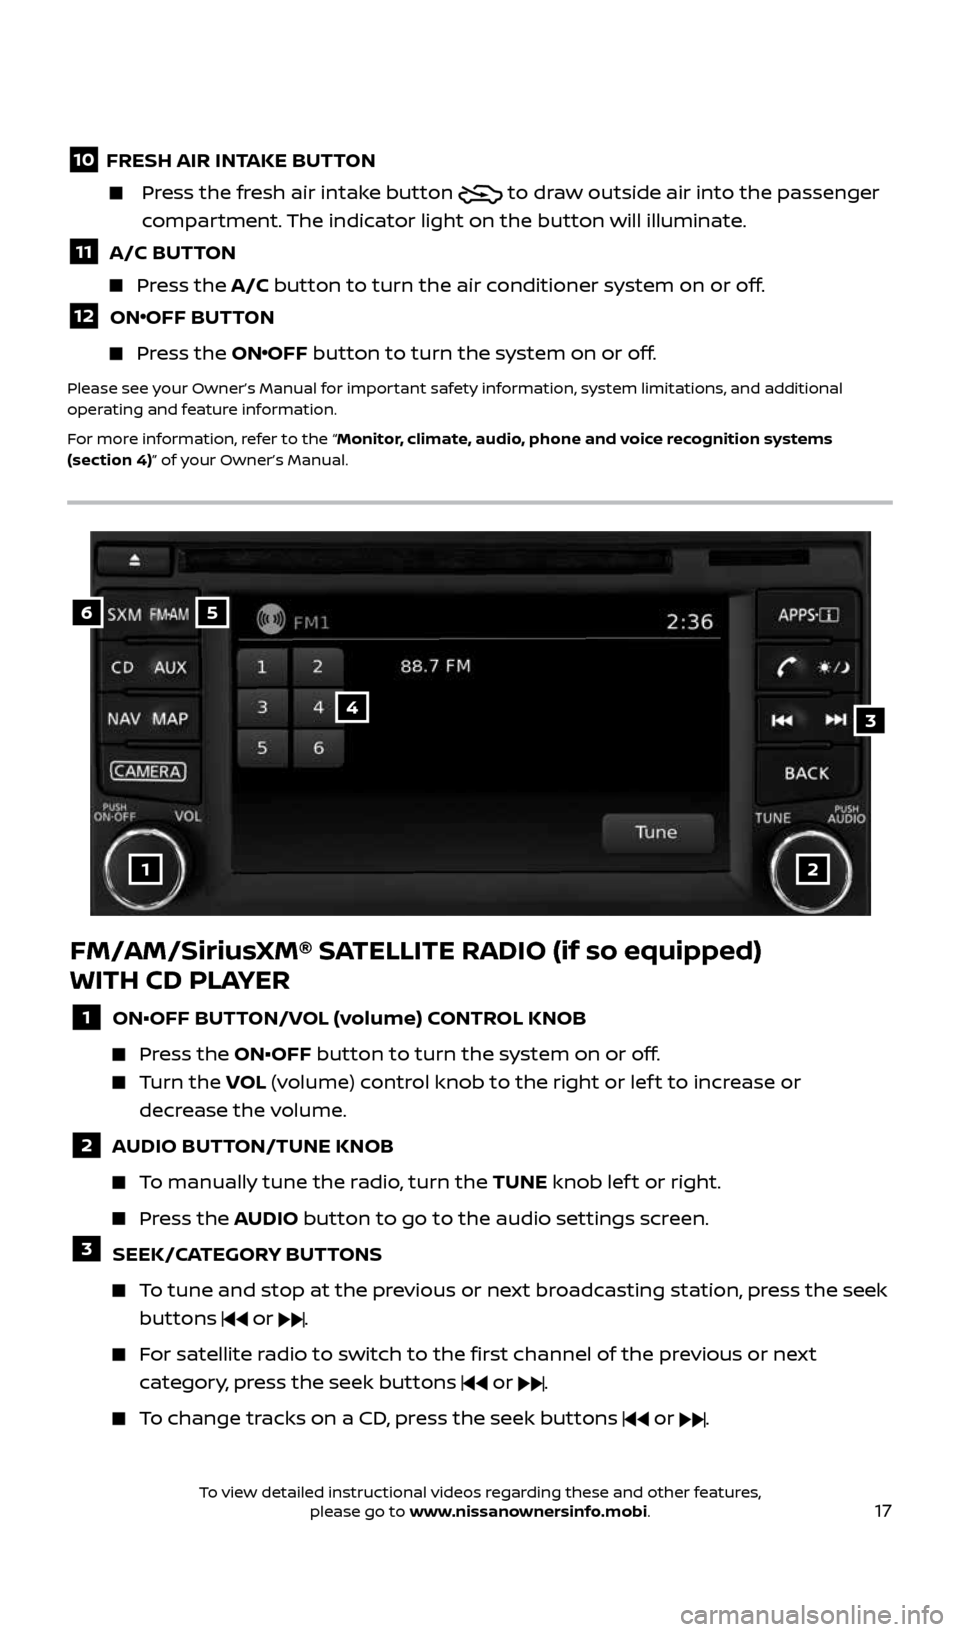
1 ON•OFF BUTTON/VOL (volume) CONTROL KNOB
Press the ON•OFF button to turn the system on or off.
Turn the VOL (volume) control knob to the right or lef t to increase or
decrease the volume.
2 AUDIO BUTTON/TUNE KNOB
To manually tune the radio, turn the TUNE knob lef t or right.
Press the AUDIO button to go to the audio settings screen.
3 SEEK/CATEGORY BUTTONS
To tune and stop at the previous or next broadcasting station, press the seek
buttons
or .
For satellite radio to switch to the first channel of the previous or next
category, press the seek buttons
or .
To change tracks on a CD, press the seek buttons or .
2434454_17b_Sentra_US_pQRG_101416.indd 1710/14/16 11:00 AM
To view detailed instructional videos regarding these and other features, please go to www.nissanownersinfo.mobi.
Page 20 of 36
18
CRUISE CONTROL (if so equipped)
The cruise control system enables you to set
a constant cruising speed once the vehicle
has reached 25 mph (40 km/h).
The system will automatically maintain the
set speed until you tap the brake pedal,
accelerate, cancel or turn the system off.
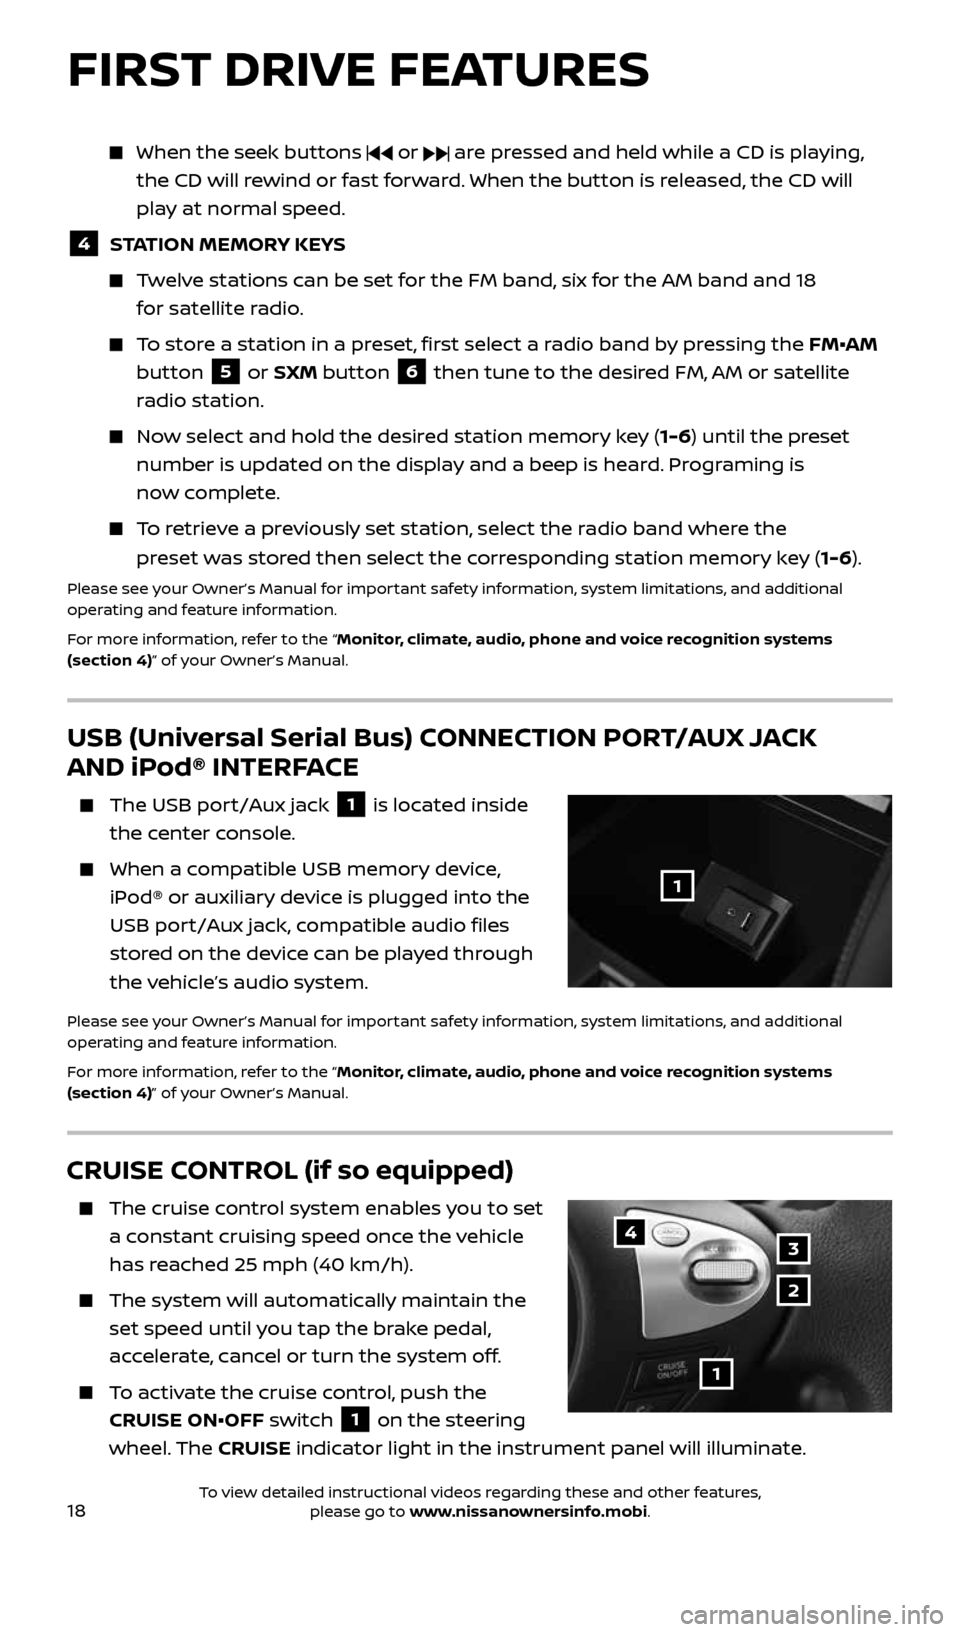
To activate the cruise control, push the
CRUISE ON•OFF switch
1 on the steering
wheel. The CRUISE indicator light in the instrument panel will illuminate.
1
4
2
3
FIRST DRIVE FEATURES
USB (Universal Serial Bus) CONNECTION PORT/AUX JACK
AND iPod® INTERFACE
The USB port/Aux jack 1 is located inside
the center console.
When a compatible USB memory device,
iPod® or auxiliary device is plugged into the
USB port/Aux jack, compatible audio files
stored on the device can be played through
the vehicle’s audio system.
Please see your Owner’s Manual for important safety information, system limitations, and additional
operating and feature information.
For more information, refer to the “Monitor, climate, audio, phone and voice recognition systems
(section 4)” of your Owner’s Manual.
1
When the seek buttons or are pressed and held while a CD is playing,
the CD will rewind or fast forward. When the button is released, the CD will
play at normal speed.
4 STATION MEMORY KEYS
Twelve stations can be set for the FM band, six for the AM band and 18
for satellite radio.
To store a station in a preset, first select a radio band by pressing the FM•AM
button
5 or SXM button 6 then tune to the desired FM, AM or satellite
radio station.
Now select and hold the desired station memory key (1-6) until the preset
number is updated on the display and a beep is heard. Programing is
now complete.
To retrieve a previously set station, select the radio band where the
preset was stored then select the corresponding station memory key (1-6).
Please see your Owner’s Manual for important safety information, system limitations, and additional
operating and feature information.
For more information, refer to the “Monitor, climate, audio, phone and voice recognition systems
(section 4)” of your Owner’s Manual.
2434454_17b_Sentra_US_pQRG_101416.indd 1810/14/16 11:00 AM
To view detailed instructional videos regarding these and other features, please go to www.nissanownersinfo.mobi.
Page 23 of 36
21
SYSTEM GUIDE
VEHICLE INFORMATION DISPLAY (if so equipped)
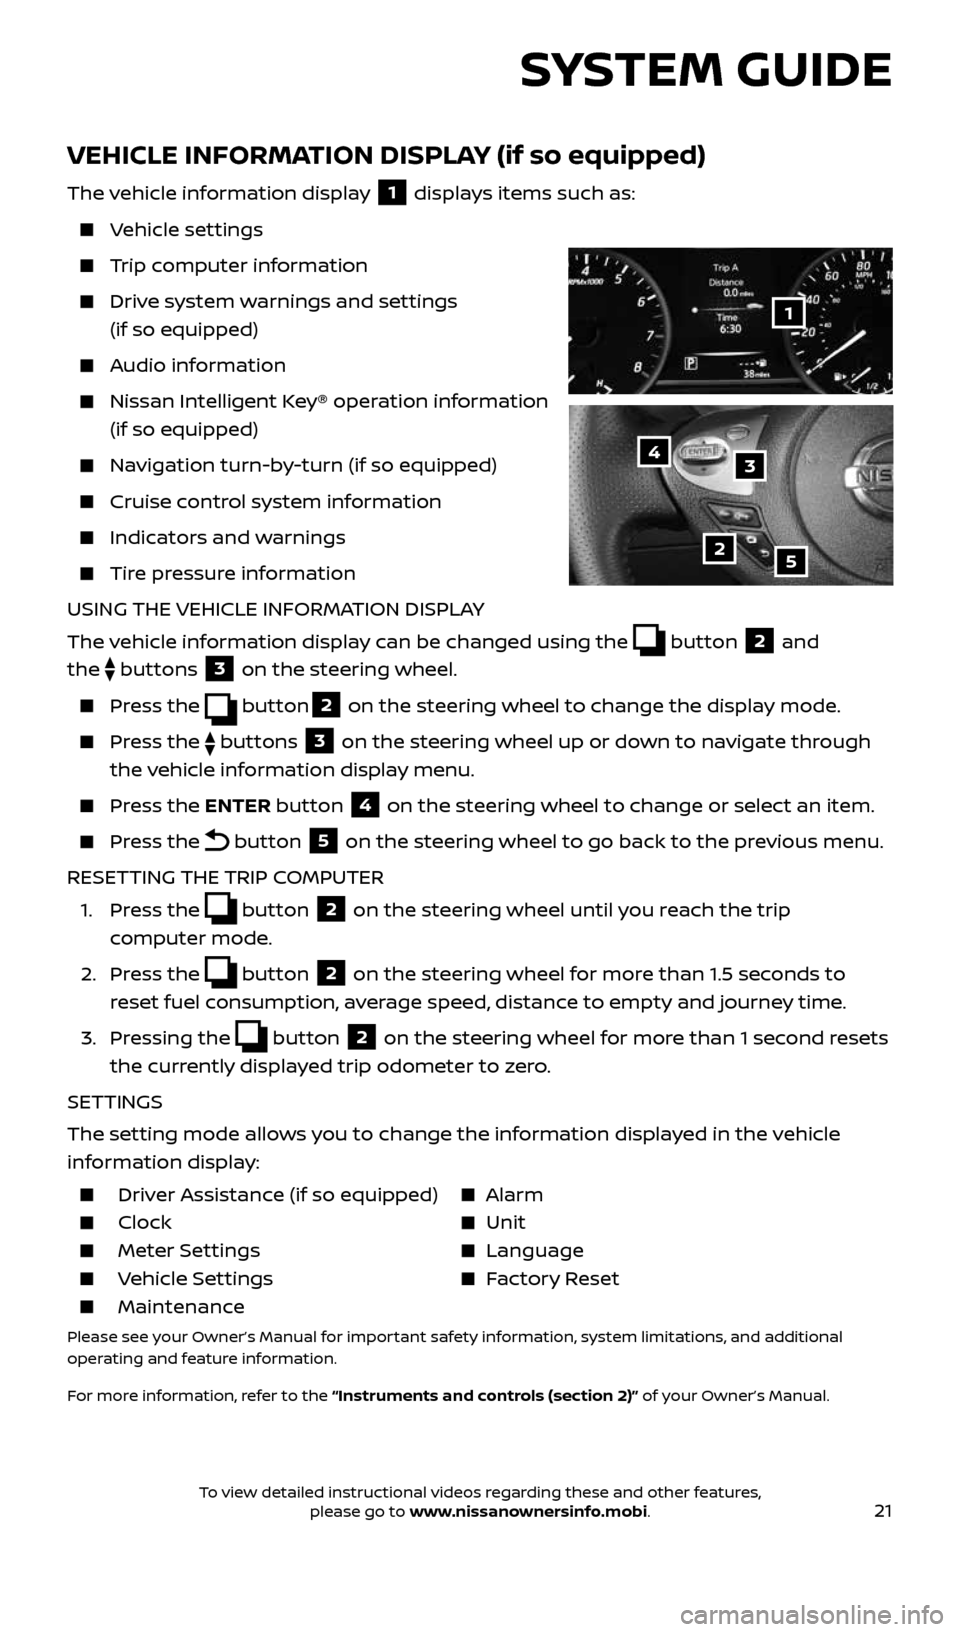
The vehicle information display 1 displays items such as:
Vehicle settings
Trip computer information
Drive system warnings and settings
(if so equipped)
Audio information
Nissan Intelligent Key® operation information
(if so equipped)
Navigation turn-by-turn (if so equipped)
Cruise control system information
Indicators and warnings
Tire pressure information
USING THE VEHICLE INFORMATION DISPLAY
The vehicle information display can be changed using the
button 2 and
the
buttons 3 on the steering wheel.
Press the button2 on the steering wheel to change the display mode.
Press the buttons 3 on the steering wheel up or down to navigate through
the vehicle information display menu.
Press the ENTER button 4 on the steering wheel to change or select an item.
Press the button 5 on the steering wheel to go back to the previous menu.
RESETTING THE TRIP COMPUTER
1. Press the
button 2 on the steering wheel until you reach the trip
computer mode.
2. Press the
button 2 on the steering wheel for more than 1.5 seconds to
reset fuel consumption, average speed, distance to empty and journey time.
3. Pressing the
button 2 on the steering wheel for more than 1 second resets
the currently displayed trip odometer to zero.
SETTINGS
The setting mode allows you to change the information displayed in the vehicle
information display:
Driver Assistance (if so equipped) Alarm
Clock Unit
Meter Settings Language
Vehicle Settings Factory Reset
Maintenance
Please see your Owner’s Manual for important safety information, system limitations, and additional
operating and feature information.
For more information, refer to the “Instruments and controls (section 2)” of your Owner’s Manual.
2
1
34
5
2434454_17b_Sentra_US_pQRG_101416.indd 2110/14/16 11:00 AM
To view detailed instructional videos regarding these and other features, please go to www.nissanownersinfo.mobi.
Page 31 of 36
29
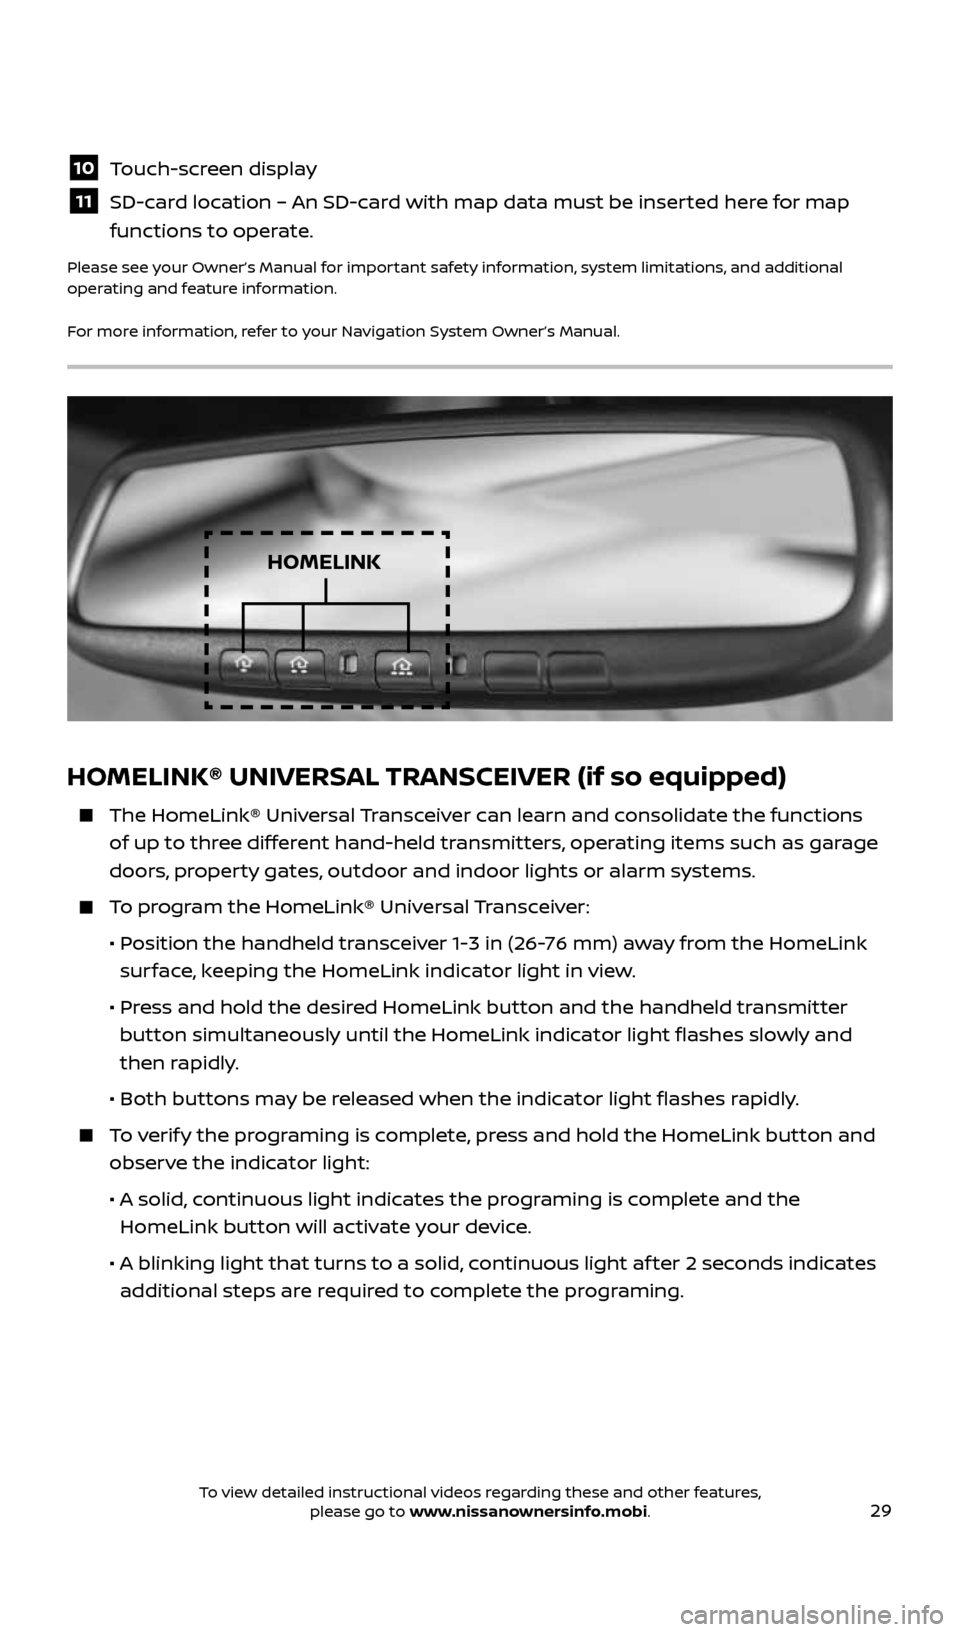
HOMELINK® UNIVERSAL TRANSCEIVER (if so equipped)
The HomeLink® Universal Transceiver can learn and consolidate the functions
of up to three different hand-held transmitters, operating items such as garage
doors, property gates, outdoor and indoor lights or alarm systems.
To program the HomeLink® Universal Transceiver:
• Position the handheld transceiver 1-3 in (26-76 mm) away from the HomeLink
surface, keeping the HomeLink indicator light in view.
• Press and hold the desired HomeLink button and the handheld transmitter
button simultaneously until the HomeLink indicator light flashes slowly and
then rapidly.
• Both buttons may be released when the indicator light flashes rapidly.
To verify the programing is complete, press and hold the HomeLink button and
observe the indicator light:
• A solid, continuous light indicates the programing is complete and the
HomeLink button will activate your device.
• A blinking light that turns to a solid, continuous light af ter 2 seconds indicates
additional steps are required to complete the programing.
HOMELINK
10 Touch-screen display
11 SD-card location – An SD-card with map data must be inserted here for map
functions to operate.
Please see your Owner’s Manual for important safety information, system limitations, and additional
operating and feature information.
For more information, refer to your Navigation System Owner’s Manual.
2434454_17b_Sentra_US_pQRG_101416.indd 2910/14/16 11:00 AM
To view detailed instructional videos regarding these and other features, please go to www.nissanownersinfo.mobi.