Engine mechanical NISSAN TEANA 2014 Service Manual
[x] Cancel search | Manufacturer: NISSAN, Model Year: 2014, Model line: TEANA, Model: NISSAN TEANA 2014Pages: 4801, PDF Size: 51.2 MB
Page 1 of 4801
A
B
C
D
E
F
G
H
I
J
K
L
M
N
P
O
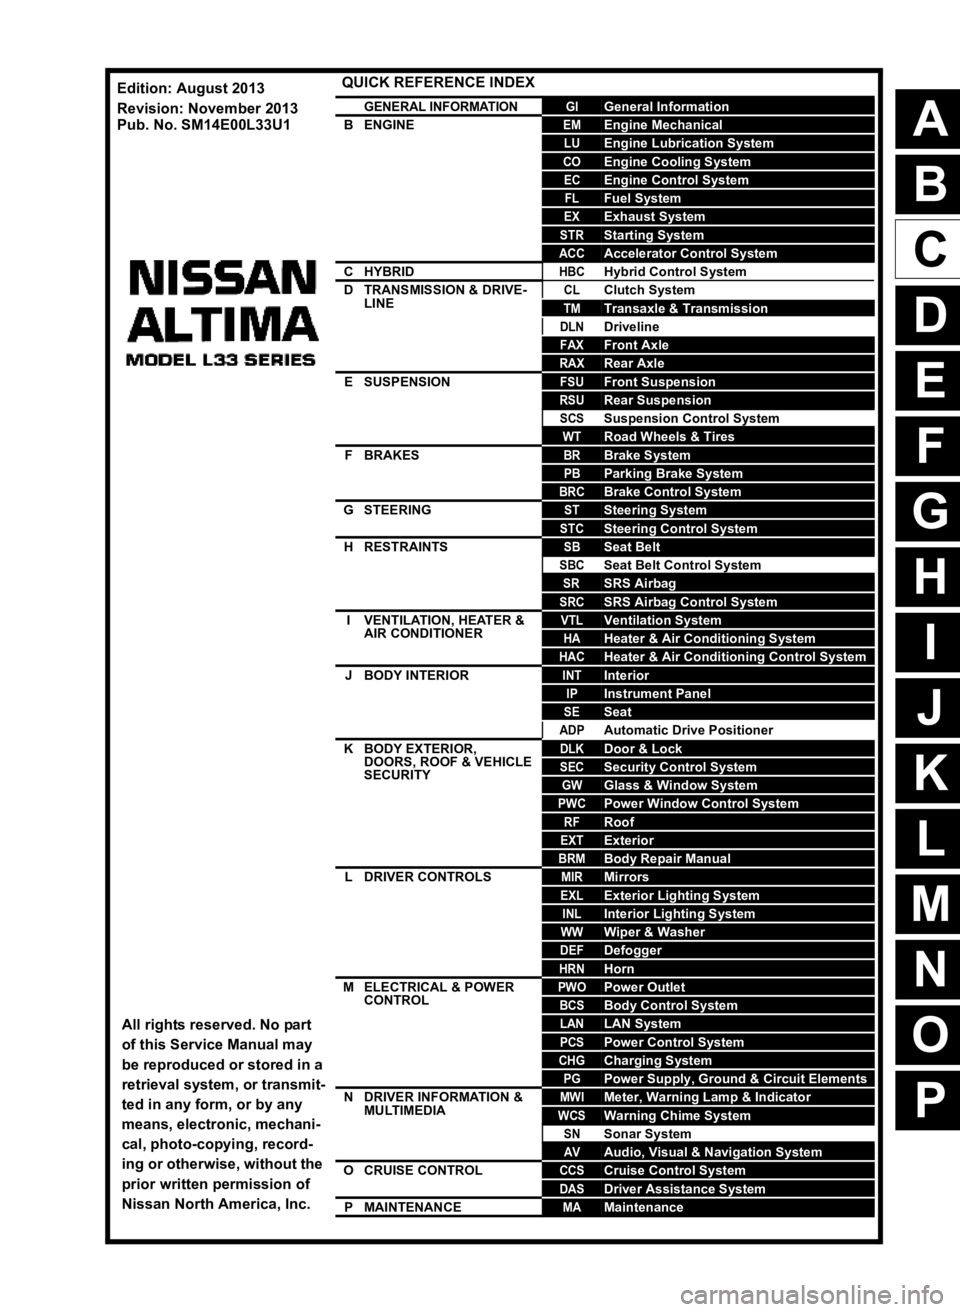
QUICK REFERENCE INDEX
AGENERAL INFORMATIONGIGeneral Information
BENGINEEMEngine Mechanical
LUEngine Lubrication System
COEngine Cooling System
ECEngine Control System
FLFuel System
EXExhaust System
STRStarting System
ACCAccelerator Control System
CHYBRIDHBCHybrid Control System
DTRANSMISSION & DRIVE-LINECLClutch System
TMTransaxle & Transmission
DLNDriveline
FAXFront Axle
RAXRear Axle
ESUSPENSIONFSUFront Suspension
RSURear Suspension
SCSSuspension Control System
WTRoad Wheels & Tires
FBRAKESBRBrake System
PBParking Brake System
BRCBrake Control System
GSTEERINGSTSteering System
STCSteering Control System
HRESTRAINTSSBSeat Belt
SBCSeat Belt Control System
SRSRS Airbag
SRCSRS Airbag Control System
IVENTILATION, HEATER &
AIR CONDITIONERVTLVentilation System
HAHeater & Air Conditioning System
HACHeater & Air Conditioning Control System
JBODY INTERIORINTInterior
IPInstrument Panel
SESeat
ADPAutomatic Drive Positioner
KBODY EXTERIOR, DOORS, ROOF & VEHICLE
SECURITYDLKDoor & Lock
SECSecurity Control System
GWGlass & Window System
PWCPower Window Control System
RFRoof
EXTExterior
BRMBody Repair Manual
LDRIVER CONTROLSMIRMirrors
EXLExterior Lighting System
INLInterior Lighting System
WWWiper & Washer
DEFDefogger
HRNHorn
MELECTRICAL & POWER
CONTROLPWOPower Outlet
BCSBody Control System
LANLAN System
PCSPower Control System
CHGCharging System
PGPower Supply, Ground & Circuit Elements
NDRIVER INFORMATION &
MULTIMEDIAMWIMeter, Warning Lamp & Indicator
WCSWarning Chime System
SNSonar System
AVAudio, Visual & Navigation System
OCRUISE CONTROLCCSCruise Control System
DASDriver Assistance System
PMAINTENANCEMAMaintenance
All rights reserved. No part
of this Service Manual may
be reproduced or stored in a
retrieval system, or transmit-
ted in any form, or by any
means, electronic, mechani-
cal, photo-copying, record-
ing or otherwise, without the
prior written permission of
Nissan North America, Inc.
Edition: August 2013
Revision: November 2013
Pub. No. SM14E00L33U1
Page 151 of 4801
![NISSAN TEANA 2014 Service Manual
PRECAUTIONSBRC-5
< PRECAUTION > [VDC/TCS/ABS]
C
D E
G H
I
J
K L
M A
B
BRC
N
O P
Precaution for Brake ControlINFOID:0000000009463736
• During ABS operation, the brake pedal may vibrate lightly and](/img/5/57390/w960_57390-150.png "NISSAN TEANA 2014 Service Manual
PRECAUTIONSBRC-5
< PRECAUTION > [VDC/TCS/ABS]
C
D E
G H
I
J
K L
M A
B
BRC
N
O P
Precaution for Brake ControlINFOID:0000000009463736
• During ABS operation, the brake pedal may vibrate lightly and")
PRECAUTIONSBRC-5
< PRECAUTION > [VDC/TCS/ABS]
C
D E
G H
I
J
K L
M A
B
BRC
N
O P
Precaution for Brake ControlINFOID:0000000009463736
• During ABS operation, the brake pedal may vibrate lightly and a mechanical noise may be heard. This is normal.
• Just after starting vehicle, the brake pedal may vibrate or a motor operating noise may be heard from engine
compartment. This is a normal status of operation check.
• Stopping distance may be longer than that of vehicles without ABS when vehicle drives on rough, gravel, or
snow-covered (fresh, deep snow) roads.
• When an error is indicated by ABS or another warning lamp, collect all necessary information from customer
(what symptoms are present under what conditions) and check for simple causes before starting diagnosis.
Besides electrical system inspection, check boos ter operation, brake fluid level, and fluid leaks.
• If incorrect tire sizes or types are installed on the vehicle or brake pads are not Genuine NISSAN parts, stop-
ping distance or steering stability may deteriorate.
• If there is a radio, antenna or related wiring near control module, ABS function may have a malfunction or
error.
• If aftermarket parts (car stereo, CD player, etc.) have been installed, check for incidents such as harness pinches, open circuits or improper wiring.
• If the following components are replaced with non-genuine components or modified, the VDC OFF indicator
lamp and SLIP indicator lamp may turn on or the VDC system may not operate properly. Components
related to suspension (shock absorbers, struts, springs , bushings, etc.), tires, wheels (exclude specified
size), components related to brake system (pads, roto rs, calipers, etc.), components related to engine (muf-
fler, ECM, etc.), components related to body reinforcement (roll bar, tower bar, etc.).
• Driving with broken or excessively worn suspensi on components, tires or brake system components may
cause the VDC OFF indicator lamp and the SLIP indicator lamp to turn on, and the VDC system may not
operate properly.
• When the TCS or VDC is activated by sudden acceleration or sudden turn, some noise may occur. The
noise is a result of the normal operation of the TCS and VDC.
• When driving on roads which have extreme slopes (such as mountainous roads) or high banks (such as sharp curves on a freeway), the VDC may not operate no rmally, or the VDC warning lamp and the SLIP indi-
cator lamp may turn on. This is not a problem if normal operation can be resumed after restarting the engine.
• Sudden turns (such as spin turns, acceleration turns), drifting, etc. with VDC turned off may cause the yaw rate/side/decel G sensor to indicate a problem. This is not a problem if normal operation can be resumed
after restarting the engine.
Precaution for CAN SystemINFOID:0000000009463737
• Do not apply voltage of 7.0V or higher to terminal to be measured.
• Maximum open terminal voltage of tester in use must be less than 7.0V.
• Before checking harnesses, turn ignition switch OFF and disconnect battery negative cable.
• Area to be repaired must be soldered and wrapped with tape. Make sure that fraying of twisted wire is within 110 mm (4.33 in).
PKIA0306E
Revision: November 20132014 Altima NAMRevision: November 20132014 Altima NAM
Page 389 of 4801
![NISSAN TEANA 2014 Service Manual
OVERHEATING CAUSE ANALYSISCO-9
< SYSTEM DESCRIPTION > [QR25DE]
C
D E
F
G H
I
J
K L
M A
CO
NP
O
OVERHEATING CAUSE ANALYSIS
Troubleshooting ChartINFOID:0000000009460389
Symptom Check items
Cooling sys](/img/5/57390/w960_57390-388.png "NISSAN TEANA 2014 Service Manual
OVERHEATING CAUSE ANALYSISCO-9
< SYSTEM DESCRIPTION > [QR25DE]
C
D E
F
G H
I
J
K L
M A
CO
NP
O
OVERHEATING CAUSE ANALYSIS
Troubleshooting ChartINFOID:0000000009460389
Symptom Check items
Cooling sys")
OVERHEATING CAUSE ANALYSISCO-9
< SYSTEM DESCRIPTION > [QR25DE]
C
D E
F
G H
I
J
K L
M A
CO
NP
O
OVERHEATING CAUSE ANALYSIS
Troubleshooting ChartINFOID:0000000009460389
Symptom Check items
Cooling sys-
tem parts
malfunction Poor heat transfer
Water pump malfunction Worn or loose drive belt
—
Thermostat stuck closed Coolant circulation
Damaged fins Dust contamination or rock
clogging
Mechanical damage
Clogged radiator cooling
tube Excess foreign material
(rust, dirt, sand, etc.)
Reduced air flow Cooling fan does not oper-
ate
Engine cooling fans —
High resistance to fan rota-
tion
Damaged fan blades
Damaged radiator shroud — Radiator shroud —
Improper coolant mixture
ratio — Coolant viscosity —
Poor coolant quality — Periodic maintenance —
Insufficient coolant Coolant leaks Cooling hose
Loose clamp
Cracked hose
Water pump Poor sealing
Radiator cap Loose
Poor sealing
Radiator O-ring for damage, deterio-
ration or improper fitting
Cracked radiator tank
Cracked radiator core
Reservoir tank Cracked reservoir tank
Overflowing reservoir tank Exhaust gas leaks into cool-
ing system Cylinder head deterioration
Cylinder head gasket deteri-
oration
Revision: November 20132014 Altima NAM
Page 1027 of 4801
![NISSAN TEANA 2014 Service Manual
COMPONENT PARTSEC-27
< SYSTEM DESCRIPTION > [QR25DE]
C
D E
F
G H
I
J
K L
M A
EC
NP
O
The ECM activates the fuel pump for 1 second after the ignition
switch is turned ON to improve engine start abil](/img/5/57390/w960_57390-1026.png "NISSAN TEANA 2014 Service Manual
COMPONENT PARTSEC-27
< SYSTEM DESCRIPTION > [QR25DE]
C
D E
F
G H
I
J
K L
M A
EC
NP
O
The ECM activates the fuel pump for 1 second after the ignition
switch is turned ON to improve engine start abil")
COMPONENT PARTSEC-27
< SYSTEM DESCRIPTION > [QR25DE]
C
D E
F
G H
I
J
K L
M A
EC
NP
O
The ECM activates the fuel pump for 1 second after the ignition
switch is turned ON to improve engine start ability. If the ECM
receives a engine speed signal from the camshaft position sensor
(PHASE), it knows that the engine is rotating, and causes the pump
to operate. If the engine speed signal is not received when the igni-
tion switch is ON, the engine stalls. The ECM stops pump operation
and prevents battery discharging, thereby improving safety. The
ECM does not directly drive the fuel pump. It sends the control signal
to the fuel pump control module, which in turn controls the fuel
pump.
FUEL LEVEL SENSOR
The fuel level sensor is mounted in the fuel level sensor unit.
The sensor detects a fuel level in the fuel tank and tr ansmits a signal to the combination meter. The combina-
tion meter sends the fuel level sensor signal to the ECM via the CAN communication line.
It consists of two parts, one is mechanical float and the ot her is variable resistor. Fuel level sensor output volt-
age changes depending on the movement of the fuel mechanical float.
Fuel Tank Temperature SensorINFOID:0000000009462060
The fuel tank temperature sensor is used to detect the fuel tempera-
ture inside the fuel tank. The sensor modifies a voltage signal from
the ECM. The modified signal returns to the ECM as the fuel temper-
ature input. The sensor uses a ther mistor which is sensitive to the
change in temperature. The electrical resistance of the thermistor
decreases as temperature increases.
*: These data are reference values and are measured between ECM terminals.
Mass Air Flow Sensor (With Intake Air Temperature Sensor)INFOID:0000000009462061
MASS AIR FLOW SENSOR
JPBIA5842ZZ
Condition Fuel pump operation
Ignition switch is turned to ON. Operates for 1 second.
Engine running and cranking Operates.
When engine is stopped Stops in 1.5 seconds.
Except as shown above Sto ps .
SEF012P
Fluid temperature
[° C ( °F)] Voltage* (V) Resistance (k
Ω)
20 (68) 3.5 2.3 - 2.7
50 (122) 2.2 0.79 - 0.90
Revision: November 20132014 Altima NAMRevision: November 20132014 Altima NAM
Page 1170 of 4801
![NISSAN TEANA 2014 Service Manual
EC-170
< BASIC INSPECTION >[QR25DE]
BASIC INSPECTION
BASIC INSPECTION
Work ProcedureINFOID:0000000009462129
1.INSPECTION START
1. Check service records for any recent repairs that ma y indicate a rel](/img/5/57390/w960_57390-1169.png "NISSAN TEANA 2014 Service Manual
EC-170
< BASIC INSPECTION >[QR25DE]
BASIC INSPECTION
BASIC INSPECTION
Work ProcedureINFOID:0000000009462129
1.INSPECTION START
1. Check service records for any recent repairs that ma y indicate a rel")
EC-170
< BASIC INSPECTION >[QR25DE]
BASIC INSPECTION
BASIC INSPECTION
Work ProcedureINFOID:0000000009462129
1.INSPECTION START
1. Check service records for any recent repairs that ma y indicate a related malfunction, or a current need for
scheduled maintenance.
2. Open engine hood and check the following:
- Harness connectors for improper connections
- Wiring harness for improper connections, pinches and cut
- Vacuum hoses for splits, kinks and improper connections
- Hoses and ducts for leaks
- Air cleaner clogging
- Gasket
3. Confirm that electrical or mechanical loads are not applied.
- Headlamp switch is OFF.
- Air conditioner switch is OFF.
- Rear window defogger switch is OFF.
- Steering wheel is in the straight-ahead position, etc.
4. Start engine and warm it up until engine coolant temperature indicator points the middle of gauge.
Ensure engine stays below 1,000 rpm.
5. Run engine at about 2,000 rpm for about 2 minutes under no load.
6. Make sure that no DTC is displayed with CONSULT or GST.
Is any DTC detected?
YES >> GO TO 2.
NO >> GO TO 3.
2.REPAIR OR REPLACE
Repair or replace components as necessary according to corresponding Diagnostic Procedure.
>> GO TO 3.
3.CHECK TARGET IDLE SPEED
1. Run engine at about 2,000 rpm for about 2 minutes under no load.
SEF983U
SEF976U
SEF977U
Revision: November 20132014 Altima NAMRevision: November 20132014 Altima NAM
Page 1529 of 4801
![NISSAN TEANA 2014 Service Manual
ENGINE CONTROL SYSTEMEC-529
< SYMPTOM DIAGNOSIS > [QR25DE]
C
D E
F
G H
I
J
K L
M A
EC
NP
O
1 - 6: The numbers refer to the order of inspection.
(continued on next table)
SYSTEM — ENGINE MECHANICA](/img/5/57390/w960_57390-1528.png "NISSAN TEANA 2014 Service Manual
ENGINE CONTROL SYSTEMEC-529
< SYMPTOM DIAGNOSIS > [QR25DE]
C
D E
F
G H
I
J
K L
M A
EC
NP
O
1 - 6: The numbers refer to the order of inspection.
(continued on next table)
SYSTEM — ENGINE MECHANICA")
ENGINE CONTROL SYSTEMEC-529
< SYMPTOM DIAGNOSIS > [QR25DE]
C
D E
F
G H
I
J
K L
M A
EC
NP
O
1 - 6: The numbers refer to the order of inspection.
(continued on next table)
SYSTEM — ENGINE MECHANICAL & OTHER
Exhaust valve timing control solenoid valve
circuit 32 13223 3
EC-225
PNP signal circuit 3 3 3 3 3 EC-410
Refrigerant pressure sensor circuit 2 3 3 4EC-523
Electrical load signal circuit 3EC-503
Intake manifold runner control valve motor cir-
cuit 44
EC-462
Intake manifold runner control valve position
sensor circuit 44
EC-465
Intake manifold tuning valve circuit 1 EC-456
Manifold absolute pressure sensor circuit 3EC-236
Air conditioner circuit 223333333 3 2HAC-46,
HAC-139
Battery current sensor circuit 4 5 5 3 EC-428
,
EC-431
,
EC-434
,
EC-438
Battery temperature sensor circuit 4 5 5 3 EC-440
ASCD steering switch circuitEC-442
ABS actuator and electric unit (control unit) 4BRC-55
SYMPTOM
Reference page
HARD/NO START/RESTART (EXCP. HA)
ENGINE STALL
HESITATION/SURGING/FLAT SPOT
SPARK KNOCK/DETONATION
LACK OF POWER/POOR ACCELERATION
HIGH IDLE/LOW IDLE
ROUGH IDLE/HUNTING
IDLING VIBRATION
SLOW/NO RETURN TO IDLE
OVERHEATS/WATER TEMPERATURE HIGH
EXCESSIVE FUEL CONSUMPTION
EXCESSIVE OIL CONSUMPTION
BATTERY DEAD (UNDER CHARGE)
Warranty symptom code AA AB AC AD AE AF AG AH AJ AK AL AM HA
Revision: November 20132014 Altima NAMRevision: November 20132014 Altima NAM
Page 1559 of 4801
![NISSAN TEANA 2014 Service Manual
COMPONENT PARTSEC-559
< SYSTEM DESCRIPTION > [VQ35DE]
C
D E
F
G H
I
J
K L
M A
EC
NP
O
FUEL LEVEL SENSOR
The fuel level sensor is mounted in the fuel level sensor unit.
The sensor detects a fuel lev](/img/5/57390/w960_57390-1558.png "NISSAN TEANA 2014 Service Manual
COMPONENT PARTSEC-559
< SYSTEM DESCRIPTION > [VQ35DE]
C
D E
F
G H
I
J
K L
M A
EC
NP
O
FUEL LEVEL SENSOR
The fuel level sensor is mounted in the fuel level sensor unit.
The sensor detects a fuel lev")
COMPONENT PARTSEC-559
< SYSTEM DESCRIPTION > [VQ35DE]
C
D E
F
G H
I
J
K L
M A
EC
NP
O
FUEL LEVEL SENSOR
The fuel level sensor is mounted in the fuel level sensor unit.
The sensor detects a fuel level in the fuel tank and tr ansmits a signal to the combination meter. The combina-
tion meter sends the fuel level sensor signal to the ECM via the CAN communication line.
It consists of two parts, one is mechanical float and the ot her is variable resistor. Fuel level sensor output volt-
age changes depending on the movement of the fuel mechanical float.
FUEL TANK TEMPERATURE SENSOR
The fuel tank temperature sensor is used to detect the fuel tempera-
ture inside the fuel tank. The sensor modifies a voltage signal from
the ECM. The modified signal returns to the ECM as the fuel temper-
ature input. The sensor uses a ther mistor which is sensitive to the
change in temperature. The electrical resistance of the thermistor
decreases as temperature increases.
*: These data are reference values and are measured between ECM terminals 95 (Fuel tank temperature sensor) and ground.
Heated Oxygen Sensor 2INFOID:0000000009462500
DESCRIPTION
The heated oxygen sensor 2, after three way catalyst (manifold),
monitors the oxygen level in the exhaust gas.
Even if switching characteristics of the air fuel ratio (A/F) sensor 1
are shifted, the air fuel ratio is c ontrolled to stoichiometric, by the sig-
nal from the heated oxygen sensor 2.
This sensor is made of ceramic zirconia. The zirconia generates volt-
age from approximately 1 V in richer conditions to 0 V in leaner con-
ditions.
Under normal conditions the heated oxygen sensor 2 is not used for
engine control operation.
HEATED OXYGEN SENSOR 2 HEATER
Heated oxygen sensor 2 heater is integrated in the sensor.
The ECM performs ON/OFF control of the heated oxygen sensor 2 heater corresponding to the engine speed,
amount of intake air and engine coolant temperature.
Condition Fuel pump operation
Ignition switch is turned to ON. Operates for 1 second.
Engine running and cranking Operates.
When engine is stopped Stops in 1.5 seconds.
Except as shown above Sto ps .
Fluid temperature
[° C ( °F)] Voltage*
(V) Resistance
(kΩ)
20 (68) 3.5 2.3 - 2.7
50 (122) 2.2 0.79 - 0.90
SEF012P
SEF327R
Engine speed Heated oxygen sensor 2 heater
Above 3,600 rpm OFF
Below 3,600 rpm after the following conditions are met.
• Engine: After warming up
• Keeping the engine speed between 3,500 and 4,000 rpm for 1
minute and at idle for 1 minute under no load ON
Revision: November 20132014 Altima NAMRevision: November 20132014 Altima NAM
Page 1675 of 4801
![NISSAN TEANA 2014 Service Manual
BASIC INSPECTIONEC-675
< BASIC INSPECTION > [VQ35DE]
C
D E
F
G H
I
J
K L
M A
EC
NP
O
BASIC INSPECTION
Work ProcedureINFOID:0000000009462550
1.INSPECTION START
1. Check service records for any recent](/img/5/57390/w960_57390-1674.png "NISSAN TEANA 2014 Service Manual
BASIC INSPECTIONEC-675
< BASIC INSPECTION > [VQ35DE]
C
D E
F
G H
I
J
K L
M A
EC
NP
O
BASIC INSPECTION
Work ProcedureINFOID:0000000009462550
1.INSPECTION START
1. Check service records for any recent")
BASIC INSPECTIONEC-675
< BASIC INSPECTION > [VQ35DE]
C
D E
F
G H
I
J
K L
M A
EC
NP
O
BASIC INSPECTION
Work ProcedureINFOID:0000000009462550
1.INSPECTION START
1. Check service records for any recent repairs that may indicate a related malfunction, or a current need for scheduled maintenance.
2. Open engine hood and check the following:
- Harness connectors for improper connections
- Wiring harness for improper connections, pinches and cut
- Vacuum hoses for splits, kinks and improper connections
- Hoses and ducts for leakage
- Air cleaner clogging
- Gasket
3. Check that electrical or mechanical loads are not applied.
- Head lamp switch is OFF.
- Air conditioner switch is OFF.
- Rear window defogger switch is OFF.
- Steering wheel is in the straight-ahead position, etc.
4. Start engine and warm it up until engine coolant temperature indicator points to the middle of gauge.
Check that engine stays below 1,000 rpm.
5. Run engine at approximately 2,000 rpm for approximately 2 min- utes under no load.
6. Check that no DTC is displayed with CONSULT or GST.
Are any DTCs detected?
YES >> GO TO 2.
NO >> GO TO 3.
2.REPAIR OR REPLACE
Repair or replace components as necessary according to corresponding Diagnostic Procedure.
>> GO TO 3
3.CHECK TARGET IDLE SPEED
1. Run engine at approximately 2,000 rpm for approximately 2 minutes under no load.
SEF983U
SEF976U
SEF977U
Revision: November 20132014 Altima NAMRevision: November 20132014 Altima NAM
Page 1988 of 4801
![NISSAN TEANA 2014 Service Manual
EC-988
< SYMPTOM DIAGNOSIS >[VQ35DE]
ENGINE CONTROL SYSTEM SYMPTOMS
1 - 6: The numbers refer to the order of inspection.
(continued on next page)
SYSTEM — ENGINE MECHANICAL & OTHER
Knock sensor ci](/img/5/57390/w960_57390-1987.png "NISSAN TEANA 2014 Service Manual
EC-988
< SYMPTOM DIAGNOSIS >[VQ35DE]
ENGINE CONTROL SYSTEM SYMPTOMS
1 - 6: The numbers refer to the order of inspection.
(continued on next page)
SYSTEM — ENGINE MECHANICAL & OTHER
Knock sensor ci")
EC-988
< SYMPTOM DIAGNOSIS >[VQ35DE]
ENGINE CONTROL SYSTEM SYMPTOMS
1 - 6: The numbers refer to the order of inspection.
(continued on next page)
SYSTEM — ENGINE MECHANICAL & OTHER
Knock sensor circuit 2 3 EC-815
Engine oil temperature sensor 4 2 3EC-801,
EC-805
Crankshaft position sensor (POS) circuit 2 2 EC-817
Camshaft position sensor (PHASE) circuit 3 2EC-820
Vehicle speed signal circuit 2 3 3 3EC-867
ECM 22333333333EC-881,
EC-883
Intake valve timing control solenoid valve cir-
cuit 32 13223 3
EC-725
PNP signal circuit 3 3 3 3 3 EC-887
VIAS control solenoid valve 1 circuit 1EC-920
VIAS control solenoid valve 2 circuit 1EC-922
Refrigerant pressure sensor circuit 2 3 3 4EC-979
Electrical load signal circuit 3EC-957
Air conditioner circuit 223333333 3 2HA-15
ABS actuator and electric unit (control unit) 4BRC-55
SYMPTOM
Reference
page
HARD/NO START/RESTART (EXCP. HA)
ENGINE STALL
HESITATION/SURGING/FLAT SPOT
SPARK KNOCK/DETONATION
LACK OF POWER/POOR ACCELERATION
HIGH IDLE/LOW IDLE
ROUGH IDLE/HUNTING
IDLING VIBRATION
SLOW/NO RETURN TO IDLE
OVERHEATS/WATER TEMPERATURE HIGH
EXCESSIVE FUEL CONSUMPTION
EXCESSIVE OIL CONSUMPTION
BATTERY DEAD (UNDER CHARGE)
Warranty symptom code AA AB AC AD AE AF AG AH AJ AK AL AM HA
Revision: November 20132014 Altima NAMRevision: November 20132014 Altima NAM
Page 1999 of 4801

EM-1
ENGINE
C
D E
F
G H
I
J
K L
M
SECTION EM
A
EM
N
O P
CONTENTS
ENGINE MECHANICAL
QR25DE
PRECAUTION ................ ...............................
4
PRECAUTIONS .............................................. .....4
Precaution for Supplemental Restraint System
(SRS) "AIR BAG" and "SEAT BELT PRE-TEN-
SIONER" ............................................................. ......
4
Precaution for Draining Coolant ................................4
Precaution for Disconnecting Fuel Piping .................4
Precaution for Removal and Disassembly ................4
Precaution for Inspection, Repair and Replace-
ment .................................................................... ......
4
Special Cautions to Ensure the Safe Disposal of
Sodium-filled Exhaust Valves .............................. ......
5
Precaution for Assembly and Installation ..................6
Parts Requiring Angular Tightening ..........................6
Precaution for Liquid Gasket ............................... ......6
PREPARATION ............................................8
PREPARATION .............................................. .....8
Special Service Tool ........................................... ......8
Commercial Service Tool ........................................10
SYMPTOM DIAGNOSIS ..............................13
NOISE, VIBRATION, AND HARSHNESS
(NVH) TROUBLESHOOTING ........................ ....
13
NVH Troubleshooting - Engine Noise ................. ....13
Use the Chart Below to Help You Find the Cause
of the Symptom ................................................... ....
14
PERIODIC MAINTENANCE .........................16
SPARK PLUG .. .............................................. ....16
Exploded View .................................................... ....16
Removal and Installation .........................................16
DRIVE BELTS ................................................ ....19
Exploded View .................................................... ....19
Checking Drive Belts ...............................................19
Tension Adjustment ............................................. ....19
Removal and Installation .........................................19
Removal and Installation of Drive Belt Auto-ten-
sioner ................................................................... ....
20
AIR CLEANER FILTER .....................................22
Exploded View .........................................................22
Removal and Installation .........................................22
CAMSHAFT VALVE CLEARANCE ..................23
Camshaft valve clearance .......................................23
COMPRESSION PRESSURE ...........................26
Compression pressure ............................................26
REMOVAL AND INSTALLATION ...............28
ENGINE ROOM COVER ...................................28
Exploded View ..................................................... ....28
Removal and Installation .........................................28
AIR CLEANER AND AIR DUCT .......................29
Exploded View .........................................................29
Removal and Installation .........................................29
INTAKE MANIFOLD .........................................30
Exploded View .........................................................30
Removal and Installation .........................................30
EXHAUST MANIFOLD AND THREE WAY
CATALYST ........................................................
33
Exploded View ..................................................... ....33
Removal and Installation .........................................33
OIL PAN AND OIL STRAINER .........................36
Exploded View .........................................................36
Removal and Installation .........................................36
IGNITION COIL .................................................40
Exploded View .........................................................40
Removal and Installation .........................................40
FUEL INJECTOR AND FUEL TUBE ................41
Revision: November 20132014 Altima NAM