Bulb NISSAN TIIDA 2009 Service Repair Manual
[x] Cancel search | Manufacturer: NISSAN, Model Year: 2009, Model line: TIIDA, Model: NISSAN TIIDA 2009Pages: 4331, PDF Size: 58.04 MB
Page 46 of 4331

AT
N
O P
The OD OFF indicator lamp is located on the combination meter.
1. If the ignition switch stays ON after repair work, be su re to turn ignition switch OFF once. Wait at least 10
seconds and then turn it ON (engine stopped) again.
2. Perform “TCM SELF-DIAGNOSTIC PR OCEDURE (No Tools)”. Refer to AT-83, " Diagnosis Procedure
without CONSULT-III " . (The engine warm-up step can be ski
pped when performing the diagnosis only to
erase the DTC.)
3. Perform “OBD-II SELF-DIAGNOSTIC PROCEDURE (No tools)”. Refer to EC-90, " Diagnosis Description "
(HR16DE),
EC-542, " Emission-related Diagnostic Information " (MR Type 1) or
EC-1052, " Emission-
related Diagnostic Information " (MR Type 2).
Malfunction Indicator Lamp (MIL) INFOID:0000000004305313
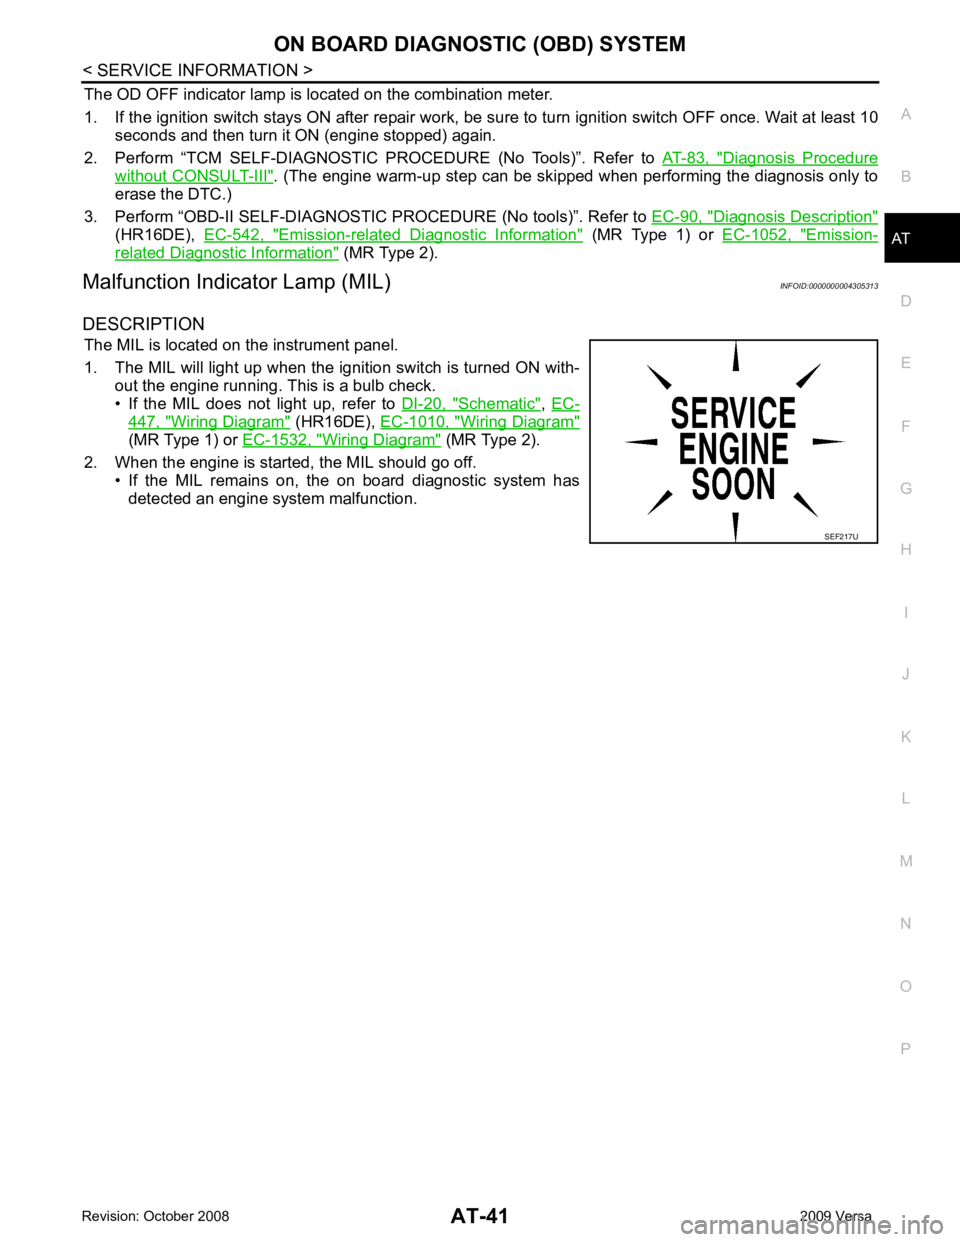
DESCRIPTION The MIL is located on the instrument panel.
1. The MIL will light up when the ignition switch is turned ON with- out the engine running. This is a bulb check.
• If the MIL does not light up, refer to DI-20, " Schematic " ,
EC- 447, " Wiring Diagram " (HR16DE),
EC-1010, " Wiring Diagram "
(MR Type 1) or
EC-1532, " Wiring Diagram " (MR Type 2).
2. When the engine is start ed, the MIL should go off.
• If the MIL remains on, the on board diagnostic system has
detected an engine system malfunction.
Page 976 of 4331
![NISSAN TIIDA 2009 Service Repair Manual CVT-32< SERVICE INFORMATION >
[RE0F08A]
ON BOARD DIAGNOSTIC (OBD) SYSTEM
The MIL is located on the instrument panel.
1. The MIL will light up when the ignition switch is turned ON with- out the engine NISSAN TIIDA 2009 Service Repair Manual CVT-32< SERVICE INFORMATION >
[RE0F08A]
ON BOARD DIAGNOSTIC (OBD) SYSTEM
The MIL is located on the instrument panel.
1. The MIL will light up when the ignition switch is turned ON with- out the engine](/img/5/57398/w960_57398-975.png)
CVT-32< SERVICE INFORMATION >
[RE0F08A]
ON BOARD DIAGNOSTIC (OBD) SYSTEM
The MIL is located on the instrument panel.
1. The MIL will light up when the ignition switch is turned ON with- out the engine running. This is a bulb check.
• If the MIL does not light up, refer to DI-20, " Schematic " , or see
EC-1010, " Wiring Diagram " .
2. When the engine is started, the MIL should go off. If the MIL remains on, the on board diagnostic system has
detected an engine system malfunction. SEF217U
Page 1155 of 4331
![NISSAN TIIDA 2009 Service Repair Manual ON BOARD DIAGNOSTIC (OBD) SYSTEM
CVT-211
< SERVICE INFORMATION >
[RE0F08B] D
E
F
G H
I
J
K L
M A
B CVT
N
O P
The MIL is located on the instrument panel.
1. The MIL will light up when the ignition swit NISSAN TIIDA 2009 Service Repair Manual ON BOARD DIAGNOSTIC (OBD) SYSTEM
CVT-211
< SERVICE INFORMATION >
[RE0F08B] D
E
F
G H
I
J
K L
M A
B CVT
N
O P
The MIL is located on the instrument panel.
1. The MIL will light up when the ignition swit](/img/5/57398/w960_57398-1154.png)
ON BOARD DIAGNOSTIC (OBD) SYSTEM
CVT-211
< SERVICE INFORMATION >
[RE0F08B] D
E
F
G H
I
J
K L
M A
B CVT
N
O P
The MIL is located on the instrument panel.
1. The MIL will light up when the ignition switch is turned ON with- out the engine running. This is a bulb check.
• If the MIL does not light up, refer to DI-20, " Schematic " , or see
EC-1532, " Wiring Diagram " .
2. When the engine is start ed, the MIL should go off.
If the MIL remains on, the on board diagnostic system has
detected an engine system malfunction. SEF217U
Page 1453 of 4331

EC
NP
O
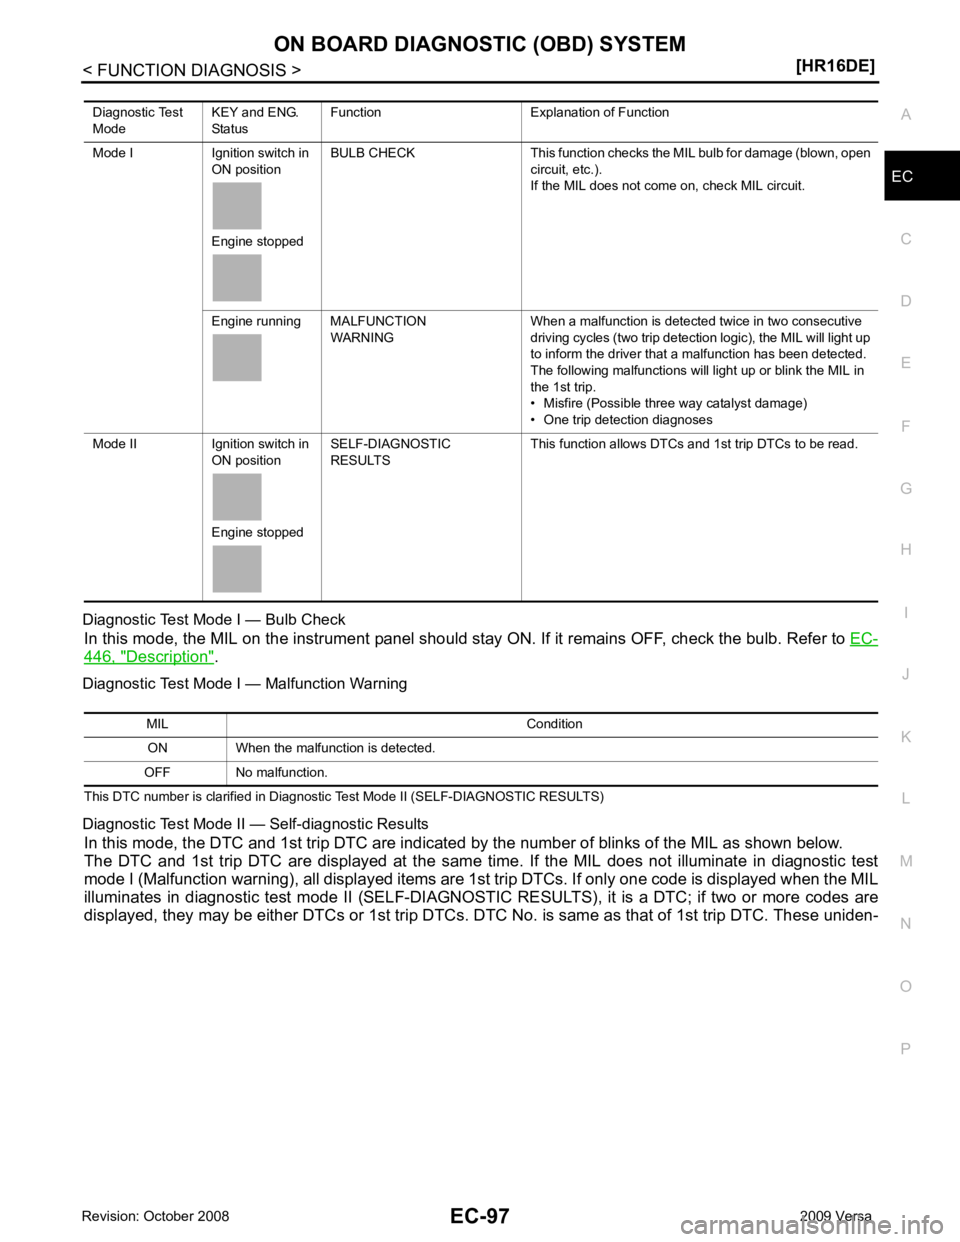
Diagnostic Test Mode I — Bulb Check
In this mode, the MIL on the instrument panel should st ay ON. If it remains OFF, check the bulb. Refer to EC-446, " Description " .
Diagnostic Test Mode I — Malfunction Warning
This DTC number is clarified in Diagnostic Test Mode II (SELF-DIAGNOSTIC RESULTS)
Diagnostic Test Mode II — Self-diagnostic Results In this mode, the DTC and 1st trip DTC are indicated by the number of blinks of the MIL as shown below.
The DTC and 1st trip DTC are displayed at the same time. If the MIL does not illuminate in diagnostic test
mode I (Malfunction warning), all displa yed items are 1st trip DTCs. If only one code is displayed when the MIL
illuminates in diagnostic test mode II (SELF-DIAGNOSTIC RESULTS), it is a DTC; if two or more codes are
displayed, they may be either DTCs or 1st trip DTCs. DTC No. is same as that of 1st trip DTC. These uniden-
Diagnostic Test
Mode KEY and ENG.
Status Function Explanation of Function
Mode I Ignition switch in ON position
Engine stopped BULB CHECK This function checks the MIL bulb for damage (blown, open
circuit, etc.).
If the MIL does not come on, check MIL circuit.
Engine running MALFUNCTION WARNING When a malfunction is detected twice in two consecutive
driving cycles (two trip detection logic), the MIL will light up
to inform the driver that a malfunction has been detected.
The following malfunctions will light up or blink the MIL in
the 1st trip.
• Misfire (Possible three way catalyst damage)
• One trip detection diagnoses
Mode II Ignition switch in ON position
Engine stopped SELF-DIAGNOSTIC
RESULTS This function allows DTCs and 1st trip DTCs to be read.
Page 1802 of 4331
![NISSAN TIIDA 2009 Service Repair Manual EC-446< COMPONENT DIAGNOSIS >
[HR16DE]
MALFUNCTION INDICATOR LAMP
MALFUNCTION INDICATOR LAMP
Description INFOID:0000000004780371
The Malfunction Indicator Lamp (MIL) is located on the combination
mete NISSAN TIIDA 2009 Service Repair Manual EC-446< COMPONENT DIAGNOSIS >
[HR16DE]
MALFUNCTION INDICATOR LAMP
MALFUNCTION INDICATOR LAMP
Description INFOID:0000000004780371
The Malfunction Indicator Lamp (MIL) is located on the combination
mete](/img/5/57398/w960_57398-1801.png)
EC-446< COMPONENT DIAGNOSIS >
[HR16DE]
MALFUNCTION INDICATOR LAMP
MALFUNCTION INDICATOR LAMP
Description INFOID:0000000004780371
The Malfunction Indicator Lamp (MIL) is located on the combination
meter.
The MIL will light up when the ignition switch is turned ON without
the engine running. This is a bulb check.
When the engine is started, the MIL should go off. If the MIL remains
on, the on board diagnostic system has detected an engine system
malfunction.
For details, refer to EC-90, " Diagnosis Description " .
Component Function Check INFOID:00000000047803721.
CHECK MIL FUNCTION
1. Turn ignition switch ON.
2. Make sure that MIL lights up.
Is the inspection result normal? YES >> INSPECTION END
NO >> Go to EC-448, " Diagnosis Procedure " . SEF217U
Page 1913 of 4331
![NISSAN TIIDA 2009 Service Repair Manual ON BOARD DIAGNOSTIC (OBD) SYSTEM
EC-557
< SERVICE INFOMATION >
[MR TYPE 1] C
D E
F
G H
I
J
K L
M A EC
NP
O
4. Touch "ERASE". (The DTC in the ECM will be erased.)
With GST
NOTE:
If the ignition switch NISSAN TIIDA 2009 Service Repair Manual ON BOARD DIAGNOSTIC (OBD) SYSTEM
EC-557
< SERVICE INFOMATION >
[MR TYPE 1] C
D E
F
G H
I
J
K L
M A EC
NP
O
4. Touch "ERASE". (The DTC in the ECM will be erased.)
With GST
NOTE:
If the ignition switch](/img/5/57398/w960_57398-1912.png)
ON BOARD DIAGNOSTIC (OBD) SYSTEM
EC-557
< SERVICE INFOMATION >
[MR TYPE 1] C
D E
F
G H
I
J
K L
M A EC
NP
O
4. Touch "ERASE". (The DTC in the ECM will be erased.)
With GST
NOTE:
If the ignition switch stays ON after repair work, be sure to turn ignition switch OFF once. Wait at least 10 sec-
onds and then turn it ON (engine stopped) again.
1. Select Service $04 with GST.
No Tools
NOTE:
If the ignition switch stays ON after repair work, be sure to turn ignition switch OFF once. Wait at least 10 sec-
onds and then turn it ON (engine stopped) again.
1. Erase DTC in ECM. Refer to How to Erase Diagnostic Test Mode II (Self-diagnostic Results).
• If the battery is disconnected, the emission-relate d diagnostic information will be lost within 24
hours.
• The following data are cleared when the ECM memory is erased.
- Diagnostic trouble codes
- 1st trip diagnostic trouble codes
- Freeze frame data
- 1st trip freeze frame data
- System readiness test (SRT) codes
- Test values
Malfunction Indicator Lamp (MIL) INFOID:0000000004537041
DESCRIPTION The MIL is located on the instrument panel.
1. The MIL will light up when the ignition switch is turned ON with- out the engine running. This is a bulb check.
If the MIL does not light up, refer to DI-20 or see
EC-1010 .
2. When the engine is start ed, the MIL should go off.
If the MIL remains on, the on board diagnostic system has
detected an engine system malfunction.
ON BOARD DIAGNOSTIC SYSTEM FUNCTION The on board diagnostic system has the following three functions. SEF217U
Page 1914 of 4331

Emission-
related Diagnostic Information " .
HOW TO SWITCH DIAGNOSTIC TEST MODE
NOTE:
• It is better to count the ti me accurately with a clock.
• It is impossible to switch the di agnostic mode when an accelerator pedal position sensor circuit has
a malfunction.
• Always ECM returns to Diagnostic Test Mode I after ignition switch is turned OFF.
How to Set Diagnostic Test Mode II (Self-diagnostic Results)
1. Confirm that accelerator pedal is fully releas ed, turn ignition switch ON and wait 3 seconds.
2. Repeat the following procedure quickly five times within 5 seconds.
a. Fully depress the accelerator pedal.
b. Fully release the accelerator pedal.
3. Wait 7 seconds, fully depress the accelerator pedal and keep it for approx. 10 seconds until the MIL starts blinking.
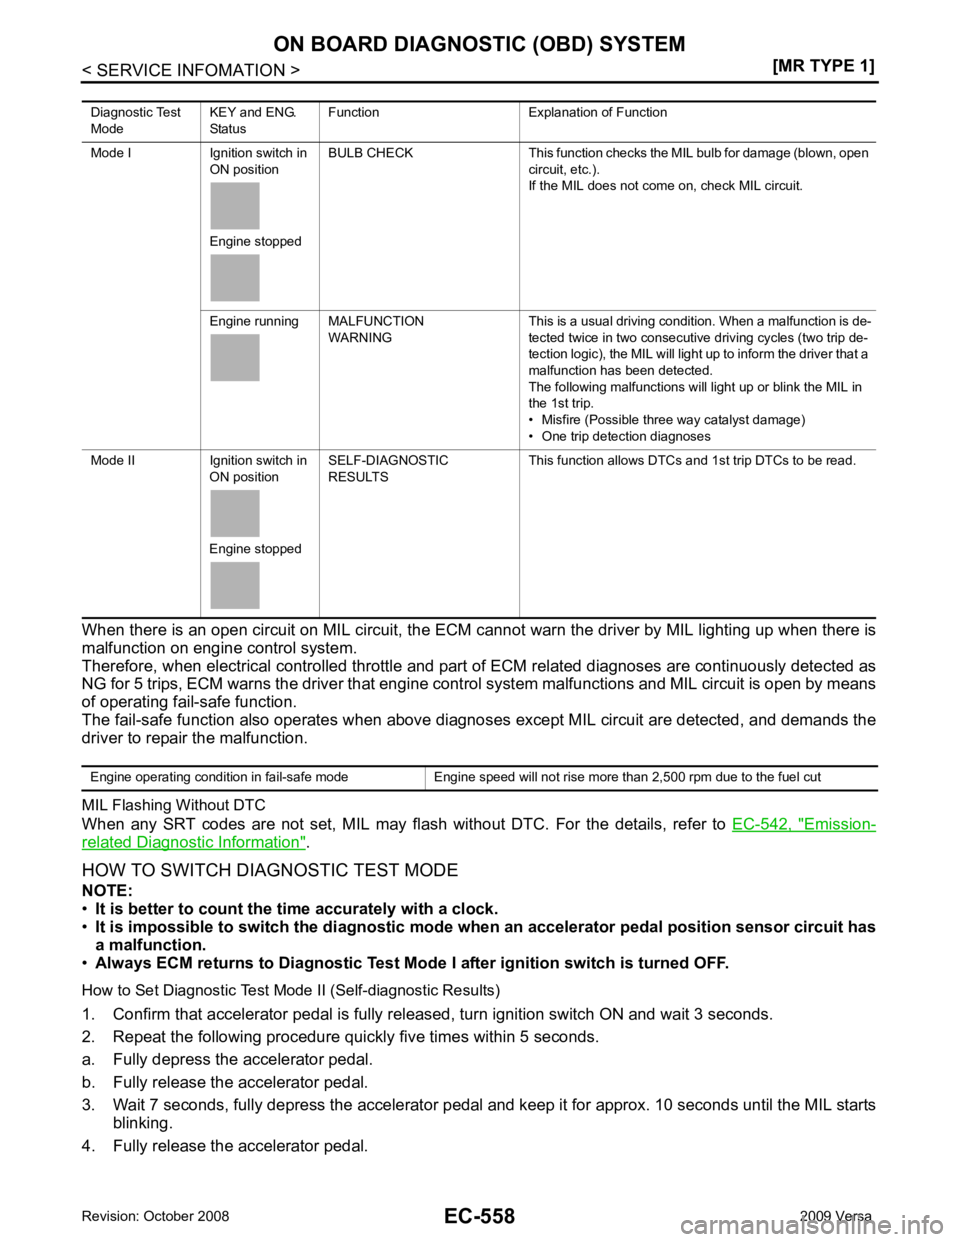
4. Fully release the accelerator pedal. Diagnostic Test
Mode KEY and ENG.
Status Function Explanation of Function
Mode I Ignition switch in ON position
Engine stopped BULB CHECK This function checks the MIL bulb for damage (blown, open
circuit, etc.).
If the MIL does not come on, check MIL circuit.
Engine running MALFUNCTION WARNING This is a usual driving condition. When a malfunction is de-
tected twice in two consecutive driving cycles (two trip de-
tection logic), the MIL will light up to inform the driver that a
malfunction has been detected.
The following malfunctions will light up or blink the MIL in
the 1st trip.
• Misfire (Possible three way catalyst damage)
• One trip detection diagnoses
Mode II Ignition switch in ON position
Engine stopped SELF-DIAGNOSTIC
RESULTS This function allows DTCs an
d 1st trip DTCs to be read.
Page 1915 of 4331
![NISSAN TIIDA 2009 Service Repair Manual ON BOARD DIAGNOSTIC (OBD) SYSTEM
EC-559
< SERVICE INFOMATION >
[MR TYPE 1] C
D E
F
G H
I
J
K L
M A EC
NP
O
ECM has entered to Diagnostic Test Mode II (Self-diagnostic results).
How to Erase Diagnostic NISSAN TIIDA 2009 Service Repair Manual ON BOARD DIAGNOSTIC (OBD) SYSTEM
EC-559
< SERVICE INFOMATION >
[MR TYPE 1] C
D E
F
G H
I
J
K L
M A EC
NP
O
ECM has entered to Diagnostic Test Mode II (Self-diagnostic results).
How to Erase Diagnostic](/img/5/57398/w960_57398-1914.png)
ON BOARD DIAGNOSTIC (OBD) SYSTEM
EC-559
< SERVICE INFOMATION >
[MR TYPE 1] C
D E
F
G H
I
J
K L
M A EC
NP
O
ECM has entered to Diagnostic Test Mode II (Self-diagnostic results).
How to Erase Diagnostic Test Mode II (Self-diagnostic Results) 1. Set ECM in Diagnostic Test Mode II (Self-diagnostic results). Refer to "How to Set Diagnostic Test Mode II (Self-diagnostic Results)".
2. Fully depress the accelerator pedal and keep it for more than 10 seconds. The emission-related diagnostic information has been erased from the backup memory in the ECM.
3. Fully release the accelerator pedal, and confirm the DTC 0000 is displayed.
DIAGNOSTIC TEST MODE I — BULB CHECK In this mode, the MIL on the instrument panel shoul d stay ON. If it remains OFF, check the bulb.
Refer to DI-20 or
EC-1010 .
DIAGNOSTIC TEST MODE I — MALFUNCTION WARNING
These DTC numbers are clarified in Diagnostic Test Mode II (SELF-DIAGNOSTIC RESULTS)
DIAGNOSTIC TEST MODE II — SELF-DIAGNOSTIC RESULTS In this mode, the DTC and 1st trip DTC are indicated by the number of blinks of the MIL as shown below.
The DTC and 1st trip DTC are displayed at the same time. If the MIL does not illuminate in diagnostic test
mode I (Malfunction warning), all displa yed items are 1st trip DTCs. If only one code is displayed when the MIL
illuminates in diagnostic test mode II (SELF-DIAGNOSTIC RESULTS), it is a DTC; if two or more codes are
displayed, they may be either DTCs or 1st trip DTCs. DTC No. is same as that of 1st trip DTC. These uniden- PBIB0092E
MIL Condition
ON When the malfunction is detected.
OFF No malfunction
Page 2425 of 4331
![NISSAN TIIDA 2009 Service Repair Manual ON BOARD DIAGNOSTIC (OBD) SYSTEM
EC-1069
< SERVICE INFOMATION >
[MR TYPE 2] C
D E
F
G H
I
J
K L
M A EC
NP
O
4. Touch "ERASE". (The DTC in the ECM will be erased.)
With GST
NOTE:
If the ignition switc NISSAN TIIDA 2009 Service Repair Manual ON BOARD DIAGNOSTIC (OBD) SYSTEM
EC-1069
< SERVICE INFOMATION >
[MR TYPE 2] C
D E
F
G H
I
J
K L
M A EC
NP
O
4. Touch "ERASE". (The DTC in the ECM will be erased.)
With GST
NOTE:
If the ignition switc](/img/5/57398/w960_57398-2424.png)
ON BOARD DIAGNOSTIC (OBD) SYSTEM
EC-1069
< SERVICE INFOMATION >
[MR TYPE 2] C
D E
F
G H
I
J
K L
M A EC
NP
O
4. Touch "ERASE". (The DTC in the ECM will be erased.)
With GST
NOTE:
If the ignition switch stays ON after repair work, be sure to turn ignition switch OFF once. Wait at least 10 sec-
onds and then turn it ON (engine stopped) again.
1. Select Service $04 with GST.
No Tools
NOTE:
If the ignition switch stays ON after repair work, be sure to turn ignition switch OFF once. Wait at least 10 sec-
onds and then turn it ON (engine stopped) again.
1. Erase DTC in ECM. Refer to How to Erase Diagnostic Test Mode II (Self-diagnostic Results).
• If the battery is disconnected, the emission-relate d diagnostic information will be lost within 24
hours.
• The following data are cleared when the ECM memory is erased.
- Diagnostic trouble codes
- 1st trip diagnostic trouble codes
- Freeze frame data
- 1st trip freeze frame data
- System readiness test (SRT) codes
- Test values
Malfunction Indicator Lamp (MIL) INFOID:0000000004499927
DESCRIPTION The MIL is located on the instrument panel.
1. The MIL will light up when the ignition switch is turned ON with- out the engine running. This is a bulb check.
If the MIL does not light up, refer to DI-20 or see
EC-1532 .
2. When the engine is start ed, the MIL should go off.
If the MIL remains on, the on board diagnostic system has
detected an engine system malfunction.
ON BOARD DIAGNOSTIC SYSTEM FUNCTION The on board diagnostic system has the following three functions. SEF217U
Page 2426 of 4331

Emission-
related Diagnostic Information " .
HOW TO SWITCH DIAGNOSTIC TEST MODE
NOTE:
• It is better to count the ti me accurately with a clock.
• It is impossible to switch the di agnostic mode when an accelerator pedal position sensor circuit has
a malfunction.
• Always ECM returns to Diagnostic Test Mode I after ignition switch is turned OFF.
How to Set Diagnostic Test Mode II (Self-diagnostic Results)
1. Confirm that accelerator pedal is fully releas ed, turn ignition switch ON and wait 3 seconds.
2. Repeat the following procedure quickly five times within 5 seconds.
a. Fully depress the accelerator pedal.
b. Fully release the accelerator pedal.
3. Wait 7 seconds, fully depress the accelerator pedal and keep it for approx. 10 seconds until the MIL starts blinking.
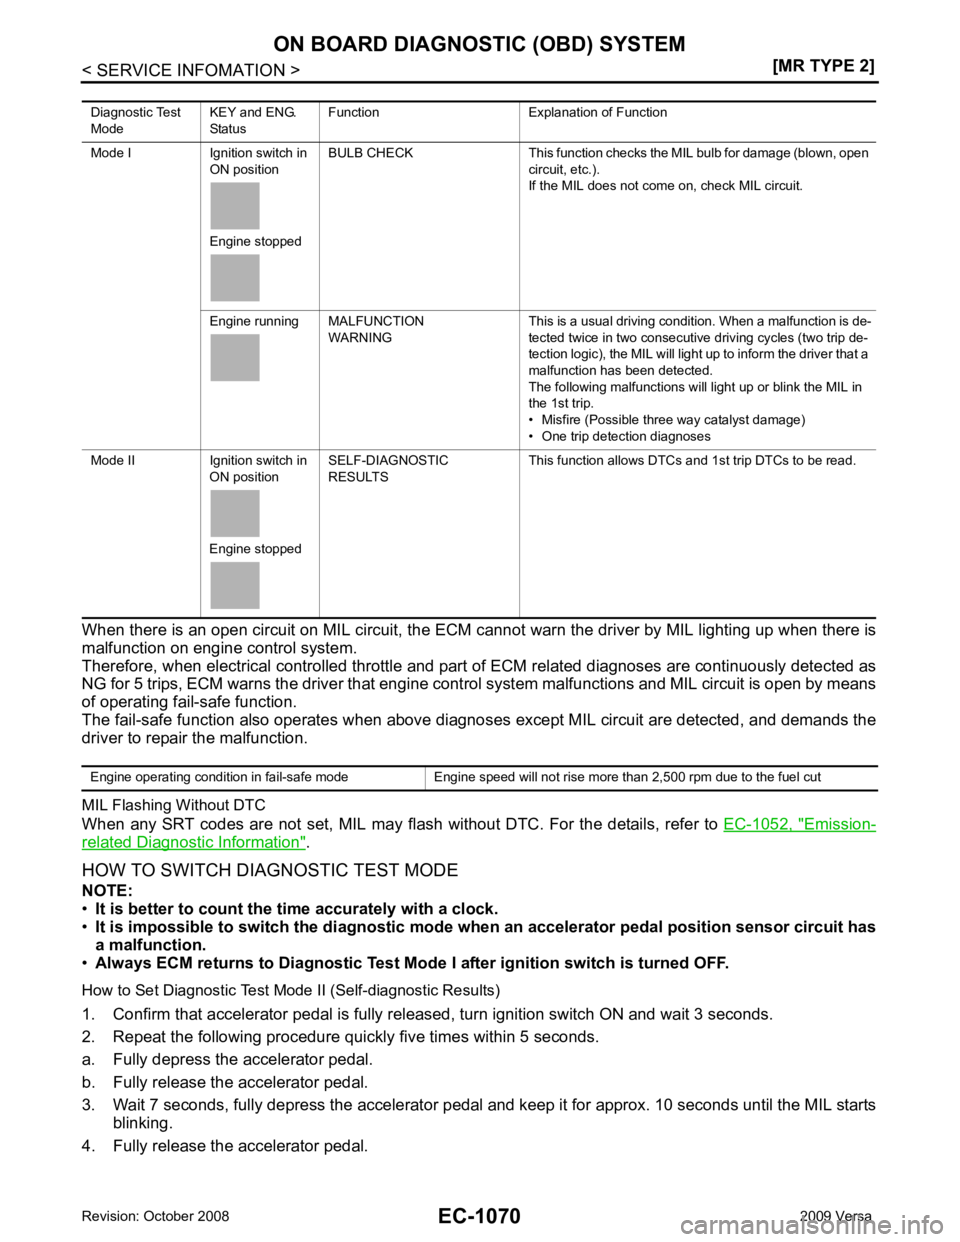
4. Fully release the accelerator pedal. Diagnostic Test
Mode KEY and ENG.
Status Function Explanation of Function
Mode I Ignition switch in ON position
Engine stopped BULB CHECK This function checks the MIL bulb for damage (blown, open
circuit, etc.).
If the MIL does not come on, check MIL circuit.
Engine running MALFUNCTION WARNING This is a usual driving condition. When a malfunction is de-
tected twice in two consecutive driving cycles (two trip de-
tection logic), the MIL will light up to inform the driver that a
malfunction has been detected.
The following malfunctions will light up or blink the MIL in
the 1st trip.
• Misfire (Possible three way catalyst damage)
• One trip detection diagnoses
Mode II Ignition switch in ON position
Engine stopped SELF-DIAGNOSTIC
RESULTS This function allows DTCs an
d 1st trip DTCs to be read.