mirror NISSAN TITAN 2008 1.G Quick Reference Guide
[x] Cancel search | Manufacturer: NISSAN, Model Year: 2008, Model line: TITAN, Model: NISSAN TITAN 2008 1.GPages: 36, PDF Size: 2.4 MB
Page 3 of 36
TAB LE O F C O NTE NTS
Remote Keyless Entry System . . . . . . . . . . . . . . . . . . 2
Windshield Wiper/Washer Switch
. . . . . . . . . . . . . . . . 2
Headlight and Turn Signal Control
. . . . . . . . . . . . . . . . 3
Steering Wheel Switches for Audio Control/ Bluetooth
® . . . . 4
Cruise Control
. . . . . . . . . . . . . . . . . . . . . . . . . . 4
Automatic Climate Control
. . . . . . . . . . . . . . . . . . . . 5
FM/AM/XM® Radio with CD Changer . . . . . . . . . . . . . . 6
Vehicle Information Display
. . . . . . . . . . . . . . . . . . . . 7
Control Panel Display with Navigation System
. . . . . . . . . 8
Clock/Set Adjustment
. . . . . . . . . . . . . . . . . . . . . . 8
Instrument Brightness Control/Trip Change Button
. . . . . . . 9
Automatic Driver Positioner
. . . . . . . . . . . . . . . . . . . 10
Adjustable Accelerator and Brake Pedals
. . . . . . . . . . . . 11
Manual Shift Mode
. . . . . . . . . . . . . . . . . . . . . . . . 11
Four-Wheel Drive (4WD) Shift Switch
. . . . . . . . . . . . . . 11
Vehicle Dynamic Control (VDC) Off Switch
. . . . . . . . . . . 12
Tow Mode Switch
. . . . . . . . . . . . . . . . . . . . . . . . . 12
E-Lock Switch
. . . . . . . . . . . . . . . . . . . . . . . . . . . 12
Front-Passenger Air Bag Status Light
. . . . . . . . . . . . . . 13
Tire Pressure Monitoring System (TPMS)
. . . . . . . . . . . . 13
Seatbelt Warning Light and Chime
. . . . . . . . . . . . . . . 13
Cargo Light Switch
. . . . . . . . . . . . . . . . . . . . . . . . 14
Rear Sonar System Off Switch
. . . . . . . . . . . . . . . . . 14
Child Safety Rear Door Locks
. . . . . . . . . . . . . . . . . . 14
Wide Open Doors
. . . . . . . . . . . . . . . . . . . . . . . . 14
High Utility Bed and Utili-Track
™ Channel System . . . . . . . . 15
Outside Mirror Control Switch
. . . . . . . . . . . . . . . . . . 15
Sunroof Controls
. . . . . . . . . . . . . . . . . . . . . . . . . 15
Front Seat Adjustments
. . . . . . . . . . . . . . . . . . . . . 16
Folding the Rear Bench Seat
. . . . . . . . . . . . . . . . . . 16
Homelink® Universal Transceiver . . . . . . . . . . . . . . . . . 16
Bluetooth® Hands-Free Phone System . . . . . . . . . . . . . 18
DVD Controls
. . . . . . . . . . . . . . . . . . . . . . . . . . . 20
Rear Audio Controls
. . . . . . . . . . . . . . . . . . . . . . . 21
Navigation System
. . . . . . . . . . . . . . . . . . . . . . . . 23
Page 7 of 36
5
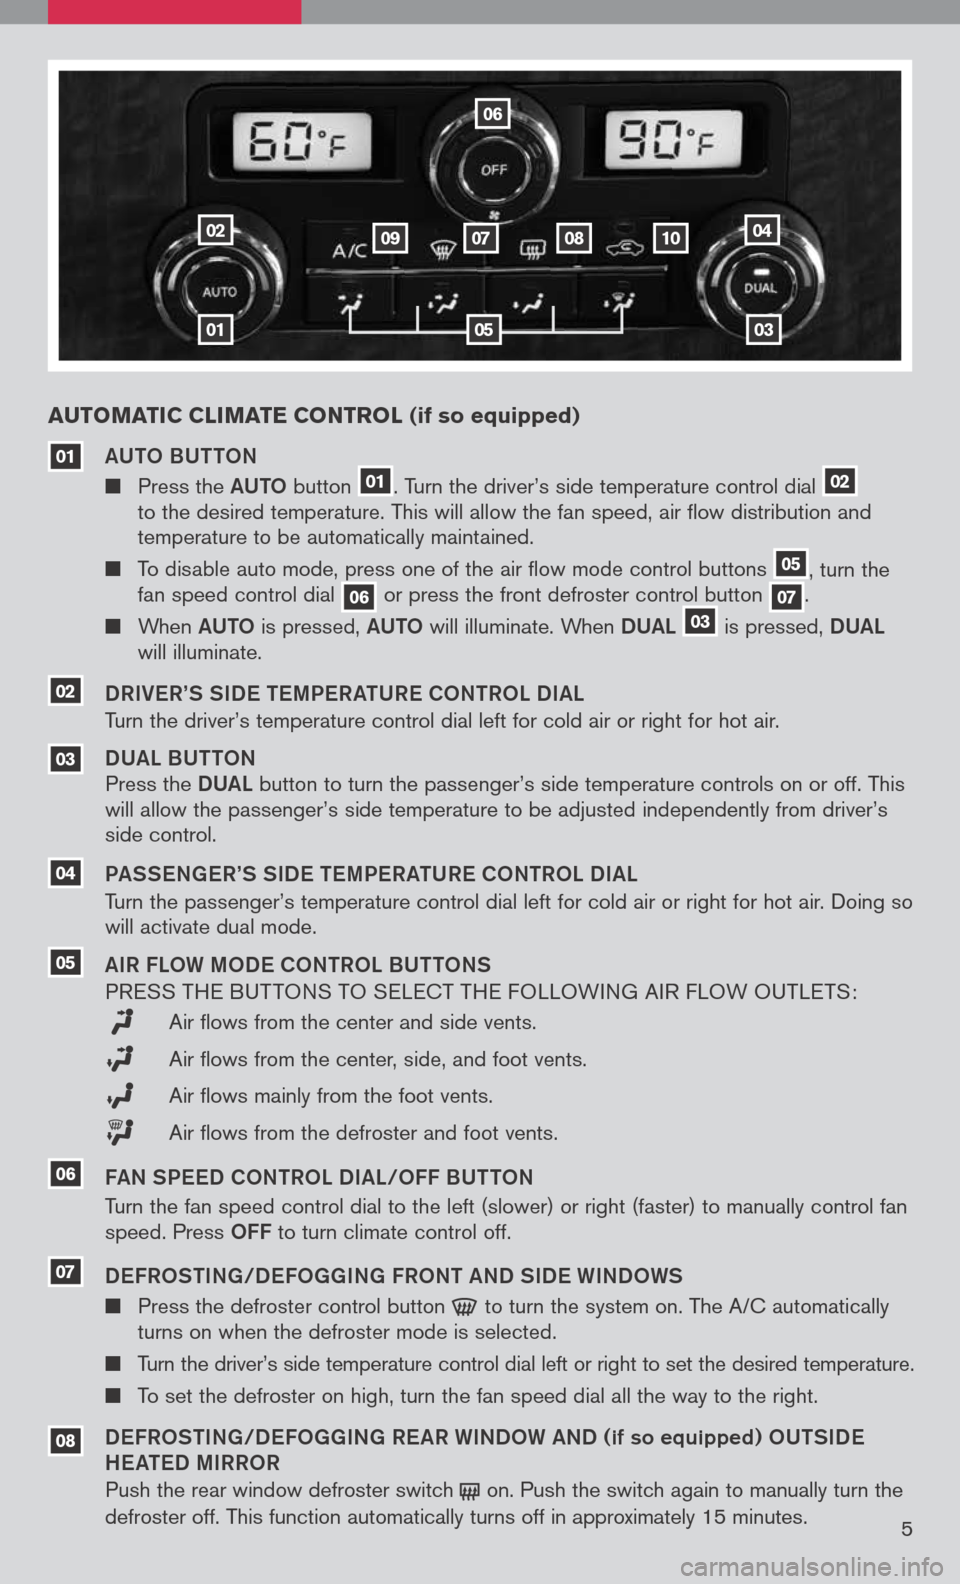
Au TOMATIC CLIMATE CONTROL (if so equipped)
01
02
03
04
06
07080910
05
aUTO BUTTON
Press the aUTO button
01. Turn the driver’s side temperature control dial 02
to the desired temperature. This will allow the fan speed, air flow distribution and
temperature to be automatically maintained.
To disable auto mode, press one of the air flow mode control buttons
05, turn the
fan speed control dial
06or press the front defroster control button 07.
When aUTO is pressed, aUTO will illuminate. When DUaL 03 is
pressed, DUaL
will illuminate.
DRIV eR’S SID e TeMP eR aTUR e CO NTROL DI aL
Turn the driver’s temperature control dial left for cold air or right for hot air.
DUa L BUTTON
Press the DUaL
button
to turn the passenger’s side temperature controls on or off. This
will allow the passenger’s side temperature to be adjusted independently from driver’s
side control.
P a SS eN ge R’S SID e TeMP eR aTUR e CONTROL DI aL
Turn the passenger’s temperature control dial left for cold air or right for hot air. Doing so
will activate dual mode.
a IR FLOW MOD e CONTROL BUTTONS
P RESS THE BUT TONS TO SELECT THE FOLLOWING AIR FLOW OUTLETS :
Air flows from the center and side vents.
Air flows from the center, side, and foot vents.
Air flows mainly from the foot vents.
Air flows from the defroster and foot vents.
F a N SP eeD CONTROL DI aL/OFF BUTTON
Turn the fan speed control dial to the left (slower) or right (faster) to manually control fan
speed. Press
OFF to turn climate control off.
D eFROSTIN g/D eFO gg INg FRONT aND SID e WINDOWS
Press the defroster control button to
turn the system on. The A/C automatically
turns on when the defroster mode is selected.
Turn the driver’s side temperature control dial left or right to set the desired temperature.
To set the defroster on high, turn the fan speed dial all the way to the right.
D eFROSTIN g/D eFO gg INg R eaR WINDOW aND (if so equipped) OUTSID e
H ea Te D MIRROR
Push the rear window defroster switch
on.
Push the switch again to manually turn the
defroster off. This function automatically turns off in approximately 15 minutes .
04
03
01
05
08
07
02
06
Page 12 of 36
10
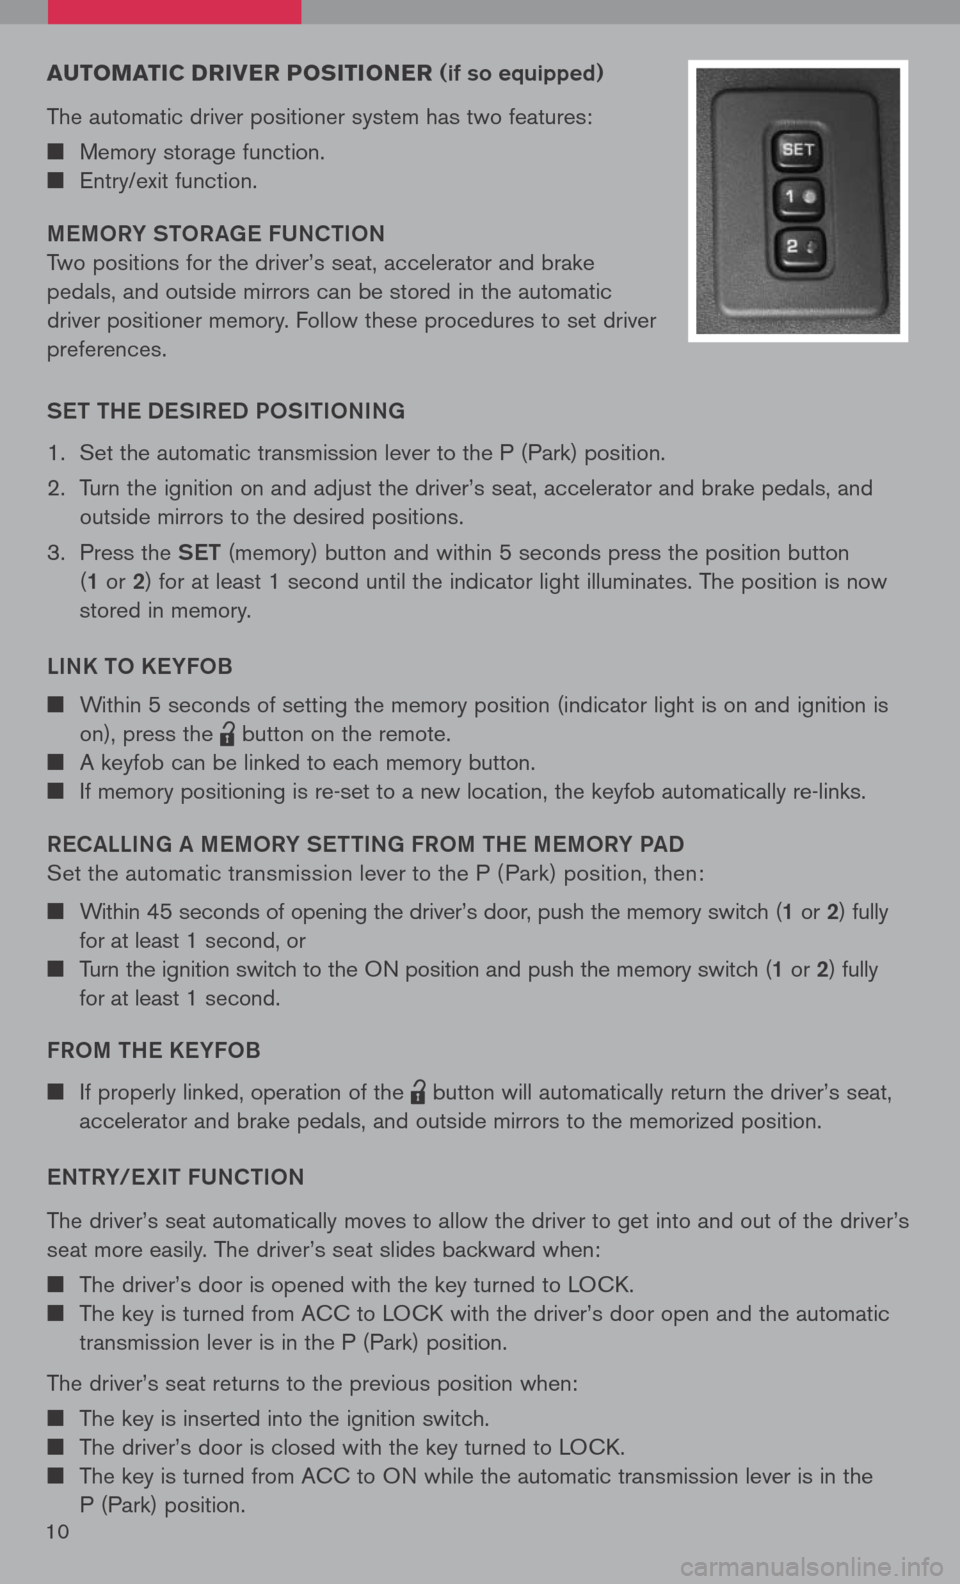
Au TOMATIC DRIVER PO sITIONER (if so equipped)
The automatic driver positioner system has two features:
Memory storage function.
Entry/exit function.
M eMORY STOR age FUNCTION
Two positions for the driver’s seat, accelerator and brake
pedals, and outside mirrors can be stored in the automatic
driver positioner memory. Follow these procedures to set driver
preferences.
S eT TH e DeSIR eD POSITIONIN g
1. Set the automatic transmission lever to the P (Park) position.
2. Turn the ignition on and adjust the driver’s seat, accelerator and brake pedals, and
outside mirrors to the desired positions.
3. Press the SeT (memory) button and within 5 seconds press the position button
(1 or 2 ) for at least 1 second until the indicator light illuminates. The position is now
stored in memory.
LINK TO K eYFOB
Within 5 seconds of setting the memory position (indicator light is on and ignition is
on), press the
lpd0151
button on the remote.
A keyfob can be linked to each memory button.
If memory positioning is re-set to a new location, the keyfob automatically re-links.
R eC aLLIN g a M eMORY S eTTIN g FROM TH e MeMORY P aD
Set the automatic transmission lever to the P ( Park) position, then:
Within 45 seconds of opening the driver’s door, push the memory switch (1 or 2) fully
for at least 1 second, or
Turn the ignition switch to the ON position and push the memory switch (1 or 2) fully
for at least 1 second.
FROM TH e KeYFOB
If properly linked, operation of the
lpd0151
button will automatically return the driver’s seat,
accelerator and brake pedals, and outside mirrors to the memorized position.
e NTRY/ eXIT FUNCTION
The driver’s seat automatically moves to allow the driver to get into and out of the driver’s
seat more easily. The driver’s seat slides backward when:
The driver’s door is opened with the key turned to LOCK.
The key is turned from ACC to LOCK with the driver’s door open and the automatic
transmission lever is in the P (Park) position.
The driver’s seat returns to the previous position when:
The key is inserted into the ignition switch.
The driver’s door is closed with the key turned to LOCK.
The key is turned from ACC to ON while the automatic transmission lever is in the
P (Park) position.
Page 17 of 36
HIg H uTILITY BED AND uTILI -TRACK™
CHANNEL sYs TEM
(if so equipped)
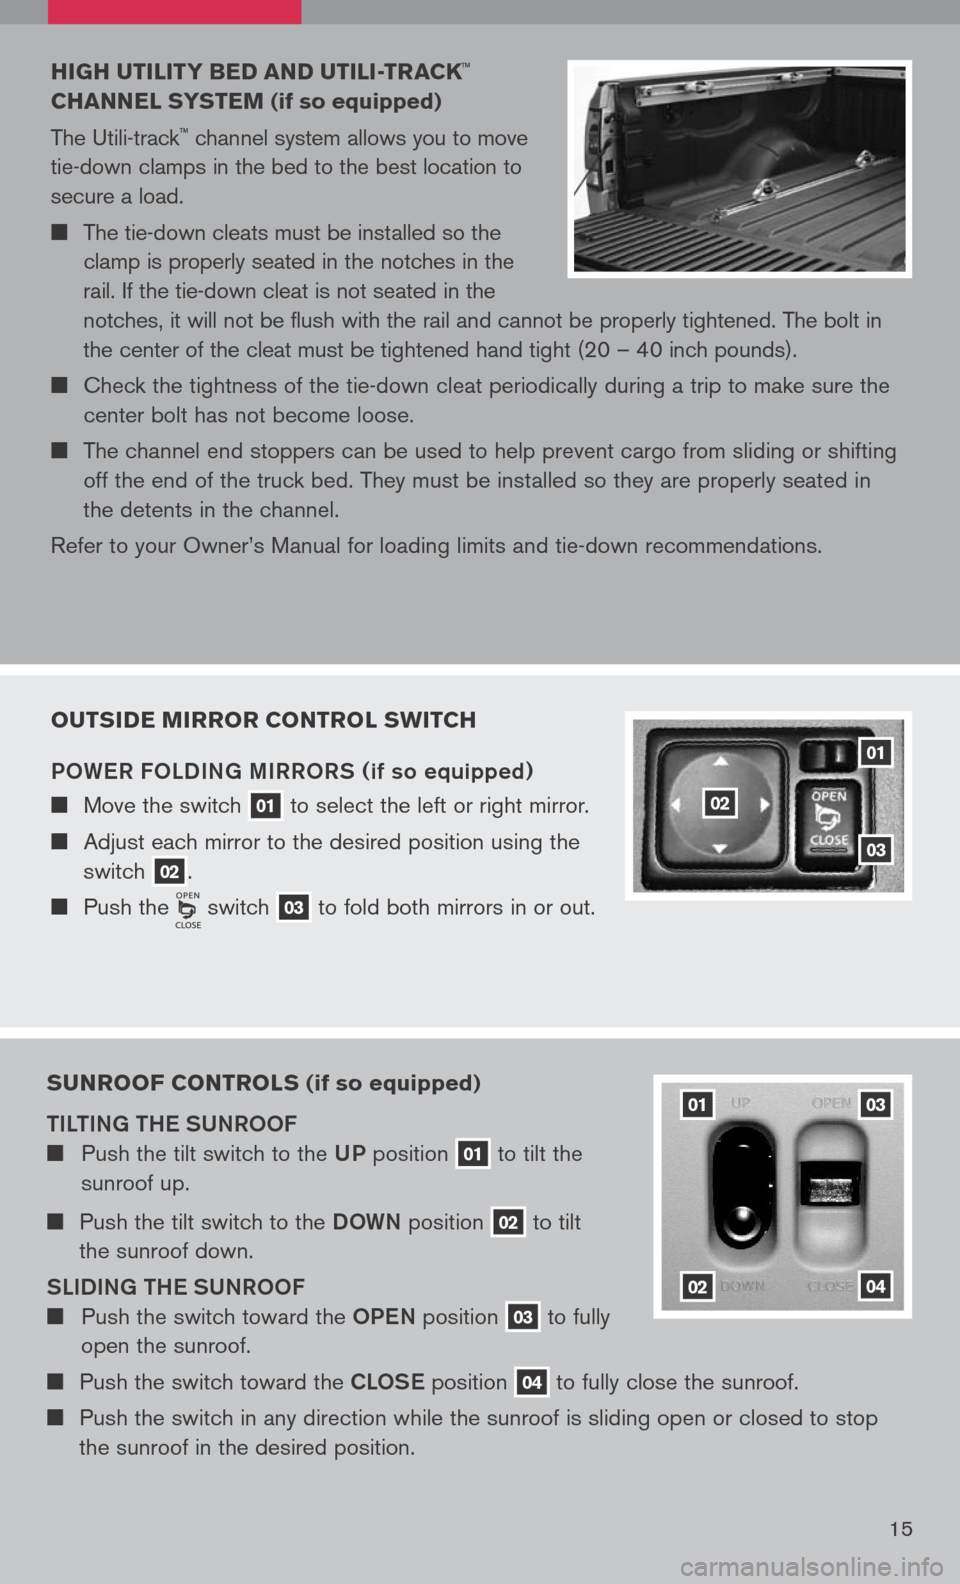
The Utili-track
™ channel system allows you to move
tie-down clamps in the bed to the best location to
secure a load.
The tie-down cleats must be installed so the
clamp is properly seated in the notches in the
rail. If the tie-down cleat is not seated in the
notches, it will not be flush with the rail and cannot be properly tightened. The bolt in
the center of the cleat must be tightened hand tight (20 – 40 inch pounds).
Check the tightness of the tie-down cleat periodically during a trip to make sure the
center bolt has not become loose.
The channel end stoppers can be used to help prevent cargo from sliding or shifting
off the end of the truck bed. They must be installed so they are properly seated in
the detents in the channel.
Refer to your Owner’s Manual for loading limits and tie-down recommendations.
15
OuTs IDE MIRROR CONTROL swITCH
POW eR FOLDIN g MIRRORS
(if so equipped)
Move the switch 01 to
select the left or right mirror.
Adjust each mirror to the desired position using the
switch 02.
Push the switch 03 to
fold both mirrors in or out.
01
02
03
su NROOF CONTROL s (if so equipped)
TILTIN g TH e SUNROOF
Push the tilt switch to the UP position 01 to
tilt the
sunroof up.
Push the tilt switch to the DOWN position 02 to
tilt
the sunroof down.
SLIDIN g TH e SUNROOF
Push the switch toward the OPeN position 03 to
fully
open the sunroof.
Push the switch toward the CLOS e position 04 to
fully close the sunroof.
Push the switch in any direction while the sunroof is sliding open or closed to stop
the sunroof in the desired position.
01
02
03
04
Page 19 of 36
To program your HomeLink® Transceiver to operate a garage door, gate, or entry door
opener, home or office lighting, you need to be at the same location as the device.
NOTe: garage door openers (manufactured after 1996) have “rolling code
protection”. To program a garage door opener equipped with “rolling code protection”, you will need to use a ladder to get up to the garage door opener motor to be able to access the “smart or learn” program button.
PROgR AMMIN g YO uR
HOMELINK® u NIVER sAL
TR AN sCEIVER ( Mirror, sun Visor
or Overhead Console)
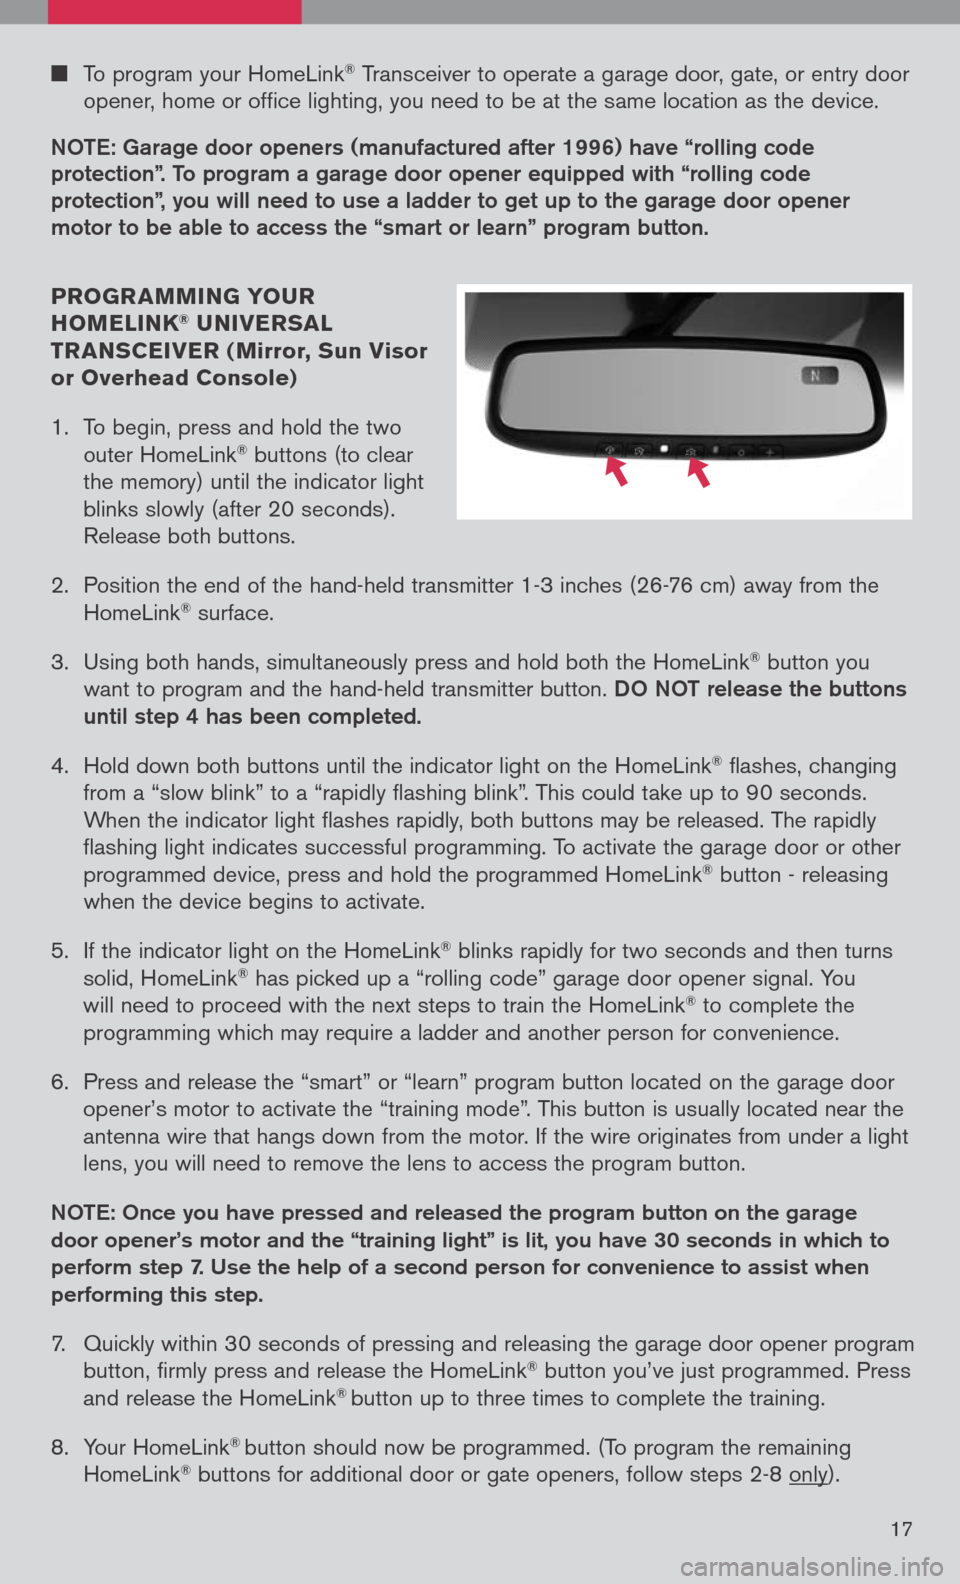
1. To begin, press and hold the two
outer HomeLink
® buttons (to clear
the memory) until the indicator light
blinks slowly (after 20 seconds).
Release both buttons.
2. Position the end of the hand-held transmitter 1-3 inches (26-76 cm) away from the
HomeLink® surface.
3. Using both hands, simultaneously press and hold both the HomeLink
® button you
want to program and the hand-held transmitter button.
DO NOT release the buttons
until step 4 has been completed.
4. Hold down both buttons until the indicator light on the HomeLink
® flashes, changing
from a “slow blink” to a “rapidly flashing blink”. This could take up to 90 seconds.
When the indicator light flashes rapidly, both buttons may be released. The rapidly
flashing light indicates successful programming. To activate the garage door or other
programmed device, press and hold the programmed HomeLink
® button - releasing
when the device begins to activate.
5. If the indicator light on the HomeLink
® blinks rapidly for two seconds and then turns
solid, HomeLink® has picked up a “rolling code” garage door opener signal. You
will need to proceed with the next steps to train the HomeLink® to complete the
programming which may require a ladder and another person for convenience.
6. Press and release the “smart” or “learn” program button located on the garage door
opener’s motor to activate the “training mode”. This button is usually located near the
antenna wire that hangs down from the motor. If the wire originates from under a light
lens, you will need to remove the lens to access the program button.
NOTe: Once you have pressed and released the program button on the garage
door opener’s motor and the “training light” is lit, you have 30 seconds in which to
perform step 7. Use the help of a second person for convenience to assist when
performing this step.
7. Quickly within 30 seconds of pressing and releasing the garage door opener program
button, firmly press and release the HomeLink® button you’ve just programmed. Press
and release the HomeLink® button up to three times to complete the training.
8. Your HomeLink
® button should now be programmed. (To program the remaining
HomeLink® buttons for additional door or gate openers, follow steps 2-8 only).
17