differential NISSAN TITAN 2021 Owner´s Manual
[x] Cancel search | Manufacturer: NISSAN, Model Year: 2021, Model line: TITAN, Model: NISSAN TITAN 2021Pages: 638, PDF Size: 4.31 MB
Page 17 of 638
20. Parking Aids system switch (P. 2-61)Vehicle Dynamic Control (VDC) OFF
switch (P. 2-57)
21. Trailer Brake Controller Unit (TBCU)
(if so equipped) (P. 2-63)
22. 4WD shif t switch (if so equipped)
(P. 5-111)
23. Push-button ignition switch (P. 5-12)
24. Driver supplemental knee air bag light
(if so equipped) (P. 1-53)
25. Tilt and telescopic steering wheel
control (P. 3-28)
26. Parking brake (P. 5-23)
27. Hood release (P. 3-25)
28. Headlight aiming control
(if so equipped) (P. 2-43)
Power inverter switch (if so equipped)
(P. 2-61)
Cargo lamp switch (P. 2-52)
Electronic locking rear differential
(E-Lock) system switch (if so equipped)
(P. 2-59)
Hill descent control system switch
(if so equipped) (P. 2-58)
29. Headlight switch (P. 2-43) Fog light switch (if so equipped) (P. 2-51)
Instrument brightness control
switches (P. 2-43)
Trip reset switch (P. 2-6)
*Refer to the separate NissanConnect®
Owner’s Manual Refer to the page number indicated in
parenthesis for operating details.
Illustrated table of contents0-7
Page 20 of 638
Warning/Indicator
light (red) Name Page
Automatic Trans-
mission Park
warning light
(
model)2-13
or
Brake warning
light
2-14
Charge warning
light2-14
Electric shif t con-
trol system warn-
ing light 2-15
Engine oil pres-
sure warning light
2-15
Warning/
Indicator
light (red) Name Page
Malfunction Indi-
cator Light (MIL)
2-15
Master warning
light2-16
Seat belt warning
light and chime2-16
Security indicator
light2-16
Supplemental air
bag warning light2-16
Warning/
Indicator light
(yellow) Name Page
or
Anti-lock Braking
System (ABS)
warning light
2-17
Automatic Emer-
gency Braking
(AEB) with Pedes-
trian Detection
system warning
light2-17
Automatic Trans-
mission check
warning light
2-17
Electronic locking
rear differential
(E-Lock) system
ON indicator light
(if so equipped)2-18
WARNING AND INDICATOR LIGHTS
0-10Illustrated table of contents
Page 108 of 638
Hill descent control switch (if so equipped).....2-58
Electronic locking rear differential (E-Lock)
system switch (if so equipped) .................2-59
Power inverter switch (if so equipped) ..........2-61
Parking Aids system switch ....................2-61
Tow mode switch .............................. 2-62
E-call (SOS) button (if so equipped) .............2-63
Trailer Brake Controller Unit (TBCU)
(if so equipped) ................................. 2-63
Rear Door Alert ................................. 2-63
Power outlets .................................. 2-64
12v Outlets .................................. 2-64
120v outlets (if so equipped) .................2-66
Extended storage switch .......................2-68
Storage ........................................ 2-69
Front-door pockets ......................... 2-69
Rear-door pockets .......................... 2-69
Console side pockets (if so equipped) .......2-69
Seatback pockets ........................... 2-70
Under-seat storage (if so equipped) .........2-70
Console box storage trays
(if so equipped) .............................. 2-72
Cell phone storage tray (if so equipped) .....2-72
Glovebox ................................... 2-72Console box (if so equipped)
................2-73
Center armrest storage (if so equipped) .....2-74
Under front seat storage bin
(if so equipped) .............................. 2-75
Overhead sunglasses storage
(if so equipped) .............................. 2-75
Cup holders ................................. 2-76
Grocery hooks (if so equipped) ..............2-79
Bed liner storage bins (if so equipped) .......2-79
Cargo hooks (if so equipped) ................2-80
C-Channel cargo hooks (if so equipped) .....2-80
Windows ....................................... 2-81
Power windows ............................. 2-81
Rear power window switch
(if so equipped) .............................. 2-84
Rear sliding window (if so equipped) .........2-85
Moonroof (if so equipped) ......................2-85
P
ower moonroof ............................ 2-85
Interior lights ................................... 2-88
Console light (if so equipped) ................2-88
Map lights (if so equipped) ...................2-89
Personal Lights (if so equipped) .............2-89
HomeLink® Universal Transceiver
(if so equipped) ................................. 2-89
Page 111 of 638
20. Parking Aids system switch (P. 2-61)Vehicle Dynamic Control (VDC) OFF
switch (P. 2-57)
21. Trailer Brake Controller Unit (TBCU)
(if so equipped) (P. 2-63)
22. 4WD shif t switch (if so equipped)
(P. 5-111)
23. Push-button ignition switch (P. 5-12)
24. Driver supplemental knee air bag light
(if so equipped) (P. 1-53)
25. Tilt and telescopic steering wheel
control (P. 3-28)
26. Parking brake (P. 5-23)
27. Hood release (P. 3-25)
28. Headlight aiming control
(if so equipped) (P. 2-43)
Power inverter switch (if so equipped)
(P. 2-61)
Cargo lamp switch (P. 2-52)
Electronic locking rear differential
(E-Lock) system switch (if so equipped)
(P. 2-59)
Hill descent control system switch
(if so equipped) (P. 2-58)
29. Headlight switch (P. 2-43) Fog light switch (if so equipped) (P. 2-51)
Instrument brightness control
switches (P. 2-43)
Trip reset switch (P. 2-6)
*Refer to the separate NissanConnect®
Owner’s Manual Refer to the page number indicated in
parenthesis for operating details.
Instruments and controls2-5
Page 118 of 638
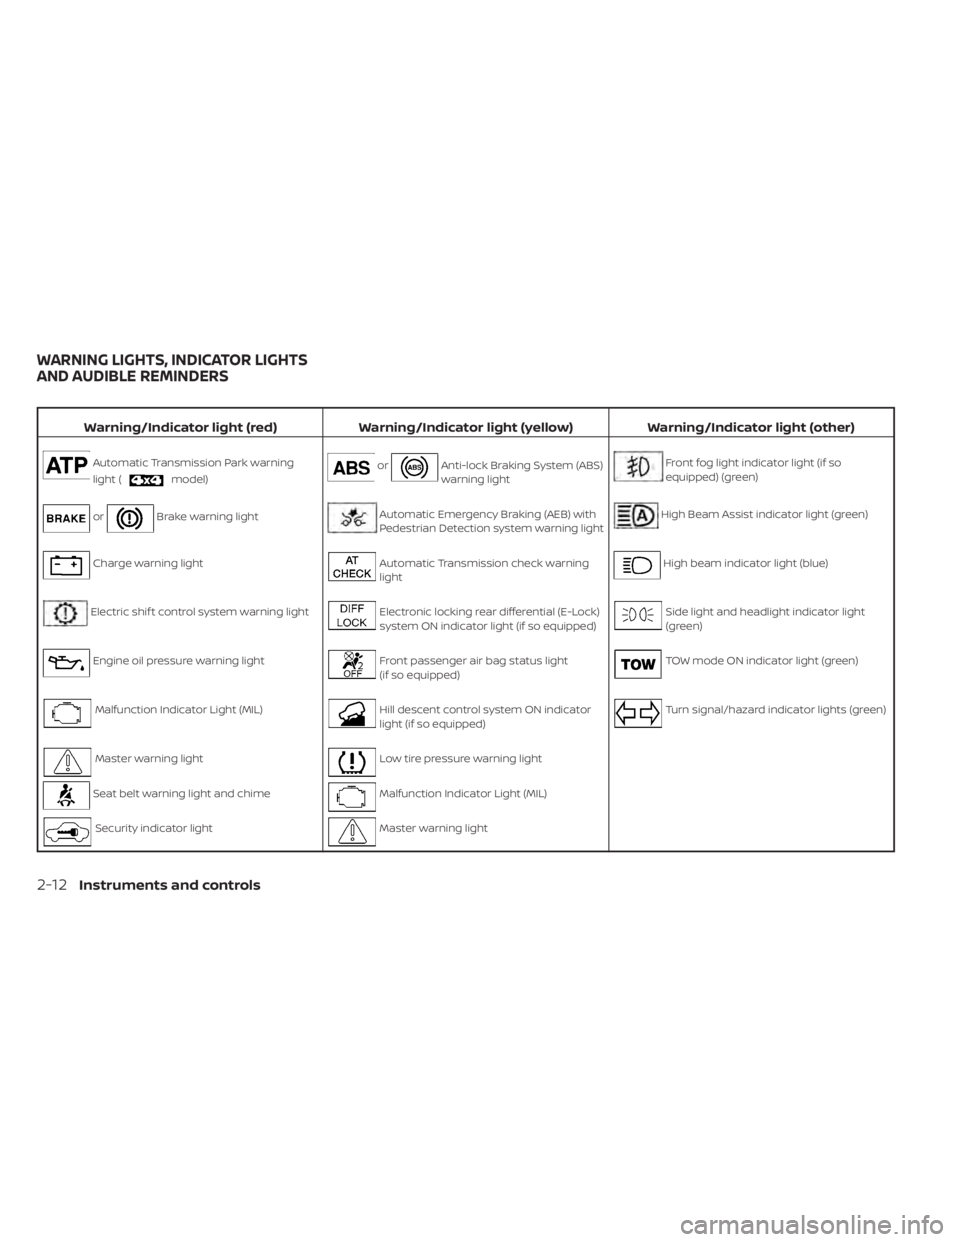
Warning/Indicator light (red)Warning/Indicator light (yellow) Warning/Indicator light (other)
Automatic Transmission Park warning
light (
model)orAnti-lock Braking System (ABS)
warning lightFront fog light indicator light (if so
equipped) (green)
orBrake warning lightAutomatic Emergency Braking (AEB) with
Pedestrian Detection system warning lightHigh Beam Assist indicator light (green)
Charge warning lightAutomatic Transmission check warning
lightHigh beam indicator light (blue)
Electric shif t control system warning lightElectronic locking rear differential (E-Lock)
system ON indicator light (if so equipped)Side light and headlight indicator light
(green)
Engine oil pressure warning lightFront passenger air bag status light
(if so equipped)TOW mode ON indicator light (green)
Malfunction Indicator Light (MIL)Hill descent control system ON indicator
light (if so equipped)Turn signal/hazard indicator lights (green)
Master warning lightLow tire pressure warning light
Seat belt warning light and chimeMalfunction Indicator Light (MIL)
Security indicator lightMaster warning light
WARNING LIGHTS, INDICATOR LIGHTS
AND AUDIBLE REMINDERS
2-12Instruments and controls
Page 124 of 638
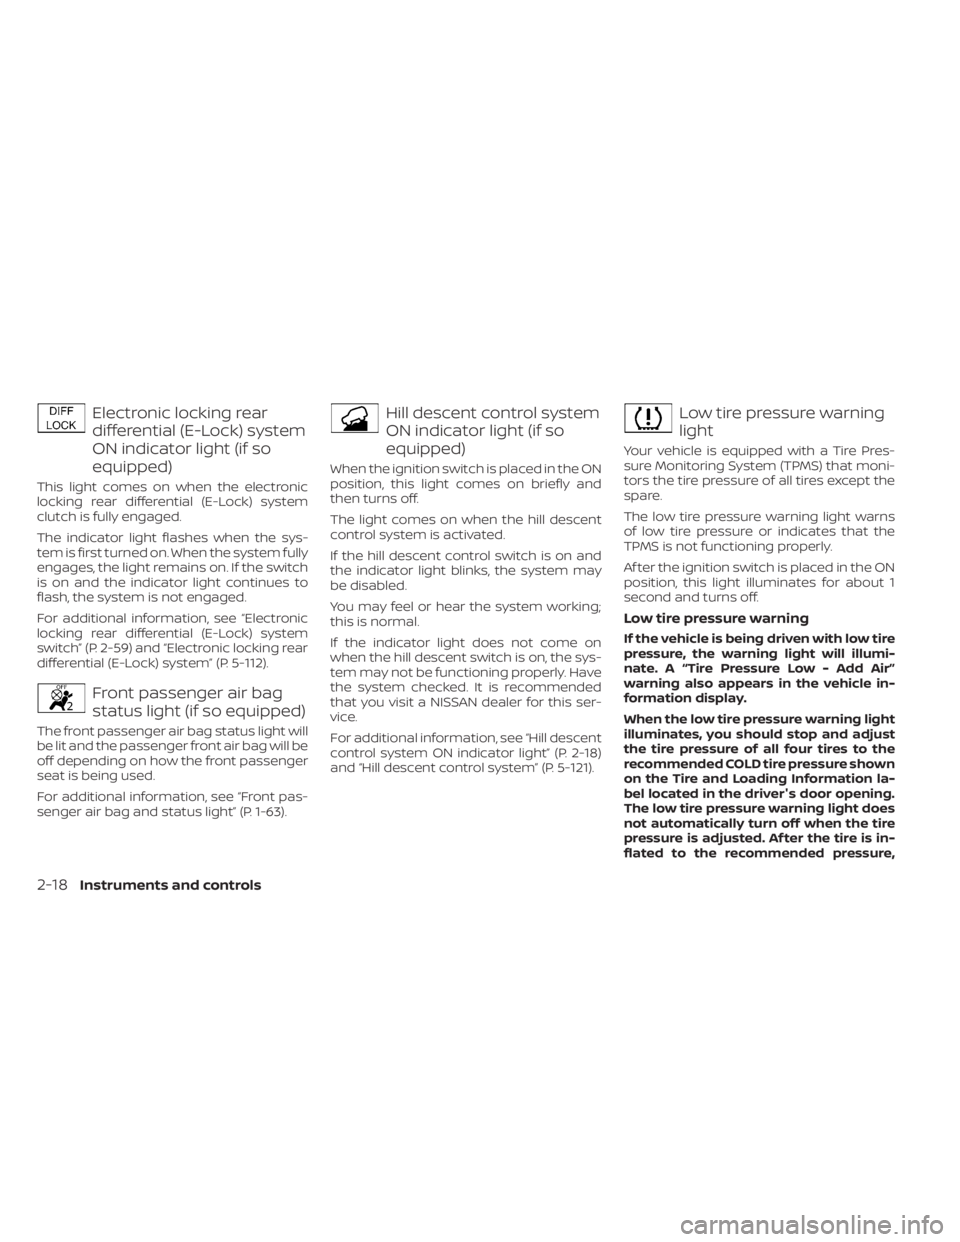
Electronic locking rear
differential (E-Lock) system
ON indicator light (if so
equipped)
This light comes on when the electronic
locking rear differential (E-Lock) system
clutch is fully engaged.
The indicator light flashes when the sys-
tem is first turned on. When the system fully
engages, the light remains on. If the switch
is on and the indicator light continues to
flash, the system is not engaged.
For additional information, see “Electronic
locking rear differential (E-Lock) system
switch” (P. 2-59) and “Electronic locking rear
differential (E-Lock) system” (P. 5-112).
Front passenger air bag
status light (if so equipped)
The front passenger air bag status light will
be lit and the passenger front air bag will be
off depending on how the front passenger
seat is being used.
For additional information, see “Front pas-
senger air bag and status light” (P. 1-63).
Hill descent control system
ON indicator light (if so
equipped)
When the ignition switch is placed in the ON
position, this light comes on briefly and
then turns off.
The light comes on when the hill descent
control system is activated.
If the hill descent control switch is on and
the indicator light blinks, the system may
be disabled.
You may feel or hear the system working;
this is normal.
If the indicator light does not come on
when the hill descent switch is on, the sys-
tem may not be functioning properly. Have
the system checked. It is recommended
that you visit a NISSAN dealer for this ser-
vice.
For additional information, see “Hill descent
control system ON indicator light” (P. 2-18)
and “Hill descent control system” (P. 5-121).
Low tire pressure warning
light
Your vehicle is equipped with a Tire Pres-
sure Monitoring System (TPMS) that moni-
tors the tire pressure of all tires except the
spare.
The low tire pressure warning light warns
of low tire pressure or indicates that the
TPMS is not functioning properly.
Af ter the ignition switch is placed in the ON
position, this light illuminates for about 1
second and turns off.
Low tire pressure warning
If the vehicle is being driven with low tire
pressure, the warning light will illumi-
nate. A “Tire Pressure Low - Add Air”
warning also appears in the vehicle in-
formation display.
When the low tire pressure warning light
illuminates, you should stop and adjust
the tire pressure of all four tires to the
recommended COLD tire pressure shown
on the Tire and Loading Information la-
bel located in the driver's door opening.
The low tire pressure warning light does
not automatically turn off when the tire
pressure is adjusted. Af ter the tire is in-
flated to the recommended pressure,
2-18Instruments and controls
Page 165 of 638
To activate the hill descent control system:
• activate the 4H or 4LO switch,
• the transmission shif t lever must be inforward or reverse gear,
• the hill descent control system switch must be ON.
The vehicle speed must be kept below
15 mph (25 km/h).
The hill descent control indicator light will
come on when the system is activated.
Also, the stop/tail lights illuminate while the
hill descent control system applies the
brakes to control vehicle speed.
You may hear a noise from under the hood
or feel a vibration from the actuator when it
is operating. This is normal and indicates
the hill descent control system is working
properly.
If the accelerator or brake pedal is de-
pressed while the hill descent control sys-
tem is on, the system will stop operating
temporarily. As soon as the accelerator or
brake pedal is released, the hill descent
control system begins to function again if
the hill descent control operating condi-
tions are fulfilled. The hill descent control indicator light
blinks if the switch is on and all conditions
for system activation are not met or if the
system becomes disengaged for any rea-
son.
To turn off the hill descent control system,
push the switch to the OFF position.
For additional information, see “Hill descent
control system ON indicator light” (P. 2-18)
and “Hill descent control system” (P. 5-121).
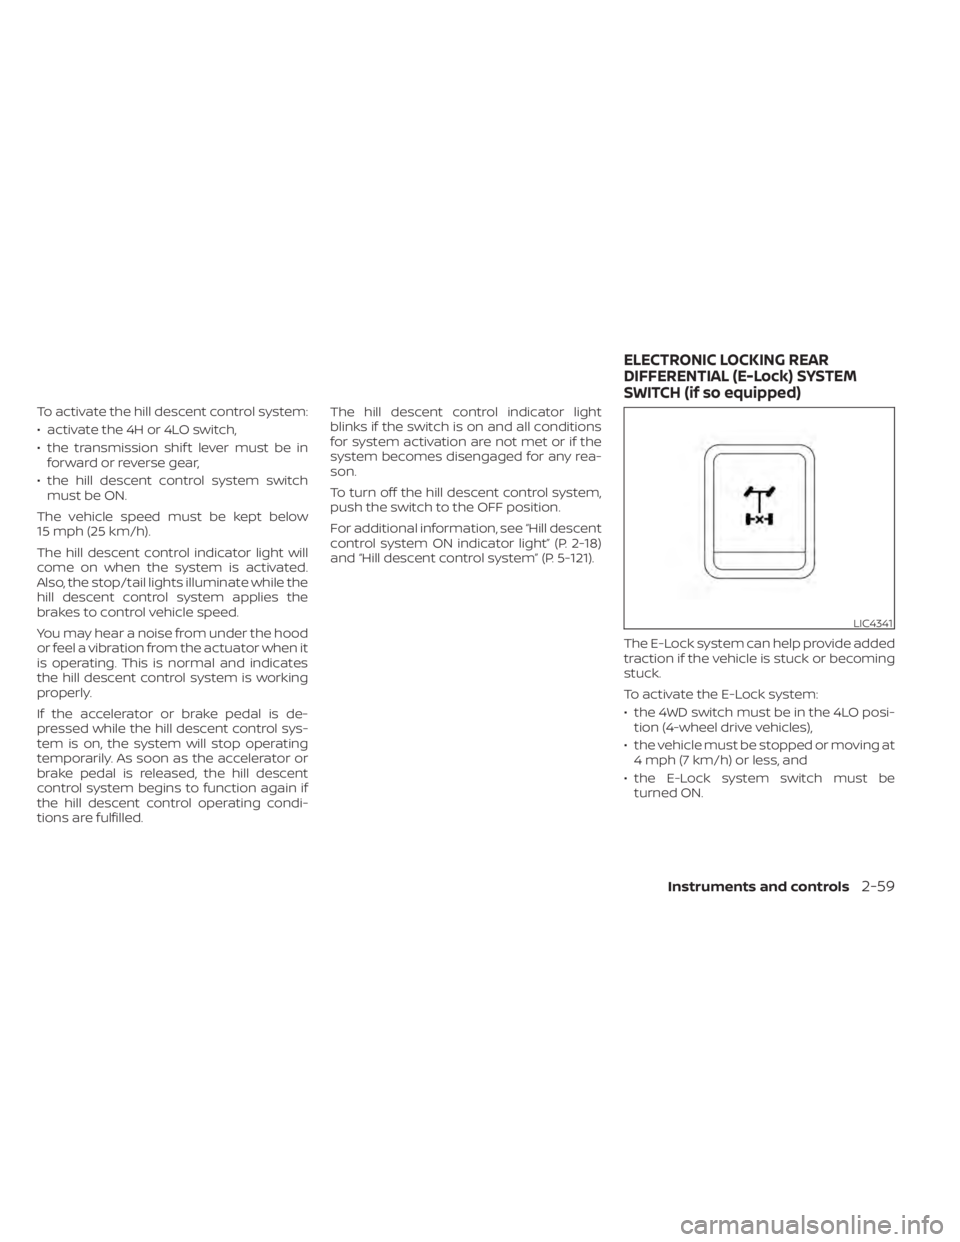
The E-Lock system can help provide added
traction if the vehicle is stuck or becoming
stuck.
To activate the E-Lock system:
• the 4WD switch must be in the 4LO posi-tion (4-wheel drive vehicles),
• the vehicle must be stopped or moving at 4 mph (7 km/h) or less, and
• the E-Lock system switch must be turned ON.
LIC4341
ELECTRONIC LOCKING REAR
DIFFERENTIAL (E-Lock) SYSTEM
SWITCH (if so equipped)
Instruments and controls2-59
Page 166 of 638
When the E-Lock system switch is turned
ON, the indicator light will flash until the
system engages. However, if all operation
conditions listed above are not met or the
system becomes disengaged, the indica-
tor light will continue to flash.
The Anti-lock Braking System (ABS) system
is disabled and the ABS light illuminates
when the E-Lock system is on.
For additional information, see “Electronic
locking rear differential (E-Lock) system”
(P. 5-112) for further explanation and system
limitations.
WARNING
• Never leave the E-Lock system ON
when driving on paved or hard-
surfaced roads. Turning the vehicle
may result in the rear wheels slipping
and result in an accident and per-
sonal injury. Af ter using the E-Lock
system to free the vehicle, turn the
system OFF. •
Use the E-lock system only in an
emergency when it is not possible to
free a stuck vehicle even using 4LO.
Never use the E-Lock system on a
slippery road surface such as snow
or ice surface. Using the E-Lock sys-
tem when driving in these road con-
ditions may cause unexpected
movement of the vehicle during en-
gine braking, accelerating or turning,
which may result in an accident and
serious personal injury.
• Observe the above warnings. Other-
wise, loss of normal steering control
may result. This may result in an ac-
cident and serious personal injury.
CAUTION
• Af ter using the E-Lock system, or
during normal driving, turn the
switch OFF to prevent possible dam-
age to drivetrain components from
extended use.
• When the E-Lock system is in opera-
tion, turning the vehicle becomes dif-
ficult. This can be dangerous, espe-
cially at high speeds. Doing so could
damage drivetrain components. •
Do not operate the E-Lock system
when the vehicle is turning or when
one side wheel is rotating. Otherwise,
the drivetrain components could be
damaged.
• The E-Lock system operates only
when the engine is running.
• In 4H mode, the E-Lock system does
not operate when the E-Lock system
switch is turned to the ON position.
(The E-Lock system indicator light
will flash.)
• Avoid quick starts while the E-Lock
system is in operation. Otherwise the
drivetrain components could be
damaged.
• Observe the above cautions. Other-
wise, loss of normal steering may
result.
2-60Instruments and controls
Page 335 of 638
Intelligent Driver Alertness (I-DA)
system limitations......................... 5-102
Break-in schedule ............................. 5-103
Fuel efficient driving tips .......................5-104
Increasing fuel economy ......................5-105
Using 4–Wheel Drive (4WD) (if so equipped) ....5-105
Transfer case shif ting procedures ..........5-106
Electronic locking rear differential (E-Lock)
system (if so equipped) ........................ 5-112
Eco Drive Report (if so equipped) ..............5-113
Parking/parking on hills .......................5-114
Power steering ................................ 5-115
Brake system ................................. 5-115
Brake precautions .......................... 5-115
Anti-lock Braking System (ABS) .............5-116
Brake Assist ................................. 5-117
Active Brake Limited Slip (ABLS) system ........5-117
Vehicle Dynamic Control (VDC) system ........5-118 Brake force distribution
....................5-120
Hill descent control system (if so equipped) . . . 5-121
Hill start assist system ........................5-122
Front and rear sonar system (if so equipped) . . 5-122 System operation .......................... 5-123
How to enable/disable the sonar
system ..................................... 5-125
Sonar limitations ........................... 5-126
System maintenance ......................5-126
Cold weather driving .......................... 5-127
Freeing a frozen door lock ..................5-127
Antifreeze .................................. 5-127
Battery..................................... 5-127
Draining of coolant water ..................5-127
Tire equipment ............................. 5-127
Special winter equipment ..................5-128
Driving on snow or ice ......................5-128
Engine block heater (if so equipped) ........5-128
Page 441 of 638
When driving on rough roads,
• Set the 4WD shif t switch to 4H or 4LO.
• Drive carefully according to the road sur-face conditions.
When the vehicle is stuck,
• Set the 4WD shif t switch to 4H or 4LO.
• Place stones or wooden blocks under the tires to free the vehicle.
• Use the Electronic locking rear differential (E-Lock) system (if so equipped). For addi-
tional information, see “Electronic locking
rear differential (E-lock) system” (P. 5-112).
• If it is difficult to free the vehicle, rock the vehicle back and forth between reverse
and drive gears.
• If the vehicle is stuck deep in mud, place stones or wooden blocks under the tires.
Then try the recovery procedures above.
Tire chains may be effective.
CAUTION
• Do not spin the tires excessively. Tires
will sink deep into the mud, making it
difficult to free the vehicle.
• Avoid shif ting gears with the engine
running at high speeds as this may
cause malfunction.
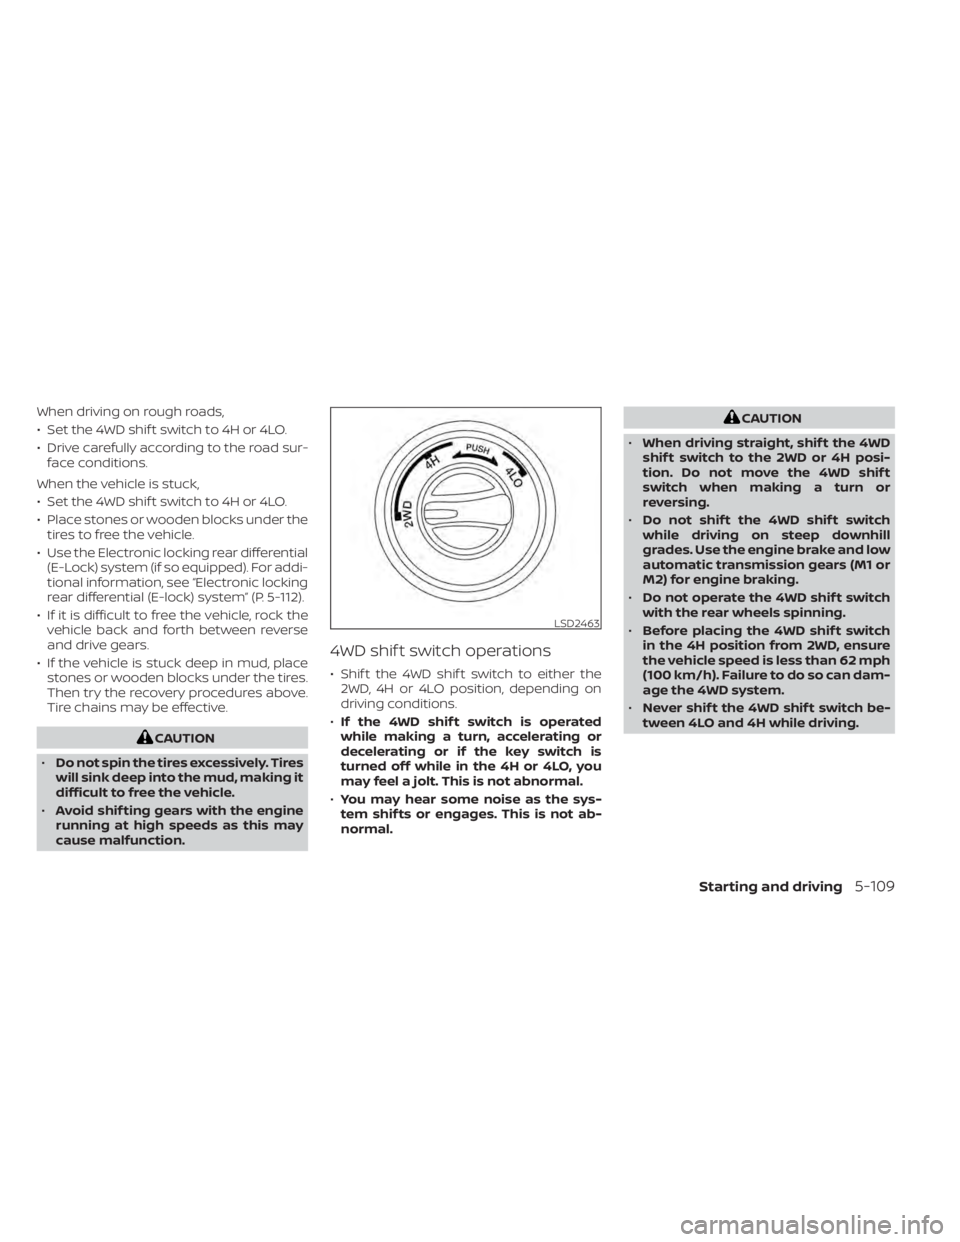
4WD shif t switch operations
• Shif t the 4WD shif t switch to either the 2WD, 4H or 4LO position, depending on
driving conditions.
• If the 4WD shif t switch is operated
while making a turn, accelerating or
decelerating or if the key switch is
turned off while in the 4H or 4LO, you
may feel a jolt. This is not abnormal.
• You may hear some noise as the sys-
tem shif ts or engages. This is not ab-
normal.
CAUTION
• When driving straight, shif t the 4WD
shif t switch to the 2WD or 4H posi-
tion. Do not move the 4WD shif t
switch when making a turn or
reversing.
• Do not shif t the 4WD shif t switch
while driving on steep downhill
grades. Use the engine brake and low
automatic transmission gears (M1 or
M2) for engine braking.
• Do not operate the 4WD shif t switch
with the rear wheels spinning.
• Before placing the 4WD shif t switch
in the 4H position from 2WD, ensure
the vehicle speed is less than 62 mph
(100 km/h). Failure to do so can dam-
age the 4WD system.
• Never shif t the 4WD shif t switch be-
tween 4LO and 4H while driving.
LSD2463
Starting and driving5-109