NISSAN VERSA NOTE 2018 Owner´s Manual
Manufacturer: NISSAN, Model Year: 2018, Model line: VERSA NOTE, Model: NISSAN VERSA NOTE 2018Pages: 878, PDF Size: 9.62 MB
Page 231 of 878
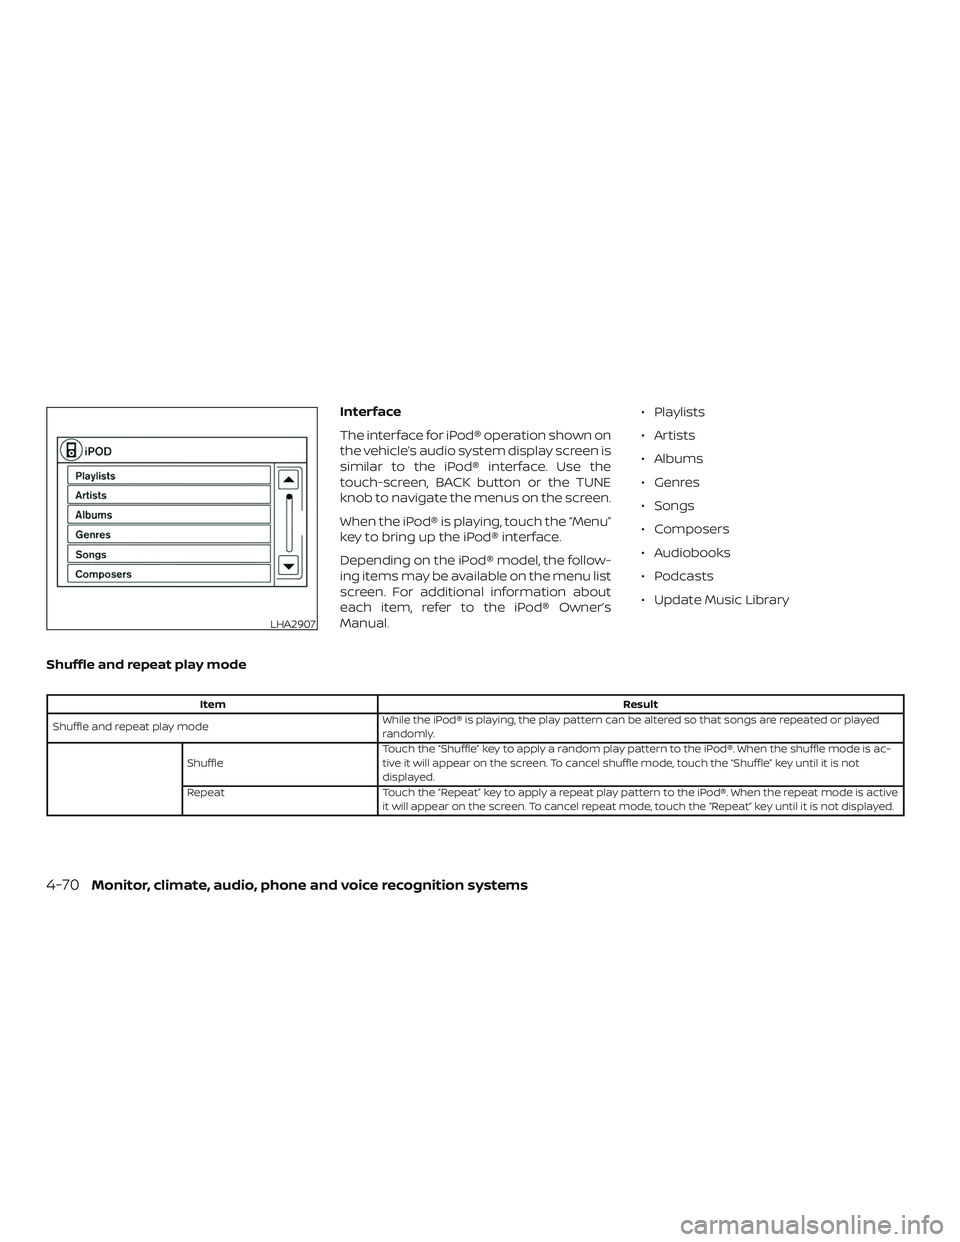
Interface
The interface for iPod® operation shown on
the vehicle’s audio system display screen is
similar to the iPod® interface. Use the
touch-screen, BACK button or the TUNE
knob to navigate the menus on the screen.
When the iPod® is playing, touch the “Menu”
key to bring up the iPod® interface.
Depending on the iPod® model, the follow-
ing items may be available on the menu list
screen. For additional information about
each item, refer to the iPod® Owner’s
Manual.∙ Playlists
∙ Artists
∙ Albums
∙ Genres
∙ Songs
∙ Composers
∙ Audiobooks
∙ Podcasts
∙ Update Music Library
Shuffle and repeat play mode
Item Result
Shuffle and repeat play mode While the iPod® is playing, the play pattern can be altered so that songs are repeated or played
randomly.
Shuffle Touch the “Shuffle” key to apply a random play pattern to the iPod®. When the shuffle mode is ac-
tive it will appear on the screen. To cancel shuffle mode, touch the “Shuffle” key until it is not
displayed.
Repeat Touch the “Repeat” key to apply a repeat play pattern to the iPod®. When the repeat mode is active it will appear on the screen. To cancel repeat mode, touch the “Repeat” key until it is not displayed.
LHA2907
4-70Monitor, climate, audio, phone and voice recognition systems
Page 232 of 878
SEEK buttons
Press the SEEK button
orto
skip backward or forward one track.
Press and hold the SEEK button
orfor 1.5 seconds while a track is
playing to reverse or fast forward the track
being played. The track plays at an in-
creased speed while reversing or fast for-
warding. When the button is released, the
track returns to normal play speed.
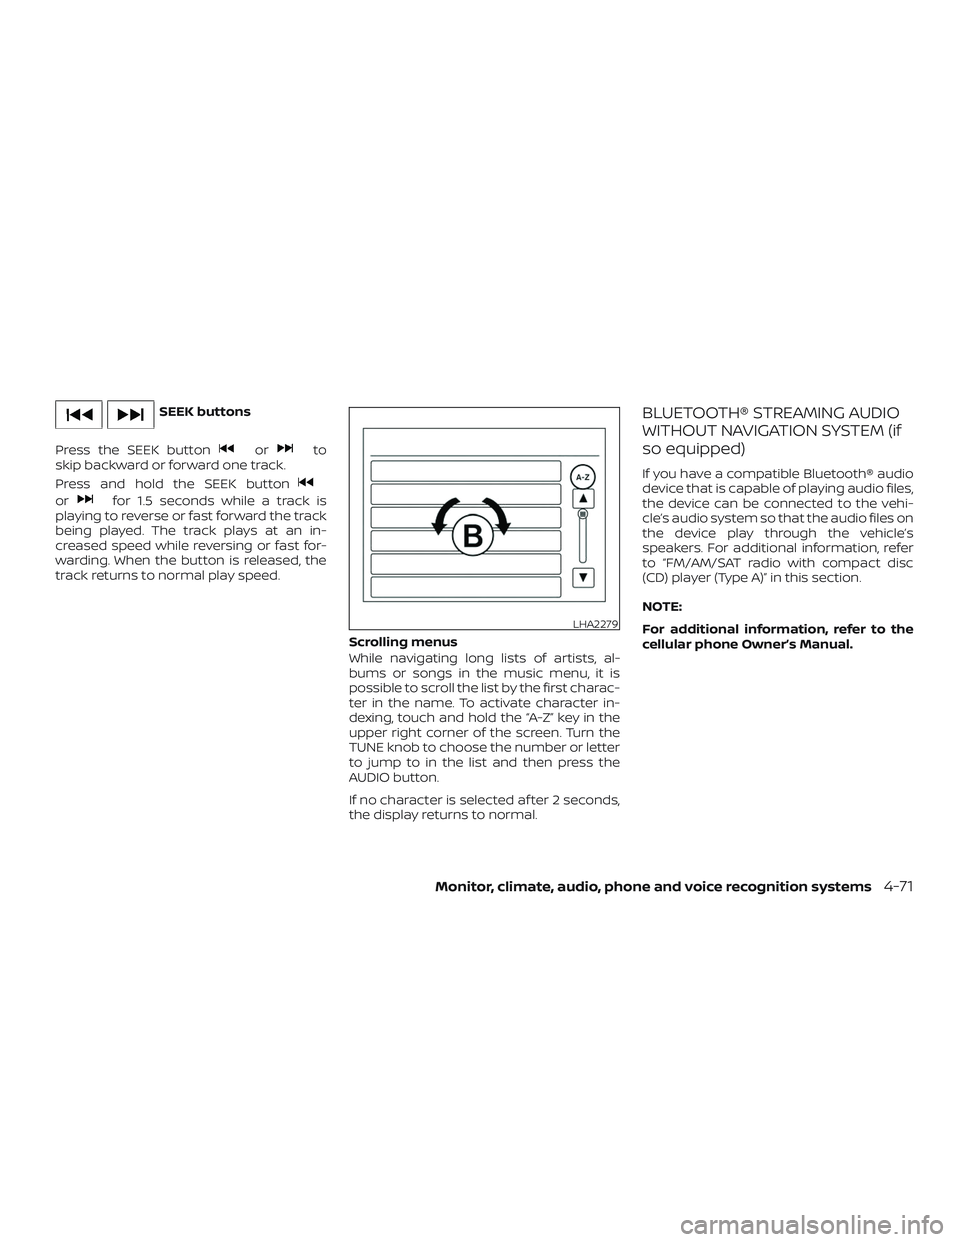
Scrolling menus
While navigating long lists of artists, al-
bums or songs in the music menu, it is
possible to scroll the list by the first charac-
ter in the name. To activate character in-
dexing, touch and hold the “A-Z” key in the
upper right corner of the screen. Turn the
TUNE knob to choose the number or letter
to jump to in the list and then press the
AUDIO button.
If no character is selected af ter 2 seconds,
the display returns to normal.
BLUETOOTH® STREAMING AUDIO
WITHOUT NAVIGATION SYSTEM (if
so equipped)
If you have a compatible Bluetooth® audio
device that is capable of playing audio files,
the device can be connected to the vehi-
cle’s audio system so that the audio files on
the device play through the vehicle’s
speakers. For additional information, refer
to “FM/AM/SAT radio with compact disc
(CD) player (Type A)” in this section.
NOTE:
For additional information, refer to the
cellular phone Owner’s Manual.
LHA2279
Monitor, climate, audio, phone and voice recognition systems4-71
Page 233 of 878
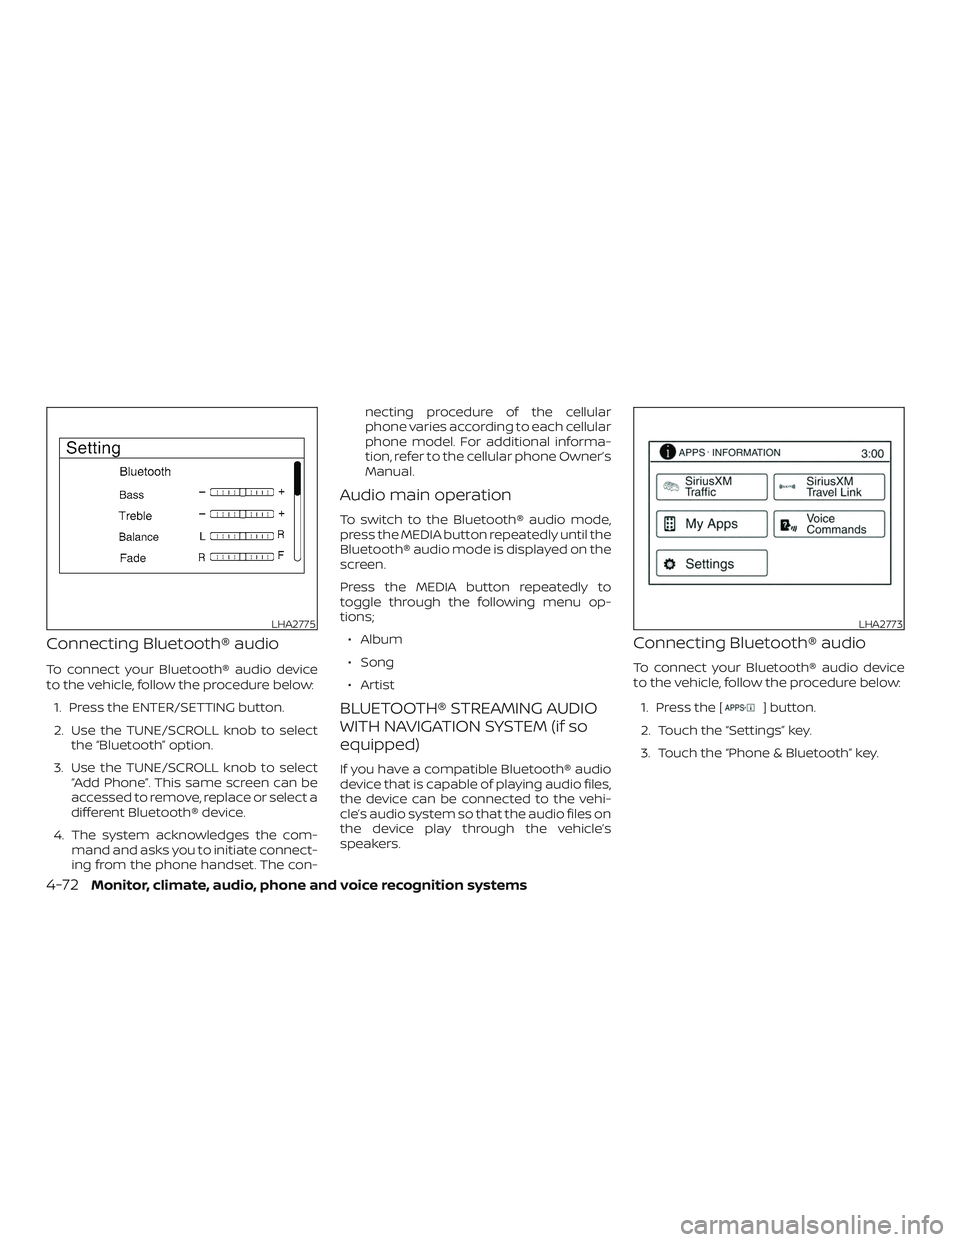
Connecting Bluetooth® audio
To connect your Bluetooth® audio device
to the vehicle, follow the procedure below:1. Press the ENTER/SETTING button.
2. Use the TUNE/SCROLL knob to select the “Bluetooth” option.
3. Use the TUNE/SCROLL knob to select “Add Phone”. This same screen can be
accessed to remove, replace or select a
different Bluetooth® device.
4. The system acknowledges the com- mand and asks you to initiate connect-
ing from the phone handset. The con- necting procedure of the cellular
phone varies according to each cellular
phone model. For additional informa-
tion, refer to the cellular phone Owner’s
Manual.
Audio main operation
To switch to the Bluetooth® audio mode,
press the MEDIA button repeatedly until the
Bluetooth® audio mode is displayed on the
screen.
Press the MEDIA button repeatedly to
toggle through the following menu op-
tions;
∙ Album
∙ Song
∙ Artist
BLUETOOTH® STREAMING AUDIO
WITH NAVIGATION SYSTEM (if so
equipped)
If you have a compatible Bluetooth® audio
device that is capable of playing audio files,
the device can be connected to the vehi-
cle’s audio system so that the audio files on
the device play through the vehicle’s
speakers.
Connecting Bluetooth® audio
To connect your Bluetooth® audio device
to the vehicle, follow the procedure below:
1. Press the [
] button.
2. Touch the “Settings” key.
3. Touch the “Phone & Bluetooth” key.
LHA2775LHA2773
4-72Monitor, climate, audio, phone and voice recognition systems
Page 234 of 878
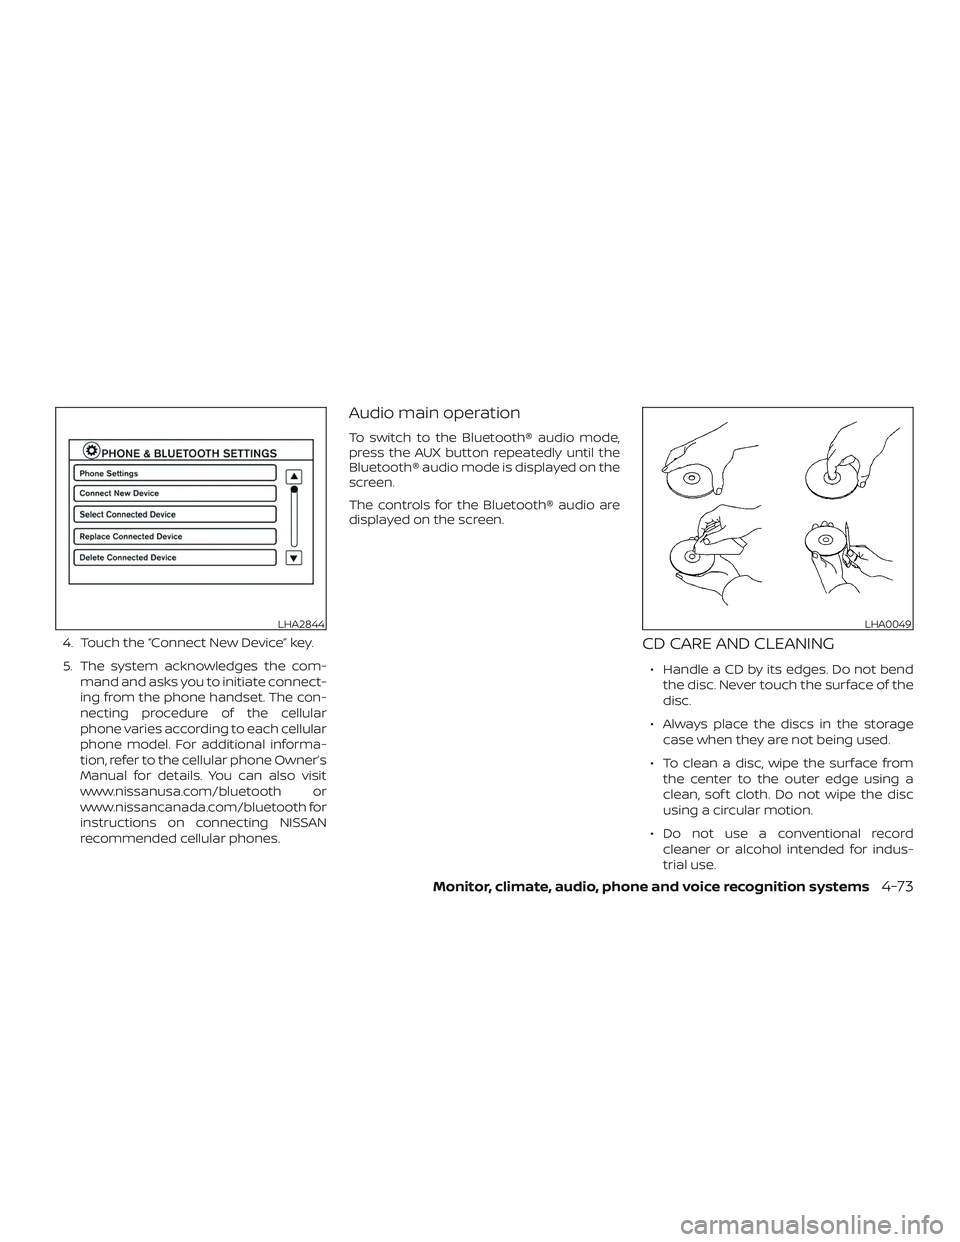
4. Touch the “Connect New Device” key.
5. The system acknowledges the com-mand and asks you to initiate connect-
ing from the phone handset. The con-
necting procedure of the cellular
phone varies according to each cellular
phone model. For additional informa-
tion, refer to the cellular phone Owner’s
Manual for details. You can also visit
www.nissanusa.com/bluetooth or
www.nissancanada.com/bluetooth for
instructions on connecting NISSAN
recommended cellular phones.
Audio main operation
To switch to the Bluetooth® audio mode,
press the AUX button repeatedly until the
Bluetooth® audio mode is displayed on the
screen.
The controls for the Bluetooth® audio are
displayed on the screen.
CD CARE AND CLEANING
∙ Handle a CD by its edges. Do not bendthe disc. Never touch the surface of the
disc.
∙ Always place the discs in the storage case when they are not being used.
∙ To clean a disc, wipe the surface from the center to the outer edge using a
clean, sof t cloth. Do not wipe the disc
using a circular motion.
∙ Do not use a conventional record cleaner or alcohol intended for indus-
trial use.
LHA2844LHA0049
Monitor, climate, audio, phone and voice recognition systems4-73
Page 235 of 878
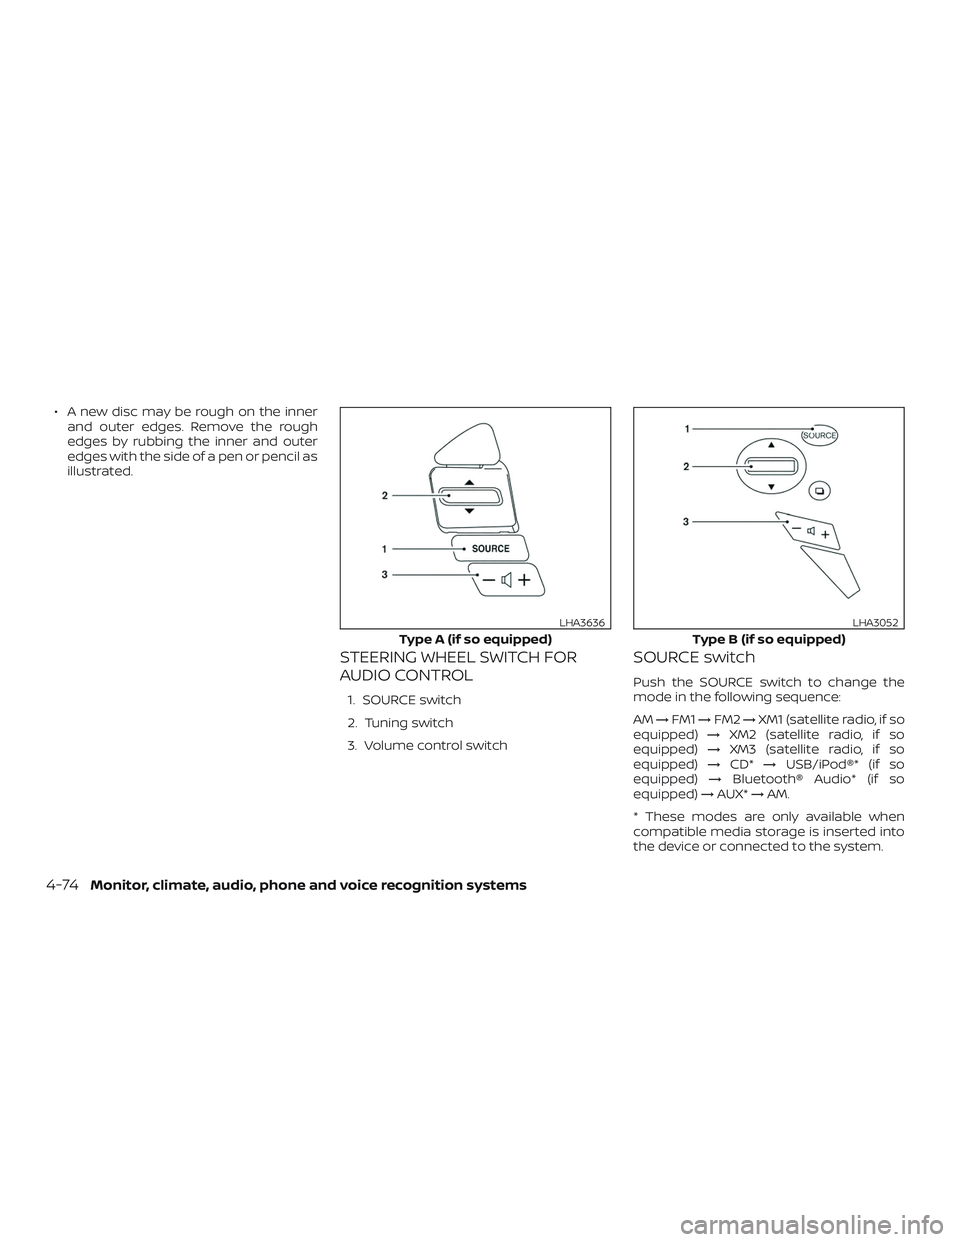
∙ A new disc may be rough on the innerand outer edges. Remove the rough
edges by rubbing the inner and outer
edges with the side of a pen or pencil as
illustrated.
STEERING WHEEL SWITCH FOR
AUDIO CONTROL
1. SOURCE switch
2. Tuning switch
3. Volume control switch
SOURCE switch
Push the SOURCE switch to change the
mode in the following sequence:
AM →FM1 →FM2 →XM1 (satellite radio, if so
equipped) →XM2 (satellite radio, if so
equipped) →XM3 (satellite radio, if so
equipped) →CD* →USB/iPod®* (if so
equipped) →Bluetooth® Audio* (if so
equipped) →AUX* →AM.
* These modes are only available when
compatible media storage is inserted into
the device or connected to the system.
Type A (if so equipped)
LHA3636
Type B (if so equipped)
LHA3052
4-74Monitor, climate, audio, phone and voice recognition systems
Page 236 of 878
Volume control switches
Push the volume control switch to increase
or decrease the volume.
Tuning switch
For most audio sources, pressing the
switches for more than 1.5 seconds pro-
vides a different function than pressing for
less than 1.5 seconds.
AM and FM:∙ Push the
switch for less than
1.5 seconds to increase or decrease the
preset station.
∙ Push the
switch for more than
1.5 seconds to seek up or down to the
next station.
XM (if so equipped):
∙ Push the
switch for less than
1.5 seconds to increase or decrease the
preset station.
∙ Push the
switch for more than
1.5 seconds to go to the next or previous
channel. iPod® (if so equipped):
∙ Push the
switch for less than
1.5 seconds to increase or decrease the
track number.
CD:
∙ Push the
switch for less than
1.5 seconds to increase or decrease the
track number.
∙ Push the
switch for more than
1.5 seconds to increase or decrease the
folder number (if playing compressed
audio files).
USB (if so equipped):
∙ Push the
switch for less than
1.5 seconds to increase or decrease the
track number.
∙ Push the
switch for more than
1.5 seconds to increase or decrease the
folder number.
Bluetooth® Audio (if so equipped):
∙ Push the
switch for less than
1.5 seconds to skip ahead or back to the
next song.
ANTENNA
The antenna cannot be shortened, but can
be removed. When you need to remove the
antenna, turn the antenna rod counter-
clockwise.
To install the antenna rod, turn the antenna
rod clockwise and hand tighten.
CAUTION
∙ Always properly tighten the antenna rod during installation or the antenna
rod may break during vehicle
operation.
∙ Be sure that the antenna is removed before the vehicle enters an auto-
matic car wash.
Monitor, climate, audio, phone and voice recognition systems4-75
Page 237 of 878
This vehicle is equipped with Smartphone
Integration technology. This allows many
compatible Smartphone applications to
be displayed and easily controlled through
the vehicle’s touch-screen.
NOTE:
A compatible smartphone and registra-
tion is required to use mobile applica-
tions or to access connected features of
certain vehicle applications.
REGISTERING WITH
NISSANCONNECT® MOBILE APPS
To use the Smartphone Integration feature,
it is necessary for the user to register. In
order to register, visit the NissanConnect®
Mobile Apps website,
www.nissanusa.com/connect/ or
www.nissan.ca/en/connect or
www.nissan.ca/fr/connect and sign up or
create an account through the prompts on
the NissanConnect Mobile Apps. Once reg-
istered, download the NissanConnect Mo-
bile Apps from your compatible phone’s
application download source and then log
into the application. If you already have an
account created through the App, please
log in.
CONNECT PHONE
To use this feature, a compatible smart-
phone must be connected via Bluetooth®
or USB to the vehicle. For additional infor-
mation on connecting your phone, refer to
“Bluetooth® Hands-Free Phone System
with Navigation System” in this section.
NOTE:
For vehicles with a navigation system,
Apple iPhones® REQUIRE the phone to be
plugged in via USB for NissanConnect
Mobile Apps to function.
For vehicles without a navigation sys-
tem, Apple iPhones® must be paired via
Bluetooth® for NissanConnect Mobile
Apps to function.
NOTE:
For Android phones, NissanConnect Mo-
bile Apps REQUIRES the phone to be
paired via Bluetooth®.
APPLICATION DOWNLOAD
Once connected, the NissanConnect App
will search your phone to determine which
compatible applications are currently in-
stalled. The user will then choose which apps
they want to bring into their vehicle from the
list of apps within the “Manage My Apps” sec-
tion of the NissanConnect App on their
smartphone. The vehicle will then download
the in-vehicle interface for each of these
compatible applications. Once downloaded,
the user can access their selected smart-
phone applications through the vehicle
touch-screen. For additional information, re-
fer to www.nissanusa.com/connect or
www.nissan.ca/en/connect or
www.nissan.ca/fr/connect regarding appli-
cation availability.
NISSANCONNECT® MOBILE APPS (if
so equipped)
4-76Monitor, climate, audio, phone and voice recognition systems
Page 238 of 878
Apple Siri® Eyes Free personal assistant
can be accessed from the vehicle. Siri Eyes
Free can be accessed in Siri Eyes Free
mode to reduce user distraction. In this
mode, Siri Eyes Free is available for interac-
tion by voice control. Af ter connecting a
compatible Apple device by using
Bluetooth®, Siri Eyes Free can be activated
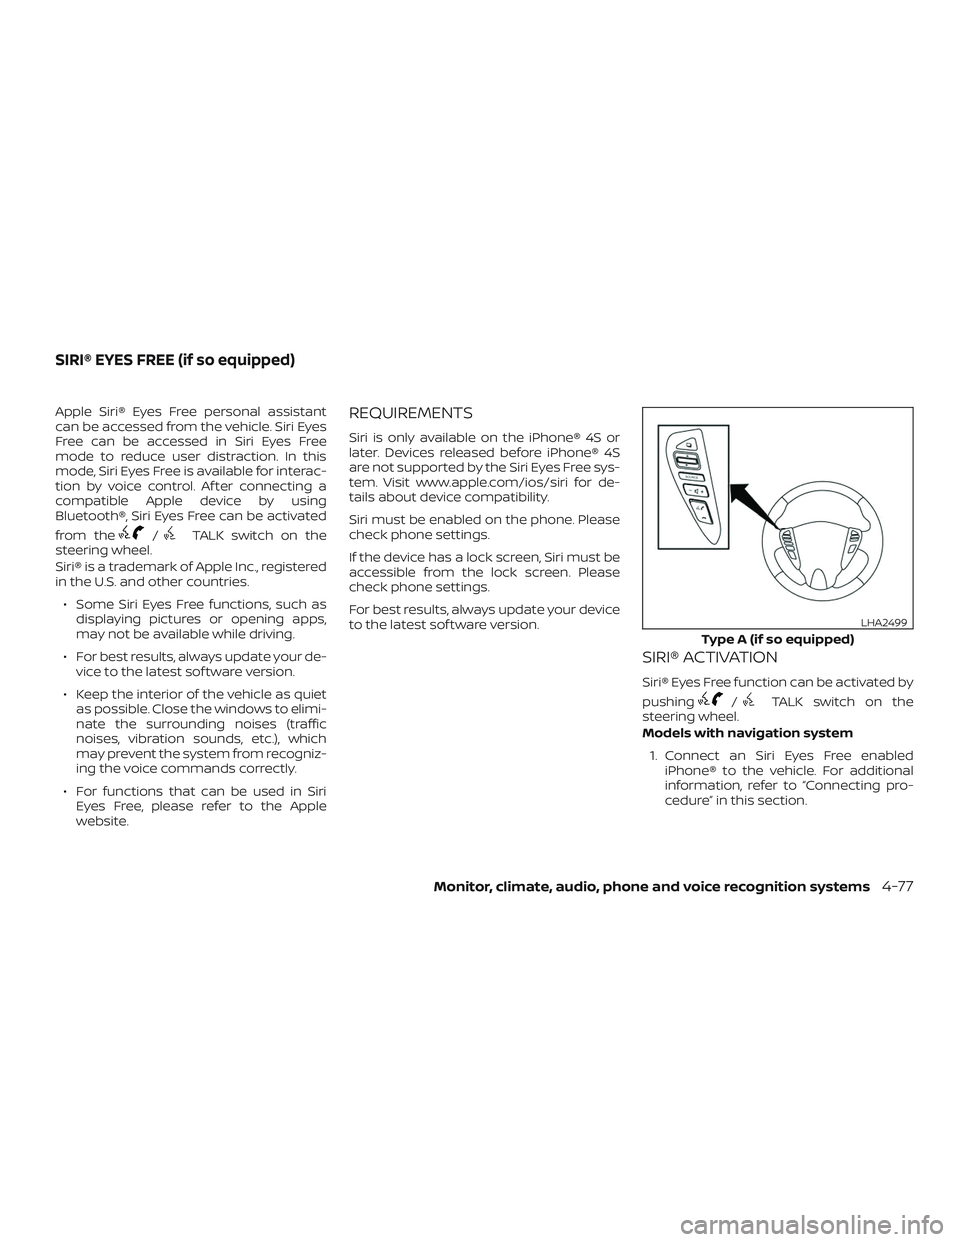
from the
/TALK switch on the
steering wheel.
Siri® is a trademark of Apple Inc., registered
in the U.S. and other countries.
∙ Some Siri Eyes Free functions, such as displaying pictures or opening apps,
may not be available while driving.
∙ For best results, always update your de- vice to the latest sof tware version.
∙ Keep the interior of the vehicle as quiet as possible. Close the windows to elimi-
nate the surrounding noises (traffic
noises, vibration sounds, etc.), which
may prevent the system from recogniz-
ing the voice commands correctly.
∙ For functions that can be used in Siri Eyes Free, please refer to the Apple
website.
REQUIREMENTS
Siri is only available on the iPhone® 4S or
later. Devices released before iPhone® 4S
are not supported by the Siri Eyes Free sys-
tem. Visit www.apple.com/ios/siri for de-
tails about device compatibility.
Siri must be enabled on the phone. Please
check phone settings.
If the device has a lock screen, Siri must be
accessible from the lock screen. Please
check phone settings.
For best results, always update your device
to the latest sof tware version.
SIRI® ACTIVATION
Siri® Eyes Free function can be activated by
pushing
/TALK switch on the
steering wheel.
Models with navigation system
1. Connect an Siri Eyes Free enabled iPhone® to the vehicle. For additional
information, refer to “Connecting pro-
cedure” in this section.
Type A (if so equipped)
LHA2499
SIRI® EYES FREE (if so equipped)
Monitor, climate, audio, phone and voice recognition systems4-77
Page 239 of 878
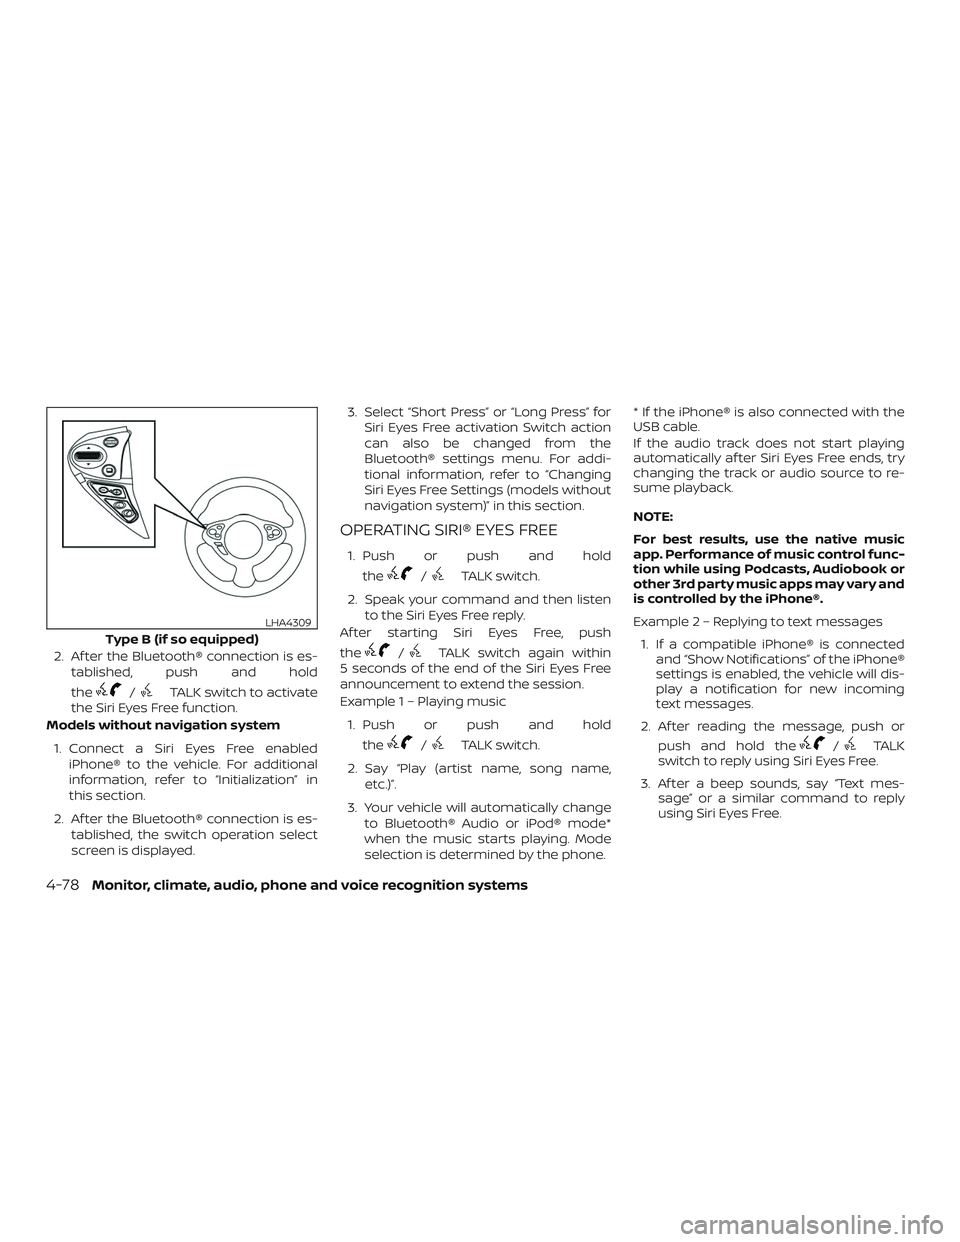
2. Af ter the Bluetooth® connection is es-tablished, push and hold
the
/TALK switch to activate
the Siri Eyes Free function.
Models without navigation system
1. Connect a Siri Eyes Free enabled iPhone® to the vehicle. For additional
information, refer to “Initialization” in
this section.
2. Af ter the Bluetooth® connection is es- tablished, the switch operation select
screen is displayed. 3. Select “Short Press” or “Long Press” for
Siri Eyes Free activation Switch action
can also be changed from the
Bluetooth® settings menu. For addi-
tional information, refer to “Changing
Siri Eyes Free Settings (models without
navigation system)” in this section.
OPERATING SIRI® EYES FREE
1. Push or push and hold
the
/TALK switch.
2. Speak your command and then listen to the Siri Eyes Free reply.
Af ter starting Siri Eyes Free, push
the
/TALK switch again within
5 seconds of the end of the Siri Eyes Free
announcement to extend the session.
Example 1 – Playing music
1. Push or push and hold the
/TALK switch.
2. Say “Play (artist name, song name, etc.)”.
3. Your vehicle will automatically change to Bluetooth® Audio or iPod® mode*
when the music starts playing. Mode
selection is determined by the phone. * If the iPhone® is also connected with the
USB cable.
If the audio track does not start playing
automatically af ter Siri Eyes Free ends, try
changing the track or audio source to re-
sume playback.
NOTE:
For best results, use the native music
app. Performance of music control func-
tion while using Podcasts, Audiobook or
other 3rd party music apps may vary and
is controlled by the iPhone®.
Example2–Repl
ying to text messages
1. If a compatible iPhone® is connected and “Show Notifications” of the iPhone®
settings is enabled, the vehicle will dis-
play a notification for new incoming
text messages.
2. Af ter reading the message, push or push and hold the/TALK
switch to reply using Siri Eyes Free.
3. Af ter a beep sounds, say “Text mes- sage” or a similar command to reply
using Siri Eyes Free.
Type B (if so equipped)
LHA4309
4-78Monitor, climate, audio, phone and voice recognition systems
Page 240 of 878
CHANGING SIRI® EYES FREE
SETTINGS (models without
navigation system)
Settings for Siri® Eyes Free can be found in
the Bluetooth® settings menu. For addi-
tional information, refer to “Bluetooth® set-
tings” in this section.1. Press the ENTER/SETTING button.
2. Use the TUNE/SCROLL knob to select “Bluetooth” and then press the
ENTER/SETTING button.
3. Use the TUNE/SCROLL knob to select “Siri” and then press the
ENTER/SETTING button.
4. Select “Short Press” or “Long Press” us- ing the TUNE/SCROLL knob and then
press the ENTER/SETTING button.
CHANGING SIRI® EYES FREE
SETTINGS (models with
navigation system)
Settings for Siri® Eyes Free can be found in
the Bluetooth® settings menu. For addi-
tional information, refer to “Bluetooth® set-
tings” in this section.
1. Press the [
] button.
2. Touch the “Settings” key.
3. Touch the “Phone & Bluetooth” key.
4. Touch the “Phone settings” key.
5. Select “Short Press” or “Long Press” to set the activation.
Monitor, climate, audio, phone and voice recognition systems4-79