window NISSAN XTERRA 2004 WD22 / 1.G Owner's Guide
[x] Cancel search | Manufacturer: NISSAN, Model Year: 2004, Model line: XTERRA, Model: NISSAN XTERRA 2004 WD22 / 1.GPages: 296, PDF Size: 4.64 MB
Page 182 of 296
SPECIAL WINTER EQUIPMENT
It is recommended that the following items be
carried in the vehicle during winter:
cA scraper and stiff-bristled brush to remove
ice and snow from the windows and wiper
blades.
cA sturdy, flat board to be placed under the
jack to give it firm support.
cA shovel to dig the vehicle out of snowdrifts.
cExtra window washer fluid to refill the reser-
voir tank.
DRIVING ON SNOW OR ICE
WARNING
cWet ice (32°F, 0°C and freezing rain) ,
very cold snow or ice can be slick and
very hard to drive on. The vehicle will
have much less traction or “grip” under
these conditions. Try to avoid driving on
wet ice until the road is salted or
sanded.
cWhatever the condition, drive with cau-
tion. Accelerate and slow down with
care. If accelerating or downshifting too
fast, the drive wheels will lose even
more traction.cAllow more stopping distance under
these conditions. Braking should be
started sooner than on dry pavement.
cAllow greater following distances on
slippery roads.
cWatch for slippery spots (glare ice) .
These may appear on an otherwise
clear road in shaded areas. If a patch of
ice is seen ahead, brake before reach-
ing it. Try not to brake while on the ice,
and avoid any sudden steering
maneuvers.
cDo not use the cruise control on slip-
pery roads.
cSnow can trap dangerous exhaust
gases under your vehicle. Keep snow
clear of the exhaust pipe and from
around your vehicle.
ENGINE BLOCK HEATER (if so
equipped)
An engine block heater to assist in extreme cold
temperature starting is available through a
NISSAN dealer.
WARNING
Do not use your heater with an un-
grounded electrical system or two-
pronged (cheater) adapters. You can be
injured by an electrical shock if you use an
ungrounded connection.
5-28Starting and driving
ZREVIEW COPY:Ð2004 Xterra(xtr)
Owners Manual(owners)ÐUSA English(nna)
10/23/03Ðdebbie
X
Page 193 of 296
CAUTION
cAlways connect positive (1) to positive
(1) and negative (2) to body ground (for
example, strut mounting bolt, engine
lift bracket, etc.) — not to the battery.
cMake sure the jumper cables do not
touch moving parts in the engine com-
partment and that the cable clamps do
not contact any other metal.
5. Start the engine of the booster vehicle and
let it run for a few minutes.
6. Keep the engine speed of the booster ve-
hicle at about 2,000 rpm, and start the en-
gine of the vehicle being jump started.
CAUTION
Do not keep the starter motor engaged for
more than 10 seconds. If the engine does
not start right away, turn the key off and
wait 3 to 4 seconds before trying again.
7. After starting the engine, carefully discon-
nect the negative cable and then the positive
cable.
8. Replace the vent caps (if so equipped) . Be
sure to dispose of the cloth used to cover
the vent holes as it may be contaminated
with corrosive acid.
WARNING
cAutomatic transmission models cannot
be push-started or tow-started. This
may cause transmission or other ve-
hicle damage.
cThree-way catalyst equipped models
should not be started by pushing. The
three-way catalyst may be damaged.
cNever try to start the vehicle by towing
it. When the engine starts, the forward
surge could cause the vehicle to collide
with the tow vehicle.If your vehicle is overheating (indicated by an
extremely high temperature gauge reading) , or if
you feel a lack of engine power, detect abnormal
noise, etc. take the following steps.
WARNING
cDo not continue to drive if your vehicle
overheats. Doing so could cause engine
damage or a vehicle fire.
cTo avoid the danger of being scalded,
never remove the radiator cap while the
engine is still hot. When the radiator
cap is removed, pressurized hot water
will spurt out, possibly causing serious
injury.
cDo not open the hood if steam is com-
ing out.
1. Move the vehicle safely off the road, apply
the parking brake and move the shift lever to
N (Neutral) (manual transmission) or to P
(Park) (automatic transmission) .
Do not stop the engine.
2. Turn off the air conditioner (if so equipped) .
Open all the windows, move the heater or air
conditioner temperature control to maximum
hot and fan control to high speed.
PUSH STARTING IF YOUR VEHICLE OVERHEATS
In case of emergency6-11
ZREVIEW COPY:Ð2004 Xterra(xtr)
Owners Manual(owners)ÐUSA English(nna)
10/23/03Ðdebbie
X
Page 201 of 296
UNDERBODY
In areas where road salt is used in winter, it is
necessary to clean the underbody regularly in
order to prevent dirt and salt from building up and
causing the acceleration of corrosion on the un-
derbody and suspension. Before the winter pe-
riod and again in the spring, the underseal must
be checked and, if necessary, retreated.
GLASS
Use glass cleaner to remove smoke and dust film
from the glass surfaces. It is normal for glass to
become coated with a film after the vehicle is
parked in the hot sun. Glass cleaner and a soft
cloth will easily remove this film.
CAUTION
When cleaning the inside of the windows,
do not use sharp-edged tools, abrasive
cleaners or chlorine-based disinfectant
cleaners. They could damage the electri-
cal conductors, radio antenna elements or
rear window defroster elements.
ALUMINUM ALLOY WHEELS
Wash the wheels regularly, especially during win-
ter months in areas where road salt is used. If not
removed, road salt could discolor the wheels.
CHROME PARTS
Clean all chrome parts regularly with a non-
abrasive chrome polish to maintain the finish.Occasionally remove loose dust from the interior
trim, plastic parts and seats using a vacuum
cleaner or soft brush. Wipe the vinyl and leather
surfaces with a clean, soft cloth dampened in
mild soap solution, then wipe clean with a dry,
soft cloth. Before using any fabric protector, read
the manufacturer’s recommendations. Some fab-
ric protectors contain chemicals that may stain or
bleach the seat material.
Use a cloth dampened only with water to clean
the meter and gauge lens.
CAUTION
cNever use benzine, thinner or any simi-
lar material.
cSmall dirt particles can be abrasive and
damaging to leather surfaces and
should be removed promptly. Do not
use saddle soap, polishes, oils, clean-
ing fluids, solvents, detergents or
ammonia-based cleaners as they may
damage the leather’s natural finish.
cNever use fabric protectors unless rec-
ommended by the manufacturer.
cDo not use glass or plastic cleaner on
meter or gauge lens covers. It may dam-
age the lens cover.
CLEANING INTERIOR
Appearance and care7-3
ZREVIEW COPY:Ð2004 Xterra(xtr)
Owners Manual(owners)ÐUSA English(nna)
10/23/03Ðdebbie
X
Page 205 of 296

8 Maintenance and do-it-yourself
Maintenance requirements..........................8-2
General maintenance..............................8-2
Explanation of general maintenance items.........8-2
Maintenance precautions...........................8-5
Engine compartment check locations................8-6
Engine cooling system.............................8-9
Checking engine coolant level...................8-9
Changing engine coolant.......................8-10
Engine oil........................................8-10
Checking engine oil level.......................8-10
Changing engine oil...........................8-11
Changing engine oil filter.......................8-13
Automatic transmission fluid.......................8-14
Temperature conditions for checking.............8-14
Power steering fluid...............................8-15
Brake and clutch fluid.............................8-16
Brake fluid....................................8-16
Clutch fluid...................................8-17
Window washer fluid.............................8-17
Window washer fluid reservoir..................8-17
Battery..........................................8-18
Jump starting.................................8-19
Drive belts.......................................8-20Spark plugs......................................8-21
Replacing spark plugs.........................8-21
Air cleaner.......................................8-23
In-cabin Microfilter (if so equipped)..............8-23
Windshield wiper blades..........................8-26
Cleaning.....................................8-26
Replacing....................................8-26
Parking brake and brake pedal.....................8-29
Checking parking brake........................8-29
Checking brake pedal..........................8-29
Brake booster.................................8-30
Fuses...........................................8-31
Passenger compartment.......................8-31
Keyfob battery replacement........................8-32
Lights...........................................8-33
Headlights....................................8-33
Fog lights (if so equipped)......................8-34
Exterior and interior lights.......................8-36
Wheels and tires.................................8-40
Tire pressure..................................8-40
Tire labeling...................................8-43
Types of tires..................................8-46
Tire chains....................................8-46
Changing wheels and tires.....................8-47
ZREVIEW COPY:Ð2004 Xterra(xtr)
Owners Manual(owners)ÐUSA English(nna)
10/23/03Ðdebbie
X
Page 221 of 296
CLUTCH FLUID
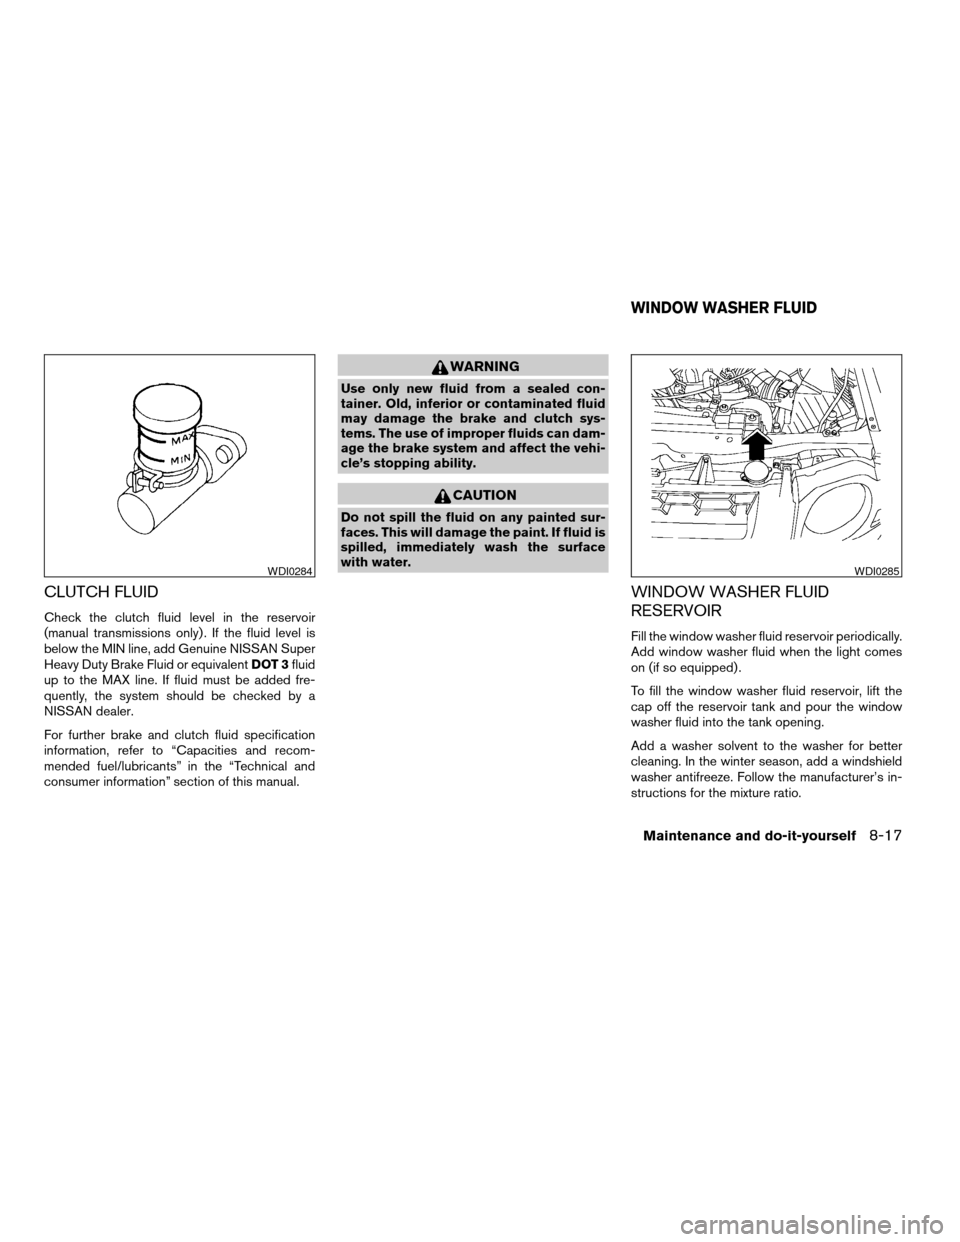
Check the clutch fluid level in the reservoir
(manual transmissions only) . If the fluid level is
below the MIN line, add Genuine NISSAN Super
Heavy Duty Brake Fluid or equivalentDOT 3fluid
up to the MAX line. If fluid must be added fre-
quently, the system should be checked by a
NISSAN dealer.
For further brake and clutch fluid specification
information, refer to “Capacities and recom-
mended fuel/lubricants” in the “Technical and
consumer information” section of this manual.
WARNING
Use only new fluid from a sealed con-
tainer. Old, inferior or contaminated fluid
may damage the brake and clutch sys-
tems. The use of improper fluids can dam-
age the brake system and affect the vehi-
cle’s stopping ability.
CAUTION
Do not spill the fluid on any painted sur-
faces. This will damage the paint. If fluid is
spilled, immediately wash the surface
with water.
WINDOW WASHER FLUID
RESERVOIR
Fill the window washer fluid reservoir periodically.
Add window washer fluid when the light comes
on (if so equipped) .
To fill the window washer fluid reservoir, lift the
cap off the reservoir tank and pour the window
washer fluid into the tank opening.
Add a washer solvent to the washer for better
cleaning. In the winter season, add a windshield
washer antifreeze. Follow the manufacturer’s in-
structions for the mixture ratio.
WDI0284WDI0285
WINDOW WASHER FLUID
Maintenance and do-it-yourself8-17
ZREVIEW COPY:Ð2004 Xterra(xtr)
Owners Manual(owners)ÐUSA English(nna)
10/23/03Ðdebbie
X
Page 222 of 296
Refill the reservoir more frequently when driving
conditions require an increased amount of win-
dow washer fluid.
Recommended fluid is Genuine NISSAN Wind-
shield Washer Concentrate Cleaner & Anti-
freeze or equivalent.
CAUTION
cDo not substitute engine anti-freeze
coolant for window washer solution.
This may result in damage to the paint.
cDo not fill the window washer reservoir
tank with washer fluid concentrates at
full strength. Some methyl alcohol
based washer fluid concentrates may
permanently stain the grille if spilled
while filling the window washer reser-
voir tank.
cPre-mix washer fluid concentrates with
water to the manufacturer’s recom-
mended levels before pouring the fluid
into the window washer reservoir tank.
Do not use the window washer reservoir
tank to mix the washer fluid concen-
trate and water.cKeep the battery surface clean and dry. Any
corrosion should be washed off with a solu-
tion of baking soda and water.
cMake certain the terminal connections are
clean and securely tightened.
cIf the vehicle is not to be used for 30 days or
longer, disconnect the negative (-) battery
terminal cable to prevent discharge.
WARNING
cDo not expose the battery to flames or
electrical sparks. Hydrogen gas gener-
ated by the battery is explosive. Do not
allow battery fluid to contact your skin,
eyes, fabrics or painted surfaces. After
touching a battery or battery cap, do not
touch or rub your eyes. Thoroughly
wash your hands. If the acid contacts
your eyes, skin or clothing, immediately
flush with water for at least 15 minutes
and seek medical attention.
cDo not operate the vehicle if the fluid in
the battery is low. Low battery fluid can
cause a higher load on the battery
which can generate heat, reduce bat-
tery life, and in some cases lead to an
explosion.cWhen working on or near a battery, al-
ways wear suitable eye protection and
remove all jewelry.
cBattery posts, terminals and related ac-
cessories contain lead and lead com-
pounds. Wash hands after handling.
cKeep battery out of the reach of
children.
BATTERY
8-18Maintenance and do-it-yourself
ZREVIEW COPY:Ð2004 Xterra(xtr)
Owners Manual(owners)ÐUSA English(nna)
10/23/03Ðdebbie
X
Page 232 of 296

Rear window wiper blade
s1Lift the wiper arm away from the rear win-
dow.
s2Push the wiper blade in and pivot until the
blade becomes free.
s3Insert a new blade onto the wiper arm and
snap into place.
WDI0292
8-28Maintenance and do-it-yourself
ZREVIEW COPY:Ð2004 Xterra(xtr)
Owners Manual(owners)ÐUSA English(nna)
10/23/03Ðdebbie
X
Page 275 of 296
3. Route the trailer tow harness so that it does
not block access to the spare tire winch
socket.
4. Connect the tow harness connector (SAE
J1239) to your trailer.
5. Confirm proper vehicle and trailer stop/turn
lamp operation.
6. When towing is completed, disconnect the
tow harness from the trailer and the vehicle.
Store the tow harness in the glove box.
Reinstall the connector cap to the vehicle
harness.
If you need further assistance in wiring a trailer to
your NISSAN, contact a NISSAN dealer.
Always confirm proper vehicle and trailer
stop/turn lamp operation every time the
trailer light circuits are connected for use.
Trailer brakes
If your trailer is equipped with a braking system,
make sure it conforms to federal and/or local
regulations and that it is properly installed.
WARNING
Never connect a trailer brake system di-
rectly to the vehicle brake system.
Pre-towing tips
cBe certain your vehicle maintains a level
position when a loaded and/or unloaded
trailer is hitched. Do not drive the vehicle if it
has an abnormal nose-up or nose-down
condition; check for improper tongue load,
overload, worn suspension or other possible
causes of either condition.
cAlways secure items in the trailer to prevent
load shift while driving.
cBe certain your rearview mirrors conform to
all federal, state or local regulations. If not,
install any mirrors required for towing before
driving the vehicle.
Trailer towing tips
In order to gain skill and an understanding of the
vehicle’s behavior, you should practice turning,
stopping and backing up in an area which is free
from traffic. Steering stability and braking perfor-
mance will be somewhat different than under
normal driving conditions.
cAlways secure items in the trailer to prevent
load shift while driving.
cAvoid abrupt starts, acceleration or stops.
cAvoid sharp turns or lane changes.cAlways drive your vehicle at a moderate
speed.
cAlways block the wheels on both vehicle and
trailer when parking. Parking on a slope is
not recommended; however, if you must do
so, and if your vehicle is equipped with an
automatic transmission, first block the
wheels and apply the parking brake, and
then move the transmission shift selector
lever into the P (Park) position. If you move
the shift selector lever to the P (Park) posi-
tion before blocking the wheels and applying
the parking brake, transmission damage
could occur.
cWhen going down a hill, shift into a lower
gear and use the engine braking effect.
When going up a long grade, downshift the
transmission to a lower gear and reduce
speed to reduce chances of engine over-
loading and/or overheating. However, for
long steep grades, do not stay in 1st or 2nd
gear when driving above 35 MPH (56 km/h) .
cIf the engine coolant rises to an extremely
high temperature when the air conditioner
system is on, turn off the air conditioner.
Coolant heat can be additionally vented by
opening the windows, switching the fan
control to high and setting the temperature
control to the HOT position.
Technical and consumer information9-21
ZREVIEW COPY:Ð2004 Xterra(xtr)
Owners Manual(owners)ÐUSA English(nna)
10/23/03Ðdebbie
X
Page 283 of 296

10 Index
A
Air bag (See supplemental restraint
system)......................1-8
Air bag warning light...........1-19, 2-13
Air cleaner housing filter............8-23
Air conditioner
Air conditioner operation...........4-5
Air conditioner service............4-9
Air conditioner specification label.....9-11
Air conditioner system refrigerant and
lubrication recommendations........9-6
Heater and air conditioner controls.....4-2
Servicing air conditioner...........4-9
Air flow charts..................4-6
Alarm system (See vehicle security system) .2-15
Anchor point locations.............1-42
Antenna.....................4-28
Anti-lock brake system (ABS).........5-24
Anti-lock brake warning light..........2-10
Audible reminders................2-15
Audio system..................4-10
Compact disc (CD) player.........4-14
FM-AM radio with compact disc (CD)
changer...................4-16
FM-AM radio with compact disc (CD)
player....................4-12
Radio....................4-10
Steering wheel audio control switch. . . .4-28
Auto-lock free-running hubs..........5-20Automatic
Automatic power window switch.....2-38
Automatic transmission fluid (ATF). . . .8-14
Driving with automatic transmission. . . .5-10
Transmission selector lever lock release .5-13
B
Battery......................8-18
Charge warning light............2-11
Battery replacement
(See remote keyless entry system). . . .3-8, 8-32
Before starting the engine............5-9
Belts (See drive belts).............8-20
Brake
Anti-lock brake system (ABS).......5-24
Brake booster................8-30
Brake fluid..................8-16
Brake light (See stop light).........8-36
Brake pedal.................8-29
Brake system................5-23
Brake warning light.............2-10
Brake wear indicators........2-15, 8-29
Parking brake check............8-29
Parking brake operation..........5-16
Self-adjusting brakes............8-29
Break-in schedule................5-18
Brightness control
Instrument panel..............2-22
Bulb check/instrument panel..........2-9
Bulb replacement................8-36C
Capacities and recommended
fuel/lubricants...................9-2
Car phone or CB radio.............4-29
Cargo (See vehicle loading information) . . .9-12
CD care and cleaning.............4-27
CD player (See audio system).........4-14
Check engine indicator light
(See malfunction indicator lamp).......2-14
Child restraint with top tether strap......1-41
Child restraints.......1-23, 1-24, 1-30, 1-39
Precautions on child restraints.......1-30
Top tether strap anchor point locations . .1-42
Child safety rear door lock............3-4
Chimes, audible reminders...........2-15
Cleaning exterior and interior..........7-2
Clock...................4-13, 4-18
Clutch
Clutch fluid.................8-17
Cold weather driving..............5-27
Compact disc (CD) player...........4-14
Controls
Audio controls (steering wheel)......4-28
Heater and air conditioner controls.....4-2
Coolant
Capacities and recommended
fuel/lubricants.................9-2
Changing engine coolant..........8-10
Checking engine coolant level........8-9
Engine coolant temperature gauge.....2-5
ZREVIEW COPY:Ð2004 Xterra(xtr)
Owners Manual(owners)ÐUSA English(nna)
10/23/03Ðdebbie
X
Page 284 of 296

Corrosion protection...............7-5
Cover
Tonneau cover................2-32
Cruise control..................5-16
Cup holders...................2-29
D
Daytime running light system
(Canada only)..................2-21
Defogger switch
Rear window defogger switch.......2-20
Dimensions and weights.............9-8
Door locks....................3-2
Door open warning light............2-11
Drive belts....................8-20
Driving
Auto-lock free-running hubs........5-20
Cold weather driving............5-27
Driving with automatic transmission. . . .5-10
Driving with manual transmission.....5-14
Precautions when starting and driving . . .5-2
Dual 12 volt power outlets...........2-26
E
Economy - fuel.................5-18
Emission control information label.......9-11
Emission control system warranty.......9-24
Engine
Before starting the engine..........5-9
Capacities and recommended
fuel/lubricants.................9-2
Changing engine coolant..........8-10Changing engine oil............8-11
Changing engine oil filter..........8-13
Checking engine coolant level........8-9
Checking engine oil level..........8-10
Engine compartment check locations. . . .8-9
Engine coolant temperature gauge.....2-5
Engine cooling system............8-9
Engine oil..................8-10
Engine oil and oil filter recommendation . .9-5
Engine oil viscosity..............9-5
Engine serial number............9-10
Engine specifications.............9-7
Starting the engine..............5-9
Engine oil pressure low/engine coolant
temperature high warning light.........2-11
Exhaust gas (Carbon monoxide)........5-2
F
First aid kit....................6-2
Flashers
(See hazard warning flasher switch)......2-23
Flat tire......................6-2
Floor mat positioning aid.............7-4
Fluid
Automatic transmission fluid (ATF). . . .8-14
Brake fluid..................8-16
Capacities and recommended
fuel/lubricants.................9-2
Clutch fluid.................8-17
Engine coolant................8-9
Engine oil..................8-10
Power steering fluid.............8-15
Window washer fluid............8-17
F.M.V.S.S. certification label..........9-10Fog light switch.................2-22
Front seats....................1-2
Fuel
Capacities and recommended
fuel/lubricants.................9-2
Fuel economy................5-18
Fuel filler cap................3-11
Fuel filler lid.................3-11
Fuel filler lid and cap............3-11
Fuel gauge..................2-6
Fuel octane rating..............9-4
Fuel recommendation............9-3
Fuses......................8-31
G
Gascap.....................3-11
Gauge
Engine coolant temperature gauge.....2-5
Fuel gauge..................2-6
Odometer...................2-3
Speedometer.................2-3
Tachometer..................2-5
Gear Basket
(see roof rack with gear basket)........2-33
General maintenance..............8-2
Glove box....................2-30
Glove box lock.................2-30
H
Hazard warning flasher switch.........2-23
Head restraints..................1-8
Headlight and turn signal switch........2-20
10-2
ZREVIEW COPY:Ð2004 Xterra(xtr)
Owners Manual(owners)ÐUSA English(nna)
10/23/03Ðdebbie
X