CD changer Oldsmobile Achieva 1997 Owner's Manuals
[x] Cancel search | Manufacturer: OLDSMOBILE, Model Year: 1997, Model line: Achieva, Model: Oldsmobile Achieva 1997Pages: 372, PDF Size: 18.52 MB
Page 91 of 372

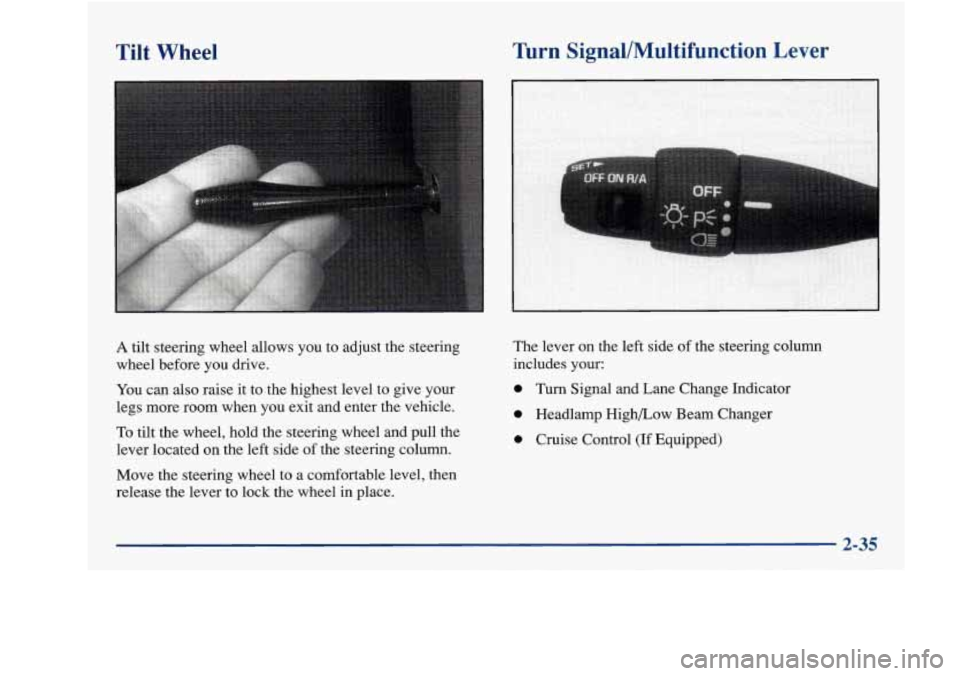
Tilt Wheel Turn
Signal/Multifunction Lever
A tilt steering wheel allows you to adjust the steering
wheel before you drive.
You can also raise it to the highest level to give your
legs more room when you exit and enter the vehicle.
To tilt the wheel, hold the steering wheel and pull the
lever located on the left side of the steering column.
Move the steering wheel to a comfortable level, then
release the lever to lock the wheel
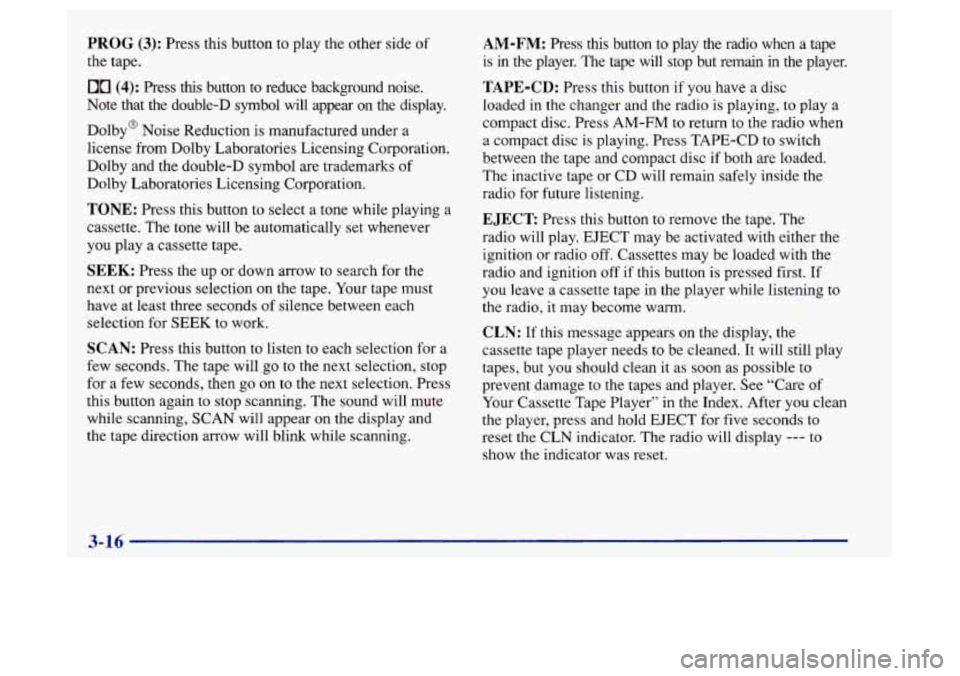
in place. The lever
on the left side of the steering column
includes your:
0 Turn Signal and Lane Change Indicator
0 Headlamp High/Low Beam Changer
0 Cruise Control (If Equipped)
2-35
Page 146 of 372

PROG (3): Press this button to play the other side of
the tape.
00 (4): Press this button to reduce background noise.
Note that the double-D symbol will appear on the display.
Dolby@ Noise Reduction
is manufactured under a
license from Dolby Laboratories Licensing Corporation.
Dolby and the double-D symbol are trademarks of
Dolby Laboratories Licensing Corporation.
TONE: Press this button to select a tone while playing a
cassette. The tone will be automatically set whenever
you play a cassette tape.
SEEK: Press the up or down arrow to search for the
next or previous selection on the tape. Your tape must
have at least three seconds of silence between each
selection for SEEK to work.
SCAN: Press this button to listen to each selection for a
few seconds. The tape will go to the next selection, stop
for a few seconds, then go
on to the next selection. Press
this button again to stop scanning. The sound will mute
while scanning, SCAN will appear on the display and
the tape direction arrow will blink while scanning.
AM-FM: Press this button to play the radio when a tape
is
in the player. The tape will stop but remain in the player.
TAPE-CD: Press this button if you have a disc
loaded
in the changer and the radio is playing, to play a
compact disc. Press AM-FM to return to the radio when
a compact disc is playing. Press TAPE-CD to switch
between the tape and compact disc
if both are loaded.
The inactive tape or CD will remain safely inside the
radio for future listening.
EJECT Press this button to remove the tape. The
radio will play. EJECT may be activated with either the
ignition or radio off. Cassettes may be loaded with the
radio and ignition off if this button is pressed first. If
you leave
a cassette tape in the player while listening to
the radio, it may become warm.
CLN: If this message appears on the display, the
cassette tape player needs to be cleaned. It will still play
tapes, but you should clean it as soon as possible to
prevent damage to the tapes and player. See “Care of
Your Cassette Tape Player” in the Index. After you clean
the player, press and hold EJECT for five seconds to
reset the CLN indicator.
The radio will display --- to
show the indicator was reset.
3-16
Page 148 of 372

SEEK: Press the down arrow to go to the start of the
current track if more than eight seconds have played.
Press the up arrow to go to the next track. If you hold
the button or press it more than once, the player will
continue moving rearward or forward through the disc.
SCAN: Press this button to listen to each selection for a
few seconds. The disc will go to the next selection, stop
for a few seconds, then go on
to the next selection. Press
this button again to stop scanning. The sound will mute
while scanning, SCAN will appear on the display and
the disc direction arrow will blink while scanning.
RCL: Press this button to see which track is playing.
Press it again within five seconds to see how long it has
been playing.
To change what is normally shown on the
display (track or elapsed time), press the button until
you see the display you want, then hold the button until
the display flashes. While elapsed time is showing,
EL
TM will appear on the display.
AM-FM: Press this button to play the radio when a
disc is
in the player.
TAPE-CD: Press this button to change to the tape or
disc function when the radio
is on and either a tape or
CD is inserted. Press
AM-FM to return to the radio
while
a CD or tape is playing. The inactive tape or CD
will remain safely inside the radio for future listening.
If
you have the optional CD changer and the CD changer
is loaded, the TAPE-CD button
will activate the changer
and a box will be lighted around CDC in the display.
EJECT Press this button to remove the compact disc
or cassette tape. The item with the box around
it on the
display will eject and the radio will play. EJECT may be
activated with either the ignition or radio off. Cassettes
and compact discs may be loaded with the radio and
ignition off if this button is pressed first.
If you leave a
compact disc in the player while listening
to the radio, it
may become warm.
3-18
Page 363 of 372

Guide en FranGais 11
GVWR ....................................... 4-33
.. .................................
Halogen Bulbs ................................ 6-35
Hazard Warning Flashers
.......................... 5-2
Head Restraints
................................. 1-5
Headlamps
.................................... 2-44
Bulb Replacement
............................ 6-35
HighLow Beam Changer
...................... 2-37
OnReminder
................................ 2-44
Wiring
..................................... 6-57
Hearing Impaired. Customer Assistance
.............. 8-4
Heating
........................................ 3-4
High-Beam Headlamps
.......................... 2-37
Highway Hypnosis
.............................. 4-24
Hill and Mountain Roads
......................... 4-24
Hitches. Trailer
................................. 4-38
Hood Checking Things Under
......................... 6-8
Release
...................................... 6-9
Horn ......................................... 2-34
Hydraulic Clutch
............................... 6-23
Hydraulic Clutch Fluid
........................... 6-23
Hydraulic Clutch System Check
................... 7-42
Hydroplaning
.................................. 4-20
If a Tire Goes Flat .............................. 5-21
Ignition Positions
............................... 2- 14
Illuminated EntryExit System
..................... 2-46
Inflation. Tire
.................................. 6-41
Inside Daymight Rearview Mirror
................. 2-49 Inspections
Brakesystem
................................ 7-46
Caliper/Knuckle Maintenance
................... 7-46
Exhaust Systems
............................. 7-45
Front-Wheel-Drive Axle Boot
.................. 7-45
Front-Wheel-Drive Axle Seal
................... 7-45
Radiator and Heater Hose
...................... 7-45
Steering
.................................... 7-45
Suspension
.................................. 7-45
Throttle Linkage
.............................. 7-45
Instrumentpanel
............................... 2-56
Brightness Control
............................ 2-46
Cleaning
.................................... 6-50
Cluster
..................................... 2-58
FuseBlock
.................................. 6-58
Interior Lamps
................................. 2-46
Jack. Tire
.................................... 5-24
Jump Starting
................................... 5-3
Key Lock Cylinders Service
..................... 7-42
Key Release Button
............................. 2-16
Keys
.......................................... 2-2
Labels Certification
................................. 4-33
Service Parts Identification
..................... 6-56
Tire-Loading Information
...................... 4-33
Vehicle Identification Number
................... 6-56
Lamps
........................................ 2-43
Interior
..................................... 2-46
OnReminder
................................ 2-44
Exterior
.................................... 2-43
Fog
........................................ 2-45
9-5
.