fuse block Oldsmobile Alero 2001 Owner's Manuals
[x] Cancel search | Manufacturer: OLDSMOBILE, Model Year: 2001, Model line: Alero, Model: Oldsmobile Alero 2001Pages: 340, PDF Size: 2.53 MB
Page 125 of 340
2-55
The main components of your instrument panel are the following:
A. Instrument Panel Fuse Blocks
B. Vents
C. Instrument Panel Cluster
D. Hazard Warning Flasher Button
E. Audio System
F. Climate Control System
G. Side Window Defogger Vent
H. Fog Lamp Button (If Equipped)
I. Instrument Panel Intensity Control
J. Turn Signal/Multifunction LeverK. Hood Release Handle
L. Cruise Control Switches
M. Tilt Wheel Lever
N. Ignition Switch
O. Windshield Wiper/Washer Lever
P. Enhanced Traction System Button
Q. Transaxle Shift Lever
R. Parking Brake
S. Cigarette Lighter/Accessory Power Outlet
T. Accessory Power Outlet
Page 198 of 340
4-31
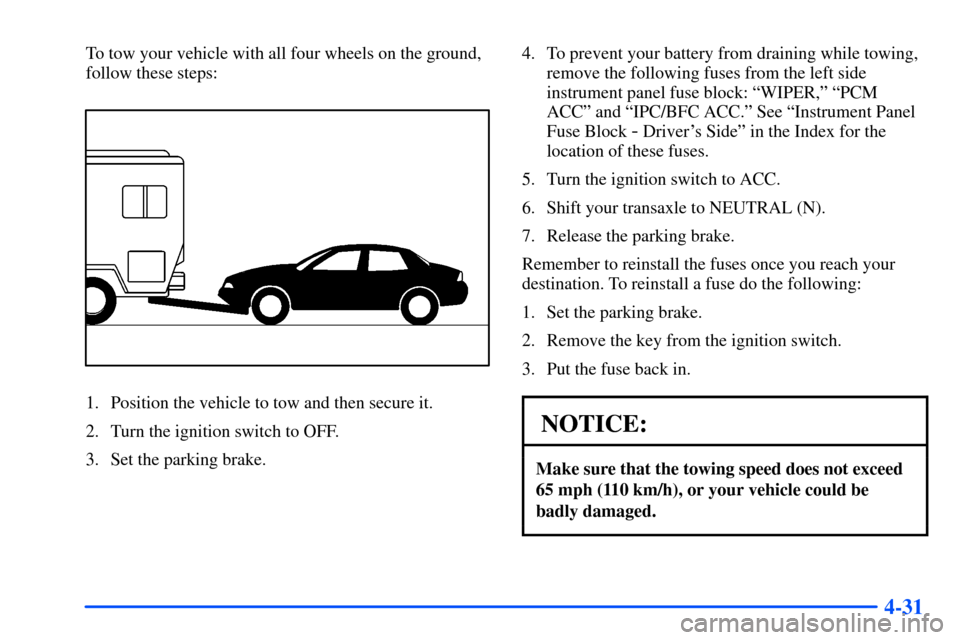
To tow your vehicle with all four wheels on the ground,
follow these steps:
1. Position the vehicle to tow and then secure it.
2. Turn the ignition switch to OFF.
3. Set the parking brake.4. To prevent your battery from draining while towing,
remove the following fuses from the left side
instrument panel fuse block: ªWIPER,º ªPCM
ACCº and ªIPC/BFC ACC.º See ªInstrument Panel
Fuse Block
- Driver's Sideº in the Index for the
location of these fuses.
5. Turn the ignition switch to ACC.
6. Shift your transaxle to NEUTRAL (N).
7. Release the parking brake.
Remember to reinstall the fuses once you reach your
destination. To reinstall a fuse do the following:
1. Set the parking brake.
2. Remove the key from the ignition switch.
3. Put the fuse back in.
NOTICE:
Make sure that the towing speed does not exceed
65 mph (110 km/h), or your vehicle could be
badly damaged.
Page 257 of 340
6-19
How to Reset the Change Oil Light
After changing the engine oil, you must reset the
system. To reset the system, you must do the following:
1. With the ignition key to ON, push the RESET button
located in the driver's side instrument panel fuse block.
2. When the CHANGE OIL light starts to flash, press
and hold the RESET button again.
The reset is complete when you hear the chimes
sound and the CHANGE OIL light goes out.
What to Do with Used Oil
Did you know that used engine oil contains certain elements
that may be unhealthy for your skin and could even cause
cancer? Don't let used oil stay on your skin for very long.
Clean your skin and nails with soap and water, or a good hand
cleaner. Wash or properly throw away clothing or rags
containing used engine oil. See the manufacturer's warnings
about the use and disposal of oil products.
Used oil can be a real threat to the environment. If you
change your own oil, be sure to drain all free
-flowing oil
from the filter before disposal. Don't ever dispose of oil by
putting it in the trash, pouring it on the ground, into
sewers, or into streams or bodies of water. Instead, recycle
it by taking it to a place that collects used oil. If you have
a problem properly disposing of your used oil, ask your
dealer, a service station or a local recycling center for help.
Engine Air Cleaner/Filter
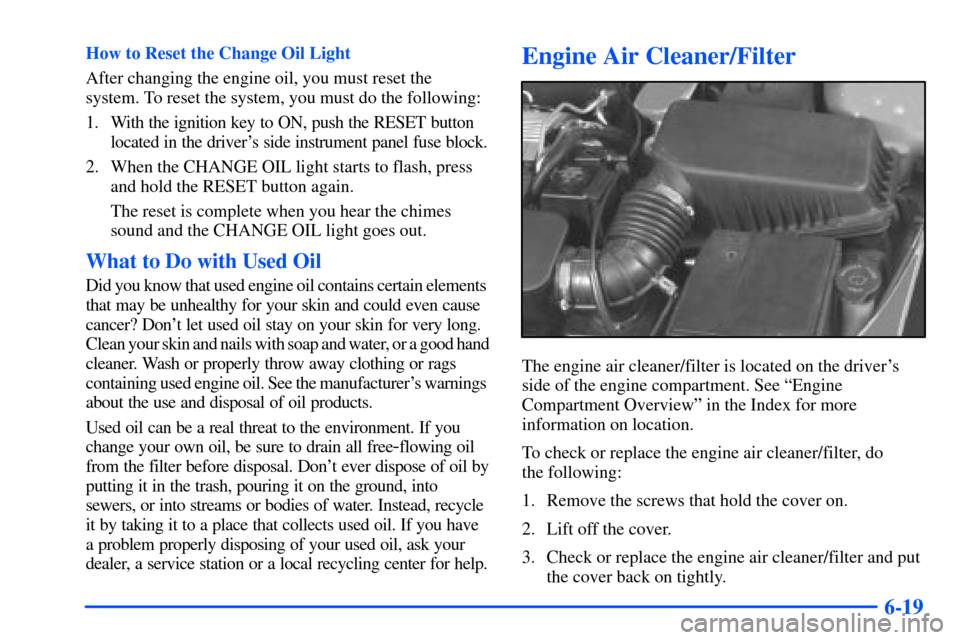
The engine air cleaner/filter is located on the driver's
side of the engine compartment. See ªEngine
Compartment Overviewº in the Index for more
information on location.
To check or replace the engine air cleaner/filter, do
the following:
1. Remove the screws that hold the cover on.
2. Lift off the cover.
3. Check or replace the engine air cleaner/filter and put
the cover back on tightly.
Page 278 of 340
6-40
Any time you adjust a tire's pressure, rotate your tires,
have one or more tires repaired or replaced, or when any
work is done on your vehicle where tires are removed
you'll need to reset (calibrate) the tire pressure monitor
system. You'll also need to reset the system whenever
you buy new tires and whenever the vehicle's battery
has been disconnected.
To reset (calibrate) the system:
1. Turn the ignition switch to ON (engine not running).
2. Press and release the RESET button located inside
of the driver's side instrument panel fuse block.
The CHANGE OIL light will begin to flash.
3. Press and release the RESET button again.
The CHANGE OIL light will go off, and the
LOW TIRE PRESSURE light will start flashing.
4. When the LOW TIRE PRESSURE light is flashing,
press and hold the RESET button until the
chime sounds.
If the LOW TIRE PRESSURE light doesn't go off,
repeat the procedure. If the LOW TIRE PRESSURE
light still remains on, see your dealer for service.
The system completes the calibration process
during driving.The system normally takes 15 to 20 minutes of driving in
each of three speed ranges to ªlearnº tire pressures. The
speed ranges are 15 to 40 mph (25 to 65 km/h), 40 to
65 mph (65 to 105 km/h) and above 65 mph (105 km/h).
When learning is complete, the system will alert you after
2
-8 minutes if a tire is 12 psi (83 kPa) different from the
other three tires. Detection thresholds may be higher and
detection times may be longer on rough roads, curves and
at high speeds. The system is not capable of detection at
speeds greater than 75 mph (120 km/h).
Tire Inspection and Rotation
Tires should be rotated every 6,000 to 8,000 miles
(10 000 to 13 000 km). Any time you notice unusual
wear, rotate your tires as soon as possible and check
wheel alignment. Also check for damaged tires or
wheels. See ªWhen It's Time for New Tiresº and
ªWheel Replacementº later in this section for
more information.
The purpose of regular rotation is to achieve more
uniform wear for all tires on the vehicle. The first
rotation is the most important. See ªScheduled
Maintenance Servicesº in the Index for scheduled
rotation intervals.
Page 294 of 340
6-56
Electrical System
Add-On Electrical Equipment
NOTICE:
Don't add anything electrical to your vehicle
unless you check with your dealer first. Some
electrical equipment can damage your vehicle
and the damage wouldn't be covered by your
warranty. Some add
-on electrical equipment
can keep other components from working as
they should.
Your vehicle has an air bag system. Before attempting to
add anything electrical to your vehicle, see ªServicing
Your Air Bag
-Equipped Vehicleº in the Index.
Windshield Wipers
The windshield wiper motor is protected by a circuit
breaker and a fuse. If the motor overheats due to heavy
snow, etc., the wiper will stop until the motor cools. If
the overload is caused by some electrical problem, have
it fixed.
Power Windows
A circuit breaker in the fuse panel protects the power
windows. When the current load is too heavy, the circuit
breaker opens and closes, protecting the circuit until the
problem is fixed.
Fuses and Circuit Breakers
The wiring circuits in your vehicle are protected from
short circuits by a combination of fuses, circuit breakers
and fusible links. This greatly reduces the chance of
damage caused by electrical problems.
Look at the silver
-colored band inside the fuse. If the
band is broken or melted, replace the fuse. Be sure to
replace a bad fuse with a new one of the identical size
and rating.
There are three fuse blocks in your vehicle: two
instrument panel fuse blocks and the engine
compartment fuse block.
There are four spare fuses located in the left instrument
panel end cap for your use.
Instrument Panel Fuse Blocks
There are two fuse panels for your vehicle. One is
located on the driver's side of the instrument panel and
the other is located on the passenger's side.
Page 295 of 340
6-57
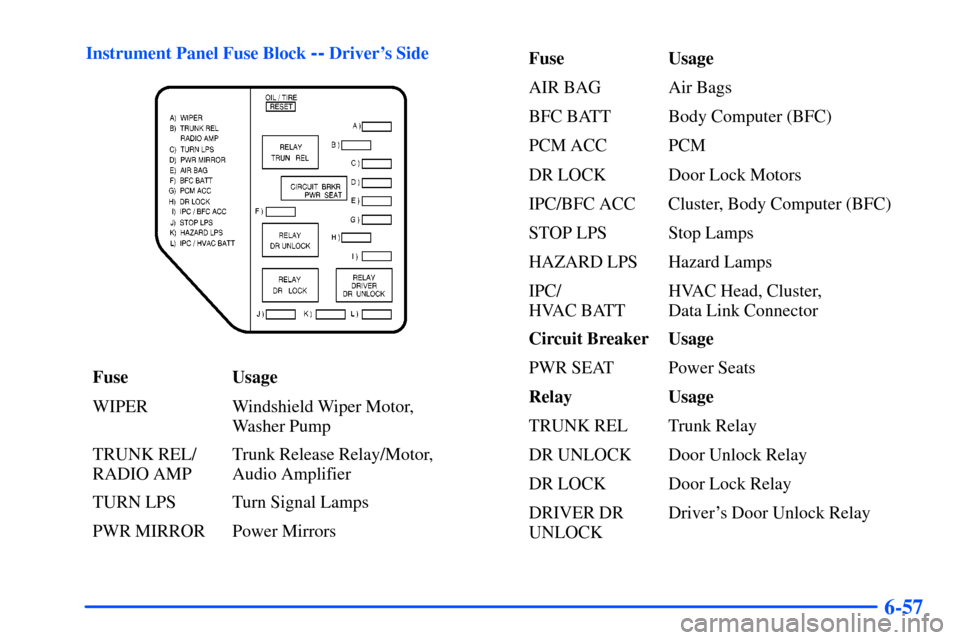
Instrument Panel Fuse Block -- Driver's Side
Fuse Usage
WIPER Windshield Wiper Motor,
Washer Pump
TRUNK REL/
RADIO AMPTrunk Release Relay/Motor,
Audio Amplifier
TURN LPS Turn Signal Lamps
PWR MIRROR Power MirrorsFuse Usage
AIR BAG Air Bags
BFC BATT Body Computer (BFC)
PCM ACC PCM
DR LOCK Door Lock Motors
IPC/BFC ACC Cluster, Body Computer (BFC)
STOP LPS Stop Lamps
HAZARD LPS Hazard Lamps
IPC/
HVAC BATTHVAC Head, Cluster,
Data Link Connector
Circuit Breaker Usage
PWR SEAT Power Seats
Relay Usage
TRUNK REL Trunk Relay
DR UNLOCK Door Unlock Relay
DR LOCK Door Lock Relay
DRIVER DR
UNLOCKDriver's Door Unlock Relay
Page 296 of 340
6-58
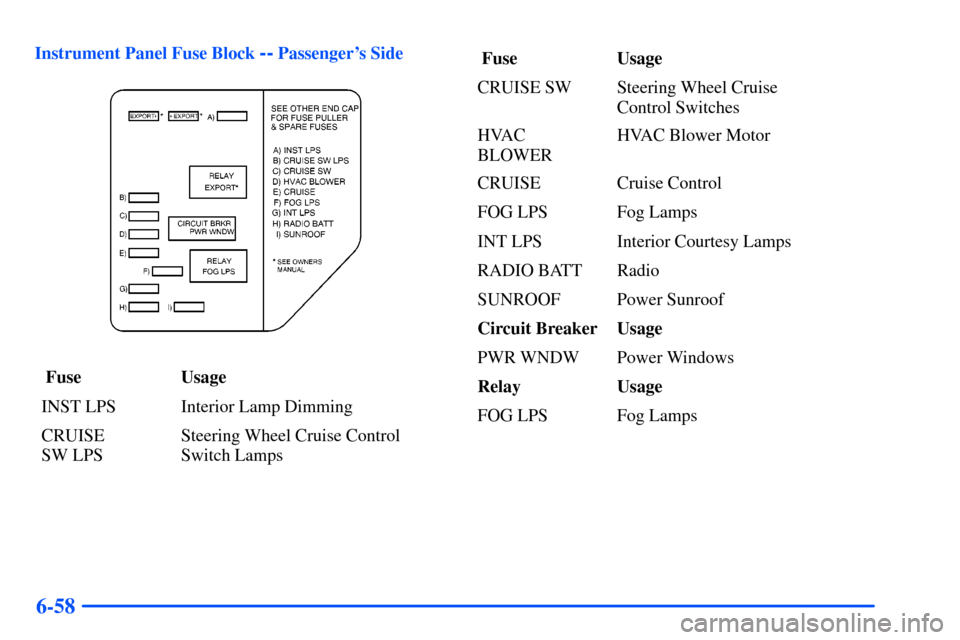
Instrument Panel Fuse Block -- Passenger's Side
Fuse Usage
INST LPS Interior Lamp Dimming
CRUISE
SW LPSSteering Wheel Cruise Control
Switch Lamps Fuse Usage
CRUISE SW Steering Wheel Cruise
Control Switches
HVAC
BLOWERHVAC Blower Motor
CRUISE Cruise Control
FOG LPS Fog Lamps
INT LPS Interior Courtesy Lamps
RADIO BATT Radio
SUNROOF Power Sunroof
Circuit Breaker Usage
PWR WNDW Power Windows
Relay Usage
FOG LPS Fog Lamps
Page 297 of 340
6-59
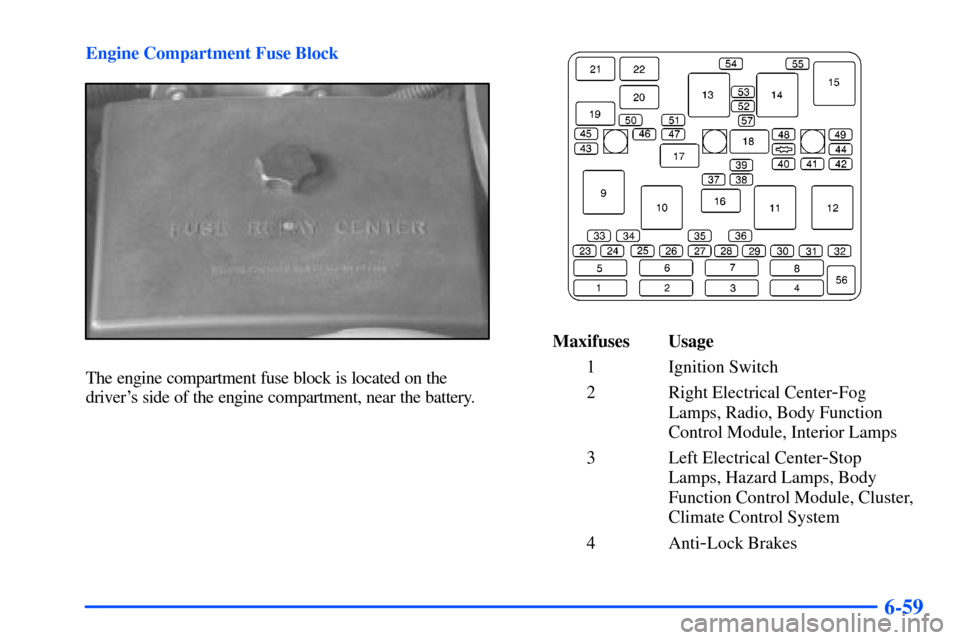
Engine Compartment Fuse Block
The engine compartment fuse block is located on the
driver's side of the engine compartment, near the battery.
Maxifuses Usage
1 Ignition Switch
2 Right Electrical Center
-Fog
Lamps, Radio, Body Function
Control Module, Interior Lamps
3 Left Electrical Center
-Stop
Lamps, Hazard Lamps, Body
Function Control Module, Cluster,
Climate Control System
4 Anti
-Lock Brakes