lock OLDSMOBILE AURORA 1995 Workshop Manual
[x] Cancel search | Manufacturer: OLDSMOBILE, Model Year: 1995, Model line: AURORA, Model: OLDSMOBILE AURORA 1995Pages: 372, PDF Size: 19.14 MB
Page 222 of 372

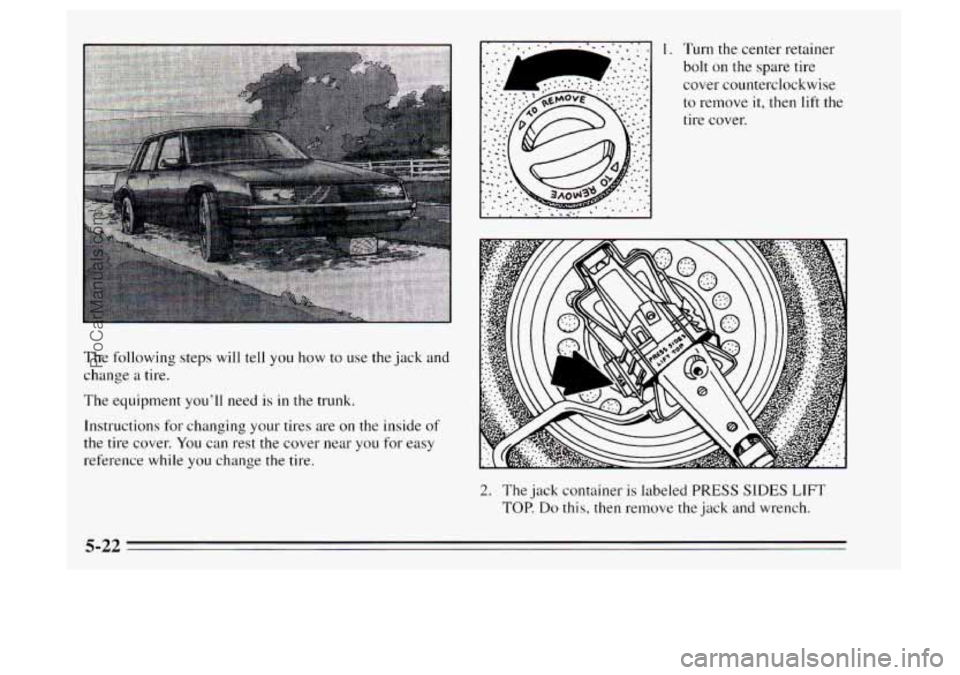
The following steps will tell you how to use the jack and
change a tire.
The equipment you’ll need is
in the trunk.
Instructions for changing your tires are on the inside of
the tire cover.
You can rest the cover near you for easy
reference while
you change the tire.
1. Turn the center retainer
bolt on the spare tire
cover counterclockwise
to remove
it, then lift the
tire cover.
2. The jack container is labeled PRESS SIDES LIFT
TOP. Do this, then remove the jack and wrench.
5-22
ProCarManuals.com
Page 223 of 372

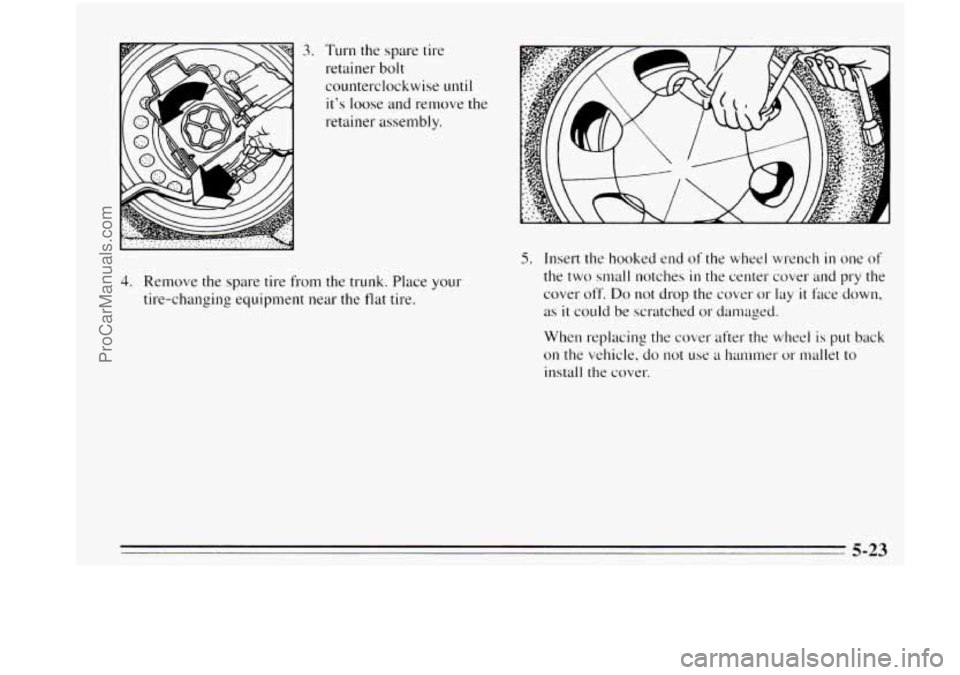
3. Turn the spare tire
retainer bolt
counterclockwise
until
it’s loose and remove the
retainer assembly.
4. Remove the spare tire from the trunk. Place your
tire-changing equipment near the flat tire.
5. Insert the hooked end of the wlleel wrench in one of
the two small notches
in the center cover and pry the
cover off.
Do not drop the cover or lay it face down,
as
it could be scratched or damaged.
When replacing the cover after the wheel is
put back
on the vehicle, do not use a han~mer or mallet to
install the cover.
5-23
ProCarManuals.com
Page 224 of 372

-4
A. P
4. Use the wheel wrench to loosen the wheel nuts. but
don't remove them.
r
7. Turn the end of the jack
clockwise
by hand to
raise the jack head
a few
inches.
8. Near each wheel well is a notch on the frame to
position the jack head. The front notch
is I 1 inches
(28 cm) back from the front wheel well. The rear
notch
is 7.5 inches (1 9 cm) forward from the rear
wheel well. You'll find the word
JACK and an arrow
stamped into the plastic near each notch.
5-24
ProCarManuals.com
Page 225 of 372

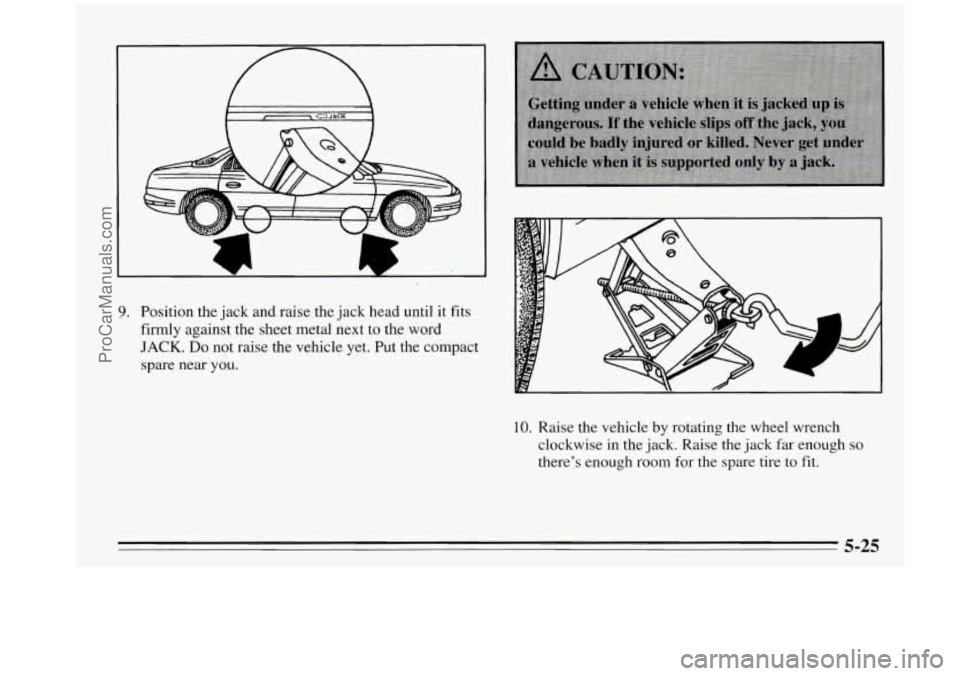
9. Position the jack and raise the jack head until it fits
firmly against the sheet metal next to the word
JACK. Do not raise the vehicle yet. Put the compact
spare near
you.
10. Raise the vehicle by rotating the wheel wrench
clockwise in the jack. Raise the jack far enough
so
there’s enough room for the spare tire to fit.
ProCarManuals.com
Page 227 of 372

13. Replace the
wheel
nuts with the
rounded end of the
nuts toward the
wheel. Tighten
each nut by hand
until the wheel is
held against the
hub.
14. Lower the vehicle by rotating the wheel wrench
counterclockwise on the jack. Lower the jack
completely. 15. In
a crisscross sequence,
tighten the wheel nuts
firmly.
5-27
ProCarManuals.com
Page 235 of 372

Remote Fuel Door Manual Release
The fuel door can be
opened lnanually
in
case of an electrical
power failure.
To do
so, first open the trunk.
The release nlechanisln
is on the driver’s side
of the vehicle, at the
top of the
trunk
compartment. Pull the
tab toward you to
release the
fuel door.
NOTICE:
Prying on a locked fuel filler door could damage
it. Use the remote fuel door manual release
located in the trunk.
Filling Your Tank
The cap is behind a hinged door on the left side of your
vehicle.
6-5
ProCarManuals.com
Page 236 of 372

To take off the cap, turn it slowly to the left
(counterclockwise).
While refueling, hang the cap inside the fuel door. Twist
it clockwise to secure it,
if necessary. Be
careful not to spill gasoline. Clean gasoline from
painted surfaces as soon
as possible. See “Cleaning the
Outside
of Your Aurora” in the Index.
When you put the cap back on, turn it to the right until
you hear at least three clicks.
I I
I NOTICE: I
If you need a new cap, be sure to get the right
type. Your retailer can get one for you. If you get
the wrong type, it may not fit or have proper
venting, and your fuel tank and emissions system
might be damaged.
6-6
ProCarManuals.com
Page 244 of 372

Engine Coolant Heater
An engine coolant heater can be a big help if you have
to park outside
in very cold weather, 0°F (- 18°C) or
colder.
If your vehicle has this option, see “Engine
Coolant Heater”
in the Index.
Air Cleaner
What to Do with Used Oil
Did you know that used engine oil contains certain
elements that may be unhealthy for your skin and could
even cause cancer‘? Don’t
let used oil stay on your skin
for very long. Clean your skin and nails with soap and
water, or a good hand cleaner- Wash
or properly throw
away clothing or rags containing used engine oil. (See
the manufacturer’s warnings about the use and disposal
of oil products.)
Used oil can be
a real threat to the environment. If you
change your own oil, be sure to drain
all free-flowing oil
from the filter before disposal. Don’t ever dispose
of oil
by putting
it in the trash, pouring it on the ground, into
sewers,
or into streams or bodies of water. Instead,
recycle
it by taking it to a place that collects used oil. If
you have a problem properly disposing of your used oil,
ask your retailer, a service station or a local recycling
center for help.
To Check or Replace the Air Filter
1. Remove hose (A) from resonator channel.
2. Release tension of the wing screw clamp (B) on the
air intake duct where
it attaches to the air cleaner
cover near the top of
the engine. Just turn the wing
screw counterclockwise, then detach the duct from
the air cleaner cover.
3. Push the duct and resonator assembly (C) rearward
and up, and hold out of the way.
6-14
ProCarManuals.com
Page 260 of 372

Headlamp Bulb Replacement
For the type of bulb, see "Replacement Bulbs'' in the
Index.
Low Beam Bulbs
1. Remove the air cleaner cover to get to the driver's
side headlamp bulb.
To do this:
a. Remove the radiator hose (A) from the resonator
channel.
b. Release tension of the wing screw clamp (B) on the
air intake duct where it attaches to the air cleaner
cover near the top
of the engine. Turn the wing
screw counterclockwise, then detach the hose
from
the air cleaner cover.
c. Push the duct and resonator assembly
(C) rearward
and up, and hold them out of the way.
2. Twist the bulb assembly 1/6 turn and pull out the
bulb assembly.
6-30
ProCarManuals.com
Page 261 of 372

3. Unclip the bulb
assembly from the
wiring harness and
replace the bulb
assembly. High Beam Bulbs
1. Pull up on the wiring harness. This unlocks the bulb.
4. Reverse steps 1-3 to replace the bulb assembly,
headlamp housing and air cleaner cover and tube.
2. Now you can reach in behind the lamp housing and
pull out the bulb.
3. To replace the bulb, angle the new bulb into the
empty socket.
4.
Push the base of the bulb down to lock it into place.
6-3 1
ProCarManuals.com