run flat OLDSMOBILE AURORA 1995 Owners Manual
[x] Cancel search | Manufacturer: OLDSMOBILE, Model Year: 1995, Model line: AURORA, Model: OLDSMOBILE AURORA 1995Pages: 372, PDF Size: 19.14 MB
Page 3 of 372

@ The 1995 Aurora Owner’s Manual
... How to Use This Manual .............................................................. .111
This section tells you how to use your manual at~d includes safct/ and vehicle damage warninls
and symbols.
This section tells you how
to use your seats and safcty belts properly. It also explains the “SRS” system.
This scction explains how to start and operate your Aurora.
This section tells you how to adjust the ventilation and comfort controls and how to operate your
audio system.
Here you‘ll I’ind information and tips about the road and how to drive under diffcrcnt conditions.
This section tells
you what to do if’ you ha\:e a problem while driving. such as B flat tire or
overheated enginc. etc.
ServiceandAppearanceCare ......................................................... 6-1
Here the ~nanual tells you how to keep your Aurora running properly and looking good.
Maintenanceschedule ............................................................... 7-1
This section tells you when to perform vehicle maintenance and what fluids and lubricants to use.
Customer Assistance Information ..................................................... 8-1
This section tells ~OLI how to contact Oldsmobile Uor assistance and how to get service publications.
It also gives you information on “Reporting Safety Defccts” on page 8-4.
Index ........................................................................\
..... 9-1
Hcrc‘s an alphabetical listing of almost every sub-ject in this manual. You can use it to quickly find
something yo11 want to read.
Seats and Restraint Systems .......................................................... 1-1
Features and Controls ............................................................... 2-1
Comfort Controls and Audio Systems .................................................. 3-1
Your Driving and the Road ........................................................... 4-1
ProblemsontheRoad ............................................................... 5-1
i
ProCarManuals.com
Page 104 of 372

Convenience Net
Your vehicle has a convenience net just inside the back
wall of the trunk.
Put small loads, like grocery bags, behind
the net. It can
help keep them from falling over during sharp turns or
quick starts and stops.
The net isn’t for larger, heavier loads. Store them in
the
trunk as far forward as you can. You can unhook the net
so that it will lie flat when you’re not using it.
Two positions exist for the convenience net, depending
on the size of the cargo.
Use this position for small loads. Use this position
for slightly larger loads.
When installing the net in either position, be sure
the
“up label” (A) is pointing up.
ProCarManuals.com
Page 192 of 372

Loading Your Vehicle
TIRE-LOADING INFORMATION
OCCUPANTS VEHICLE CAP. WT
FRT. CTR. RR. TOTAL
LBS. KG
MAX. LOADING & GVWR SAME AS VEHICLE
CAPACITY
WEIGHT XXX COLD TIRE
TIRE SIZE SPEED PRESSURE
RTG PSI;KPa
FRT.
RR.
SPA.
IF TIRES ARE HOT, ADD 4PSI.'28KPa
SEE OWNER'S MANUAL FOR ADDITIONAL
[ INFORMATION
Two labels on your vehicle show how much weight it
may properly carry. The Tire-Loading Information label
found on the rear edge of the driver's door tells
you the
proper size, speed rating and recommended inflation
pressure for the tires on your vehicle.
It also gives YOLI
important information about the number of people that
can be
in your vehicle and the total weight that you can
carry. This weight is called the Vehicle Capacity Weight
and includes the weight of
all occupants, cargo, and all
nonfactory-installed options.
MFD BY GENERAL MOTORS CORP
DATE GVWR GAWR
FRT GAWR RR
THIS VEHICLE CONFORMS TO ALL APPLI-
CABLE U.S. FEDERAL MOTOR VEHICLE
SAFETY, BUMPER, AND THEFT PREVENTION
STANDARDS IN EFFECT
ON THE DATE OF
MANUFACTURE SHOWN ABOVE.
The other label is the Certification label, found on the
rear edge of the driver's door.
It tells you the gross
weight capacity
of your vehicle, called the GVWR
(Gross Vehicle Weight Rating). The GVWR includes
the weight of the vehicle, all occupants, f~~el and cargo.
Never exceed the GVWR for your vehicle, or the Gross
Axle Weight Rating (GAWR) for either the
front of rear
axle.
And,
if you do have a heavy load, you should spread
it out. Don't carry more than I76 lbs. (80 kg) in your
trunk.
ProCarManuals.com
Page 223 of 372

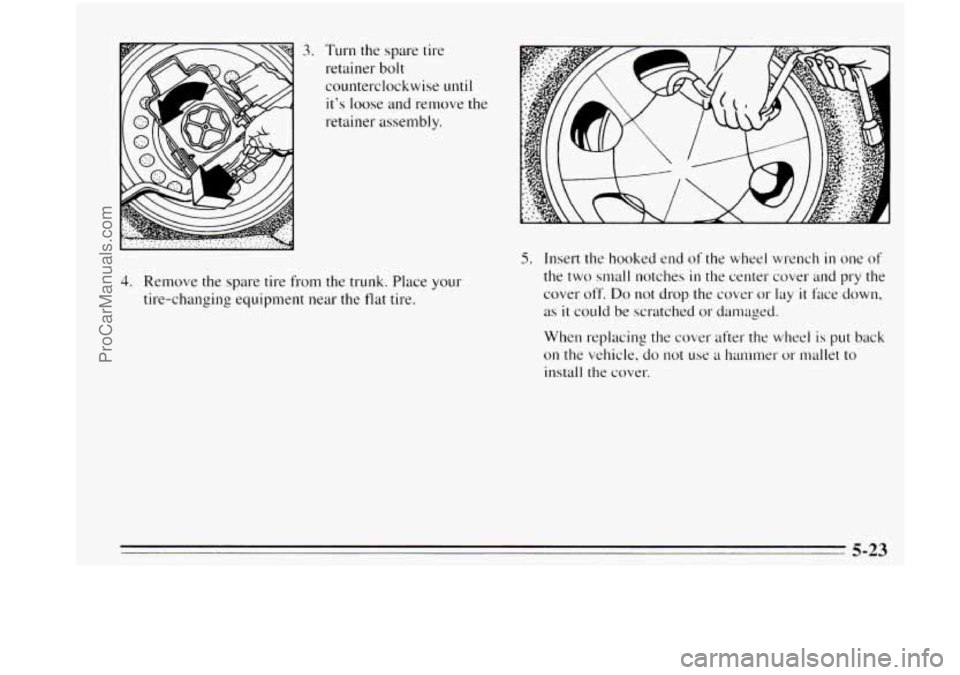
3. Turn the spare tire
retainer bolt
counterclockwise
until
it’s loose and remove the
retainer assembly.
4. Remove the spare tire from the trunk. Place your
tire-changing equipment near the flat tire.
5. Insert the hooked end of the wlleel wrench in one of
the two small notches
in the center cover and pry the
cover off.
Do not drop the cover or lay it face down,
as
it could be scratched or damaged.
When replacing the cover after the wheel is
put back
on the vehicle, do not use a han~mer or mallet to
install the cover.
5-23
ProCarManuals.com
Page 228 of 372

Don’t try to put the wheel cover on the compact spare tire.
It won’t fit. Store the wheel cover
in the trunk until you
have replaced the compact spare tire with a regular tire.
NOTICE:
Wheel covers won’t fit on your compact spare. If
you try to put a wheel cover on your compact
spare, you could damage the cover or the
1 spare.
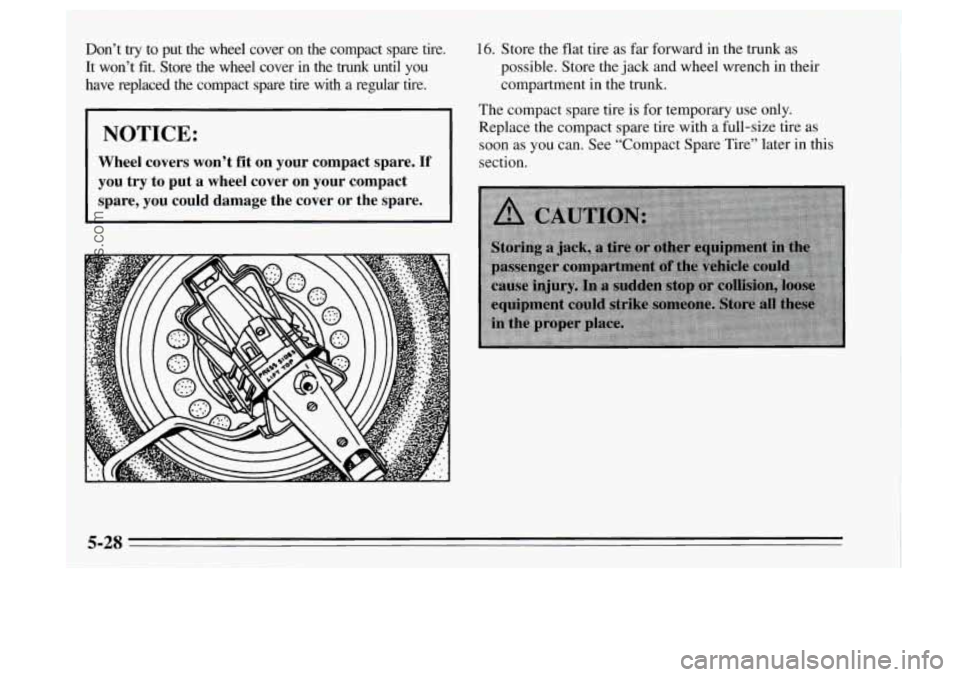
16. Store the flat tire as far forward in the trunk as
possible. Store the jack and wheel wrench in their
compartment in the trunk.
The compact spare tire is for temporary use only.
Replace the compact spare tire with a full-size tire as
soon as you can. See “Compact Spare Tire’’ later in this
section.
5-28
ProCarManuals.com
Page 352 of 372

ey ......................................... 2-2
Ignition Positions
............................
PASS ...................................... 2-13
Reminder Warning ........................... 2-16
Heater.
Engine Coolant (Engine Block)
.............. 2- 18 1
Highway Hypnosis .............................. 4-2 I
Hill and Mountain Roads ......................... 4-22
Hitches. Trailer ................................. 4-33
HolneLink
lM Universal Transmitter ................. 2-48
Hood Release ................................... 6-7
Hot Engine Safety Warnings ...................... 5- 16 Lamps
Hydroplaning
.................................. 4- I7 Cornering .................................. 2-40
Daytime Running
............................ 2-41
Horn ......................................... 2-30 Label. Service Parts Identil'ication ................. 6-51
Identification
Label. Service Parts ................. 6-5 I
Identification Number. Vehicle (VIN) ............... 6-5 I
Idling Your Engine ..................... 2-26. 2-28 . 3-8
If You're Stuck: In Sand. Mud. Ice or Snow .......... 5-30
Ignition
Key ........................................ 2-2
Switch Positions
............................. 2- I5
Illuminated Entry ............................... 2-9
Indicators. Warning Lights and Gages ............... 2-63
Inlint Restraint
................................. 1-32
Inflation. Tire
.................................. 6-35
Information Center. Driver
........................ 2-72
Instrurnent Panel
Cluster
... 2-60
Intensity Control ............................. 2-42
Warning Lights and Gages
..................... 2-63
.....................................
Jack. Tire .................................... 5-22
Jump Starting ................................... 5-2
Fog ....................................... 2-41
Headlanyx
....................... 2.39.6.28$ 6.30
Illuminated Entry System ....................... 2-9
Reading .................................... 2-43
Lane Change Indicator ........................... 2-33
LapBelt
...................................... 1-29
Lap-Shoulder Belt
Front
...................................... 1-10
Rear ....................................... 1-24
Leather Cleaning ............................... 6-46
Leaving Your Vehicle
............................. 2-7
Lighter . Cigar .................................. 2-56
Lights Air Bag Readiness
...................... 1 . 18. 2.64
Anti-Lock Brake System Wuning ............... 2-67
Battery Wdrning ............................. 2-65
Brake System Warning
........................ 2-65
Oil Pressure Warning
......................... 2-70
9-6
ProCarManuals.com