OLDSMOBILE AURORA 1996 Owners Manual
Manufacturer: OLDSMOBILE, Model Year: 1996, Model line: AURORA, Model: OLDSMOBILE AURORA 1996Pages: 388, PDF Size: 20.24 MB
Page 111 of 388

If you want to stop the sunroof in a partially open
position, lightly press the switch again. To fully open the
sunroof, press the switch rearward again. The sunshade
can also be opened by hand.
To close the sunroof, press and hold the control switch
forward to close the glass panel.
The sunroof glass panel cannot be opened or closed if
your vehicle has an electrical failure.
To open the sunroof rear vent, open the sunshade by
hand. Press the control switch forward when the sunroof
is closed.
To close the sunroof rear vent, press the switch
rearward.
This transmitter allows you to consolidate the functions
of
up to three individual hand-held transmitters. It will
operate garage doors and gates, or with the accessory
package, other devices controlled by radio frequency such as home/offke lighting systems and security systems.
The transmitter will learn and transmit the frequencies
of most current transmitters and is powered by your
vehicle’s battery and charging system.
ProCarManuals.com
Page 112 of 388

This device complies with Part 15 of the FCC Rules.
Operation is subject to the following two conditions:
(1)
Ths device may not cause harmful interference,
and
(2) This device must accept any interference
received, including interference that may cause
undesired operation.
Programming the Transmitter
Do not use the universal transmitter with any garage
door opener that does not have the “stop and reverse’’
safety feature. This includes any garage door opener
model manufactured before April
1, 1982.
Be sure that people and objects are clear of the garage
door you are programming!
Your vehicle’s engine should be turned off while
programming your transmitter. Follow these steps to
program up to three channels:
1. If you have not previously programmed a universal
transmitter channel, proceed to Step
2. Otherwise,
hold down the two outside buttons on the uniyersal
transmitter until the red light begins
to flash rapidly
(approximately 20 seconds). Then release the
buttons. This procedure initializes the memory and
erases any previous settings for all three channels. 2. Hold the end of your hand-held transmitter against
the bottom surface of the universal transmitter
so
that you can still see the red light.
3. Decide which one of the three channels you want to
program. Using both hands, press the hand-held
transmitter button and the desired button on the
universal transmitter. Continue to hold both buttons
through Step
4.
4. Hold down both buttons until you see the red light
on the universal transmitter flash rapidly. The rapid
flashing, which could take up to
90 seconds,
indicates that the universal transmitter has been
programmed. Release both buttons once the light
starts to flash rapidly.
If you have trouble programming the universal
transmitter, make sure that you have followed the
directions exactly as described and that the batteries in
the hand-held transmitter are not dead. If you still
cannot program it, rotate your hand-held transmitter end
over end and try again. The universal transmitter may
not work with older garage door openers that do not
meet current Federal Consumer Safety Standards.
If you
cannot program the transmitter after repeated attempts,
consult your Aurora retailer.
ProCarManuals.com
Page 113 of 388

Be sure to keep your original hand-held transmitter in
case you need to erase and reprogram the universal
transmitter.
Note to Canadian Owners: During programming, your
hand-held transmitter may stop transmitting after one or
two seconds. If you are programming from one of these
transmitters, you should press and repress the button on
the hand-held transmitter every two seconds without
ever releasing the button on the universal transmitter.
Release both buttons when the red light on the universal
transmitter begins to flash rapidly.
Operating the Transmitter
Press the appropriate button on the universal transmitter.
The red light comes on while the signal is being
transmitted.
Note that the effective transmission range of the
universal transmitter may differ from your hand-held transmitter and from one channel to another.
Erasing Channels
To erase all three programmed channels, hold down the
two outside buttons until the red light begins to flash.
Individual channels cannot be erased, but can be
reprogrammed using the procedure for programming the
transmitter explained earlier.
Accessories
Accessories for your universal transmitter are available
from the manufacturer of the unit. If you would like
additional information please call 1-800-355-35 15.
ProCarManuals.com
Page 114 of 388

Instrument Panel
ProCarManuals.com
Page 115 of 388

15. Selectable Shift
The
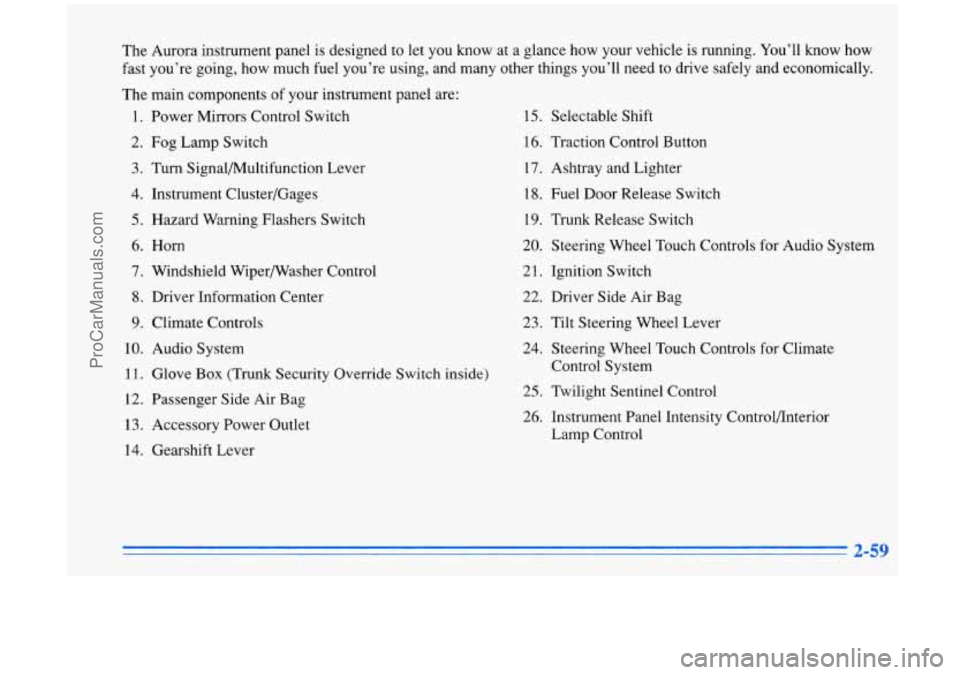
Aurora instrument panel is designed to let you know at a glance how your vehicle is running. You’ll know how
fast you’re going, how much fuel you’re using, and many other things you’ll need to drive safely and economically.
The main components of your instrument panel are: 1. Power Mirrors Control Switch
2. Fog Lamp Switch
3. Turn Signal/Multifunction Lever
4. Instrument Cluster/Gages
5. Hazard Warning Flashers Switch
6. Horn
7. Windshield Wipermasher Control
8. Driver Information Center
9. Climate Controls
10. Audio System 11. Glove
Box (Trunk Security Override Switch inside)
12. Passenger Side Air Bag
13. Accessory Power Outlet
14. Gearshift Lever 16. Traction Control Button
17. Ashtray and Lighter
18. Fuel Door Release Switch
19. Trunk Release Switch
20. Steering
Wheel Touch Controls for Audio System
21. Ignition Switch 22. Driver Side Air Bag
23. Tilt Steering Wheel Lever
24. Steering Wheel Touch Controls for Climate
Control System
25, Twilight Sentinel Control
26. Instrument Panel Intensity Controlflnterior Lamp Control
ProCarManuals.com
Page 116 of 388

Instrument Panel Cluster
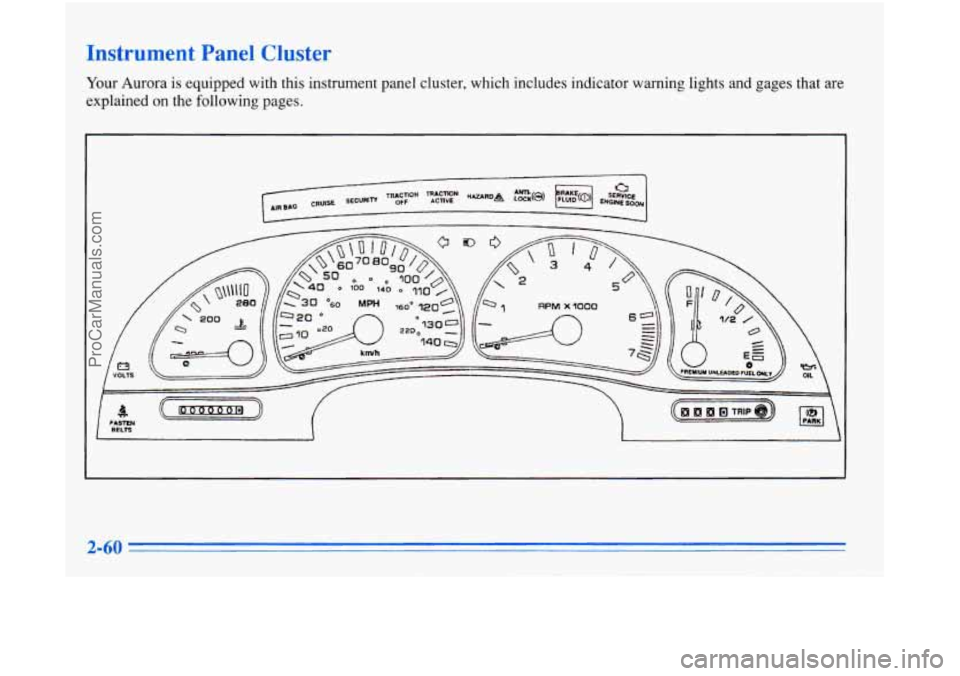
Your Aurora is equipped with this instrument panel cluster, which includes indicator warning lights and gages that are
explained on the following pages.
ProCarManuals.com
Page 117 of 388

Speedometer
Your speedometer lets you see your speed in both miles
per hour (mph) and kilometers per hour
(km/h).
Odometer and Trip Odometer
Your odometer shows how far your vehicle has been
driven in either miles (used in the United States) or
kilometers (used in Canada).
Your trip odometer tells you how far you have driven
since you last reset it. Press the trip button located next
to the trip odometer below the fuel gage.
Your Aurora has a tamper resistant odometer. If you see
silver lines between the numbers, you’ll know someone
has probably tampered with it and the numbers may not
be true.
You may wonder what happens if your vehicle needs a
new odometer installed.
If the new one can be set to the
mileage total of the old odometer, then it must be. But if
it can’t, then it’s set at zero and a label must be put on
the driver’s door to show the old mileage reading when
the new odometer was installed.
ProCarManuals.com
Page 118 of 388

Tachometer
The tachometer displays the
Warning Lights, Gages and
Indicators
If your engine speed equals or exceeds the safe limit for
operation, the message HOT.
..REDUCE ENGINE RPM
is displayed on the information center.
I NOTICE: I
Do not operate the engine with the tachometer in
the red area,
or when the message
HOT. ..REDUCE ENGINE RPM is displayed.
Engine damage may
occur.
This part describes the warning lights and gages that
may be on your vehicle. The pictures will help you
locate them.
Warning lights and gages can signal that something is
wrong before
it becomes serious enough to cause an
expensive repair or replacement. Paying attention to
your warning lights and gages could also save you or
others from injury.
Warning lights come on when there may be or
is a
problem with one of your vehicle’s functions.
As you
will see in the details on the next few pages, some
warning lights come on briefly when you start the
engine just to let you know they’re working. If you are
familiar with this section, you should not be alarmed
when this happens.
ProCarManuals.com
Page 119 of 388

Gages can indicate when there may be or is a problem
with one of your vehicle’s functions. Often gages and
warning lights work together to let you know when
there’s a problem with your vehicle.
When one of the warning lights comes on and stays on
when
you are driving, or when one of the gages shows
there may be a problem, check the section that tells you
what
to do about it. Please follow this manual’s advice.
Waiting to do repairs can be costly
-- and even
dangerous.
So please get to know your warning lights
and gages. They’re a big help.
Your vehicle may also have a driver information system
that works along with the warning lights and gages. See
“Driver Information System” in the Index.
Safety Belt Reminder Light
When the key is turned to RUN or START, a chime will
come on for about eight seconds to remind people to
fasten their safety belts.
The safety belt light will
also come on and stay on
for about
70 seconds. If the
driver’s belt is already
buckled, neither the chime
nor the light will come on.
ProCarManuals.com
Page 120 of 388

Air Bag Readiness Light
There is an air bag readiness light on the instrument
panel, which shows AIR BAG. The system checks the
air bag’s electrical system for malfunctions. The light
tells you if there is an electrical problem. The system
check includes the air bag sensors, the air bag modules,
the wiring and the crash sensing and diagnostic module.
For more infoimation on the air bag system, see “Air
Bag” in the Index.
AIR BAG
You will see this light flash
for a few seconds when you
turn your ignition to RUN
or START. Then the light
should go out. This means
the system is ready.
If the air bag readiness light doesn’t come on when you
start your vehicle, or stays on, or comes
on when you
are driving, your air bag system may not work properly.
Have your vehicle serviced right away.
Battery Warnlng Light
VOLTS
This light will come on
briefly when you start the
vehicle, as a check to show
you it is working, then it
should
go out. If it stays on,
or comes on while
you are
driving, you may have a
problem with the electrical
charging system.
A warning chime and the message CHECK CHARGE
SYSTEM may also come on. Have it checked right
away. Driving while this light is on could drain your
battery.
If you must drive a short distance with the light on, be
certain to turn off all your accessories, such as the radio
and climate control.
ProCarManuals.com