ECU Oldsmobile Aurora 1998 s Owner's Guide
[x] Cancel search | Manufacturer: OLDSMOBILE, Model Year: 1998, Model line: Aurora, Model: Oldsmobile Aurora 1998Pages: 380, PDF Size: 19.75 MB
Page 243 of 380

Removing the Flat Tire and Installing the Spare Tire
3. Turn the wheel wrench to the left by hand to lower
the jack head until it fits under the vehicle.
1. Position the wheel wrench securely over the wheel
nuts to loosen, but don’t remove them.
2. Attach the wheel wrench to the bolt on the end of the
jack to create a jack handle.
5-27
Page 284 of 380
Vehicle Storage
If you’re not going to drive your vehicle for 25 days
or more, remove the black, negative
(-) cable from
the battery. This will help keep your battery from
running down.
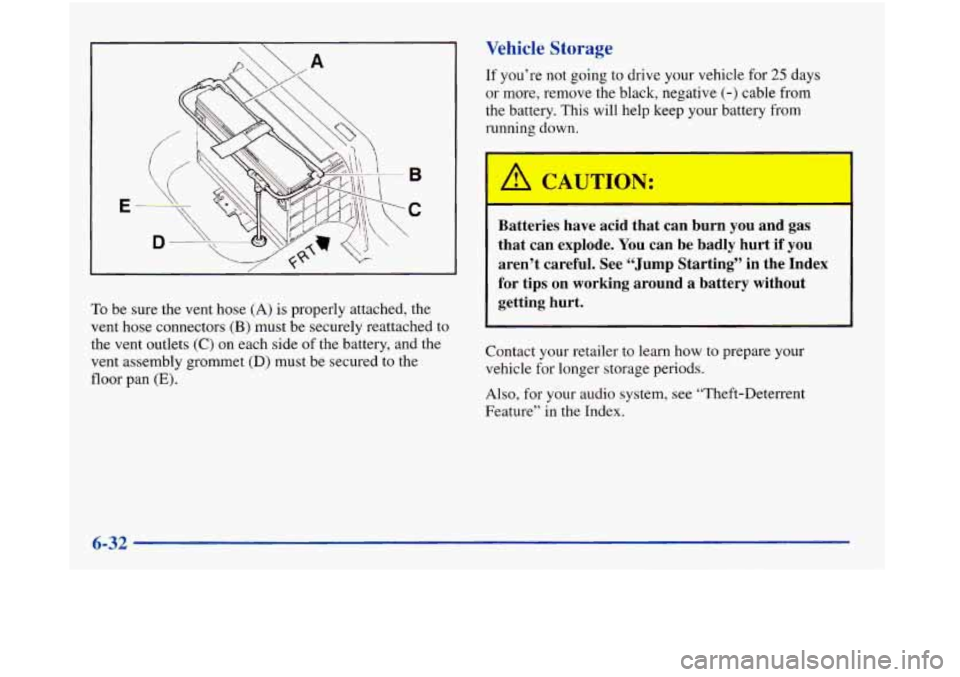
To be sure the vent hose (A) is properly attached, the
vent hose connectors
(B) must be securely reattached to
the vent outlets
(C) on each side of the battery, and the
vent assembly grommet
(D) must be secured to the
floor pan
(E).
Batteries have acid that can burn you and gas
that can explode. You can be badly hurt if you
aren’t careful. See “Jump Starting” in the Index for tips on working around a battery without
getting hurt.
I I
Contact your retailer to learn how to prepare your
vehicle for longer storage periods.
Also, for your audio system, see “Theft-Deterrent
Feature’’ in the Index.
6-32
Page 286 of 380
Low-Beam Headlamp Bulbs
If you need to replace a low-beam headlamp bulb, do
the following:
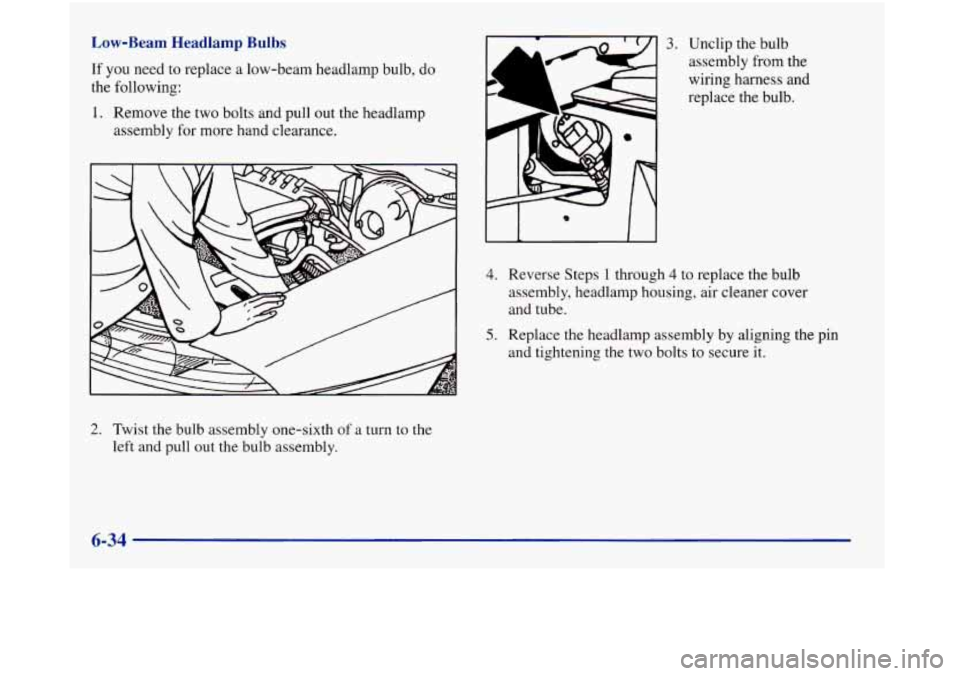
1. Remove the two bolts and pull out the headlamp
assembly for more hand clearance.
I
0
II
3. Unclip the bulb
assembly from the
wiring harness and
replace the bulb.
4. Reverse Steps 1 through 4 to replace the bulb
assembly, headlamp housing, air cleaner cover
and tube.
5. Replace the headlamp assembly by aligning the pin
and tightening the two bolts to secure it.
2. Twist the bulb assembly one-sixth of a turn to the
left and pull out the bulb assembly.
6-34
Page 287 of 380
High-Beam Headlamp Bulbs
If you need to replace a high-beam headlamp bulb, do
the following:
1. Remove the headlamp assembly if you need more
hand clearance.
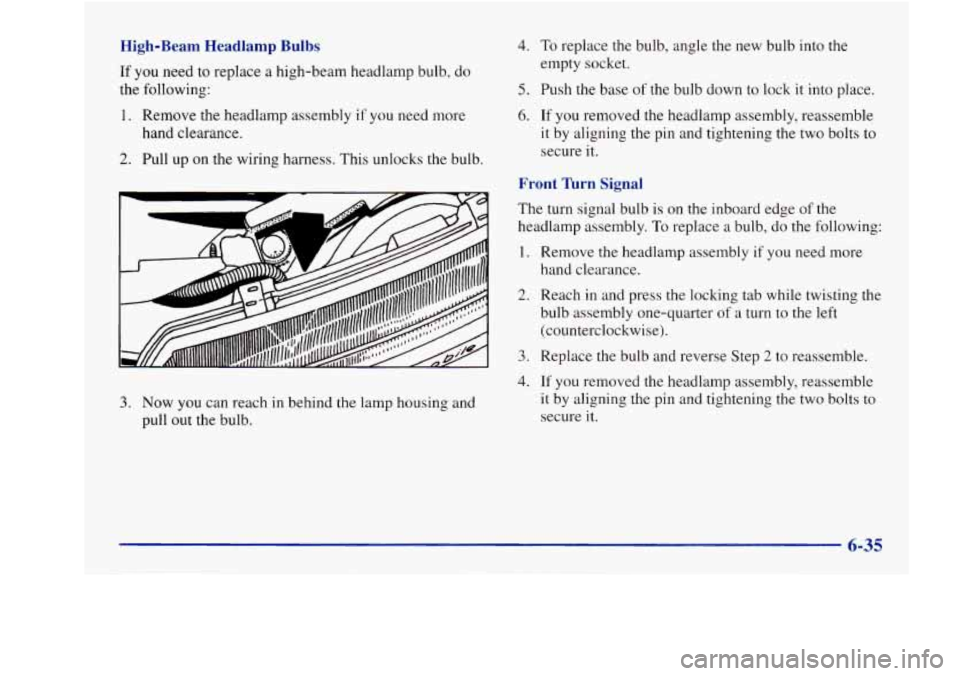
2. Pull up on the wiring harness. This unlocks the bulb.
1.
4. To replace the bulb, angle the new bulb into the
empty socket.
5. Push the base of the bulb down to lock it into place.
6. If you removed the headlamp assembly, reassemble
it by aligning the pin and tightening the two bolts
to
secure it.
Front Turn Signal
The turn signal bulb is on the inboard edge of the
headlamp assembly.
To replace a bulb, do the following:
2.
3.
4.
3. Now you can reach in behind the lamp housing and
pull out the bulb. Remove
the headlamp assembly
if you need more
hand clearance.
Reach in and press the locking tab while twisting the
bulb assembly one-quarter
of a turn to the left
(counterclockwise).
Replace the bulb and reverse Step
2 to reassemble.
If you removed the headlamp assembly, reassemble
it by aligning the pin and tightening
the two bolts to
secure it.
6-35
Page 295 of 380
Windshield Wiper Blade Replacement
Replacement blades come in different types and are
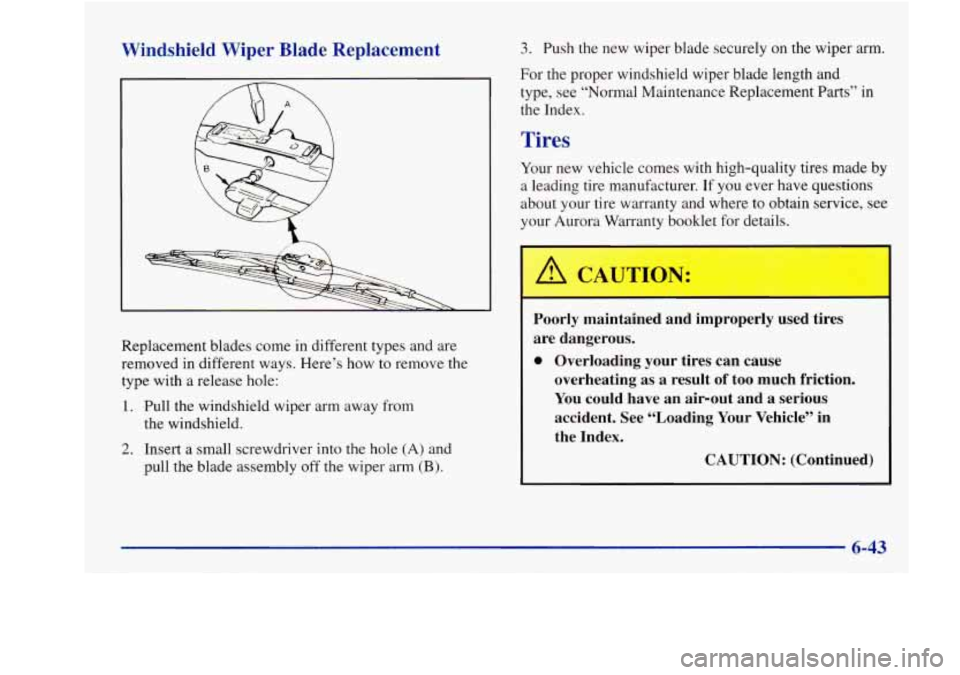
removed in different ways. Here’s how
to remove the
type with a release hole:
1. Pull the windshield wiper arm away from
the windshield.
2. Insert a small screwdriver into the hole (A) and
pull the blade assembly
off the wiper arm (B).
3. Push the new wiper blade securely on the wiper arm.
For the proper windshield wiper blade length and
type, see “Normal Maintenance Replacement Parts” in
the Index.
Tires
Your new vehicle comes with high-quality tires made by
a leading tire manufacturer. If you ever have questions
about your tire warranty and where to obtain service, see
your Aurora Warranty booklet
for details.
Poorly maintained and improperly used tires
are dangerous.
0 Overloading your tires can cause
overheating as a result of
too much friction.
You could have an air-out and a serious
accident. See “Loading Your Vehicle” in
the Index.
CAUTION: (Continued)
Page 302 of 380
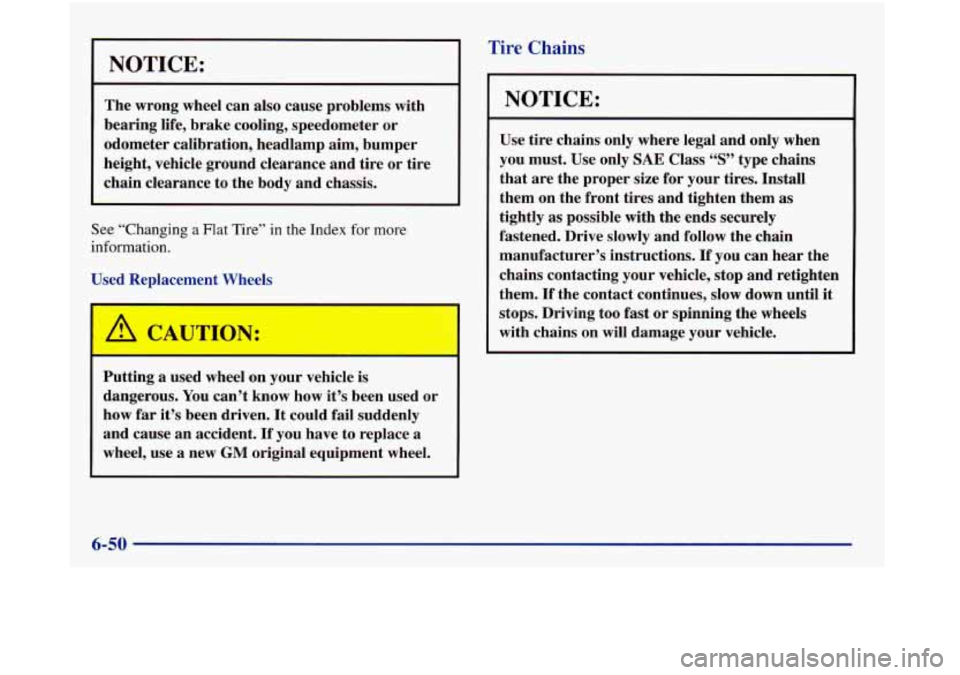
NOTICE:
The wrong wheel can also cause problems with
bearing life, brake cooling, speedometer or
odometer calibration, headlamp aim, bumper
height, vehicle ground clearance and tire or tire
chain clearance to the body and chassis.
See “Changing a Flat Tire” in the Index for more
information.
Used Replacement Wheels
Putting
a used wheel on your vehicle is
dangerous. You can’t know how it’s been used or
how far it’s been driven. It could fail suddenly
and cause an accident. If you have to replace
a
wheel, use a new GM original equipment wheel.
Tire Chains
NOTICE:
Use tire chains only where legal and only when
you must. Use only
SAE Class “S” type chains
that are the proper size for your tires. Install
them on the front tires and tighten them as
tightly as possible with the ends securely
fastened. Drive slowly and follow the chain
manufacturer’s instructions. If you can hear the
chains contacting your vehicle, stop and retighten
them.
If the contact continues, slow down until it
stops. Driving too fast or spinning the wheels
with chains on will damage your vehicle.
6-50
Page 317 of 380
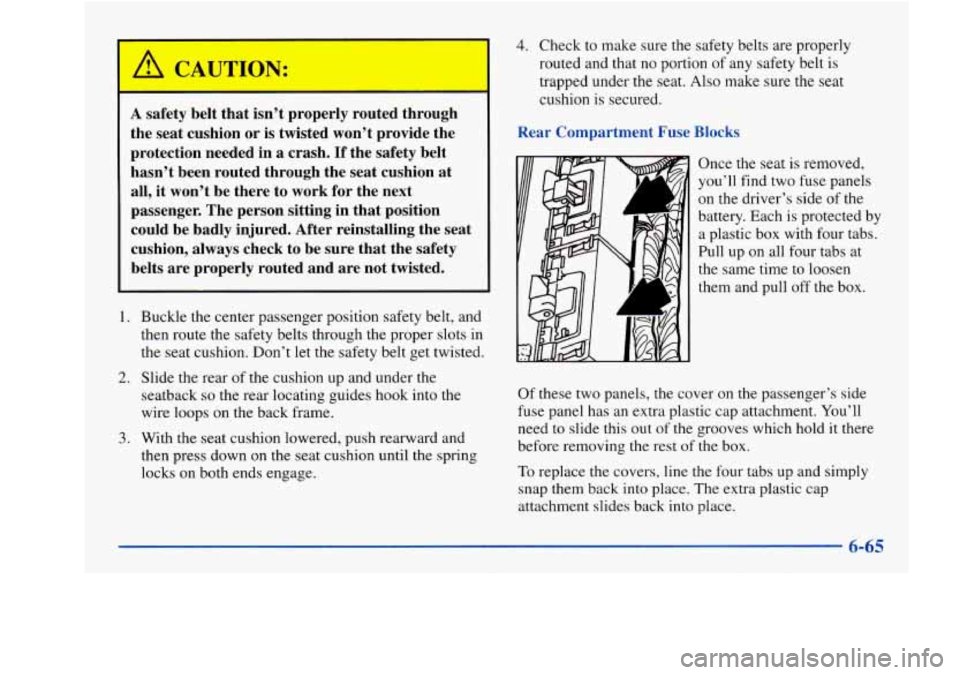
A safety belt that isn’t properly routed through
the seat cushion or is twisted won’t provide the
protection needed in a crash.
If the safety belt
hasn’t been routed through the seat cushion at
all, it won’t be there to work for the next
passenger.
The person sitting in that position
could be badly injured. After reinstalling the seat
cushion, always check to be sure that the safety
belts are properly routed and are not twisted.
1.
2.
3.
Buckle the center passenger position safety belt, and
then route the safety belts through the proper slots in
the seat cushion. Don’t let the safety belt get twisted.
Slide the rear of the cushion up and under the
seatback
so the rear locating guides hook into the
wire loops on the back frame.
With the seat cushion lowered, push rearward and
then press down on the seat cushion until the spring
locks on both ends engage.
4. Check to make sure the safety belts are properly
routed and that
no portion of any safety belt is
trapped under the seat. Also make sure the seat
cushion is secured.
Rear Compartment Fuse Blocks
Once the seat is removed,
you’ll find two
fuse panels
on the driver’s side of the
battery. Each is protected by
a plastic box with four tabs.
Pull up on all four tabs at
the same time to loosen
them and pull off the box.
Of these two panels, the cover on the passenger’s side
fuse panel has an extra plastic cap attachment. You’ll
need
to slide this out of the grooves which hold it there
before removing the rest of the box.
To replace the covers, line the four tabs up and simply
snap them back into place. The extra plastic cap
attachment slides back into place.
6-65
Page 364 of 380
Battery Voltage Message ......................... 2-77
BBB Auto Line
................................. 8-7
Belt. Engine Accessory
.......................... 6-72
Better Business Bureau Mediation
................... 8-7
Blizzard
...................................... 4-27
Brake Adjustment
.................................. 6-30
Fluid
....................................... 6-28
Master Cylinder
.............................. 6-28
Parkmg
..................................... 2-27
PedalTravel
................................. 6-30
Replacing System Parts
........................ 6-3 1
System Warning Light
......................... 2-66
Trailer
...................................... 4-34
Transaxle Shift Interlock Check
.................. 7- 16
Wear
....................................... 6-30
Brakes. Anti-Lock
............................... 4-7
Braking
........................................ 4-6
Braking in Emergencies
.......................... 4-10
Break-In. New Vehicle
.......................... 2- 19
Brightness Control
.............................. 2-45
BTSICheck
................................... 7-16
Bulb Replacement
.............................. 6-33
Exterior Front
................................ 6-33
Exterior Rear
................................ 6-38
Interior Lamps
............................... 6-42
Canadian Roadside Assistance
.................... 8-6
Capacities and Specifications
...................... 6-70
Carbon Monoxide
.......... 2- 15. 2.3 1.2.32.4.28. 4.34 Cassette
Deck Service
........................... 7-14
Cassette Tape Player
............................ 3-14
Care
....................................... 3-25
Errors
...................................... 3-14
Cellular Telephone
.............................. 2-55
Center Passenger Position ........................ 1-32
Central Door Unlocking System
.................... 2-5
Certification Label .............................. 4-30
Chains. Safety
................................. 4-34
Chains. Tire
................................... 6-50
Change Oil Soon Message
........................ 2-78
Changing a Flat Tire
............................. 5-24
Check Oil Level Warning
......................... 2-79
Checking Your Restraint Systems
.................. 1-51
Chemical Paint Spotting
.......................... 6-57
Child Restraints ................................ 1-37
Securing in a Rear Outside Seat Position
........... 1-42
Securing in the Center Rear Seat Position
.......... 1-44
Securing in the Right Front Seat Position
.......... 1-46
TopStrap
................................... 1-42
WheretoPut
................................ 1-41
Cigarette Lighter
............................... 2-54
Circuit Breakers and Fuses
....................... 6-61
Cleaner. Air
................................... 6-15
Cleaning Aluminum or Chrome Wheels
................... 6-56
Fabric
...................................... 6-52
Glass
....................................... 6-54
Inside of
Your Vehicle ......................... 6-51
Instrumentpanel
............................. 6-53
Leather
..................................... 6-53
9-2
Page 369 of 380
Rear Door Security ............................. 2-7
Tr~nk
...................................... 2-14
Window
.................................... 2-33
Lubricants and Fluids
............................ 7-20
Lubrication Service. Body
........................ 7- 15
Lumbar Controls
................................ 1-3
Magnasteer
M ................................ 4. 10
Maintenance. Normal Replacement Parts
............ 6-7 1
Maintenance Record ............................ 7-22
Maintenance Schedule
............................ 7- 1
Owner Checks and Services ..................... 7- 14
Periodic Maintenance Inspections
................ 7- 18
Recommended Fluids and Lubricants
............. 7-20
Scheduled Maintenance Services
.................. 7-4
Maintenance. Underbody
......................... 6-57
Malfunction Indicator Lamp
...................... 2-7 1
Maxifuse/Relay Center
.......................... 6-6 1
Memory Door Locks
........................ 2.5. 2. 11
Memory Seat and Mirrors
........................ 2- 11
Methanol
...................................... 6-4
Mirrors
....................................... 2-48
Convex Outside
.............................. 2-52
Electrochromic Daymight Rearview
.............. 2-48
Heated Outside
............................... 2-52
Memory
.................................... 2-11
Parallel Park Assist
........................... 2-5 1
Power Remote Control
......................... 2-5 1
Visor Vanity. Illuminated ....................... 2-55
With Compass
............................... 2-48
Maintenance
When Trailer Towing
................. 4-37 MMT
......................................... 6-4
Mountain Roads
................................ 4-23
Multifunction Lever
............................. 2-34
Net. Convenience
.............................. 2-53
Neutral. Automatic Transaxle
..................... 2-25
New Vehicle Break-In
........................... 2-19
Nightvision
................................... 4-16
Normal Maintenance Replacement Parts ............. 6-71
Odometer
.................................... 2-63
Odometer. Trip
................................. 2-63
Off-Road Recovery
............................. 4-13
Oil. Engine
.................................... 6-11
Oil Life Indicator
............................... 2-78
Oil Pressure Light
.............................. 2-73
Oil Pressure Message
............................ 2-77
Overdrive. Automatic Transaxle
................... 2-26
Overheated Engine Protection Operating Mode
....... 5-14
Overheating Engine
............................. 5-14
Owner Checks and Services
....................... 7-14
Owner Publications. Ordering
................. 8-9. 8-10
Paint Spotting. Chemical
........................ 6-57
Parallel Park Assist Mirror
........................ 2-51
Park
Automatic Transaxle
.......................... 2-24
Shifting Into
................................. 2-28
Shifting
Out of ............................... 2-30
Page 370 of 380
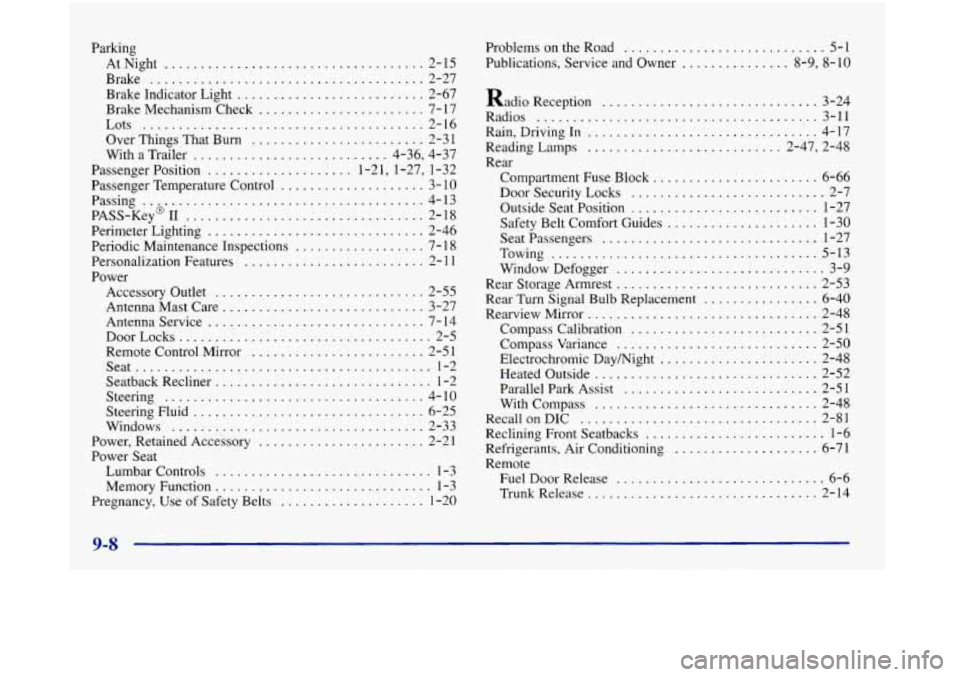
Parkmg AtNight
.................................... 2-15
Brake
...................................... 2-27
Brake Indicator Light
.......................... 2-67
Brake Mechanism Check
....................... 7-17
Lots
....................................... 2-16
Over Things That Burn
........................ 2-3 1
With a Trailer ........................... 4-36, 4-37
Passenger Position
.................... 1-21, 1-27, 1-32
Passenger Temperature Control
.................... 3- 10
Passing ..&.................................... 4-13
PASS-Key 11 ................................. 2-18
Perimeter Lighting .............................. 2-46
Periodic Maintenance Inspections
.................. 7- 1 8
Personalization Features ......................... 2- 11
Power
Accessory Outlet
............................. 2-55
AntennaMastCare
............................ 3-27
Antennaservice
.............................. 7-14
Remote Control Mirror
........................ 2-51
Seat
......................................... 1-2
Seatback Recliner
.............................. 1-2
Steering .................................... 4-10
Steering Fluid
................................ 6-25
Windows
................................... 2-33
Power, Retained Accessory
....................... 2-21
Power Seat
Lumbar Controls
.............................. 1-3
Memory Function
.............................. 1-3
Pregnancy, Use of Safety Belts
.................... 1-20
DoofLocks ................................... 2-5 Problems on the Road
............................ 5-1
Publications. Service and Owner
............... 8.9. 8-10
Radio Reception
.............................. 3-24
Radios
....................................... 3-11
Rain. Driving
In ................................ 4-17
Reading Lamps
........................... 2-47. 2-48
Rear Compartment Fuse Block
....................... 6-66
Door Security Locks
........................... 2-7
Outside Seat Position
.......................... 1-27
Safety Belt Comfort Guides
..................... 1-30
Seatpassengers
.............................. 1-27
Towing
..................................... 5-13
Window Defogger
............................. 3-9
Rear Storage Armrest
............................ 2-53
Rear Turn Signal Bulb Replacement
................ 6-40
Rearview Mirror
................................ 2-48
Compass Calibration
.......................... 2-51
Compass Variance
............................ 2-50
Electrochromic Daymight
...................... 2-48
Heated Outside
............................... 2-52
Parallel Park Assist
........................... 2-51
With Compass
............................... 2-48
RecallonDIC
................................. 2-81
Reclining Front Seatbacks
......................... 1-6
Refrigerants. Air Conditioning .................... 6-71
Remote Fuel Door Release
............................. 6-6
Trunk Release
................................ 2-14
9-8
..