length Oldsmobile Aurora 1998 Owner's Manuals
[x] Cancel search | Manufacturer: OLDSMOBILE, Model Year: 1998, Model line: Aurora, Model: Oldsmobile Aurora 1998Pages: 380, PDF Size: 19.75 MB
Page 145 of 380
Check Oil Level Warning
When CHECK OIL LEVEL appears, it indicates that the
engine oil level is 1 to
1 1/2 quarts (0.9 L to 1.4 L) low.
The message will appear only if the engine is running
and it’s been at least eight minutes since the engine was
last running. If the message appears, check the oil
dipstick level. If it reads low, your oil level should be
brought up to the proper level (see “Engine Oil” in the Index). After bringing the oil to the proper level, the
ignition must be off for eight minutes to allow the
majority
of oil to drain into the oil pan.
Distance to Destination
This feature acts as a reverse trip odometer by counting
backward from an estimated distance which you enter
before starting your trip.
It also uses that information to
determine the estimated time of arrival.
To set, press DEST, then
RESET and enter a maximum
of four digits for the length
of your trip. (Always use
whole miles or kilometers.) Then press ENTER. The
system will only accept the last four digits you enter
as your distance to destination.
The system will display the total distance to destination,
such as:
365 MI TO DEST or 587 KM TO DEST When
the system counts down
to zero distance
remaining, even
if you’re in another display, a chime
will sound and the display will show:
TRIP COMPLETE
The TRIP COMPLETE message will go off when you
press any button, or when you turn your ignition to
OFF,
then on. The display returns to the mode displayed prior
to the interruption.
Estimated Time of Arrival (ETA)
ETA is based on the average speed, the date and time of
the day, and the estimated distance to your destination.
After you have entered your distance to destination,
press ETA to display estimated time
of arrival, such as:
ETA TUE
12% PM
Press ETA again to display the time to destination. The
display will show the current time
as the hours and
minutes to destination, such as:
1250 TIME
TO DEST
If the time to destination calculation is seven days or
greater, the display will read:
TRIP OVER
7 DAYS
Page 154 of 380
Automatic Operation
Press the AUTO-PUSH knob when you want the system
to automatically adjust the interior temperature to your
preference. When the system
is set for automatic
operation, air will come from the floor, upper or the
windshield outlets depending on the temperature inside
the vehicle, the outside temperature and the
sun load.
Fan speed will vary as the system reaches and maintains
the comfort setting you have selected.
To find your comfort setting, start with the system in
automatic mode by pressing the AUTO-PUSH knob.
Adjust the comfort setting by using the red and blue
buttons located below the digital display until
you reach
a setting of
75°F (24"C), on the display. Give the
vehicle about 20 minutes to stabilize and then readjust
the comfort setting
if necessary. The display will show
the comfort setting for five seconds and then it will
show the outside temperature.
In cold weather, the system will delay turning on the fan
to avoid blowing cold air. The length of the delay
depends
on the engine coolant temperature and the
outside temperature. Rotating the AUTO
FAN knob will
override this delay by turning off the automatic fan
mode and changing the fan speed.
...................................... ...................................................
Your automatic electronic climate control system has
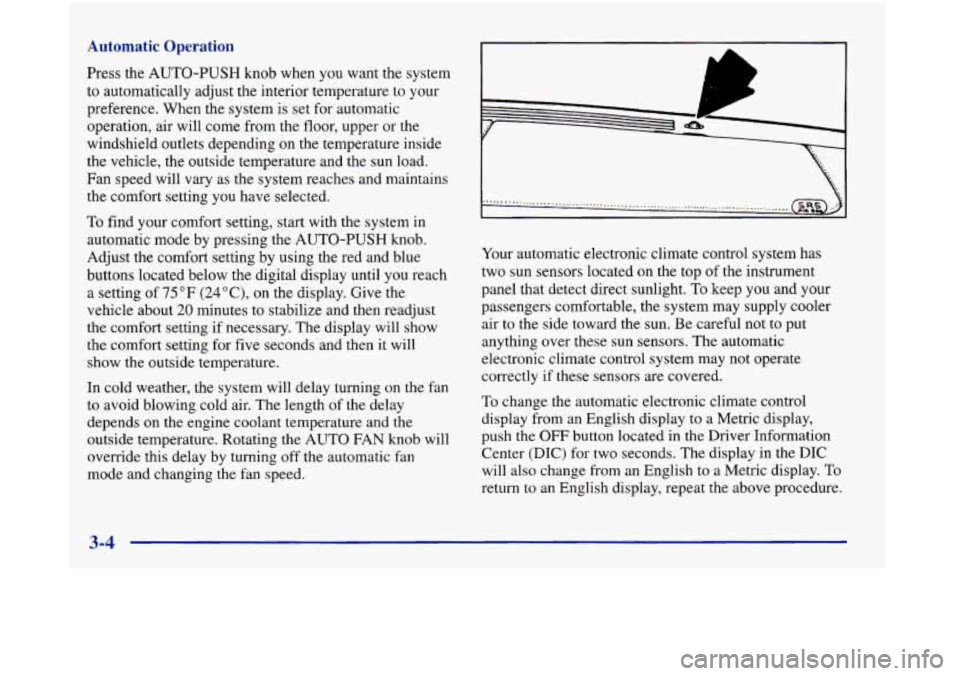
two sun sensors located on the top of the instrument
panel that detect direct sunlight.
To keep you and your
passengers comfortable, the system may supply cooler
air to the side toward the sun. Be careful not to put
anything over these sun sensors. The automatic
electronic climate control system may not operate
correctly
if these sensors are covered.
To change the automatic electronic climate control
display from an English display to a Metric display,
push the
OFF button located in the Driver Information
Center (DIC) for two seconds. The display in the DIC
will also change from an English to a Metric display. To
return to an English display, repeat the above procedure.
Page 157 of 380
Heating
In cold weather, if the automatic mode is selected
(AUTO-PUSH knob indicator light is on), the system
will automatically direct the airflow out of the lower
floor outlets and the temperature door will be positioned
at the full hot position. You can choose the extreme
comfort setting of
90°F (32°C) but the system will not
warm
up any faster by selecting the extreme
comfort setting.
In cold weather, the system will delay turning on the fan
to avoid blowing cold air. The length of the delay
depends on the engine coolant temperature and the
outside temperature. The fan speed will increase as the
temperature
of the engine coolant increases. Rotating the
AUTO FAN
knob will override this delay by turning off
the automatic fan control mode and changing the
fan speed.
Ventilation System
Your vehicle’s flow-through ventilation system always
allows outside air
to flow through your vehicle when it
is moving, even when the system is off.
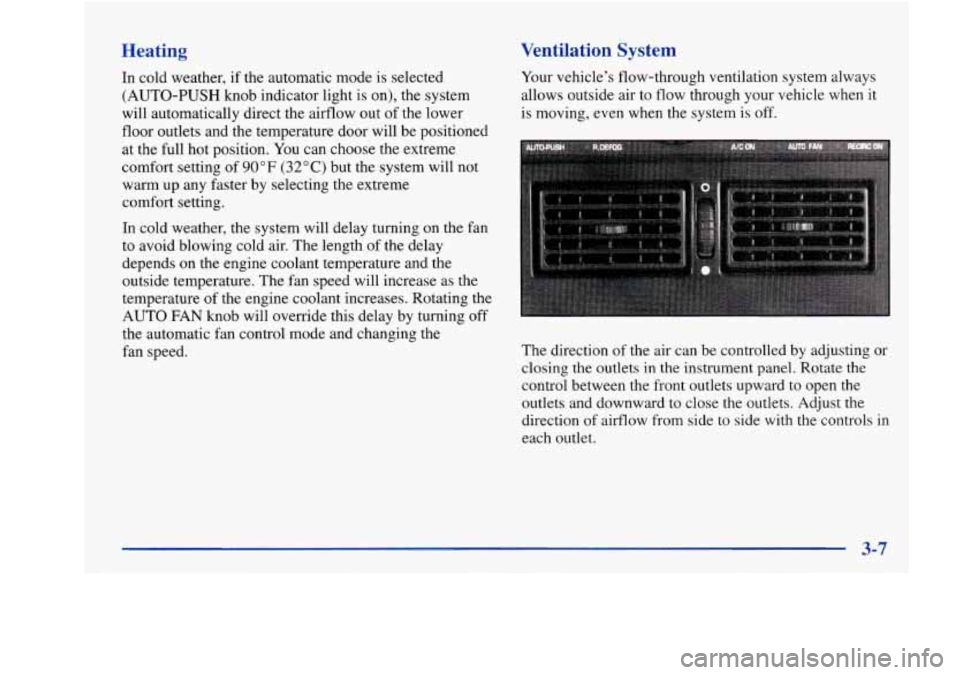
The direction of the air can be controlled by adjusting or
closing the outlets
in the instrument panel. Rotate the
control between the front outlets upward to open the
outlets and downward to close the outlets. Adjust the
direction of airflow
from side to side with the controls in
each outlet.
Page 181 of 380
Drunken Driving
Death and injury associated with drinking and driving
is a national tragedy. It’s the number one contributor to
the highway death toll, claiming thousands of victims
every year.
Alcohol affects four things that anyone needs to drive
a vehicle:
0 Judgment
0 Muscular Coordination
0 Vision
0 Attentiveness.
Police records show that almost half of all motor
vehicle-related deaths involve akohol. In most cases,
these deaths are the result
of someone who was drinking
and driving. In recent years, over
17,000 annual motor
vehicle-related deaths have been associated with the use
of alcohol, with more than
300,000 people injured.
Many adults
-- by some estimates, nearly half the
adult population
-- choose never to drink alcohol, so
they never drive after drinking. For persons under
2 1, it’s against the law in every U.S. state to drink
alcohol. There
are good medical, psychological and
developmental reasons for these laws. The
obvious way to solve this highway safety problem
is for people never to drink alcohol and then drive. But
what
if people do? How much is “too much’’ if the
driver plans to drive? It’s a lot less than many might
think. Although
it depends on each person and situation
here is some general information on the problem.
The Blood Alcohol Concentration (BAC)
of someone
who is drinking depends upon four things:
0 The amount of alcohol consumed
0 The drinker’s body weight
0 The amount of food that is consumed before and
during drinking
0 The length of time it has taken the drinker to
consume the alcohol.
According to the American Medical Association, a
180-lb. (82 kg) person who drinks three 12-ounce
(355 ml) bottles of beer in an hour will end up with a
BAC of about 0.06 percent. The person would reach the
same BAC by drinking three 4-ounce (120 ml) glasses
of wine or three mixed drinks if each had
1 - 1/2 ounces
(45 ml) of a liquor like whiskey, gin or vodka.
Page 295 of 380
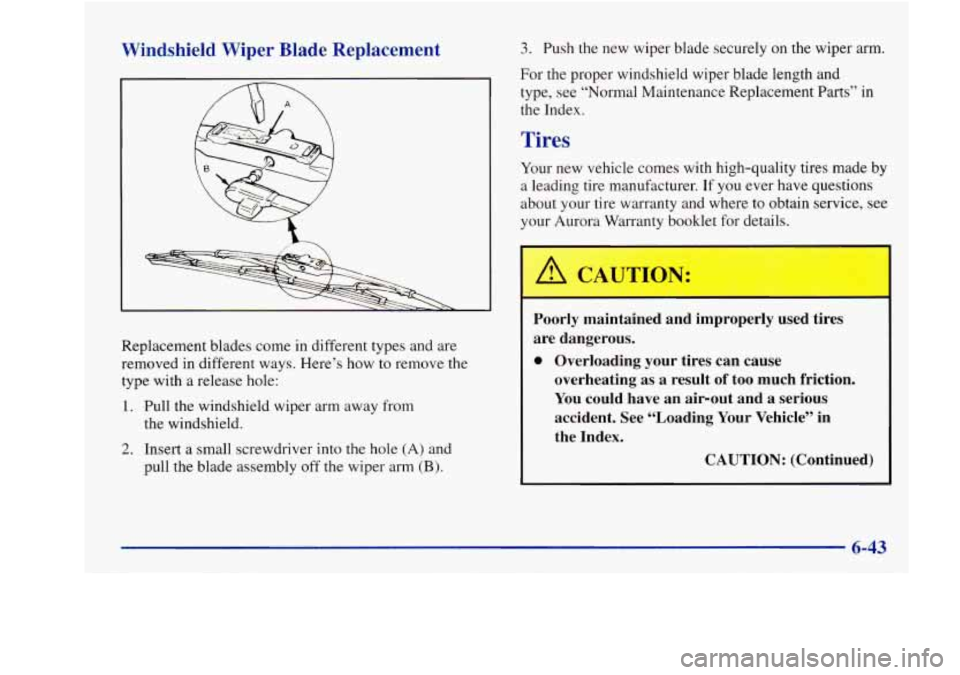
Windshield Wiper Blade Replacement
Replacement blades come in different types and are
removed in different ways. Here’s how
to remove the
type with a release hole:
1. Pull the windshield wiper arm away from
the windshield.
2. Insert a small screwdriver into the hole (A) and
pull the blade assembly
off the wiper arm (B).
3. Push the new wiper blade securely on the wiper arm.
For the proper windshield wiper blade length and
type, see “Normal Maintenance Replacement Parts” in
the Index.
Tires
Your new vehicle comes with high-quality tires made by
a leading tire manufacturer. If you ever have questions
about your tire warranty and where to obtain service, see
your Aurora Warranty booklet
for details.
Poorly maintained and improperly used tires
are dangerous.
0 Overloading your tires can cause
overheating as a result of
too much friction.
You could have an air-out and a serious
accident. See “Loading Your Vehicle” in
the Index.
CAUTION: (Continued)
Page 323 of 380
Power Steering
Pump Only ....................... 1 pint (0.5 L)
Complete System ............... 1.5 pints (0.7 L)
Tire Pressures ...... See Tire-Loading Information
label on the rear edge
of the driver’s doox
Wheel Nut Torque .......... 100 lb-ft (140 Nam)
Refrigerant (R=134a),
Air Conditioning
.... See refrigeran.t charge label
under the hood.
NOTE: All capacities are approximate. When adding,
be sure to fill
to the appropriate level as recommended
in this manual.
Air Conditioning Refrigerants
Not all air conditioning refrigerants are the same.
If the air conditioning system
in your vehicle needs
refrigerant, be sure the proper refrigerant is used.
If
you’re not sure, ask your retailer.
Engine Specifications
VIN Engine Code ........................... C
Type
.................................... V8
Displacement ............................. 4 L
Horsepower ............................. 250
Compression Ratio
...................... 10.3: 1
Firing Order ................... 1-2-7-3-4-5-6-8
Thermostat Temperature
Specification
................... 180°F (82°C)
Normal Maintenance
Replacement Parts
Air Cleaner Element .......... AC Type A-1096C
Engine Oil Filter
................ AC Type PF-58
Gap:
0.050 inch (1.52 mm)
Spark Plugs
................... AC Type 4
1-929
Windshield Wiper Blades
Type
............................... 6.32Pin
Length
..................... 22 inches (56 cm)
Page 324 of 380
Vehicle Dimensions
Length .................. .205.4 inches (522 cm)
Width
.................... .74.4 inches (1 89 cm)
Height
.................... .55.4 inches (141 cm)
Wheelbase
.............. 1 13.8 inches (289.1 cm)
Front Tread
................ .62.5 inches (1 59 cm)
Rear Tread ................ .62.5 inches (159 cm)
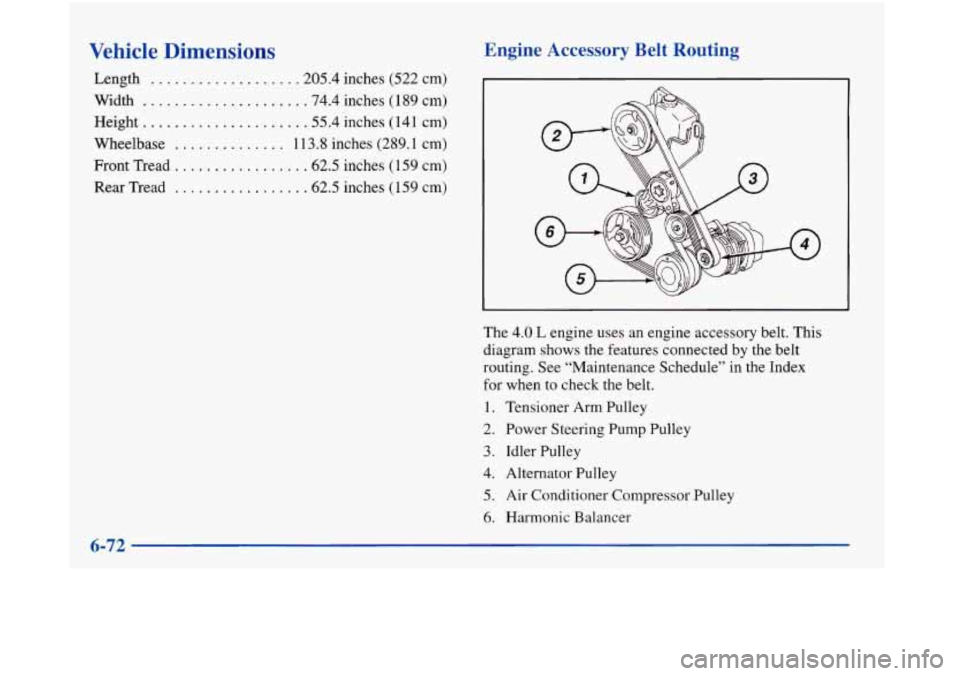
Engine Accessory Belt Routing
The 4.0 L engine uses an engine accessory belt. This
diagram shows the features connected by the belt
routing. See “Maintenance Schedule” in the Index
for when to check the belt.
1. Tensioner Arm Pulley
2. Power Steering Pump Pulley
3. Idler Pulley
4. Alternator Pulley
5. Air Conditioner Compressor Pulley
6. Harmonic Balancer