radio controls Oldsmobile Aurora 1998 Owner's Manuals
[x] Cancel search | Manufacturer: OLDSMOBILE, Model Year: 1998, Model line: Aurora, Model: Oldsmobile Aurora 1998Pages: 380, PDF Size: 19.75 MB
Page 151 of 380
@ Section 3 Comfort Controls and Audio Systems
In this section, you’ll find out how to operate the comfort control and audio systems offered with your vehicle. Be
sure to read about the particular systems supplied with your vehicle.
3-2 3-2
3-6
3-7 3-7
3-9
3-9
3- 10
3-10
3-11
3-11
Comfort Controls
Automatic Electronic Climate Control
Air Conditioning
Heating Ventilation System
Defogging and Defrosting
Rear Window Defogger
Passenger Temperature Control Steering
Wheel Controls for Climate Control
Audio Systems Setting
the Clock 3-11
3-18
3-21
3-23 3 -24
3 -24
3-25
3-26
3-26
3-27 AM-FM
Stereo with Cassette Tape and
Compact Disc Player with Automatic
Tone Control
Trunk Mounted CD Changer (Option)
Theft-Deterrent Feature
Audio Steering Wheel Controls
Understanding Radio Reception
Tips About Your Audio System
Care of Your Cassette Tape Player
Care of Your Compact Discs
Care of Your Compact Disc Player
Power Antenna Mast Care
Page 161 of 380

Audio Systems
Your Delco Electronics audio system has been designed
to operate easily and give years of listening pleasure.
You will get the most enjoyment out of it
if you acquaint
yourself with it first. Find out what your Delco
Electronics system can do and how to operate all its
controls, to be sure you’re getting the most out of the
advanced engineering that went into it.
AM-FM Stereo with Cassette Tape and
Compact
Disc Player with Automatic
Tone Control
Setting the Clock
Press and hold HR until the correct hour appears. The
letter
A or P may appear on the display for AM or PM.
Then, press and hold
MN until the correct minute
appears.
The clock may be set with the ignition on
or off.
Standard Radio -- Base@ Not Shown
If your vehicle is equipped with the Base@ AM-FM
Stereo with Cassette Tape and Compact Disc Player (not
shown), automatic tone control is not available. Your radio
will have
a MUTE button rather than a TONE button.
Playing the Radio
PWR-VOL: Press this knob to turn the system on and
off.
To increase volume, turn the knob to the right. Turn
it to
the left to decrease volume.
3-11
Page 164 of 380

Playing a Cassette Tape
Your tape player is built to work best with tapes that are
30 to 45 minutes long on each side. Tapes longer than
that
are so thin they may not work well in this player.
The longer side with the tape visible should face to the
right.
If the ignition is on, but the radio is off, the tape
can be inserted and will begin playing.
If you hear
nothing but a garbled sound, the tape may not be in
squarely. Press EJECT to remove the tape and start over.
While the tape is playing, use the
VOL, FADE, BAL,
TREB, BASS, TONE, SEEK and SCAN controls just as
you
do for the radio. (The TONE control is not available
on the Bose radio.) The display will show TP with a box
around it and an arrow to show which side of the tape
is playing.
Your tape bias is set automatically. When a metal or
chrome tape is inserted,
HI-BIAS appears on the
display. If you want to insert a tape when the ignition is
off, first press EJECT or RCL. If
E and a number appear
on the radio display and the
tape won’t play because of an error, it could be that:
E10: The tape is tight and the player can’t turn the
tape hubs. Remove the tape. Hold the tape with the
open end down and try to turn the right hub to the
left with a pencil. Turn the tape over and repeat. If
the hubs do not turn easily, your tape may be
damaged and should not be used in the player.
Try a new tape to make sure your player is
working properly.
Ell: The tape is broken. Try a new tape.
If any error occurs repeatedly or if an error can’t be
corrected, please contact your retailer.
If your radio
displays an error number,
write it down and provide it to
your retailer when reporting the problem.
REV (1): Press this button to reverse the tape rapidly.
Press
it again to return to playing speed. The radio will
play the last-selected station while the tape reverses.
You may select stations during REV operation by
using
TUNE.
3-14
Page 173 of 380
If you enter the wrong code eight times, INOP will
appear on the display. You will have to wait an hour
with the ignition on before
you can try again. When you
try again, you will only have three chances to enter the
correct code before INOP appears.
If you lose or forget your code, contact your retailer.
Disabling the Theft-Deterrent Feature
Enter your secret code as follows; pause no more than
15 seconds between steps:
I. Turn the ignition to ACCESSORY or RUN.
2. Turn the radio off.
3. Press the 1 and 4 buttons together. Hold them down
until SEC shows on the display.
4. Press MN and 000 will appear on the display.
5. Press MN again to make the last two digits agree
with your code.
6. Press HR to make the first one or two digits agree
with your code.
7. Press AM-FM after you have confirmed that the
code matches the secret code you have written down.
The display will show
---, indicating that the radio is
no longer secured. If
the code entered is incorrect,
SEC will appear on the
display. The radio will remain secured until the correct
code is entered.
When battery power is removed and later applied to
a
secured radio, the radio won’t turn on and LOC will
appear on the display.
To unlock a secured radio, see “Unlocking the
Theft-Deterrent Feature After a Power
Loss” earlier in
this section.
Audio Steering Wheel Controls
With this feature, you can
control certain radio
functions using the buttons
on your steering wheel.
Some steering wheel controls operate climate controls.
See “Steering-Wheel Controls for Climate Control”
earlier in
this section.
s 3-23
Page 315 of 380
Fuse Usage
1 Supplemental Inflatable Restraint (Air Bag)
2
3
4
5
6
7
Injectors
Anti-Lock Brake System
Left Exterior Lamps Turn Signal Lamps
Injectors Climate Controls
8 Right Exterior Lamps
9 Chime (Ignition l), Memory Set
10 Powertrain Control Module, VATS
PASS-Key@II
11 Auxiliary Power
12
13
14
15
16
Interior Lamps Shift Solenoids
Linear
EGR
Cruise Control
Perimeter Lights
Fuse
17 18
19
20
21 22
23
24
25
26 27
28
Usage
Driver Information Center
Converter Oxygen Sensors
Radio Open
Climate Control Relay
Fog Lamps
Windshield Wipers
Flat Pack Motor
TMNSS
Cigarette Lighter
Crank,
Air Bag Module
Climate Control Blower
6-63
Page 363 of 380
@ Section 9 Index
Accessory Power Outlet ......................... 2-55
Air Bag
....................................... 1-21
How Does
it Restrain .......................... 1-24
How it Works
................................ 1-23
Location
.................................... 1-23
Readiness Light
......................... 1.22, 2.65
Servicing
................................... 1-26
What Makes it Inflate
.......................... 1-24
What Will
You See After it Inflates ............... 1-25
When Should it Inflate
......................... 1-24
Aircleaner
.................................... 6-15
Air Conditioning ................................ 3-6
Air Control. Climate Control System
............. 3-3. 3-5
Alignment and Balance. Tire
...................... 6-49
Aluminum or Chrome Wheels. Cleaning
............. 6-56
Antenna. Power
................................ 3-27
Antifreeze
..................................... 6-2 1
Anti-Lock
Brake System Warning Light
................ 2-68. 4-7
Brakes
...................................... 4-7
Anti-Lockout Feature
............................ 2-9
Anti.Theft. Radio
.............................. 3-2 1
Appearance Care ............................... 6-5 1
Appearance Care Materials ....................... 6-53
Air
Conditioning Refrigerants
..................... 6-7 1
Alarm. Universal Theft-Deterrent .................. 2- 16 Arbitration Program
.............................. 8-7
Assist Handles
................................. 2-55
Audio Controls. Steering Wheel
................... 3-23
Audio Equipment. Adding
........................ 3-25
Audio Systems
................................. 3-11
Automatic DoorLocks
................................... 2-5
Electronic Climate Control
...................... 3-2
Overdrive
................................... 2-26
Check
...................................... 7-15
Fluid
....................................... 6-18
Operation
................................... 2-24
ParkMechanismCheck
........................ 7-17
Auto-Push Knob. Climate Control
.................. 3-2
Ashtrays
...................................... 2-54
Automatic Transaxle Averagespeed
................................. 2-77
Back-up Lamps Bulb Replacement
............... 6-40
Battery
....................................... 6-31
Jump Starting
................................. 5-3
Replacement. Remote Lock Control
.............. 2-13
Saver
...................................... 2-47
Warning Light
............................... 2-66
Warnings
................................ 5.3. 5.5
9-1
Page 370 of 380
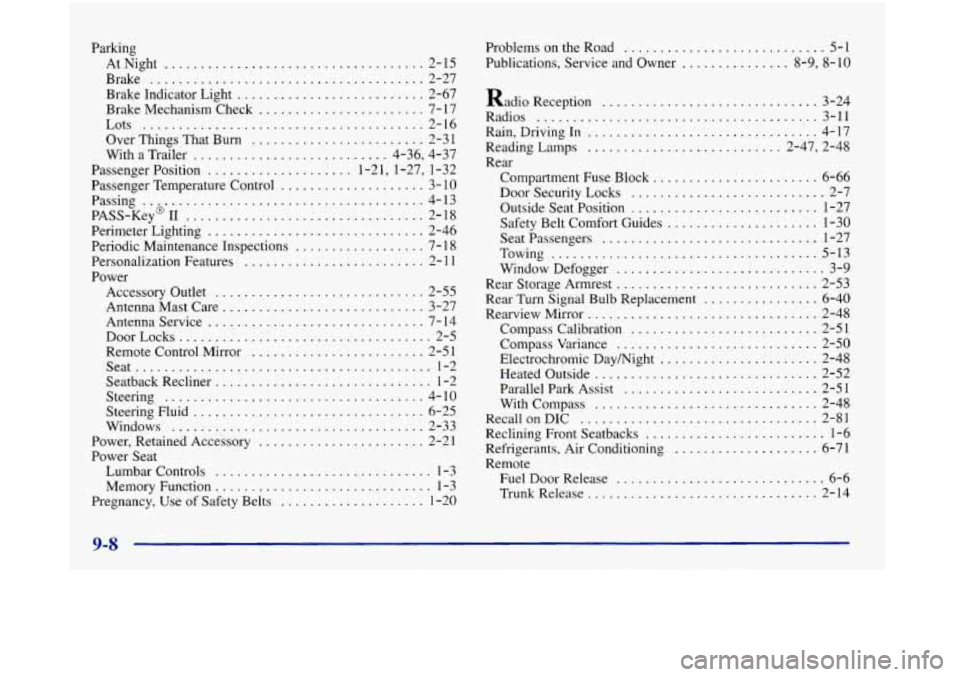
Parkmg AtNight
.................................... 2-15
Brake
...................................... 2-27
Brake Indicator Light
.......................... 2-67
Brake Mechanism Check
....................... 7-17
Lots
....................................... 2-16
Over Things That Burn
........................ 2-3 1
With a Trailer ........................... 4-36, 4-37
Passenger Position
.................... 1-21, 1-27, 1-32
Passenger Temperature Control
.................... 3- 10
Passing ..&.................................... 4-13
PASS-Key 11 ................................. 2-18
Perimeter Lighting .............................. 2-46
Periodic Maintenance Inspections
.................. 7- 1 8
Personalization Features ......................... 2- 11
Power
Accessory Outlet
............................. 2-55
AntennaMastCare
............................ 3-27
Antennaservice
.............................. 7-14
Remote Control Mirror
........................ 2-51
Seat
......................................... 1-2
Seatback Recliner
.............................. 1-2
Steering .................................... 4-10
Steering Fluid
................................ 6-25
Windows
................................... 2-33
Power, Retained Accessory
....................... 2-21
Power Seat
Lumbar Controls
.............................. 1-3
Memory Function
.............................. 1-3
Pregnancy, Use of Safety Belts
.................... 1-20
DoofLocks ................................... 2-5 Problems on the Road
............................ 5-1
Publications. Service and Owner
............... 8.9. 8-10
Radio Reception
.............................. 3-24
Radios
....................................... 3-11
Rain. Driving
In ................................ 4-17
Reading Lamps
........................... 2-47. 2-48
Rear Compartment Fuse Block
....................... 6-66
Door Security Locks
........................... 2-7
Outside Seat Position
.......................... 1-27
Safety Belt Comfort Guides
..................... 1-30
Seatpassengers
.............................. 1-27
Towing
..................................... 5-13
Window Defogger
............................. 3-9
Rear Storage Armrest
............................ 2-53
Rear Turn Signal Bulb Replacement
................ 6-40
Rearview Mirror
................................ 2-48
Compass Calibration
.......................... 2-51
Compass Variance
............................ 2-50
Electrochromic Daymight
...................... 2-48
Heated Outside
............................... 2-52
Parallel Park Assist
........................... 2-51
With Compass
............................... 2-48
RecallonDIC
................................. 2-81
Reclining Front Seatbacks
......................... 1-6
Refrigerants. Air Conditioning .................... 6-71
Remote Fuel Door Release
............................. 6-6
Trunk Release
................................ 2-14
9-8
..