bulb Oldsmobile Aurora 1998 Owner's Manuals
[x] Cancel search | Manufacturer: OLDSMOBILE, Model Year: 1998, Model line: Aurora, Model: Oldsmobile Aurora 1998Pages: 380, PDF Size: 19.75 MB
Page 101 of 380
Turn and Lane Change Signals
The turn signal has two upward (for right) and two
downward (for left) positions. These positions allow
you to signal a turn or a lane change.
To signal a turn, move the lever all the way up or
down. When the turn is finished, the lever will
return automatically.
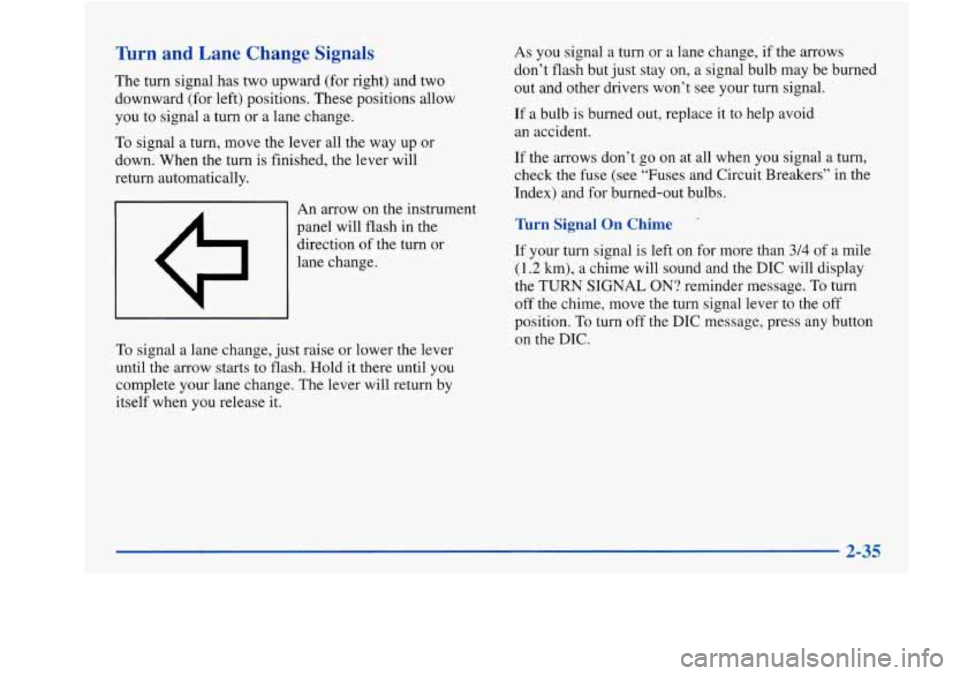
I 1 An arrow on the instrument
panel will flash in the
direction of the turn or
lane change.
To signal a lane change, just raise or lower the lever
until the arrow starts to flash.
Hold it there until you
complete your lane changp The lever will return
bv
itself when you release it. As
you signal
a turn or a lane change, if the arrows
don’t flash but just stay on, a signal bulb may be burned
out and other drivers won’t see your turn signal.
If a bulb
is burned out, replace it to help avoid
an accident.
If the arrows don’t
go on at all when you signal a turn,
check the fuse (see “Fuses and Circuit Breakers” in the
Index) and for burned-out bulbs.
Turn Signal On Chime
If your turn signal is left on for more than 3/4 of a mile
(1.2 km),
a chime will sound and the DIC will display
the TURN SIGNAL ON? reminder message.
To turn
off the chime, move the turn signal lever to the
off
position. To turn off the DIC message, press any button
on the DIC.
Page 139 of 380
Have you recently changed brands of fuel?
If
so, be sure to fuel your vehicle with quality fuel (see
“Fuel” in the Index). Poor fuel quality will cause your
engine not to run as efficiently as designed. You may
notice this as stalling after start-up, stalling when you
put the vehicle into gear, misfiring, hesitation on
acceleration or stumbling on acceleration. (These
conditions may go away once the engine is warmed up.)
This will be detected by the system and cause the light
to turn
on.
If you experience one or more of these conditions,
change the fuel brand you use. It will require at least one
full tank of the proper fuel to turn the light off.
If none
of the above steps have made the light turn off,
have your retailer or qualified service center check the
vehicle. Your retailer has the proper test equipment and
diagnostic tools to
fix any mechanical or electrical
problems that may have developed.
Oil Pressure Warning Light
If you have a problem with
your oil, this light may
stay on after you start your
engine, or come on when
OIL you are driving.
A warning chime and the message
LOW OIL
PRESSURE may also come on.
These indicate that oil is not going through your engine
quickly enough to keep it cool. The engine could be low
on oil, or could have some other oil problem. Have it
fixed right away.
The oil light could also come on briefly when the
ignition is on but
the engine is not running. The light
will come on as a test to show
you it is working, but the
light will go out when you turn the ignition to START.
If
it doesn’t come on with the ignition on, you may have a
problem with the fuse or bulb. Have it fixed right away.
Page 214 of 380
Making Turns
I NOTICE: 1
Making very sharp turns while trailering could
cause the trailer to come in contact with the
vehicle. Your vehicle could be damaged. Avoid
making very sharp turns while trailering.
When you’re turning with a trailer, make wider
turns than normal.
Do this so your trailer won’t
strike soft shoulders, curbs, road signs, trees or other
objects. Avoid jerky or sudden maneuvers. Signal
well in advance.
Tbrn Signals When Towing a Trailer
The green arrows on your instrument panel will flash
whenever you signal a turn or lane change. Properly
hooked up, the trailer lamps will also flash, telling other
drivers you’re about to turn, change lanes or stop.
When towing a trailer, the green arrows on your
instrument panel will flash for turns even if the bulbs on
the trailer are burned out. Thus, you may think drivers behind
you are seeing your signal when they
are not. It’s
important to check occasionally to be sure the trailer
bulbs are still working.
Your vehicle may have bulb warning messages. When
you plug a trailer lighting system into your vehicle’s
lighting system, its bulb warning messages may not let
you know if one
of your lamps goes out. So, when you
have a trailer lighting system plugged in, be sure to
check your vehicle and trailer lamps from time to time
to be sure they’re all working. Once you disconnect the
trailer lamps, the bulb warning messages again can tell
you if one of your vehicle lamps is out.
Driving On Grades
Reduce speed and shift to a lower gear before you start
down a long or steep downgrade.
If you don’t shift
down, you might have to use your brakes
so much that
they would get hot and no longer work well.
Parking on Hills
You really should not park your vehicle, with a trailer
attached, on a hill. If something goes wrong, your rig
could start
to move. People can be injured, and both
your vehicle and the trailer can be damaged.
4-36
Page 253 of 380
@ Section 6 Service and Appearance Care
Here you will find information about the care of your vehicle. This section begins with service and fuel information,
and then it shows
how to check important fluid and lubricant levels. There is also technical information about your
vehicle, and a part devoted to its appearance care.
6-2 6-3
6- 8
6- 8
6-11
6- 15
6-18
6-2 1
6-26
6-28
6-3
1
6-33
6-36
6-43
6-5 1 Service
Fuel
Filling a Portable Fuel Container
Checking Things Under the Hood
Engine Oil
Air Cleaner Automatic Transaxle Fluid
Engine Coolant
Windshield Washer Fluid
Brakes
Battery Bulb Replacement
Headlamp Aiming
Tires Appearance Care 6-5
1
6-55
6-57
6-57
6-58
6-59
6-60
6-64 6-70
6-70
6-7 1
6-7
1
6-7 1
6-72 Cleaning the
Inside of Your Vehicle
Cleaning the Outside
of Your Vehicle
Underbody Maintenance Chemical Paint Spotting
Appearance Care Materials Chart
Vehicle Identification Number (VIN)
Electrical System
Removing the Rear Seat Cushion
Replacement Bulbs Capacities and Specifications
Air Conditioning Refrigerants
Engine Specifications
Normal Maintenance Replacement Parts Vehicle Dimensions
6-1
Page 285 of 380
Bulb Replacement
For any bulb changing procedure not listed in this
section, contact your retailer’s service department.
For the type of bulb to use, see “Replacement Bulbs” in
the Index.
Halogen Bulbs
‘ A CAUTION:
A
Exterior Front Bulbs
1
Halogen bulbs have pressurized gas inside and
can burst if you drop or scratch the bulb. You or
others could be injured. Be sure to read and
follow the instructions on the bulb package.
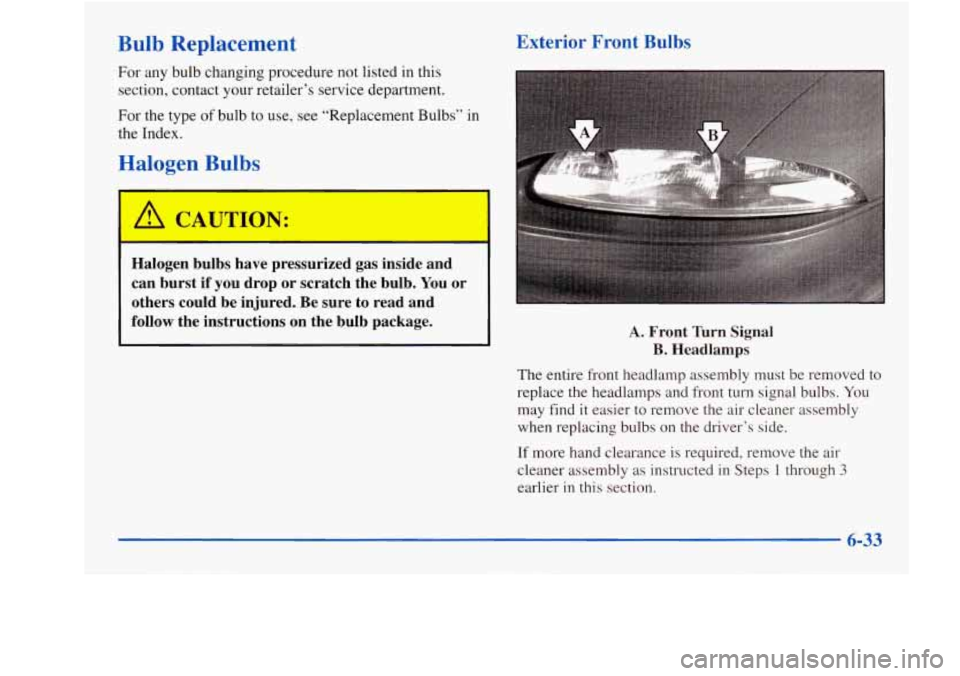
A. Front Turn Signal
B. Headlamps
The entire front headlamp assembly must be removed to
replace
the headlamps and front turn signal bulbs. You
may find it easier
to remove the air cleaner assembly
when replacing bulbs on
the driver’s side.
If more hand clearance is required, remove the air
cleaner assembly as instructed in Steps 1 through
3
earlier in this section.
6-33
Page 286 of 380
Low-Beam Headlamp Bulbs
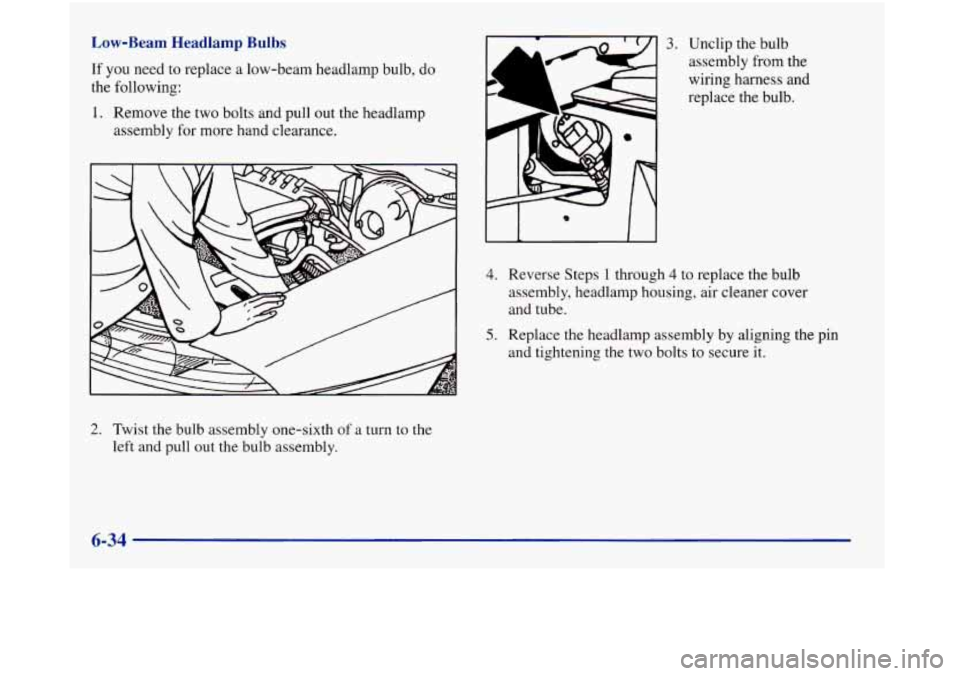
If you need to replace a low-beam headlamp bulb, do
the following:
1. Remove the two bolts and pull out the headlamp
assembly for more hand clearance.
I
0
II
3. Unclip the bulb
assembly from the
wiring harness and
replace the bulb.
4. Reverse Steps 1 through 4 to replace the bulb
assembly, headlamp housing, air cleaner cover
and tube.
5. Replace the headlamp assembly by aligning the pin
and tightening the two bolts to secure it.
2. Twist the bulb assembly one-sixth of a turn to the
left and pull out the bulb assembly.
6-34
Page 287 of 380
High-Beam Headlamp Bulbs
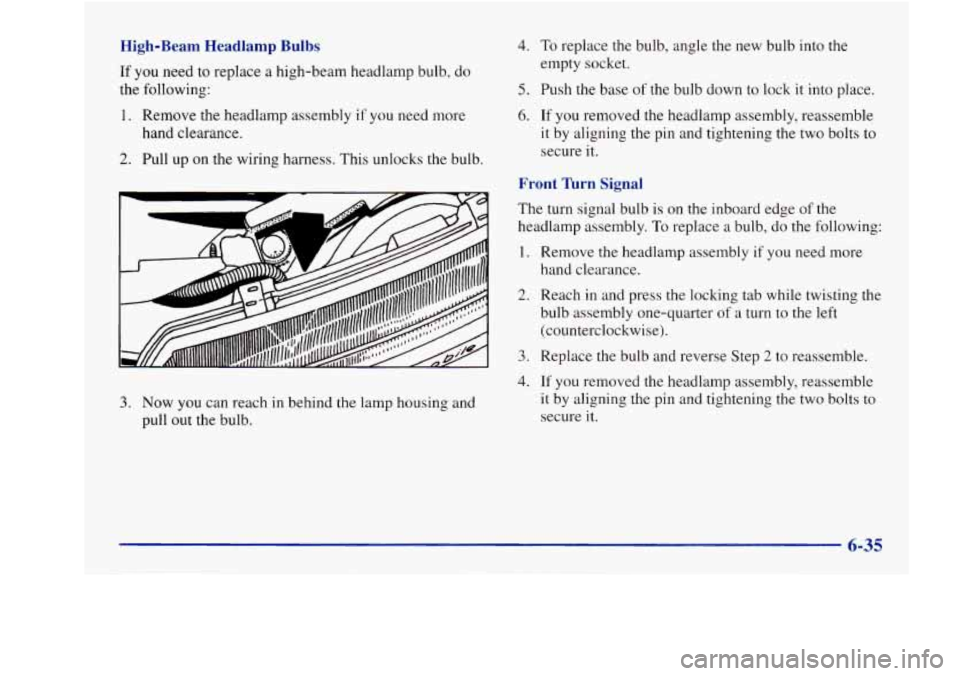
If you need to replace a high-beam headlamp bulb, do
the following:
1. Remove the headlamp assembly if you need more
hand clearance.
2. Pull up on the wiring harness. This unlocks the bulb.
1.
4. To replace the bulb, angle the new bulb into the
empty socket.
5. Push the base of the bulb down to lock it into place.
6. If you removed the headlamp assembly, reassemble
it by aligning the pin and tightening the two bolts
to
secure it.
Front Turn Signal
The turn signal bulb is on the inboard edge of the
headlamp assembly.
To replace a bulb, do the following:
2.
3.
4.
3. Now you can reach in behind the lamp housing and
pull out the bulb. Remove
the headlamp assembly
if you need more
hand clearance.
Reach in and press the locking tab while twisting the
bulb assembly one-quarter
of a turn to the left
(counterclockwise).
Replace the bulb and reverse Step
2 to reassemble.
If you removed the headlamp assembly, reassemble
it by aligning the pin and tightening
the two bolts to
secure it.
6-35
Page 290 of 380
Exterior Rear Bulbs Taillamps
For the type of bulb to use, see “Replacement Bulbs” in
the Index.
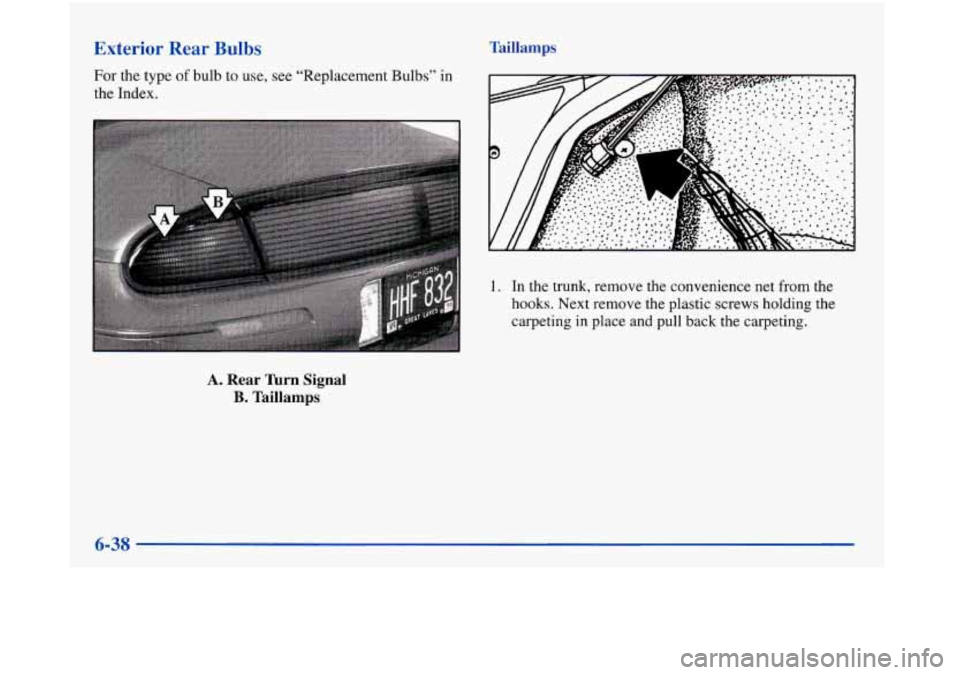
1. In the trunk, remove the convenience net from the
hooks. Next remove the plastic screws holding the
carpeting in place
and pull back the carpeting.
A. Rear nrn Signal
B. Taillamps
6-38
Page 292 of 380
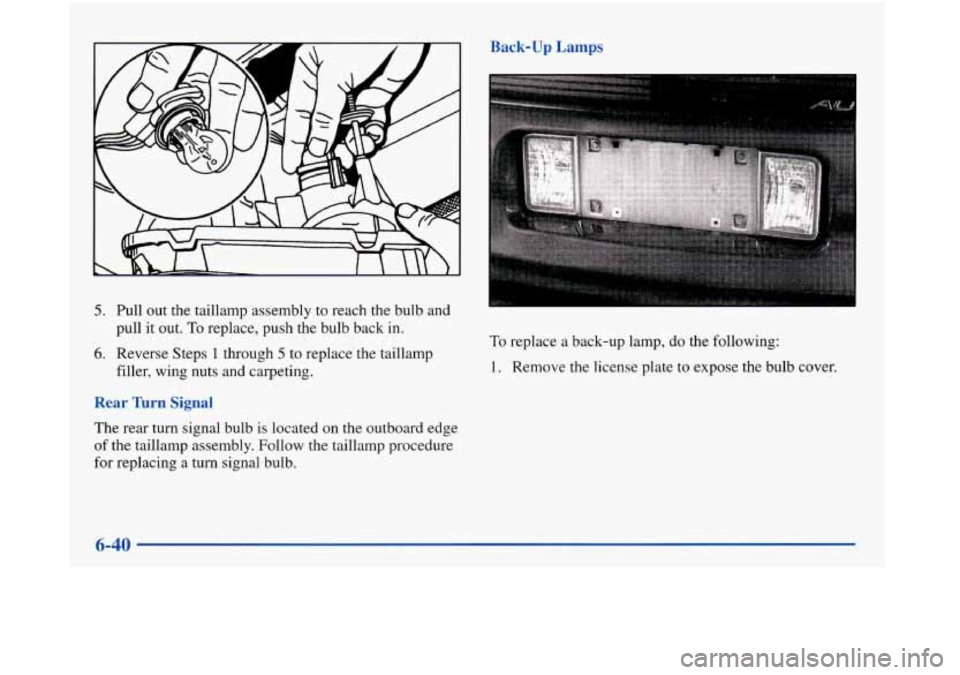
Back-up Lamps
5. Pull out the taillamp assembly to reach the bulb and
pull it out.
To replace, push the bulb back in.
6. Reverse Steps 1 through 5 to replace the taillamp
filler, wing nuts and carpeting.
Rear lhrn Signal
The rear turn signal bulb is located on the outboard edge
of the taillamp assembly. Follow the taillamp procedure
for replacing a turn signal bulb.
To replace a back-up lamp, do the following:
1. Remove the license plate to expose the bulb cover.
6-40
Page 293 of 380
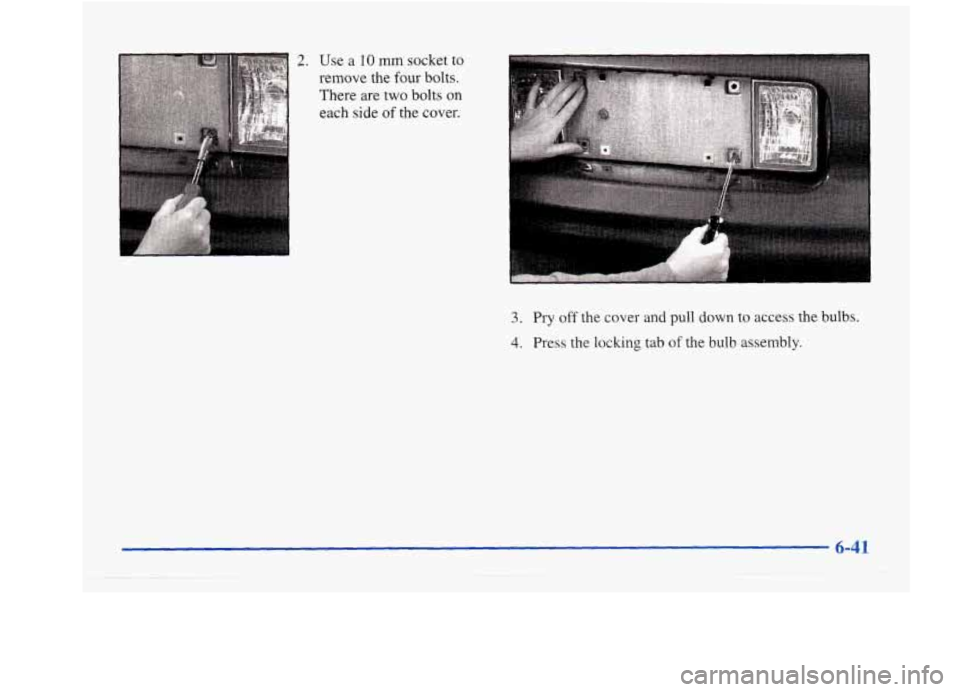
2. Use a 10 mm socket to
remove the four bolts.
There are two
bolts on
each side of the cover.
3. Pry off the cover and pull down to access the bulbs.
4. Press the locking tab of the bulb assembly.
6-41