CD changer OLDSMOBILE AURORA 2003 Owners Manual
[x] Cancel search | Manufacturer: OLDSMOBILE, Model Year: 2003, Model line: AURORA, Model: OLDSMOBILE AURORA 2003Pages: 387, PDF Size: 18.05 MB
Page 114 of 387
3 Instrument Panel
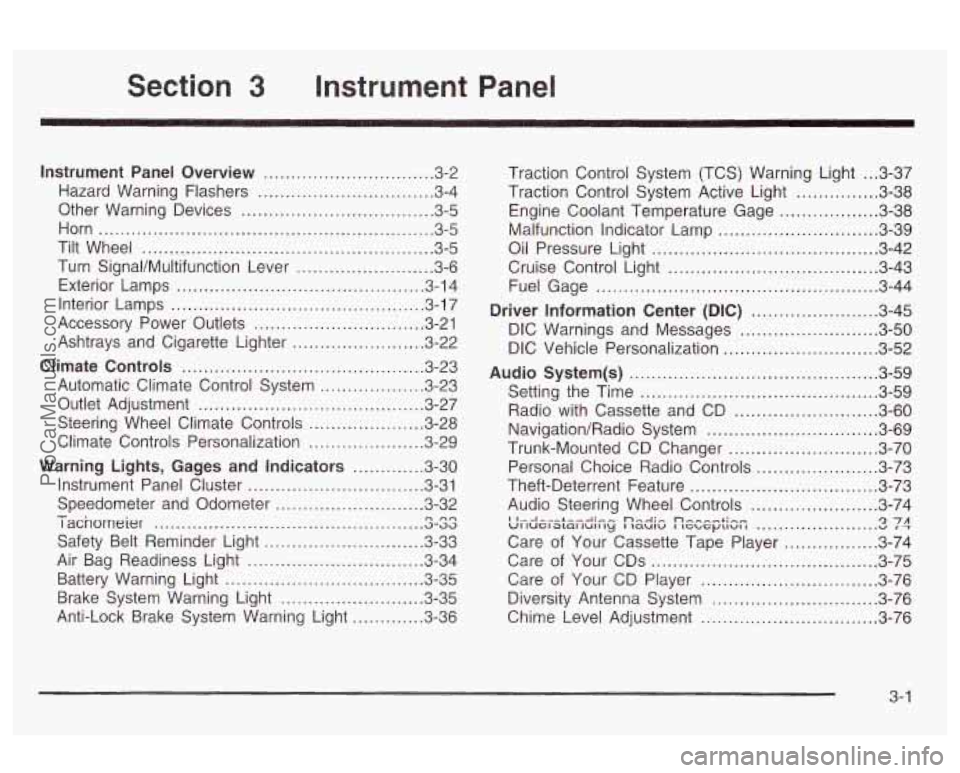
Instrument Panel Overview .............................. -3-2
Hazard Warning Flashers
................................ 3-4
Other Warning Devices
................................... 3-5
Horn
............................................................. 3-5
Tilt Wheel
..................................................... 3-5
Turn SignaVMultifunction Lever
......................... 3-6
Exterior Lamps
............................................. 3-14
Interior Lamps
.............................................. 3-17
Accessory Power Outlets
............................... 3-21
Ashtrays and Cigarette Lighter
........................ 3-22
Climate Controls
............................................ 3.23
Automatic Climate Control System
.................. 3-23
Outlet Adjustment
......................................... 3-27
Steering Wheel Climate Controls
..................... 3-28
Climate Controls Personalization
..................... 3.29
Warning Lights, Gages and Indicators
............. 3-30
Instrument Panel Cluster
............................... -3-31
Speedometer and Odometer
........................... 3-32
I acnorneier .-..
Safety Belt Reminder Light ............................. 3-33
Air Bag Readiness Light
................................ 3-34
Battery Warning Light
.................................... 3.35
Brake System Warning Light
.......................... 3.35
Anti-Lock Brake System Warning Light
............. 3-36
- n no .................................................
Traction Control System (TCS) Warning Light ... 3.37
Traction Control System Active Light
............... 3.38
Engine Coolant Temperature Gage
.................. 3.38
Oil Pressure Light
......................................... 3.42
Cruise Control Light
...................................... 3.43
Fuel Gage
................................................... 3.44
Driver Information Center
(DIC) ....................... 3.45
DIC Warnings and Messages
......................... 3.50
DIC Vehicle Personalization
............................ 3.52
Audio System(s)
............................................. 3.59
Setting the Time
........................................... 3.59
Radio with Cassette and CD
.......................... 3.60
Navigation/Radio System
............................... 3.69
Trunk-Mounted CD Changer
........................... 3-70
Personal Choice Radio Controls
...................... 3.73
Theft-Deterrent Feature
.................................. 3.73
Audio Steering Wheel Controls
....................... 3.74
Care of Your Cassette Tape Player
................. 3-74
Care of Your CDs
......................................... 3-75
Care
of Your CD Player ................................ 3-76
Malfunction Indicator
Lamp
............................. 3.39
I I...I-.-L--A.- ... n,.-J:, n-, --+in- VI luel awl lull ty I laulu I IGL, G~LIUI I u 1 T '2 7A ......................
Diversity Antenna System .............................. 3.76
Chime Level Adjustment
............................... -3-76
3-
1
ProCarManuals.com
Page 119 of 387

Turn SignaVMultifunction Lever
I
The lever on the left side of the steering column
includes the following:
Turn and Lane-Change Signals
Headlamp High/Low-Beam Changer
Flash-To-Pass
For information on exterior lamps, see “Exterior Lamps”
later in this section.
Turn and Lane-Change Signals
The turn signal has two upward (for right) and two
downward (for left) positions. These positions allow you
to signal either a turn or a lane change.
To signal a turn, move the lever all the way up or down.
When the turn is finished, the lever will return
automatically.
An arrow on the instrument panel cluster will flash in
the direction of the
turn or lane change.
To signal a lane change, just raise or lower the lever
until the arrow starts to flash. Hold
it there until you
complete your lane change. The lever will return
by itself
when you release it.
3-6
ProCarManuals.com
Page 120 of 387

As you signal a turn or a lane change, if the arrows
flash very fast, a bulb may be burned out and
other drivers won’t see your turn signal.
If a bulb is burned out, replace
it to help avoid an
accident.
If the arrows don’t go on at all when you signal a turn,
check the fuse (see
Fuses and Circuit Breakers on
page
5-92 ) and check for burned-out bulbs.
Turn Signal On Chime
If your turn signal is left on for more than 0.8 miles
(1.3 km), a chime will sound at each flash of the turn
signal and the DIC will display the TURN SIGNAL
ON?
reminder message. To turn off the chime and
message, move the turn signal lever to the
off position.
To turn off the DIC message while the turn signal is
still active, press any button on the DIC. See
Driver
information Center (DE) on page 3-45 for more
information.
Headlamp High/Low-Beam Changer
To change the headlamps from low beam to high, push
the lever away from you until you hear a click. Then
release it.
When the high beams are
on, this light on the
instrument panel cluster
will also be on.
If the fog lamps are on when you turn on the high-beam
headlamps, the fog lamps will turn
off. The fog lamps
will turn back on when you turn
off the high-beam
headlamps.
3-7
ProCarManuals.com
Page 179 of 387
< SEEK > : Your tape must have at least three
seconds of silence between each selection for seek to
work. Press the right or the left arrow to search for
the next or the previous selection on the tape. You can
skip as many as nine selections up or down on the
tape. Choose how many selections you want to skip,
then press the right or left
SEEK arrows that many
times. The number of selections to be skipped
will appear on the display.
< SCAN > : Press and hold either arrow for more
than two seconds until you hear a beep and SCAN
appears on the display. The tape will go to the next
selection, play for a few seconds, then
go on to the next
selection. Press this button again to stop scanning.
BAND: Press this button to listen to the radio when a
cassette tape is playing. The tape will stop but remain in
the player.
TP CD (TAPE): Press this button to play a cassette
tape or a CD when listening to the radio. Press TP CD
to switch between the tape and compact disc
if both
are loaded. The inactive tape or CD will remain safely
inside the radio for future listening. The display will
show the TAPE and CD symbols.
If you have the optional CD changer and it is loaded,
the TP CD button will activate the changer and a symbol
will be lit on the display.
A (Eject): Press this button, located next to the
cassette tape slot, to eject a tape. Eject may be
activated with either the ignition or radio
off. Cassettes
may be loaded with the radio and ignition
off if this
button is pressed first.
Cassette Tape Messages
If an error occurs while trying to play a cassette tape, it
could be for one of the following reasons:
TIGHT TAPE: When this message is displayed, the
tape
is tight and the player can’t turn the tape hubs.
Remove the tape. Hold the tape with the open end down
and try
to turn the right hub counterclockwise with a
pencil. Turn the tape over and repeat. If the hubs do not
turn easily, your tape may be damaged and should
not be used in the player. Try a new tape to make sure
your player is working properly.
BROKEN TAPE: If this message is displayed, the tape
is broken. Try a new tape.
WRAPPED: When this message is displayed, the tape
is wrapped around the tape head. Attempt to get the
cassette out. Try a new tape.
3-66
ProCarManuals.com
Page 181 of 387
< SCAN > : Press and hold either arrow for more
than two seconds until you hear a beep and SCAN
appears on the display. The disc will go to the next
track, play for a few seconds, then go on to the
next track. SCAN and the track number will appear on
the display. Press this button again to stop scanning.
RCL (Recall): Press this knob to see how long the
current track has been playing. To change what
is normally shown on the display (track or elapsed
time), press the knob until you see the display you want,
then hold the knob until the display flashes. While
elapsed time is showing,
EL TM will appear on the
display.
BAND: Press this button to listen to the radio when a
CD is playing.
TP CD (Tape): Press this button to play a cassette
tape or a CD when listening to the radio. Press TP CD
to switch between the tape and compact disc
if both
are loaded. The inactive tape or CD will remain safely
inside the radio for future listening. The display will
show the TAPE and CD symbols.
A (Eject): Press this button to eject a CD. Eject may
be activated with either the ignition or radio
off. CDs
may be loaded with the radio and ignition
off if this
button
is pressed first.
Compact Disc Messages
CHECK CD: If this message appears on the radio
display and the disc comes out, it could be for one
of
the following reasons:
You’re driving on a very rough road. When the road
The disc is dirty, scratched, wet or upside down.
The air is very humid. If so, wait about an hour and
becomes smoother,
the disc should play.
try again.
If the CD is not playing correctly, for any other reason,
try a known good CD.
If any error occurs repeatedly or if an error can’t be
corrected, contact your dealer.
If your radio displays an
error message, write it down and provide it to your
dealer when reporting the problem.
If you have the optional CD changer and the CD
changer is loaded, the TP CD button will activate the
changer and a symbol will be lit in the display.
3-68
ProCarManuals.com
Page 183 of 387
Trunk-Mounted CD Changer
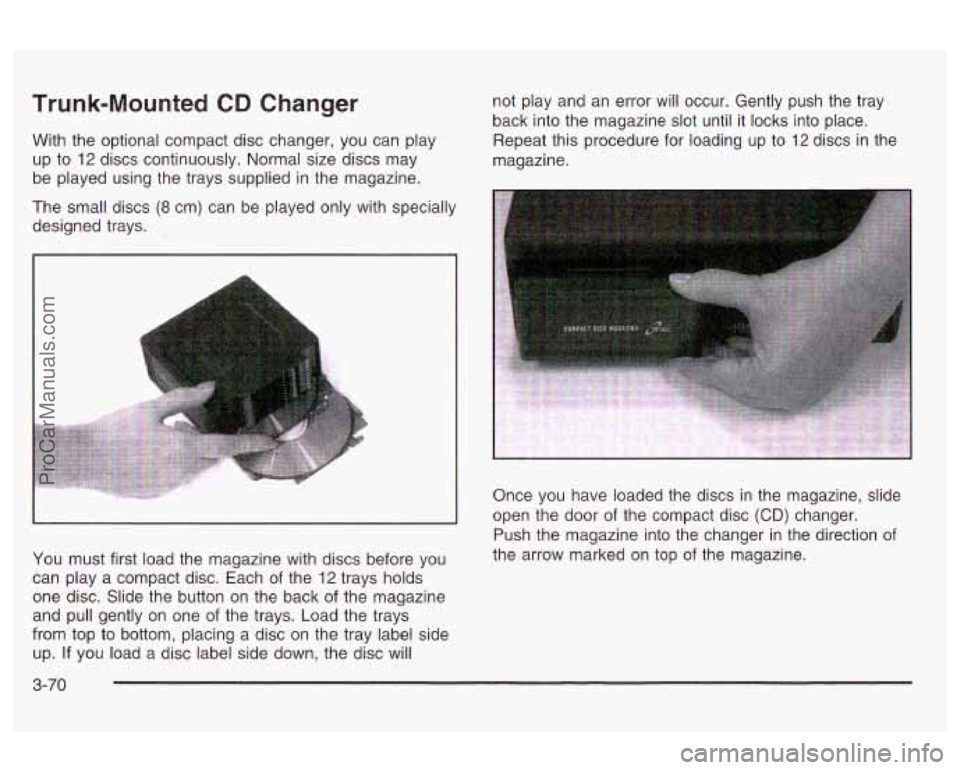
With the optional compact disc changer, you can play
up to
12 discs continuously. Normal size discs may
be played using the trays supplied in the magazine.
The small discs
(8 cm) can be played only with specially
designed trays. not play
and an error
will occur. Gently push the tray
back into the magazine slot until it locks into place.
Repeat this procedure for loading up to
12 discs in the
magazine.
You must first load the magazine with discs before you
can play a compact disc. Each
of the 12 trays holds
one disc. Slide the button on the back of the magazine
and pull gently on one of the trays. Load the trays
from top to bottom, placing a disc on the tray label side
up.
If you load a disc label side down, the disc will Once you have loaded
the discs in the magazine, slide
open the door of the compact disc
(CD) changer.
Push the magazine into the changer in the direction of
the arrow marked on top of the magazine.
3-70
ProCarManuals.com
Page 184 of 387
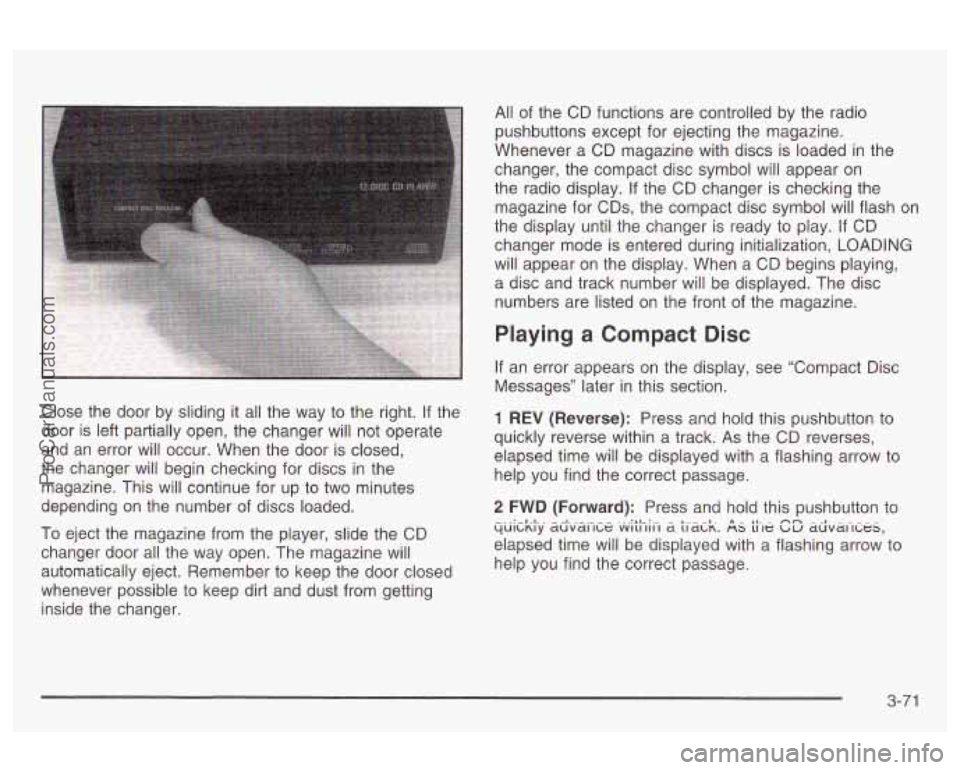
Close the door by sliding it all the way to the right. If the
door is left partially open, the changer will not operate
and an error will occur. When the door is closed,
the changer will begin checking for discs in the
magazine. This will continue for up to two minutes
depending on the number of discs loaded.
To eject the magazine from the player, slide the CD
changer door all the way open. The magazine will
automatically eject. Remember to keep the door closed
whenever possible to keep dirt and dust from getting
inside the changer. All
of the CD functions are controlled by the radio
pushbuttons except for ejecting the magazine.
Whenever a CD magazine with discs is loaded in the
changer, the compact disc symbol will appear on
the radio display. If the CD changer is checking the
magazine for CDs, the compact disc symbol will flash on
the display until the changer is ready to play.
If CD
changer mode is entered during initialization, LOADING
will appear on the display. When a CD begins playing,
a disc and track number will be displayed. The disc
numbers are listed on the front
of the magazine.
Playing a Compact Disc
If an error appears on the display, see “Compact Disc
Messages” later in this section.
1 REV (Reverse): Press and hold this pushbutton to
quickly reverse within a track. As the CD reverses,
elapsed time will be displayed with a flashing arrow to
help you find the correct passage.
2 FWD (Forward): Press and hold this pushbutton to
elapsed time will be displayed with a flashing arrow to
help you find the correct passage. ac;.v.ai7G~e .“.vjt;-,ji-l a ti.&-..k. A& $-le cE ad.v.ai-,c;es,
3-7 1
ProCarManuals.com
Page 185 of 387
4 RDM (Random): Press this pushbutton to play the
tracks on the discs in random, rather than sequential,
order. If you press
SEEK while in the random mode,
discs and tracks will be scanned randomly. Press this
button again
to turn off the random feature and return to
normal operation.
5 SIDE: Press this pushbutton to select the next disc in
the magazine. Each time you press SIDE, the disc
number will be displayed.
RCL (Recall): Press this knob to see what track is
currently playing. Press RCL again within five seconds
to see how long the track has been playing. EL TM
will appear on the display when in elapsed time mode.
When a new track starts
to play, the track number
will also appear. Press RCL a third time and the time of
day will be displayed.
< SEEK > : Press the right or the left arrow to go to
the next or
to the previous tracks on the disc.
< SCAN > : Press and hold the right arrow until
SCAN appears on the display. The disc will scan to the
next track, play for a few seconds, then go on to the
next track. Press this button again to stop scanning.
To scan a few seconds of each loaded disc, press and
hold the right arrow for two seconds until P SCAN
appears on the display. Press SCAN again to stop
scanning. AM FM:
Press this button to listen to the radio when
a
CD is playing.
TP/CD (Tape): Press this button
to play a CD when
listening to the radio. You can also press this button to
switch between playing a cassette tape, a CD and
the CD changer.
Compact Disc Errors
If an error appears on the display, an error has occurred
and the compact disc temporarily cannot play.
The CD changer will send an error message to the
receiver to indicate:
PLAYER OPEN: CD Changer Door Open.
Completely close the door
to restore normal
operation.
NO CD’S: CD Changer Cartridge Empty. Try the
magazine again with a disc loaded on one of
the trays.
CHECK CD
#: If this error message is displayed while
trying to play a CD in the compact disc player or
changer, the following conditions may have caused the
error:
You’re driving on a very rough road. When the road
The disc is dirty, scratched, wet or upside down.
The air is very humid. If so, wait about an hour and
becomes smoother
the disc should play.
try again.
3-72
ProCarManuals.com
Page 187 of 387
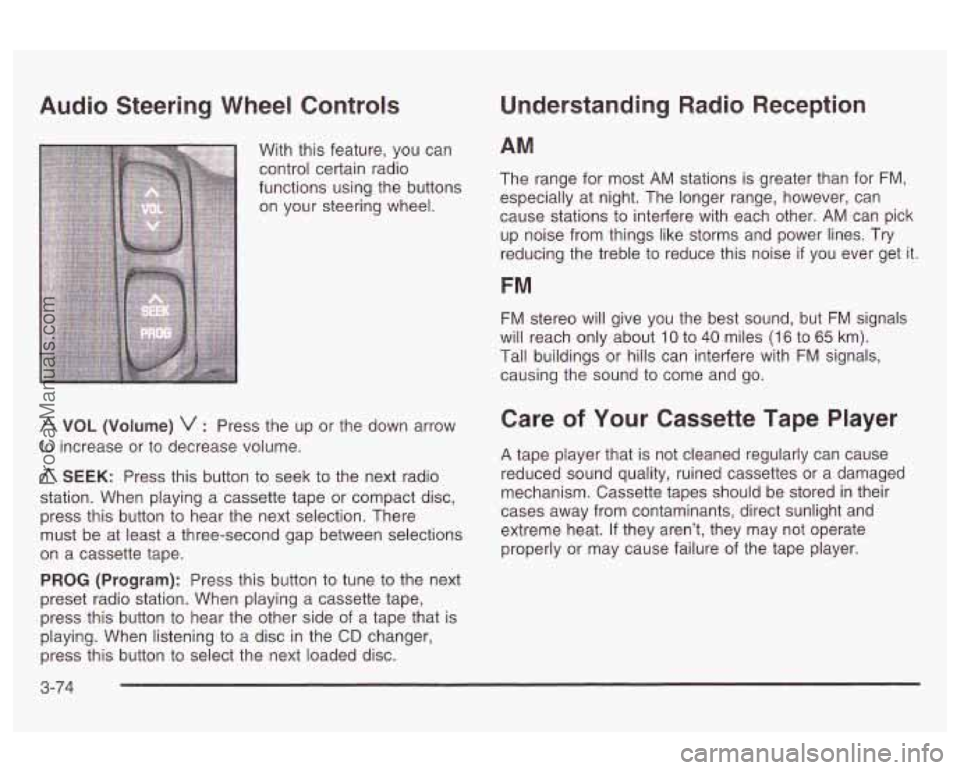
Audio Steering Wheel Controls
With this feature, you can
control certain radio
functions using the buttons
on your steering wheel.
A VOL (Volume) v : Press the up or the down arrow
to increase or to decrease volume.
A SEEK: Press this button to seek to the next radio
station. When playing a cassette tape or compact disc,
press this button to hear the next selection. There
must be at least a three-second gap between selections
on a cassette tape.
PROG (Program): Press this button to tune to the next
preset radio station. When playing a cassette tape,
press this button
to hear the other side of a tape that is
playing. When listening to a disc in the
CD changer,
press this button to select the next loaded disc.
Understanding Radio Reception
AM
The range for most AM stations is greater than for FM,
especially at night. The longer range, however, can
cause stations
to interfere with each other. AM can pick
up noise from things like storms and power lines.
Try
reducing the treble to reduce this noise if you ever get it.
FM
FM stereo will give you the best sound, but FM signals
will reach only about
10 to 40 miles (1 6 to 65 km).
Tall buildings or hills can interfere with
FM signals,
causing the sound to come and go.
Care of Your Cassette Tape Player
A tape player that is not cleaned regularly can cause
reduced sound quality, ruined cassettes or a damaged
mechanism. Cassette tapes should be stored in their
cases away from contaminants, direct sunlight and
extreme heat.
If they aren’t, they may not operate
properly or may cause failure of the tape player.
3-74
ProCarManuals.com
Page 364 of 387

Accessory Power Outlets ................................. 3-21
Adding Washer Fluid
....................................... 5-38
Additional Program Information
........................... 7-8
Additives, Fuel
................................................. 5-6
Add-on Electrical Equipment
............................ 5-91
Adjusting the Speakers (Balance/Fade)
.............. 3-62
Air Bag
Readiness Light
.......................................... 3-34
Air Bag Systems
............................................. 1-47
How Does an Air Bag Restrain? .................... 1-52
Servicing Your Air Bag-Equipped Vehicle
......... 1-54
What Makes an Air Bag Inflate?
.................... 1-52
What Will You See After an Air Bag Inflates? ...... 1-52
When Should an Air Bag Inflate?
................... 1-51
Where Are the Air Bags?
.............................. 1-49
Air CleanedFilter, Engine
................................. 5-21
All Overseas Locations
...................................... 7-4
Aluminum or Chrome-Plated Wheels
.................. 5-86
Antenna, Diversity
........................................... 3-76
Anti-Lock Brake, System Warning Light
.............. 3-36
Appearance Care
............................................ 5-82
Care
of Safety Belts .................................... 5-84
AM
............................................................... 3-74
r-11 It1-Iucln u1anG \JYQLGI II
uw) f-r A,-.+: I ,.-I, D.-~.I,A C?.,-+A- /A DC A7 ...........................
Appearance Care (cont.)
Chemical Paint Spotting
............................... 5-87
Cleaning the inside of Your Vehicle
................ 5-82
Cleaning the Outside of Your Vehicle
.............. 5-85
Finish Damage
............................................ 5-87
GM Vehicle Care/Appearance Materials
.......... 5-88
Sheet Metal Damage
................................ 5-87
Underbody Maintenance
........ ........ 5-87
Weatherstrips
........................... .... 5-84
Ashtrays
..................................... ........ 3-22
Assist Handles
............................................... 2-45
Audio System(s)
............................................. 3-59
Audio Systems
Audio Steering Wheel Controls
...................... 3-74
Care of Your Cassette Tape Player
................ 3-74
Care of Your CD Player
............................... 3-76
Care of Your CDs
........................................ 3-75
Chime Level Adjustment
............................... 3-76
Diversity Antenna System
............................. 3-76
NavigatiodRadio System
.............................. 3-69
Personal Choice Radio Controls
.................... 3-73
Radio with Cassette and CD
......................... 3-60
~eLlilly LIIt: I It lit3 3-a3
Theft-Deterrent Feature ................................ 3-73
Trunk-Mounted CD Changer
.......................... 3-70
Understanding Radio Reception
..................... 3-74
0 -LA:.- - . &I- - -r:.-- n rn ..........................................
1
ProCarManuals.com