warning lights OLDSMOBILE AURORA 2003 Owners Manual
[x] Cancel search | Manufacturer: OLDSMOBILE, Model Year: 2003, Model line: AURORA, Model: OLDSMOBILE AURORA 2003Pages: 387, PDF Size: 18.05 MB
Page 2 of 387
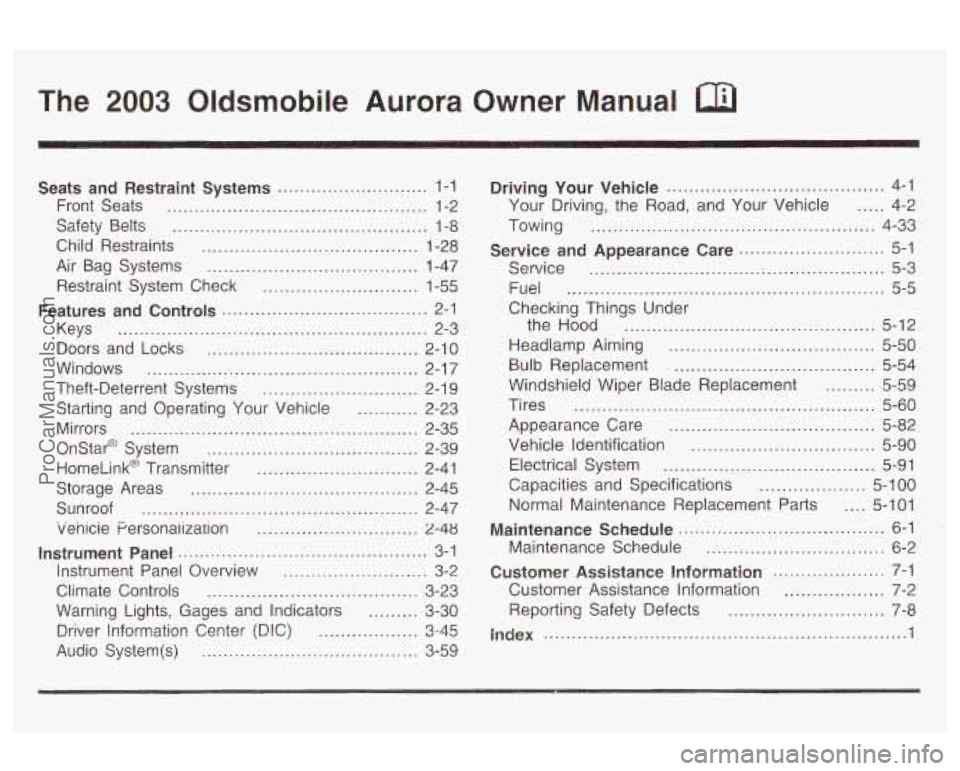
The 2003 Oldsmobile Aurora Owner Manual
Seats and Restraint Systems ........................... 1-1
Front Seats
............................................... 1-2
Safety Belts
.............................................. 4 -8
Child Restraints
....................................... 1-28
Air Bag Systems
...................................... 1-47
Restraint System Check
............................ 1-55
Features and Controls ..................................... 2-1
Keys
........................................................ 2-3
Doors and Locks
...................................... 2-10
Windows
................................................. 2-1 7
Theft-Deterrent Systems ............................ 2-1 9
Starting and Operating Your Vehicle
........... 2-23
Mirrors
.................................................... 2-35
Onstar@ System
...................................... 2-39
HomeLink@ Transmitter
............................. 2-41
Storage Areas
......................................... 2-45
Sunroof
.................................................. 2-47
venicie Personaiization
............................. 2-48
Instrument Panel ............................................. 3-1
Instrument Panel Overview
.......................... 3-2
Climate Controls
...................................... 3-23
Warning Lights, Gages and Indicators
......... 3-30
D!%%?r !!?formatior! Center (D!C) .................. u 12-AK -rJ
Audio System(s) ....................................... 3-59 Driving
Your Vehicle
....................................... 4-1
Your Driving. the Road. and Your Vehicle
..... 4-2
Service and Appearance Care
.......................... 5-1
Towing
................................................... 4-33
Service
............................... ;. .................... 5-3
Fuel
......................................................... 5-5
Checking Things Under
the Hood
............................................. 5-12
Headlamp Aiming
..................................... 5-50
Windshield Wiper Blade Replacement
= ~ iI I I 5-59
Tires ...................................................... 5-60
Appearance Care
..................................... 5-82
Vehicle Identification
................................. 5-90
Electrical System
...................................... 5-91
Capacities and Specifications
................... 5-1 00
Maintenance Schedule ..................................... 6-1
Maintenance Schedule ................................ 6-2
Customer Assistance Information
.................... 7-1
Customer Assistance Information
.................. 7-2
Bulb
Replacement
.................................... 5-54
Normal Maintenance Replacement Parts
.... 5-101
Reporting Safety Defects
............................ 7-8
I-- -I ~ a lnQex ................................................................. 1
ProCarManuals.com
Page 5 of 387
Vehicle Damage Warnings
Also, in this book you will find these notices:
Notice: These mean there is something that could
damage your vehicle.
A notice will tell you about something that can damage
your vehicle. Many times, this damage would not be
covered by your warranty, and it could be costly. But the
notice will tell you what to do to help avoid the
damage.
When you read other manuals, you might see CAUTION
and NOTICE warnings
in different colors or in different
words.
You’ll also see warning labels on your vehicle. They use
the same words, CAUTION or NOTICE.
Vehicle Symbols
Your vehicle may be equipped with components and
labels that use symbols instead of text. Symbols, used
on your vehicle, are shown along with the text
describing the operation or information relating to a
specific component, control, message, gage or indicator.
If you need help figuring out a specific name of a
component, gage or indicator reference the following
topics in the Index:
“Engine Compartment Overview”
“Instrument Panel Overview”
“Climate Controls”
“Audio Systems”
Also see
Warning Lights, Gages and Indicators on
page
3-30.
iv
ProCarManuals.com
Page 87 of 387
ACC (Accessory): This position lets you use your
electrical accessories such as power windows, power
sunroof (option), radio and the windshield wipers.
ON: This is the position the switch returns to after you
start your engine and release the switch. This is the
position for normal driving. Even when the engine is not
running, you can use
ON to operate your electrical
accessories and
to display some instrument panel
warning lights.
START: This position starts your engine. When the
engine starts, release the key. The ignition switch will
return
to ON for normal driving.
Key Reminder Warning
If you leave your key in the OFF ignition position, you
will hear a warning chime when you open the
driver’s door.
Always leave your key in
OFF. If you leave it in any
other position, you will drain the battery power.
Retained Accessory Power (RAP)
After you turn the ignition off and remove the key, you
will still have power
to accessories such as the
power windows, audio steering wheel controls, clock,
sunroof (option), accessory power outlet and the
radio for up
to 10 minutes. The instrument panel cluster
lights will stay on for
a few seconds, then go out.
Once you open a door, the power will shut off.
Starting Your Engine
Move your shift lever to PARK (P) or NEUTRAL (N).
Your engine won’t start in any other position
- that’s a
safety feature. To restart when you’re already moving,
use NEUTRAL
(N) only.
Notice: Don’t try to shift to PARK (P) if your
vehicle is moving.
If you do, you could damage the
transaxle. Shift to PARK (P) only when your
vehicle is stopped.
1. With your foot off the accelerator pedal, turn your
ignition key
to START. When the engine starts, let
go of the key. The idle speed will go down as
your engine gets warm.
Notice: Holding your key in START for longer than
15 seconds at a time will cause your battery to
be drained much sooner. And the excessive heat
can damage your starter motor. Wait about
15
seconds between each try to help avoid draining
your battery
or damaging your starter.
2. If it doesn’t start within 10 seconds, hold your key in
START for about
10 seconds at a time until your
engine starts. Wait about
15 seconds between
each
try.
2-24
ProCarManuals.com
Page 114 of 387
3 Instrument Panel
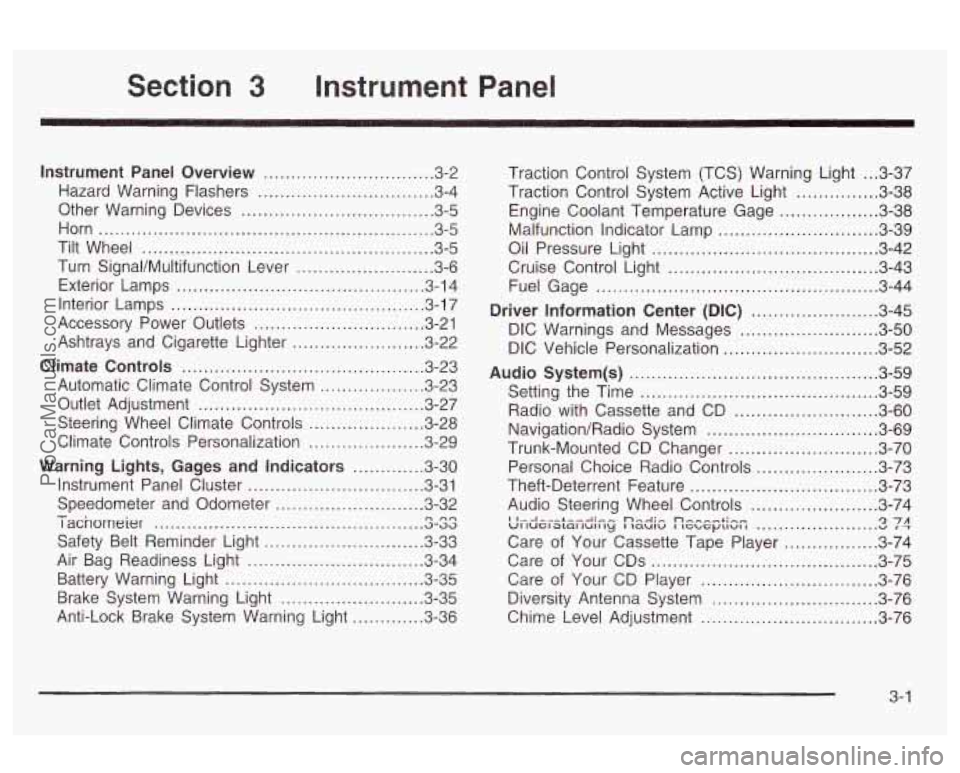
Instrument Panel Overview .............................. -3-2
Hazard Warning Flashers
................................ 3-4
Other Warning Devices
................................... 3-5
Horn
............................................................. 3-5
Tilt Wheel
..................................................... 3-5
Turn SignaVMultifunction Lever
......................... 3-6
Exterior Lamps
............................................. 3-14
Interior Lamps
.............................................. 3-17
Accessory Power Outlets
............................... 3-21
Ashtrays and Cigarette Lighter
........................ 3-22
Climate Controls
............................................ 3.23
Automatic Climate Control System
.................. 3-23
Outlet Adjustment
......................................... 3-27
Steering Wheel Climate Controls
..................... 3-28
Climate Controls Personalization
..................... 3.29
Warning Lights, Gages and Indicators
............. 3-30
Instrument Panel Cluster
............................... -3-31
Speedometer and Odometer
........................... 3-32
I acnorneier .-..
Safety Belt Reminder Light ............................. 3-33
Air Bag Readiness Light
................................ 3-34
Battery Warning Light
.................................... 3.35
Brake System Warning Light
.......................... 3.35
Anti-Lock Brake System Warning Light
............. 3-36
- n no .................................................
Traction Control System (TCS) Warning Light ... 3.37
Traction Control System Active Light
............... 3.38
Engine Coolant Temperature Gage
.................. 3.38
Oil Pressure Light
......................................... 3.42
Cruise Control Light
...................................... 3.43
Fuel Gage
................................................... 3.44
Driver Information Center
(DIC) ....................... 3.45
DIC Warnings and Messages
......................... 3.50
DIC Vehicle Personalization
............................ 3.52
Audio System(s)
............................................. 3.59
Setting the Time
........................................... 3.59
Radio with Cassette and CD
.......................... 3.60
Navigation/Radio System
............................... 3.69
Trunk-Mounted CD Changer
........................... 3-70
Personal Choice Radio Controls
...................... 3.73
Theft-Deterrent Feature
.................................. 3.73
Audio Steering Wheel Controls
....................... 3.74
Care of Your Cassette Tape Player
................. 3-74
Care of Your CDs
......................................... 3-75
Care
of Your CD Player ................................ 3-76
Malfunction Indicator
Lamp
............................. 3.39
I I...I-.-L--A.- ... n,.-J:, n-, --+in- VI luel awl lull ty I laulu I IGL, G~LIUI I u 1 T '2 7A ......................
Diversity Antenna System .............................. 3.76
Chime Level Adjustment
............................... -3-76
3-
1
ProCarManuals.com
Page 143 of 387
Warning Lights, Gages and Indicators
This part describes the warning lights and gages that
may be on your vehicle. The pictures will help you
locate them.
Warning lights and gages can signal that something is
wrong before it becomes serious enough to cause
an expensive repair or replacement. Paying attention to
your warning lights and gages could also save you
or others from injury.
Warning lights come on when there may be or is a
problem with one of your vehicle’s functions.
As you will
see in the details on the next few pages, some
warning lights come on briefly when you start the
engine just to let you know they’re working. If you are
familiar with this section, you should not be alarmed
when this happens. Gages can
indicate when there may be or is
a problem
with one of your vehicle’s functions. Often gages
and warning lights work together to let you know when
there’s a problem with your vehicle.
When one of the warning lights comes on and stays on
when you are driving, or when one of the gages
shows there may be a problem, check the section that
tells you what to do about it. Please follow this
manual’s advice. Waiting to do repairs can be
costly
- and even dangerous. So please get to know
your warning lights and gages. They’re a big help.
Your vehicle has a Driver Information Center (DIC) that
works along with the warning lights and gages. See
Driver Information Center (DIC) on page 3-45.
3-30
ProCarManuals.com
Page 144 of 387
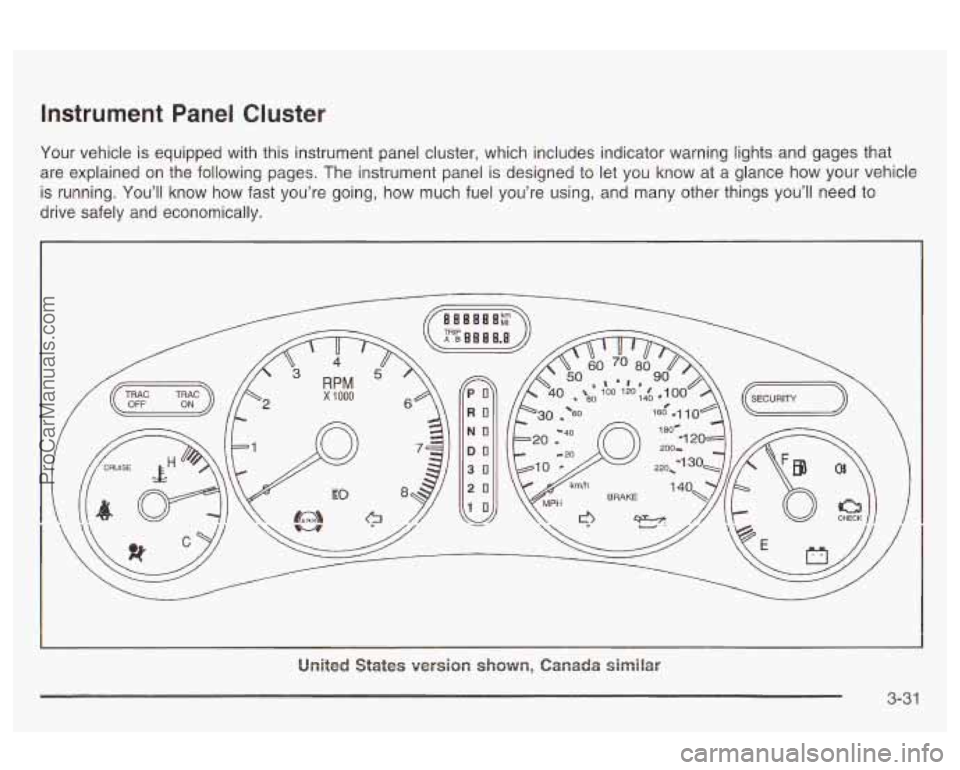
Instrument Panel Cluster
Your vehicle is equipped with this instrument panel cluster, which includes indicator warning lights and gages that
are explained on the following pages. The instrument panel is designed to let you know at a glance how your vehicle
is running. You’ll know how fast you’re going, how much fuel you’re using, and many other things you’ll need to
drive safely and economically.
PO
RO
NO
DO
30
20
10
United States version shown, Canada similar
3-3 1
ProCarManuals.com
Page 257 of 387

How to Add Fluid Engine Coolant
Refer to the Maintenance Schedule to determine what
kind of transaxle fluid to use. See
Part D:
Recommended Fluids and Lubricants on page 6-15.
If the fluid level is low, add only enough of the proper
fluid to bring the level into the cross-hatched area on the
dipstick.
1, Pull out the dipstick.
2. Using a long-neck funnel, add enough fluid at the
dipstick hole to bring it to the proper level.
It doesn’t take much fluid, generally less than one
pint
(0.5 L). Don’t overfill.
Notice: We recommend you use only fluid labeled
DEXRON@-Ill, because fluid with that label is
made especially for your automatic transaxle.
Damage caused by fluid other than DEXRON@-Ill is
not covered by your new vehicle warranty.
3. After adding fluid, recheck the fluid level as
described under “How to Check,” earlier in this
section. The
cooling system in your vehicle is filled with
DEX-COOL@ engine coolant. This coolant is designed
to remain in your vehicle for
5 years or 150,000 miles
(240
000 km), whichever occurs first, if you add
only extended life coolant.
The following explains your cooling system and how to
add coolant when it is
low. If you have a problem
with engine overheating, see
Engine Overheating on
page
5-28.
A 50/50 mixture of clean, drinkable water and
DEX-COOL@ coolant will:
Give freezing protection down to -34°F (-37°C).
Give boiling protection up to 265°F (129°C).
Protect against rust and corrosion.
Help keep the proper engine temperature.
Let the warning lights and gages work as they
should.
4. When the correct fluid level is obtained, push the
dipstick back in all the way.
5-24
ProCarManuals.com
Page 378 of 387

Trip Odometers .............................................. 3-32 Vehicle Personalization
Trunk
............................................................ 2-14 DIC ........................................................... 3-52
Trunk Lock Release
........................................ 2-15 Memory Seat and Mirrors ............................. 2-48
Trunk Release Lockout
.................................... 2-15 Vehicle Storage .............................................. 5-43
Turn and Lane-Change Signals
.......................... 3-6 Ventilation Adjustment ...................................... 3-27
Turn Signal/Multifunction Lever
........................... 3-6 Vinyl ............................................................. 5-83
Turn Signals When Towing a Trailer
.................. 4-41 Visors ........................................................... 2-18
U
Underbody Flushing Service ............................. 6-1 2
Understanding Radio Reception
........................ 3-74
Uniform Tire Quality Grading
............................ 5-67
United States
................................................... 7-4
Used Replacement Wheels
.............................. 5-69
Using HomeLink@
........................................... 2-44
Using RDS
.................................................... 3-62
v
Vehicle
Cnntrc\! ........................................................ 4-5
Damage Warnings ........................................... iv
Loading
...................................................... 4-34
Symbols
......................................................... iv
Number
(VIN) ............................................. 5-90
Service Parts Ideniification Label ................... 5-90
Vehicle Identification Warning
Lights. Gages and Indicators
................ 3-30
Warnings DIC Warnings and Messages
........................ 3-50
Hazard Warning Flashers
............................... 3-4
Safety and Symbols
......................................... III
Vehicle Damage .............................................. iv
Washing Your Vehicle
................................... 5-85
Other Warning
Devices
.................................. 3-5 ...
Weatherstrip Lubrication ..... .................... 6-10
Weight of the Trailer
......................... .... 4-38
Weight of the Trailer Tongue
............................. 4-38
What Kind of Engine Oil to Use
........................ 5-18
What to Do with Used Oil ................................ 5-20
What to Use .................................. 5-25, 5-37, 5-38
Wheels
Alignment and Tire Balance
.......................... 5-68
Replacement
............................................... 5-68
LVher; to Add Efigine Oil 1747 ..................................
15
ProCarManuals.com