lock OLDSMOBILE BRAVADA 1996 Workshop Manual
[x] Cancel search | Manufacturer: OLDSMOBILE, Model Year: 1996, Model line: BRAVADA, Model: OLDSMOBILE BRAVADA 1996Pages: 340, PDF Size: 17.49 MB
Page 148 of 340

Q.’ What should I do if my vehicle stalls, or is about
A: If this happens, there are some things you should
to stall, and I can’t make it up the hill?
0
0
0
0
do, and there are some things you must not do.
First, here’s what you
should do:
Push the brake pedal to stop the vehicle and keep
it
from rolling backwards. Also, apply the parking brake.
If your engine is still running, shift the transmission
to REVERSE (R), release the parking brake, and
slowly back down the hill in REVERSE
(R).
If your engine has stopped running, you’ll need to
restart
it. With the brake pedal depressed and the
parking brake still applied, shift the transmission to
PARK (P) and restart the engine. Then, shift
to
REVERSE (R), release the parking brake, and
slowly back down the hill as straight as possible
in
REVERSE (R).
As you are backing down the hill, put your left hand
on the steering wheel at the 12 o’clock position. This
way, you’ll be able to tell
if your wheels are straight
and maneuver as you back down. It’s best that you
back down the
hill with your wheels straight rather
than in the left or right direction. Turning the wheel
too far to the
left or right will increase the possibility
of a rollover. Here are some things
you
must not do if you stall, or are
about
to stall, when going up a hill.
Never attempt to prevent a stall by shifting into
NEUTRAL
(N) to “rev-up7’ the engine and regain
forward momentum. This won’t work. Your vehicle
will roll backwards very quickly and you could go
out
of control.
Instead, apply the regular brake to stop the
vehicle. Then apply the parking brake. Shift to
REVERSE (R), release the parking brake, and
slowly back straight down.
Never attempt to turn around if you are about to stall
when going up a
hill. If the hill is steep enough to
stall your vehicle, it’s steep enough to cause you to
roll over
if you turn around. If you can’t make it up
the hill, you must back straight down the hill.
Suppose, after stalling, I try to back down the hill
and decide
I just can’t do it. What should I do?
A: Set the parking brake, put your transmission in
PARK (P) and
turn off the engine. Leave the
vehicle and go get some help. Exit on the uphill
side and stay clear of the path the vehicle would
take if it rolled downhill.
ProCarManuals.com
Page 166 of 340

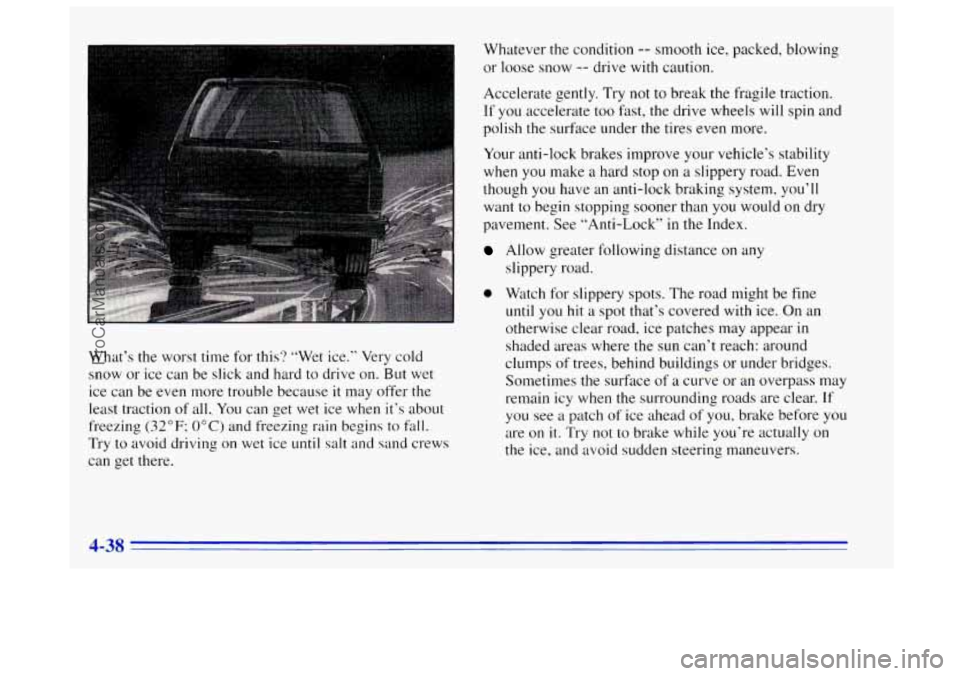
What’s the worst time for this? “Wet ice.’’ Very cold
snow or ice can be slick and hard
to drive on. But wet
ice can be even more trouble because it may offer the
least traction of all.. You can get wet ice when it’s about
freezing
(32°F; OOC) and freezing rain begins to fall.
Try to avoid driving on wet ice until salt and sand crews
can get there. Whatever
the condition -- smooth ice, packed, blowing
or loose snow -- drive
with caution.
Accelerate gently. Try
not to break the fragile traction.
If you accelerate too fast, the drive wheels will spin and
polish
the surface under the tires even more.
Your anti-lock brakes improve your vehicle’s stability
when
you make a hard stop on a slippery road. Even
though you have an anti-lock braking system, you’ll
want to begin stopping sooner than you would on dry
pavement. See “Anti-Lock” in the Index.
Allow greater following distance on any
slippery road.
0 Watch for slippery spots. The road might be fine
until you
hit a spot that’s covered with ice. On an
otherwise clear road, ice patches may appear in
shaded areas where the sun can’t reach: around
clumps of trees, behind buildings or under bridges.
Sometimes the surface
of a curve or an overpass may
remain icy when the surrounding roads are clear. If
you see a patch of ice ahead of you, brake before you
are on
it. Try not to brake while you’re actually on
the ice, and avoid sudden steering maneuvers.
ProCarManuals.com
Page 168 of 340

A CAUTIOh:
- -
Snow can trap exhaust gases under your vehicle.
This can cause deadly
CO (carbon monoxide) gas
to get inside.
CO could overcome you and kill
you.
You can’t see it or smell it, so you might not
know it is in your vehicle. Clear away snow from
around the base
of your vehicle, especially any
that is blocking your exhaust pipe. And check
around again from time to time to be sure snow
doesn’t collect there.
Open
a window just a little on the side of the
vehicle that’s
away from the wind. This will help
keep CO out. Run
your engine
only as long as you must. This saves
fuel. When you run the engine, make it go a little faster
than just idle. That is, push
the accelerator slightly. This
uses less
fuel for the heat that you get and it keeps the
battery charged. You will need a well-charged battery to
restart the vehicle, and possibly for signaling later
on
with your headlamps. Let the heater run for awhile.
Then, shut the engine off and close the window almost
all the way to preserve the heat. Start
the engine again
and repeat this only when
you feel really uncomfortable
from the cold. But do it
as little as possible. Preserve the
fuel as long as you can. To help keep warm, you can get
out of the vehicle and
do some fairly vigorous exercises
every half hour or
so until help comes.
ProCarManuals.com
Page 180 of 340

Trailer Wiring Harness
The light duty trailer wiring is a six-wire harness
assembly. The optional heavy duty trailer wiring is an
eight-wire harness assembly. The harnesses are stored
under the vehicle, on the driver’s side corner frame
crossmember. The heavy duty trailer wiring
has a
30-amp feed wire with an inline fuse located by the
junction block. See “Fuses and Circuit Breakers”
in the
Index. Both harnesses have no connector and should be
wired by a qualified electrical technician. The technician
can use the following color code chart when connecting
the wiring harness to your trailer.
0 DARK BLUE: Use for electric trailer brakes or
auxiliary wiring.
0 RED: Use for battery charging; it connects to the
starter solenoid (eight-wire harness only).
0 LIGHT GREEN: Back-up lamps (eight-wire
harness only).
BROWN: Taillamps and parking lamps.
YELLOW: Left stoplamp and turn signal.
DARK GREEN: Right stoplamp and turn signal.
WHITE (Heavy Gage): Ground wire.
WHITE (Light Gage): Auxiliary stoplamp.
Securely attach the harness to the trailer, then tape or
strap
it to your vehicle’s frame rail. Be sure you leave it
loose enough
so the wiring doesn’t bend or break, but
not
so loose that it drags on the ground. Store the
harness
in its original place. Wrap the harness together
and tie
it neatly so it won’t be damaged.
ProCarManuals.com
Page 187 of 340

1 A CAUTION:
I
~ To help avoid injury to you or others:
0 Never let passengers ride in a vehicle that is
Never tow faster than safe or posted speeds.
Never tow with damaged parts not fully
Never get under your vehicle after it has
Always use separate safety chains on each
Never use J-hooks. Use T-hooks instead.
being
towed.
secured.
been lifted by the tow truck. side when towing a vehicle. I
A CAUTION:
A vehicle can fall from a car carrier if it isn’t
adequately secured. This can cause a collision,
serious personal injury and vehicle damage. The
vehicle should be tightly secured with chains or
steel cables before it
is transported.
Don’t use substitutes (ropes, leather straps,
canvas webbing, etc.) that can be cut by sharp
edges underneath the towed vehicle. Always use
T-hooks inserted in the T-hook slots. Never use
J-hooks. They
will damage drivetrain and
suspension components.
When your vehicle is being towed, have the ignition key
turned to the
OFF position. The steering wheel should
be clamped
in a straight-ahead position with a clamping
device designed for towing service.
Do not use the
vehicle’s steering column lock for this. The transmission
should be
in NEUTRAL (N). The parking brake should
be released.
5-7
ProCarManuals.com
Page 188 of 340

If your vehicle has no electrical power, the electrical
solenoid lock must be overridden to
shift from
PARK
(P) to NEUTRAL (N). Follow these steps:
1. Push the base of the leather shift lever boot forward
with your thumb.
2. Lift the boot and find the white solenoid lever.
3. Move the white
lever toward the
driver’s side to
unlock it.
4. While holding the white solenoid lever in the unlock
position, press the
shift lever button and shift
into NEUTRAL
(N).
5. Release the solenoid lever and snap the boot back
into place.
Don’t have your vehicle towed on the drive wheels
unless you must.
If the vehicle must be towed on the
drive wheels, be sure not to exceed
35 mph (56 km/h)
and not to travel more than
50 miles (80 km) or your
transmission
will be damaged. The drive wheels have to
be supported on a dolly.
ProCarManuals.com
Page 197 of 340

How to Add Coolant to the Radiator
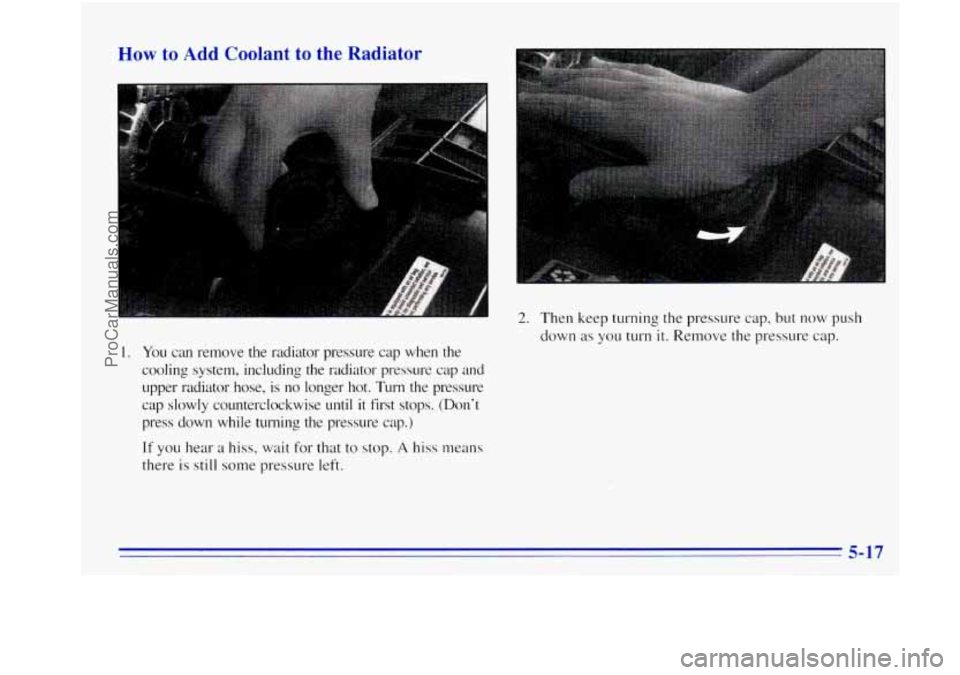
1. You can remove the radiator pressure cap when the
cooling system, including the radiator pressure cap and
upper radiator hose. is no longer hot. Turn the pressure
cap slowly counterclockwise
until it first stops. (Don’t
press down while turning
the pressure cap.)
If you hear a hiss, wait for that to stop. A hiss means
there is still some pressure left.
2. Then keep turning the pressure cap, but now push
down as you
turn it. Remove the pressure cap.
ProCarManuals.com
Page 200 of 340

If a Tire Goes Flat
It’s unusual for a tire to “blow out” while you’re driving,
especially if you maintain your tires properly.
If air goes
out
of a tire, it’s much more likely to leak out slowly.
But if
you should ever have a “blowout,” here are a few
tips about what to expect and what to do:
If
a front tire fails, the flat tire will create a drag that
pulls the vehicle toward that side. Take your foot off the
accelerator pedal and grip the steering wheel
firmly.
Steer to maintain lane position, and then gently brake to
a stop well out of the traffic lane.
A rear blowout, particularly on a curve, acts much like a
skid and may require the same correction you’d use in a
skid. In any rear blowout, remove your foot from the
accelerator pedal. Get the vehicle under control by
steering the way you want the vehicle to go. It may be
very bumpy and noisy, but you can still steer. Gently
brake to a
stop -- well off the road if possible.
If a tire goes flat, the next part shows how to use your
jacking equipment to change a
flat tire safely.
Changing a Flat Tire
If a tire goes flat, avoid further tire and wheel damage
by driving slowly to a level place. Turn on your hazard
warning flashers.
ur
Changing a tire can cause an injury. The vehicle
can slip
off the jack and roll over you or other
people. You and they could be badly injured.
Find a level place to change your tire.
To help
prevent the vehicle from moving:
1. Set the parking brake firmly.
2. Put the shift lever in PARK (P).
3. Turn off the engine.
To be even more certain the vehicle won’t move,
you can put blocks at the front and rear of the
tire farthest away from the one being changed.
That would be the tire
on the other side of the
vehicle, at the opposite end.
ProCarManuals.com
Page 201 of 340

Removing the Spare Tire and Tools
The jacking equipment you'll need is stored along the
driver's rear wall. Your vehicle is also equipped
with
work gloves and a plastic ground mat to assist in the
changing
of a flat tire.
To remove the jack
cover, pull up on
the latch
at the end
of the cover,
near the endgate.
The following steps will tell you how to use the jack and
change
a tire.
Then pull up
on the latch on the top of the cover.
Remove the wheel blocks, jack and wheel wrench.
ProCarManuals.com
Page 202 of 340

The spare tire is stowed under the vehicle.
I NOTICE:
Never remove or restow a tire frondto a stowage
position under the vehicle while the vehicle
is
supported by a jack. Always tighten the tire
fully against the underside of the vehicle when restawing.
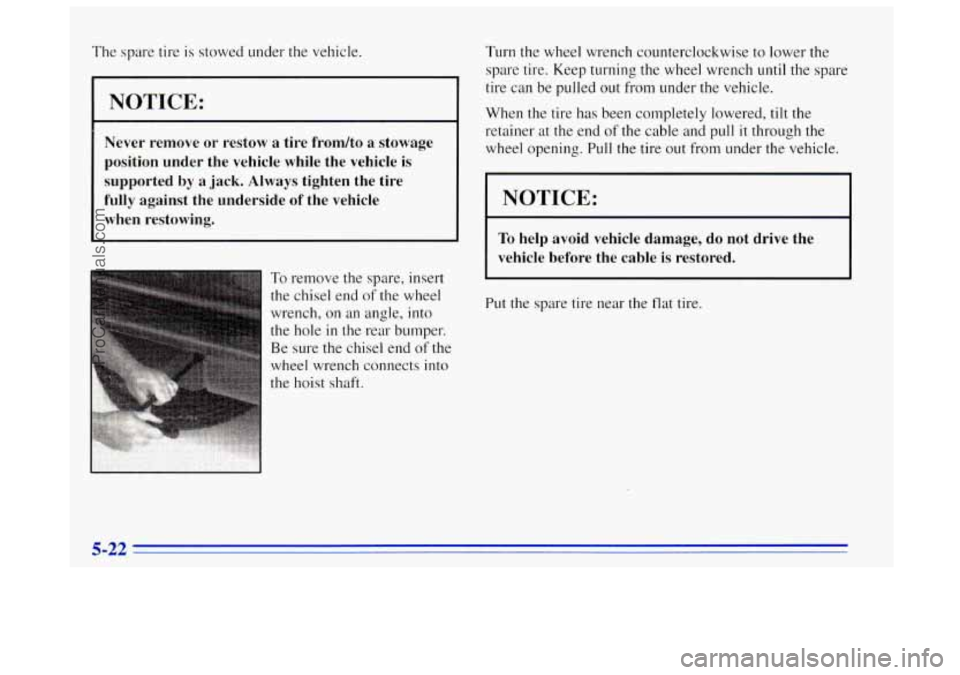
To remove the spare, insert
the chisel end
of the wheel
wrench, on an angle, into
the hole in the rear bumper.
Be sure the chisel end of the
wheel wrench connects into
the hoist shaft. Turn the wheel wrench
counterclockwise to lower the
spare tire. Keep turning the wheel wrench
until the spare
tire can be pulled out
from under the vehicle.
When the tire has been completely lowered, tilt the
retainer at the end
of the cable and pull it through the
wheel opening. Pull the tire out from under the vehicle.
NOTICE:
To help avoid vehicle damage, do not drive the
vehicle before the cable
is restored.
Put the spare tire near the flat tire.
ProCarManuals.com