ignition Oldsmobile Bravada 2003 s Repair Manual
[x] Cancel search | Manufacturer: OLDSMOBILE, Model Year: 2003, Model line: Bravada, Model: Oldsmobile Bravada 2003Pages: 410, PDF Size: 20.1 MB
Page 248 of 410
Don’t leave an unsecured child resL,int in
your vehicle.
When you carry something inside the
vehicle, secure it whenever you
can.
Don’t leave a seat folded down unless you
need to.
There’s also important loading information for off-road
driving in this manual.
Electronically Controlled Air
Suspension System
Your vehicle may be equipped with an electronically
controlled air suspension system that automatically
keeps your vehicle level as you load and unload. The
system includes a compressor, two height sensors
and two air springs supporting the rear axle. The system also has an internal clock to prevent
overheating.
If the system overheats, all leveling function
stops until the system cools down. During this time, the
indicator light on the air inflator system will be flashing.
The ignition has
to be on for the system to inflate, in
order
to raise the vehicle to the standard ride height after
loading. The system can lower the vehicle
to the
standard ride height after unloading with the ignition on
and also for up
to 30 minutes after the ignition has
been turned
off.
You may hear the compressor operating when you load
your vehicle, and periodically as the system adjusts
the vehicle
to the standard ride height.
Load leveling will not function normally with the inflator
hose attached
to the inflator outlet. Remove the
inflator hose from the outlet during loading and
unloading.
If the vehicle is parked for an extended period of time,
some bleed down of the suspension is normal. Upon
starting the vehicle, proper height will be achieved.
4-43
Page 249 of 410

Overload Protection Indicator Light
The air suspension system is equipped with overload
protection. Overload protection is designed
to protect the
air suspension system, and
it is an indicator to the
driver that the vehicle
is overloaded. When the overload
protection mode is on,
it will not allow damage to the
air compressor. However, do not overload the vehicle.
See
Loading Your Vehicle on page 4-4 1.
If the suspension remains at a low height, the rear axle
load has exceeded GAWR (Gross Axle Weight
Rating). When the overload protection mode is activated,
the compressor operates for about
30 seconds to one
minute without raising the vehicle depending on the
amount of overload. This will continue each time
the ignition
is turned on until the rear axle load is
reduced below GAWR. The indicator light
on the inflator switch in the rear
passenger compartment also serves as an indicator for
internal system error.
If the indicator light is flashing
without the load leveling function or the inflator being
active, turn
off the ignition. The next day turn on
the ignition and check the indicator light. The vehicle
can be driven with the light flashing, but
if it is you
should have the vehicle serviced as soon as possible.
Adding a Snow Plow or Similar
Equipment
Your vehicle was neither designed nor intended for a
snow plow.
Notice: Adding a snow plow or similar equipment
to your vehicle can damage it, and the repairs
wouldn’t be covered by warranty.
Do not install a
snow plow or similar equipment on your vehicle.
4-44
Page 277 of 410
How to Reset the CHANGE ENG OIL Light
The GM Oil Life System calculates when to change
your engine oil and filter based on vehicle use. Anytime
your oil is changed, reset the system
so it can
calculate when the next oil change is required. If a
situation occurs where you change your oil prior to a
CHANGE ENG OIL light being turned on, reset the
system.
To reset the CHANGE ENG OIL light, do the following:
1. Turn the ignition key to RUN with the
2. Fully press and release the accelerator pedal three
engine
off.
times within five seconds.
For vehicles with the Driver Information Center, see
Driver Information Center (DE) on page 3-43 to reset
the system.
What to Do with Used Oil
Used engine oil contains certain elements that may be
unhealthy for your skin and could even cause cancer.
Don’t let used oil stay on your skin for very long. Clean
your skin and nails with soap and water, or a good
hand cleaner. Wash or properly dispose of clothing or
rags containing used engine oil. See the manufacturer’s
warnings about the use and disposal of oil products. Used oil can be a threat
to the environment. If you
change your own oil, be sure to drain all the oil from the
filter before disposal. Never dispose
of oil by putting it
in the trash, pouring it on the ground, into sewers, or into
streams
or bodies of water. Instead, recycle it by
taking it to a place that collects used oil. If you have a
problem properly disposing
of your used oil, ask
your dealer, a service station or a local recycling center
for help.
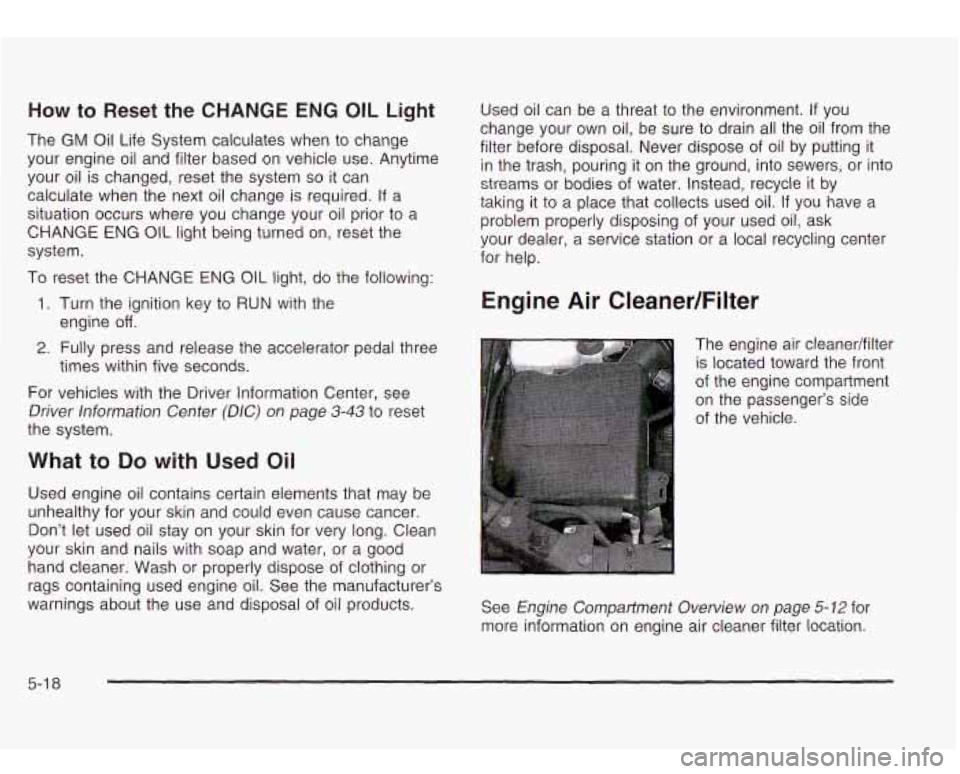
Engine Air CleanedFilter
The engine air cleanedfilter
is located toward the front
of the engine compartment
on the passenger’s side
of the vehicle.
See
Engine Compartment Overview on page 5-12 for
more information on engine air cleaner filter location.
5-1 8
Page 298 of 410
Jump Starting
If your battery has run down, you may want to use
another vehicle and some jumper cables to start your
vehicle. But please use the following steps
to do it
safely.
can be dangerous
* They contain acid that can burn you.
0 They contain gas that can explode or
* They contain enough electricity to
If you don’t follow these steps exactly, some
Notice: Ignoring these steps could result in costly
damage to your vehicle that wouldn’t be covered
by your warranty.
Trying to start your vehicle by pushing or pulling
it
won’t work, and it could damage your vehicle.
1. Check the other vehicle. It must have a 12-volt
battery with
a negative ground system.
Notice: If the other system isn’t a 12-volt system
with a negative ground, both vehicles can be damaged.
2. Get the vehicles close enough so the jumper cables
can reach, but be sure the vehicles aren’t touching
each other. If they are, it could cause a ground
connection you don’t want.
You wouldn’t be able to
start your vehicle, and the bad grounding could
damage the electrical systems.
To avoid the possibility of the vehicles rolling, set
the parking brake firmly on both vehicles involved in
the jump start procedure. Put an automatic
transmission in
PARK (P) or a manual transmission
in NEUTRAL before setting the parking brake. If
you have a four- wheel-drive vehicle, be sure
the transfer case is not in NEUTRAL.
Notice: If you leave your radio on, it could be badly
damaged. The repairs wouldn’t be covered by
your warranty.
3. Turn off the ignition on both vehicles. Unplug
unnecessary accessories plugged into the cigarette
lighter or accessory power outlets (if equipped).
Turn
off the radio and all lamps that aren’t needed.
This will avoid sparks and help
to save both
batteries. And it could save your radio!
5-39
Page 348 of 410
Fuses
10
11 12
13 14
15 16
17
18
19
20
21 22
23
24
25
26
27
28
29
30
31
Usage
Powertrain Control Module B
Fog Lamps
Stop Lamp
Cigarette Lighter
Ignition Coils
Air Suspension Ride
TBD-Ignition
1
Crank
Air Bag
Electric Brake
Cooling Fan
Horn Ignition
E
Electronic Throttle Control
Instrument Panel Cluster, Driver
Information Center
Automatic Shift Lock Control System
Engine 1
Back-up Powertrain Control Module 1
Oxygen Sensor
Air Conditioning
Truck Body Controller
Fuses
32
33
34
35
36
50
51
52
Relays
37
38
39
40
41
42
43
44
45
46 47
Usage
Trailer
Anti-Lock Brakes (ABS) Ignition A
Blower Motor Ignition B Passenger’s Side Trailer Turn
Driver’s Side Trailer Turn
Hazard Flashers
Usage
Blank Rear Window Washer
Fog Lamps
Horn Fuel Pump
Windshield WipersNasher
High-Beam Headlamp
Air Conditioning
Cooling Fan
Headlamp Driver Module
Starter
Miscellaneous Usage
48 Instrument Panel Battery
49 Fuse Puller
5-89
Page 351 of 410
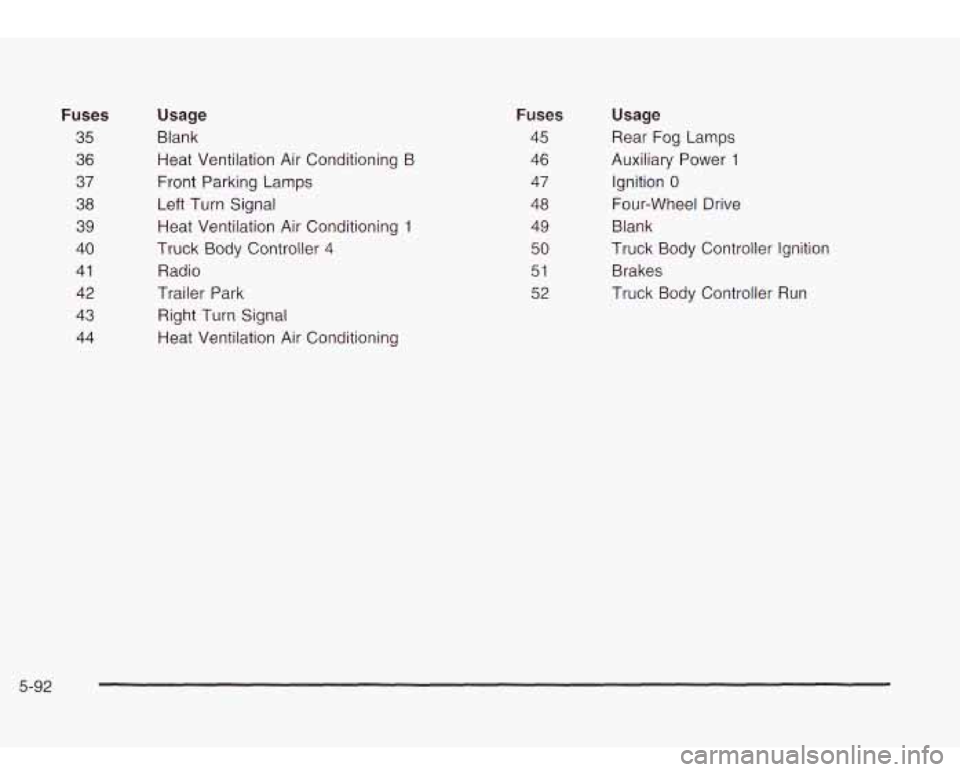
Fuses
35
36
37
38
39
40
41
42
43
44
Usage
Blank Heat Ventilation Air Conditioning B
Front Parking Lamps
Left Turn Signal Heat Ventilation Air Conditioning
1
Truck Body Controller 4
Radio
Trailer Park
Right Turn Signal
Heat Ventilation Air Conditioning
Fuses
45
46
47
48
49
50
51
52
Usage
Rear Fog Lamps
Auxiliary Power
1
Ignition 0
Four-wheel Drive
Blank
Truck Body Controller Ignition Brakes
Truck Body Controller Run
5-92
Page 366 of 410

Automatic Transmission Shift Lock
Cmtrol Sy-tem Check
When you are doing this check, the vehicle
could move suddenly.
If it does, you or others
could be injured. Follow the steps below.
1. Before you start, be sure you have enough room
around the vehicle. It should be parked on a level
surface.
2. Firmly apply the parking brake. See Parking Brake
on page
2-25 if necessary.
3. With the engine off, turn the key to the RUN
position, but don’t start the engine. Without applying
the regular brake, try to move the shift lever out
of PARK
(P) with normal effort. If the shift lever
moves out
of PARK (P), your vehicle needs service.
Ignition Transmission Lock Check
While parked, and with the parking brake set, try to turn
the ignition key to LOCK in each shift lever position.
The key should turn to LOCK only when the
shift lever is in PARK (P).
The key should come out only
in LOCK.
Be ready to apply the regular brake immediately
if
the vehicle begins to move.
6-1 3
Page 394 of 410
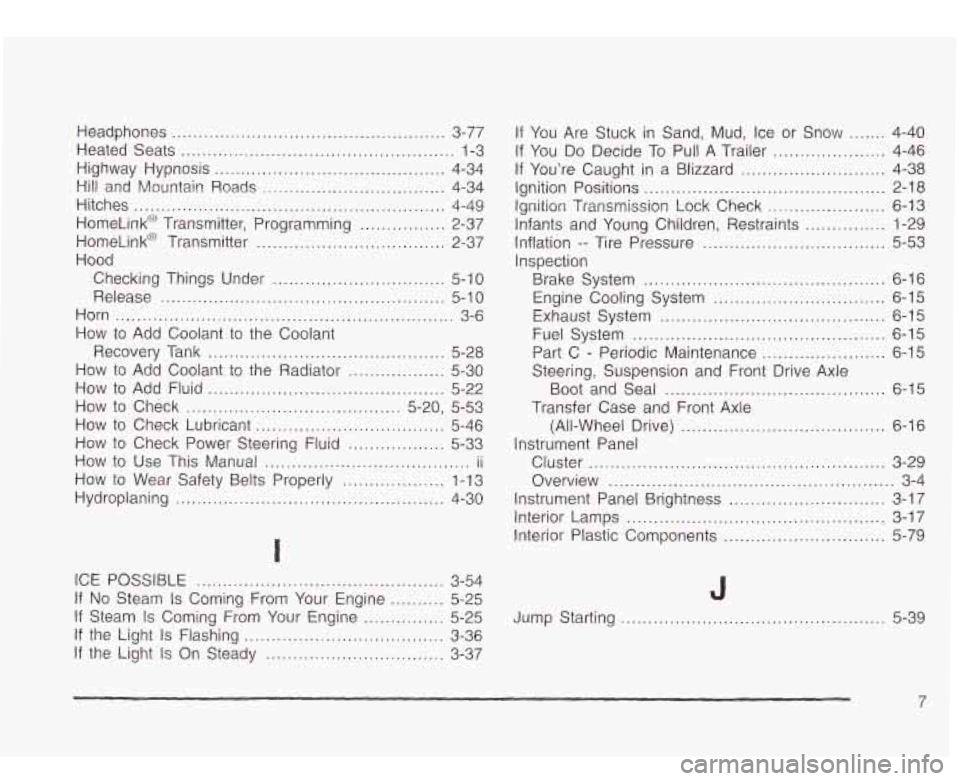
Headphones ................................................... 3-77
Heated Seats
................................................... 1-3
Highway Hypnosis
........................................... 4-34
Hill and Mountain Roads
.................................. 4-34
Hitches
.......................................................... 4-49
HomeLink@ Transmitter, Programming
................ 2-37
HomeLink@ Transmitter
................................... 2-37
Hood Checking Things Under
................................ 5-10
Release ..................................................... 5-1 0
Horn ............................................................... 3-6
Recovery Tank
............................................ 5-28
How to Add Fluid ............................................ 5-22
How to Check ........................................ 5-20, 5-53
How to Check Lubricant
................................... 5-46
How to Check Power Steering Fluid
.................. 5-33
How
to Wear Safety Belts Properly ................... 1-13
Hydroplaning
.................................................. 4-30
How
to Add
Coolant to the Coolant
How
to Add Coolant to the Radiator .................. 5-30
How to Use This Manual ...................................... ii
I
ICE POSSIBLE .............................................. 3-54
If No Steam Is Coming From Your Engine .......... 5-25
If Steam Is Coming From Your Engine ............... 5-25
If the Light Is On Steady ................................. 3-37
If the
Light
Is Flashing ..................................... 3-36
If You Are Stuck in Sand. Mud. Ice or Snow ....... 4-40
If You Do Decide To Pull A Trailer ..................... 4-46
If You’re Caught in a Blizzard
........................... 4-38
Ignition Positions ............................................. 2-18
Inflation -- Tire Pressure .................................. 5-53
Brake System
............................................. 6-16
Engine Cooling System
................................ 6-15
Fuel System
............................................... 6-15
Part C
- Periodic Maintenance ....................... 6-15
Boot and Seal
......................................... 6-15
(All-Wheel Drive)
...................................... 6-16
Cluster
....................................................... 3-29
Overview
..................................................... 3-4
Instrument Panel Brightness
............................. 3-17
Interior Lamps
................................................ 3-17
Interior Plastic Components
.............................. 5-79
Ignition Transmission
Lock Check
...................... 6-13
Infants and Young Children, Restraints
............... 1-29
inspection
Exhaust System
.......................................... 6-15
Steering, Suspension and Front Drive Axle
Transfer Case and Front Axle
Instrument Panel
J
Jump Starting ................................................. 5-39
7