ignition Oldsmobile Bravada 2003 s Workshop Manual
[x] Cancel search | Manufacturer: OLDSMOBILE, Model Year: 2003, Model line: Bravada, Model: Oldsmobile Bravada 2003Pages: 410, PDF Size: 20.1 MB
Page 183 of 410

SCAN: You can also scan through the channels within
a category by performing the following:
1. Press the P-TYPE button. P-TYPE and the last
selected PTY will be displayed on the screen.
2. Select a category by turning the P-TYPE knob.
3. Once the desired category is displayed, press and
hold either SCAN arrow, and the radio will begin
scanning within your chosen category.
4. Press either SCAN arrow again to stop at a
particular station.
AM
FM (Alternate Frequency): Alternate frequency
allows the radio
to switch to a stronger station with the
same program type. Press and hold AM FM for two
seconds
to turn alternate frequency on. AF ON
will appear on the display. The radio may switch to
stronger stations. Press and hold AM FM again for two
seconds
to turn alternate frequency off. AF OFF will
appear on the display. The radio will not switch
to other
stations. When you turn the ignition
off and then on
again, the alternate frequency feature will automatically
be turned on.
Setting Preset PTYs
The six numbered pushbuttons let you return to your
favorite PTYs. These buttons have factory PTY presets.
You can set up
to 12 PTYs (six FMl and six FM2) by
performing the following steps:
1.
2.
3.
4.
5.
Press BAND to select FMl or FM2.
Press the P-TYPE button
to activate program type
select mode.
Turn the P-TYPE knob
to select a PTY.
Press and hold one of the six numbered
pushbuttons until you hear a beep. Whenever you
press that numbered pushbutton, the PTY you
set will return.
Repeat the steps for each pushbutton.
3-70
Page 185 of 410
Playing a Compact Disc
If an error appears on the display, see “Compact Disc
Messages” later in this section.
LOAD CD : Press the LOAD side of this button to
load CDs into the compact disc player. This compact
disc player will hold up
to six discs.
To insert one disc, do the following:
1. Turn the ignition on.
2. Press and release the LOAD side of the LOAD CD
button.
3. Wait for the light, located to the right of the slot, to
turn green.
4. Load a disc. Insert the disc partway into the slot,
label side up. The player will pull the disc in.
When a disc is inserted, the CD symbol will be
displayed. If you select an equalization setting for your
disc, it will be activated each time you play a disc.
If the radio is on or
off, the disc will begin to play
automatically.
To insert multiple discs, do the following:
1. Turn the ignition on.
2. Press and hold the LOAD side of the LOAD CD
button for two seconds.
You will hear a beep and the light, located
to the
right of the
slot, will begin to flash.
3. Once the light stops flashing and turns green, load
a disc. Insert the disc partway into the
slot, label
side up. The player will pull the disc in.
Once the disc is loaded, the light will begin flashing
again. Once the light stops flashing and turns
green you can load another disc. The disc player
takes up
to six discs. Do not try to load more
than six.
To load more than one disc but less than six, complete
Steps
1 through 3. When you have finished loading
discs, with the radio on or
off, press the LOAD side of
the LOAD CD button
to cancel the loading function. The
radio will begin
to play the last CD loaded.
When a disc is inserted, the CD symbol will be
displayed. If more than one disc has been loaded, a
number for each disc will be displayed. If you select an
equalization setting for your disc, it will be activated
each time you play a disc.
If the radio is on or
off, the last disc loaded will begin to
play automatically.
As each new track starts
to play, the track number will
appear on the display.
3-72
Page 192 of 410
When the video screen is not in use, push it up into its
locked position.
The DVD player and display will continue
to operate
when the display is in either the up or the down position.
Notice: Avoid directly touching the video screen,
as damage may occur. See “Cleaning the Video
Screen” in the Index for more information.
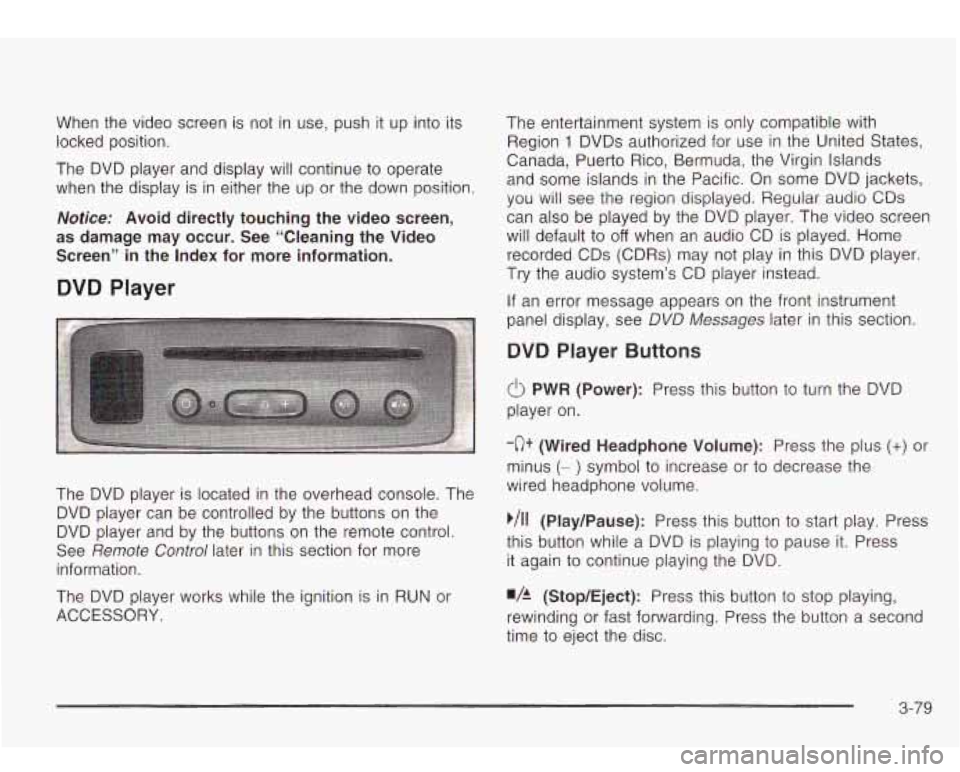
DVD Player
The DVD player is located in the overhead console. The
DVD player can be controlled by the buttons on the
DVD player and by the buttons on the remote control.
See
Remote Control later in this section for more
information.
The DVD player works while the ignition is in RUN or
ACCESSORY. The entertainment system is only compatible with
Region
1 DVDs authorized for use in the United States.
Canada, Puerto Rico, Bermuda, the Virgin Islands
and some islands in the Pacific. On some DVD jackets,
you will see the region displayed. Regular audio CDs
can also be played by the DVD player. The video screen
will default to
off when an audio CD is played. Home
recorded CDs (CDRs) may not play in this DVD player.
Try the audio system’s CD player instead.
If an error message appears on the front instrument
panel display, see DVD
Messages later in this section.
DVD Player Buttons
(I> PWR (Power): Press this button to turn the DVD
player on.
-c)+ (Wired Headphone Volume): Press the plus (+) or
minus (- ) symbol to increase or to decrease the
wired headphone volume.
,/I1 (Play/Pause): Press this button to start play. Press
this button while a DVD is playing
to pause it. Press
it again to continue playing the DVD.
w/h (StopIEject): Press this button to stop playing,
rewinding or fast forwarding. Press the button a second
time
to eject the disc.
3-79
Page 197 of 410
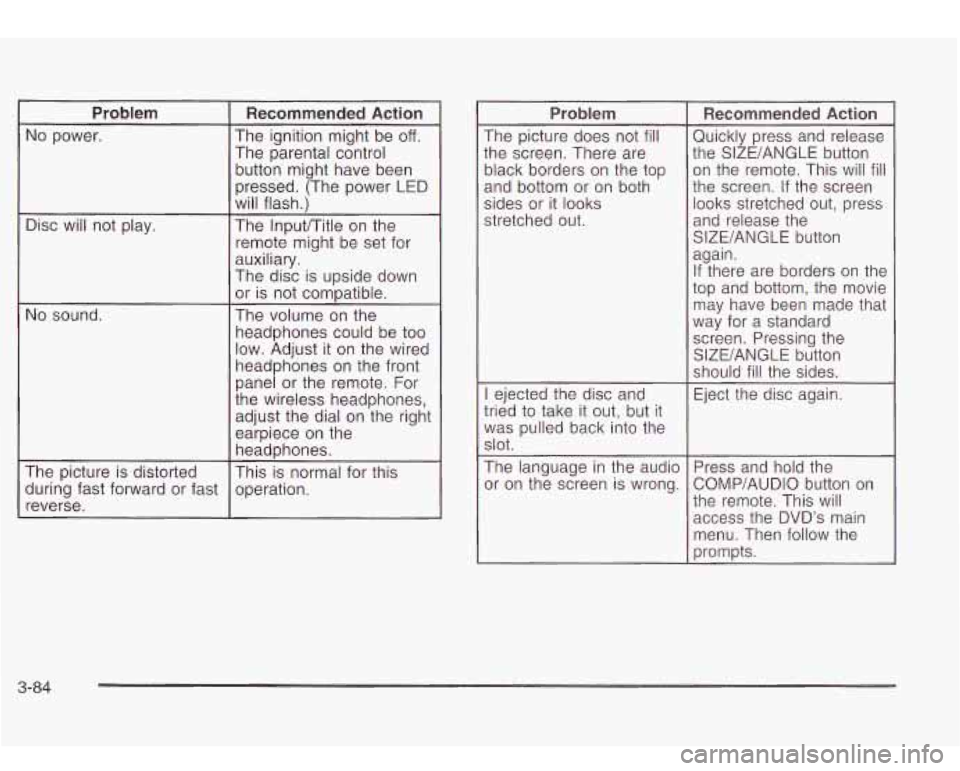
Problem
The ignition might be off. No power.
Recommended Action
The parental control
Disc will not play.
No sound. button
might have been
pressed. (The power
LED
will flash.)
The lnputrritle on the
remote might be set for
auxiliary.
The disc is upside down
or is not compatible.
The volume on the
headphones could be
too
low. Adjust it on the wired
headphones on the front
panel or the remote. For
the wireless headphones,
adjust the dial on the right
earpiece on the
headphones.
The picture is distorted
reverse. operation.
during
fast forward or fast This
is normal for this
Problem
The picture does not fill
the screen. There are
black borders on the top
and bottom or on both
sides or it looks
stretched out.
I ejected the disc and
tried
to take it out, but it
was pulled back into the
slot.
The language in the audio
or on the screen is wrong.
Recommended Action
Quickly press and release
the SIZE/ANGLE button
on the remote. This will
fill
the screen. If the screen
looks stretched out, press
and release the
SIZE/ANGLE button
again.
If there are borders on the
top and bottom, the movie
may have been made that
way for a standard
screen. Pressing the
SIZE/ANGLE button
should
fill the sides.
Eject the disc again.
Press and hold the
COMP/AUDlO button on
the remote. This will
access the
DVD’s main
menu. Then follow the
prompts.
3-84
Page 203 of 410
Care of Your Cassette Tape Player
A tape player that is not cleaned regularly can cause
reduced sound quality, ruined cassettes or a damaged
mechanism. Cassette tapes should be stored in their
cases away from contaminants, direct sunlight and
extreme heat.
If they aren’t, they may not operate
properly or may cause failure of the tape player.
Your tape player should be cleaned regularly after every
50 hours of use. Your radio may display CLEAN
PLAYR
to indicate that you have used your tape player
for
50 hours without resetting the tape clean timer. If
this message appears on the display, your cassette tape
player needs
to be cleaned. It will still play tapes, but
you should clean it as soon as possible to prevent
damage
to your tapes and player. If you notice a
reduction in sound quality, try a known good cassette to
see
if the tape or the tape player is at fault. If this
other cassette has no improvement in sound quality,
clean the tape player.
For best results, use a scrubbing action, non-abrasive
cleaning cassette with pads which scrub the tape
head as the hubs of the cleaner cassette turn. The
recommended cleaning cassette is available through
your dealership.
The cut tape detection feature of your cassette tape
player may identify the cleaning cassette as a damaged
tape,
in error. To prevent the cleaning cassette from
being ejected, use the following steps.
I. Turn the ignition on.
2. Turn the radio off.
3. Press and hold the TP CD button for five seconds.
4. Insert the scrubbing action cleaning cassette.
5. Eject the cleaning cassette after the manufacturer’s
recommended cleaning time.
You may also choose a non-scrubbing action, wet-type
cleaner which uses a cassette with a fabric belt
to
clean the tape head. This type of cleaning cassette will
not eject on its own. A non-scrubbing action cleaner
may not clean as thoroughly as the scrubbing type
cleaner. The use
of a non-scrubbing action, dry-type
cleaning cassette is not recommended.
After you clean the player, press and hold the eject
button for five seconds to reset the CLEAN PLAYR
indicator. The radio will display CLEANED
to show the
indicator was reset.
Cassettes are subject
to wear and the sound quality
may degrade over time. Always make sure the cassette
tape
is in good condition before you have your tape
player serviced.
3-90
Page 204 of 410
Care of Your CDs and DVDs
Handle discs carefully. Store them in their original cases
or other protective cases and away from direct sunlight
and
dust. If the surface of a disc is soiled, dampen
a clean, soft cloth in a mild, neutral detergent solution
and clean it, wiping from the center to the edge.
Be sure never
to touch the side without writing when
handling discs. Pick up discs by grasping the outer
edges or the edge of the hole and the outer edge.
Care of Your CD and DVD Player
The use of CD lens cleaner discs is not advised, due to
the risk of contaminating the lens of the CD optics
with lubricants internal
to the CD mechanism.
Cleaning the Video Screen
Pour some isopropyl or rubbing alcohol on a clean cloth
and gently wipe the video screen. Do not spray
directly onto the screen and do not press
too hard or
too long on the video screen.
Fixed Mast Antenna
The fixed mast antenna can withstand most car washes
without being damaged.
If the mast should ever
become slightly bent, you can straighten it out by hand.
If the mast is badly bent, as it might be by vandals,
you should replace it.
Check occasionally to be sure the mast is still tightened
to the fender. If tightening
is required, tighten by
hand, then with a wrench one quarter turn.
Chime Level Adjustment
The volume level of the vehicle’s chimes can be
controlled by the radio. To change the volume level,
press and hold pushbutton
6 with the ignition on and the
radio power
off. The chime volume level will change
from the normal level to loud, and
LOUD will be
displayed on the radio. To change back to the default or
normal setting, press and hold pushbutton
6 again.
The chime level will change from the loud level
to normal, and NORMAL will be displayed.
3-91
Page 212 of 410
Anti-lock Brake System
Your vehicle has anti-lock brakes. ABS is an advanced
electronic braking system that will help prevent a
braking skid.
When you start your engine and begin to drive away,
your anti-lock brake system will check itself. You
may hear a momentary motor or clicking noise while
this test
is going on. This is normal.
If there’s a problem with
~ the anti-lock brake system,
~ this warning light will
stay on. See
Anti-Lock
Brake System Warning
Light
on page 3-34.
Along with ABS, your vehicle has a Dynamic Rear
Proportioning (DRP) system. If there’s a DRP problem,
both the brake and ABS warning lights will come on
accompanied by a IO-second chime. The lights
and chime will come on each time the ignition
is turned
on until the problem is repaired. See your dealer for
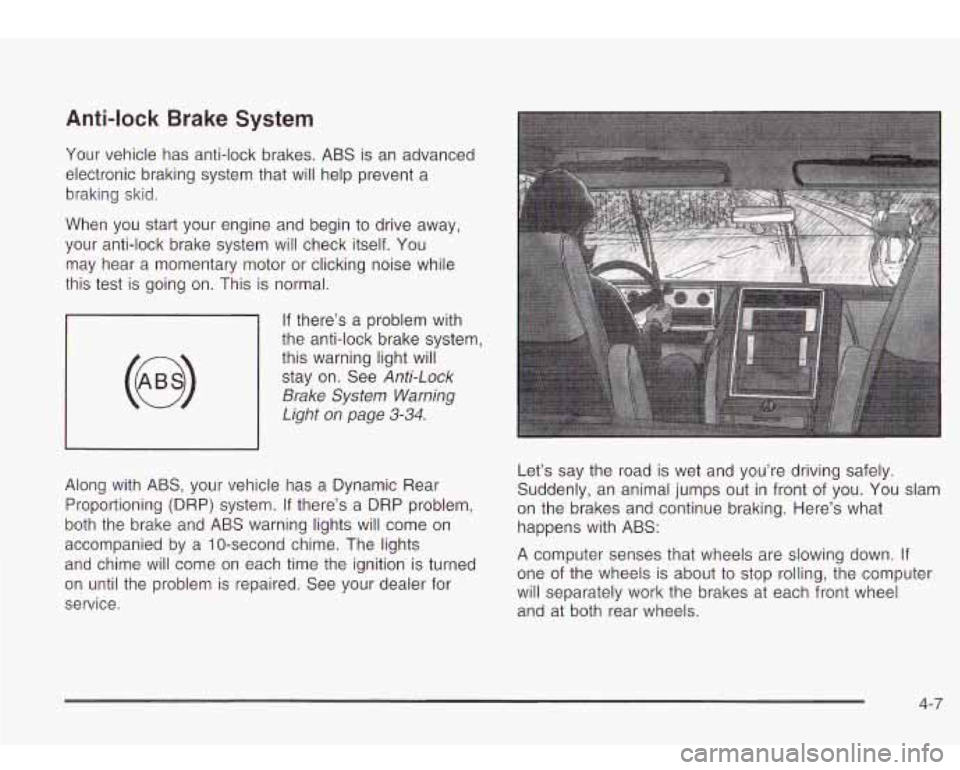
service. Let’s say the
road is wet and you’re driving safely.
Suddenly, an animal jumps out in front of you. You slam
on the brakes and continue braking. Here’s what
happens with ABS:
A computer senses that wheels are slowing down. If
one of the wheels is about to stop rolling, the computer
will separately work the brakes at each front wheel
and at both rear wheels.
4-7
Page 215 of 410
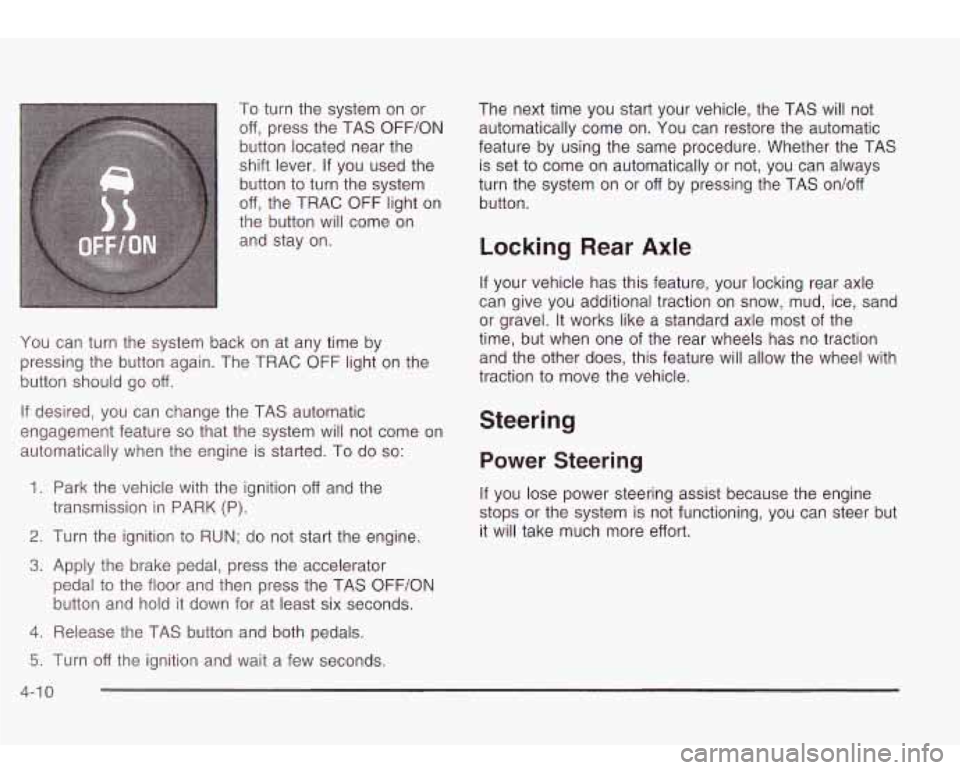
To turn the system on or
off, press the TAS OFF/ON
button located near the
shift lever.
If you used the
button to turn the system
off, the TRAC OFF light on
the button will come on
and stay on.
You can turn the system back on at any time by
pressing the button again. The TRAC OFF light on the
button should go off.
If desired, you can change the TAS automatic
engagement feature
so that the system will not come on
automatically when the engine is started. To do
so:
1.
Park the vehicle with the ignition off and the
2. Turn the ignition to RUN; do not start the engine.
3. Apply the brake pedal, press the accelerator
transmission in
PARK (P).
pedal
to the floor and then press the TAS OFF/ON
button and hold it down for at least six seconds.
4. Release the TAS button and both pedals. The next time you
start your vehicle, the TAS will not
automatically come on. You can restore the automatic
feature by using the same procedure. Whether the TAS
is set
to come on automatically or not, you can always
turn the system on or off by pressing the TAS on/off
button.
Locking Rear Axle
If your vehicle has this feature, your locking rear axle
can give you additional traction on snow, mud, ice, sand
or gravel. It works like a standard axle most of the
time, but when one
of the rear wheels has no traction
and the other does, this feature will allow the wheel with
traction to move the vehicle.
Steering
Power Steering
If you lose power steering assist because the engine
stops or the system is not functioning, you can steer but
it will take much more effort.
5. Turn off the ignition and wait a few seconds.
4-1 0
Page 231 of 410
Driving in Water
Heavy rain can mean flash flooding, and flood waters
demand extreme caution.
Find out how deep the water is before you drive through
it.
If it’s deep enough to cover your wheel hubs, axles
or exhaust pipe, don’t try
it - you probably won’t
get through. Also, water that deep can damage your
axle and other vehicle parts.
If the water isn’t too deep, drive slowly through it. At
faster speeds, water splashes on your ignition system
and your vehicle can stall. Stalling can also occur
if you
get your tailpipe under water. And, as long as your
tailpipe
is under water, you’ll never be able to start your
engine. When you go through water, remember that
when your brakes get wet, it may take you longer
to stop.
Driving through rushing water can be
dangerous. Deep water can sweep your vehicle
downstream and you and your passengers
CAUTION: (Continued)
1
coula arowr r it’s y snallo‘ Mater, can
still wash away the ground from under your
tires, and you could lose traction and roll the
vehicle over. Don’t drive through rushing
water.
See Driving in Rain and on Wet Roads on page 4-28 for
more information on driving through water.
After Off-Road Driving
Remove any brush or debris that has collected on the
underbody, chassis or under the hood. These
accumulations can be a fire hazard.
After operation in mud or sand, have the brake linings
cleaned and checked. Theses substances can cause
glazing and uneven braking. Check the body structure,
steering, suspension, wheels, tires and exhaust
system for damage.
Also, check the fuel lines and
cooling system for any leakage.
Your vehicle will require more frequent service due
to
off-road use. Refer to the Maintenance Schedule
for additional information.
4-26
Page 240 of 410
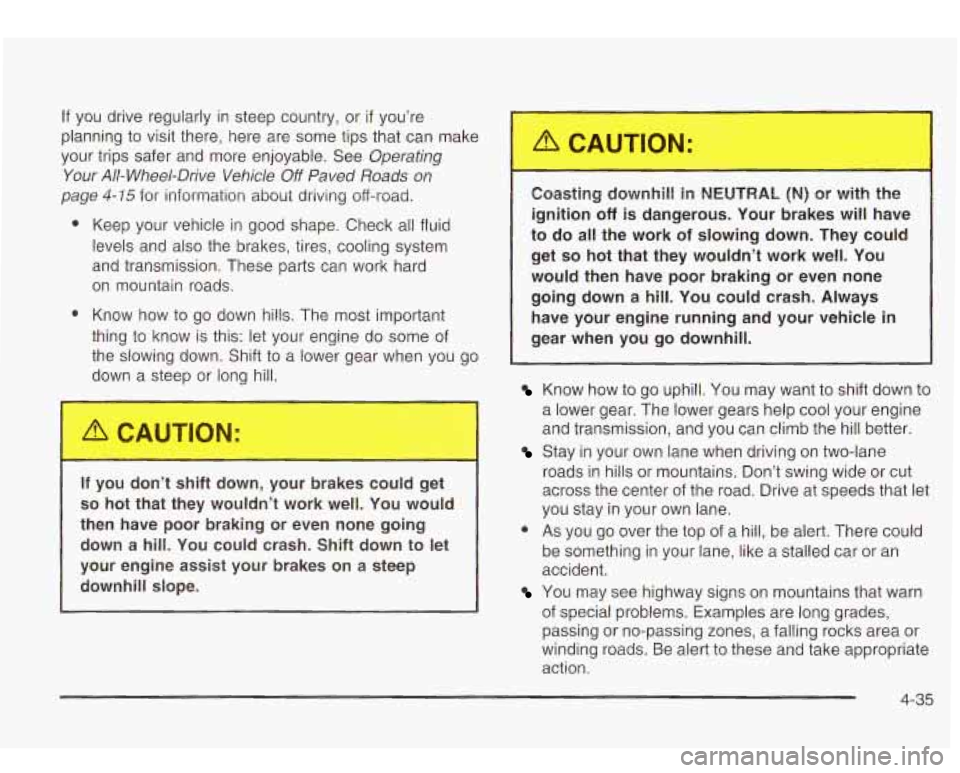
If you drive regularly in steep country, or if you’re
planning to visit there, here are some tips that can make
your trips safer and more enjoyable. See
Operating
Your
All- Wheel-Drive Vehicle Off Paved Roads on
page 4-15 for information about driving off-road.
0 Keep your vehicle in good shape. Check all fluid
levels and also the brakes, tires, cooling system
and transmission. These parts can work hard
on mountain roads.
0 Know how to go down hills. The most important
thing to know is this: let your engine do some of
the slowing down. Shift to
a lower gear when you go
down a steep or long hill.
If you don’t shift down, your brakes could get
so hot that they wouldn’t work well. You would
then have poor braking or even none going down a hill. You could crash. Shift down to let
your engine assist your brakes on
a steep
downhill slope. Coasting downhill in
NEU ,‘RAL (N) or with the
ignition
off is dangerous. Your brakes will have
to do
all the work of slowing down. They could
get
so hot that they wouldn’t work well. You
would then have poor braking or even none going down a
hill. You could crash. Always
have your engine running and your vehicle
in
gear when you go downhill. ~
Know how to go uphill. You may want to shift down to
a lower gear. The lower gears help cool your engine
and transmission, and you can climb the hill better.
roads in hills or mountains. Don’t swing wide or cut
across the center of the road. Drive at speeds that let
you stay in your own lane.
0 As you go over the top of a hill, be alert. There could
be something in your lane, like a stalled car or an
accident.
You may see highway signs on mountains that warn
of special problems. Examples are long grades,
passing or no-passing zones, a falling rocks area or
winding roads. Be alert to these and take appropriate
action.
Stay in your own lane when driving on two-lane
4-35