clock Oldsmobile Bravada 2003 Owner's Manuals
[x] Cancel search | Manufacturer: OLDSMOBILE, Model Year: 2003, Model line: Bravada, Model: Oldsmobile Bravada 2003Pages: 410, PDF Size: 20.1 MB
Page 128 of 410
Automatic Headlamp System
When it is dark enough outside, your automatic
headlamp system will turn on your headlamps at the
normal brightness along with other lamps such as
the taillamps, sidemarker, parking lamps and the
instrument panel lights. The radio lights will also be on.
Your vehicle is equipped with a light sensor on the
top of the instrument panel. Be sure it is not covered or
the system will be on whenever the ignition is on.
The system may also turn on your lights when driving
through a parking garage, heavy overcast weather
or a tunnel. This is normal.
There is a delay in the transition between the daytime
and nighttime operation
of the Daytime Running
Lamps (DRL) and the automatic headlamp systems,
so
that driving under bridges or bright overhead street
lights does not affect the system. The DRL and
automatic headlamp system will only be affected when
the light sensor sees a change in lighting lasting
longer than the delay. If
you start your vehicle in a dark garage, the automatic
headlamp system will come on immediately. Once
you leave the garage, it will take approximately
one minute for the automatic headlamp system to
change to DRL
if it is light outside. During that delay,
your instrument panel cluster may not be as bright
as usual. Make sure your instrument panel brightness
control is in the full bright position.
To idle your vehicle with the automatic headlamp
system off, set the parking brake while the ignition is off.
Then start your vehicle. The automatic headlamp
system will stay off until you release the parking brake,
shift out
of park or turn the exterior lamp control to
the
off position as described in “Exterior Lamps”.
Lamps On Reminder
A reminder tone will sound when your headlamps or
parking lamps are manually turned on, the driver’s door
is open and your ignition is in LOCK or ACCESSORY.
To turn the tone off, turn the knob all the way
counterclockwise. In the automatic mode, the headlamps
turn
off once the ignition key is in LOCK.
3-1 5
Page 134 of 410
Climate Controls
Dual Automatic Climate Control
System
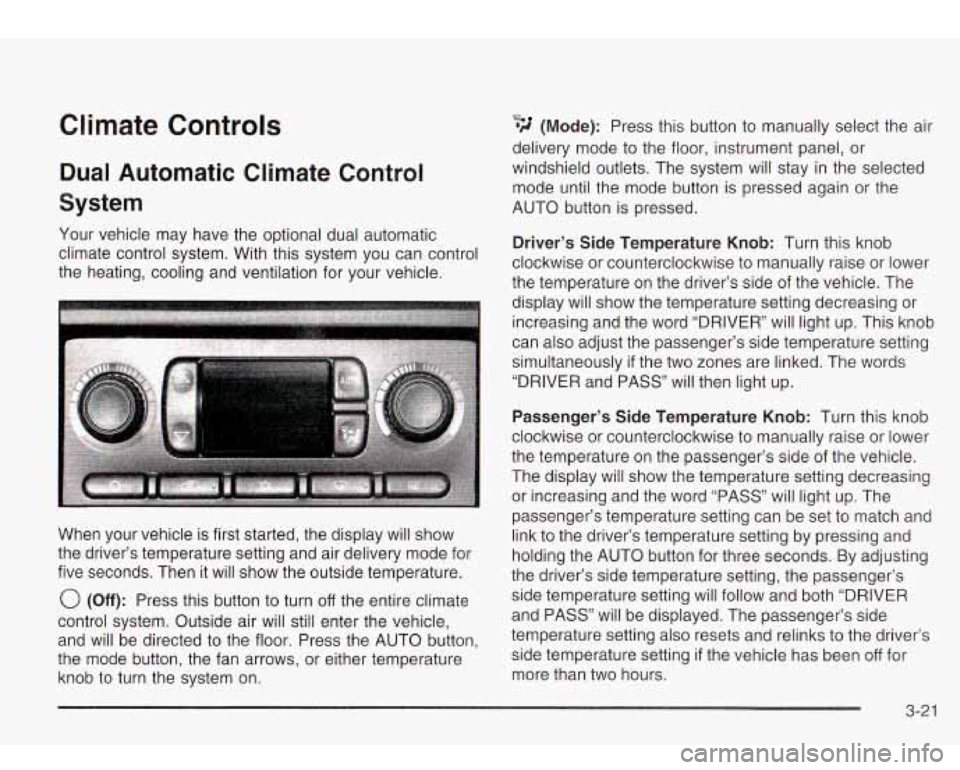
Your vehicle may have the optional dual automatic
climate control system. With this system you can control
the heating, cooling and ventilation for your vehicle.
When your vehicle is first started, the display will show
the driver’s temperature setting and air delivery mode for
five seconds. Then it will show the outside temperature.
0 (Off): Press this button to turn off the entire climate
control system. Outside air will still enter the vehicle,
and will be directed to the floor. Press the AUTO button,
the mode button, the fan arrows, or either temperature
knob to turn the system on.
Q., *d (Mode): Press this button to manually select the air
delivery mode to the floor, instrument panel, or
windshield outlets. The system will stay in the selected
mode until the mode button is pressed again or the
AUTO button is pressed.
Driver’s Side Temperature Knob: Turn this knob
clockwise or counterclockwise to manually raise or lower
the temperature on the driver’s side of the vehicle. The
display will show the temperature setting decreasing or
increasing and the word “DRIVER” will light up. This knob
can also adjust the passenger’s side temperature setting
simultaneously
if the two zones are linked. The words
“DRIVER and PASS” will then light up.
Passenger’s Side Temperature Knob: Turn this knob
clockwise or counterclockwise to manually raise or lower
the temperature on the passenger’s side of the vehicle.
The display will show the temperature setting decreasing
or increasing and the word “PASS” will light up. The
passenger’s temperature setting can be set to match and
link to the driver’s temperature setting by pressing and
holding the AUTO button for three seconds. By adjusting
the driver’s side temperature setting, the passenger’s
side temperature setting will follow and both “DRIVER
and PASS” will be displayed. The passenger’s side
temperature setting also resets and relinks to the driver’s
side temperature setting
if the vehicle has been off for
more than two hours.
3-21
Page 169 of 410
Audio System(s)
Notice: Before you add any sound equipment to
your vehicle
- like a tape player, CB radio, mobile
telephone or two-way radio
- be sure you can
add what you want. If you can,
it’s very important to
do
it properly. Added sound equipment may
interfere with the operation
of your vehicle’s engine,
Delphi Electronics radio or other systems, and
even damage them. Your vehicle’s systems may interfere with the operation
of sound equipment that
has been added improperly.
So, before adding sound equipment, check with
your dealer and be sure to check federal rules covering mobile radio and telephone units.
Your audio system has been designed
to operate easily
and
to give years of listening pleasure. You will get the
most enjoyment out of it
if you acquaint yourself with it
first. Find out what your audio system can do and how
to
operate all of its controls to be sure you’re getting the
most out of the advanced engineering that went into it.
Your vehicle has a feature called Retained Accessory
Power (RAP). With RAP, you can play your audio
system even after the ignition is turned
off. See
“Retained Accessory Power (RAP)” under
lgnition
Positions on page
2- 18.
Setting the Time
Your radio may have a button marked with an H or HR
to represent hours and an M or MIN to represent
minutes.
Press and hold the hour button until the correct hour
appears on the display. AM or PM will also appear
on the display. Press and hold the minute button until
the correct minute appears on the display. The time may
be set with the ignition on or
off.
To synchronize the time with an FM station broadcasting
Radio Data System
(RDS) information, press and
hold the hour and minute buttons at the same time for
two seconds until UPDATED and the clock symbol
appear on the display. If the time is not available from
the station,
NO UPDAT will appear on the display
instead.
RDS time is broadcast once a minute. Once you have
tuned
to an RDS broadcast station, it may take a
few minutes for your time
to update.
3-56
Page 177 of 410
Cassette Tape Messages
If an error occurs while trying to play a cassette tape, it
could be for one of the following reasons:
TIGHT TAPE: When this message is displayed, the
tape is tight and the player can’t turn the tape hubs.
Remove the tape. Hold the tape with the open end down
and try
to turn the right hub counterclockwise with a
pencil. Turn the tape over and repeat. If the hubs do not
turn easily, your tape may be damaged and should
not be used in the player. Try a new tape
to make sure
your player is working properly.
BROKEN TAPE: If this message is displayed, the tape
is broken. Try a new tape.
WRAPPED: When this message is displayed, the tape
is wrapped around the tape head. Attempt to get the
cassette out. Try a new tape.
CLEAN PLAYR (Clean Player): This message may
also appear on the radio display
to indicate that
the cassette tape player needs
to be cleaned. It will still
play tapes, but you should clean it as soon as possible
to prevent damage to the tapes and player. For
additional information see
Care of Your Cassette Tape
Player on page 3-90.
If any error occurs repeatedly or if an error can’t be
corrected, contact your dealer. If your radio displays an
error message, write it down and provide
it to your
dealer when reporting the problem.
Playing a Compact Disc
With the ignition on, insert a disc partway into the slot,
label side up. The player will pull it in and the disc should
begin playing. If you want
to insert a CD when the ignition
is
off, first press the eject button or the RCL knob.
When the disc is inserted, the CD symbol will be
displayed.
If you select an EQ setting for your CD, it will
be activated each time you play a
CD.
As each new track starts to play, the track number will
appear on the display.
If an error appears on the display, see “Compact Disc
Messages” later in this section.
1 REV (Reverse): Press and hold this pushbutton to
reverse quickly within a track. You will hear sound at a
reduced volume. Release it
to play the passage. The
display will show elapsed time.
2 FWD (Forward): Press and hold this pushbutton to
advance quickly within a track. You will hear sound at a
reduced volume. Release it
to play the passage. The
display will show elapsed time.
4 RDM (Random): Press this pushbutton to hear the
tracks in random, rather than sequential, order.
RDM and the track number will appear on the display.
Press this pushbutton again
to turn off random mode.
3-64
Page 217 of 410

An emergency like this requires close attention and a
quick decision.
If you are holding the steering wheel at
the recommended
9 and 3 o’clock positions, you
can turn it a full
180 degrees very quickly without
removing either hand. But you have
to act fast, steer
quickly, and just as quickly straighten the wheel once you have avoided the object.
The fact that such emergency situations are always
possible is a good reason
to practice defensive driving
at all times and wear safety belts properly.
Off-Road Recovery
You may find that your right wheels have dropped off the
edge of a road onto the shoulder while you’re driving.
If the level of the shoulder
is only slightly below the
pavement, recovery should be fairly easy. Ease
off the
accelerator and then,
if there is nothing in the way,
steer
so that your vehicle straddles the edge of
the pavement.
You can turn the steering wheel up to
one-quarter turn until the right front tire contacts
the pavement edge. Then turn your steering wheel
to go
straight down the roadway.
4-1 2
Page 226 of 410

Driving to the top (crest) of a hill at full speed
can cause an accident. There could be a
drop-off, embankment, cliff, or even another
vehicle. You could be seriously injured or
killed.
As you near the top of a hill, slow down
and stay alert.
Q: What should I do if my vehicle stalls, or is
about to stall, and
I can’t make it up the hill?
A: If this happens, there are some things you should
do, and there are some things you must not do?
First, here’s what you should do:
Push the brake pedal to stop the vehicle and keep
it from rolling backwards. Also, apply the parking
brake.
If your engine is still running, shift the transmission
to REVERSE (R), release the parking brake, and
slowly back down the hill in REVERSE (R).
0 If your engine has stopped running, you’ll need to
restart it. With the brake pedal pressed and the
parking brake still applied, shift the transmission to
PARK (P) and restart the engine. Then shift to REVERSE
(R), release the parking brake, and
slowly back down the hill as straight as possible
in
REVERSE (R).
As you are backing down the hill, put your left hand
on the steering wheel at the
12 o’clock position.
This way you’ll be able to tell
if your wheels
are straight and maneuver as you back down. It’s
best that you back down the hill with your
wheels straight rather than in the left or right
direction. Turning the wheel too far to the left or
right will increase the possibility of a rollover.
Here are some things you
must not do if you stall, or
are about to stall, when going up a hill.
Never attempt to prevent a stall by shifting into
NEUTRAL (N) to “rev-up” the engine and regain
forward momentum. This won’t work. Your vehicle
will roll backwards very quickly and you could
go out of control.
Instead, apply the regular brake to stop the vehicle.
Then apply the parking brake. Shift to
REVERSE (R), release the parking brake, and
slowly back straight down.
0 Never attempt to turn around if you are about to stall
when going up a hill. If the hill is steep enough to stall
your vehicle, it’s steep enough to cause you to roll
over
if you turn around. If you can’t make it up the hill
you must back straight down the hill.
4-21
Page 248 of 410
Don’t leave an unsecured child resL,int in
your vehicle.
When you carry something inside the
vehicle, secure it whenever you
can.
Don’t leave a seat folded down unless you
need to.
There’s also important loading information for off-road
driving in this manual.
Electronically Controlled Air
Suspension System
Your vehicle may be equipped with an electronically
controlled air suspension system that automatically
keeps your vehicle level as you load and unload. The
system includes a compressor, two height sensors
and two air springs supporting the rear axle. The system also has an internal clock to prevent
overheating.
If the system overheats, all leveling function
stops until the system cools down. During this time, the
indicator light on the air inflator system will be flashing.
The ignition has
to be on for the system to inflate, in
order
to raise the vehicle to the standard ride height after
loading. The system can lower the vehicle
to the
standard ride height after unloading with the ignition on
and also for up
to 30 minutes after the ignition has
been turned
off.
You may hear the compressor operating when you load
your vehicle, and periodically as the system adjusts
the vehicle
to the standard ride height.
Load leveling will not function normally with the inflator
hose attached
to the inflator outlet. Remove the
inflator hose from the outlet during loading and
unloading.
If the vehicle is parked for an extended period of time,
some bleed down of the suspension is normal. Upon
starting the vehicle, proper height will be achieved.
4-43
Page 267 of 410

.-
While refueling, hang the fuel cap by the tether using
the hook located on the inside of the filler door.
To remove the fuel cap, turn it slowly to the left
(counterclockwise). The fuel cap has
a spring in it. If
you let go of the cap too soon, it will spring back to the
right. If you gel ,Jel on yoursel,.
,nd then some.,,,ng
ignites
it, you could be badly burned. Fuel can
spray out on you
if you open the fuel cap too
quickly. This spray can happen
if your tank is
nearly full, and is more likely in hot weather.
Open the fuel
cap slowly and wait for any
“hiss” noise to stop. Then unscrew the cap all
the way.
Be careful not to spill fuel. Clean fuel from painted
surfaces
as soon as possible. See Cleaning the Outside
of Your Vehicle on page 5-80. When filling the tank
do not overfill by squeezing in much more fuel after the
pump shuts
off.
5-8
Page 268 of 410

When you put the fuel cap back on, turn it to the right
(clockwise) until you hear a clicking sound. Make
sure you fully install the cap. The diagnostic system can
determine
if the fuel cap has been left off or improperly
installed. This would allow fuel to evaporate into the
atmosphere. See
Malfunction lndicator Lamp on
page 3-35.
Notice: If you need a new fuel cap, be sure to get
the right type. Your dealer can get one for you.
If you get the wrong type, it may not fit properly.
This may cause your malfunction indicator lamp to
light and may damage your fuel tank and emissions
system. See “Malfunction lndicator Lamp”
in the
Index.
Filling a Portable Fuel Container
NeveL ,,I1 a portable f,,l container while it is in
your vehicle. Static electricity discharge from
the container can ignite the gasoline vapor. You can be badly burned and your vehicle damaged if
this occurs. To help avoid injury to
you and others:
Dispense gasoline only into approved
containers.
Do not fill a container while it is inside a
vehicle,
in a vehicle’s trunk, pickup bed or
on any surface other than the ground.
Bring the fill nozzle in contact with the
I inside of the fill opening before operating
i the nozzle. Contact should be maintained
Don’t smoke while pumping gasoline.
until the filling
is complete.
5-9
Page 289 of 410

How to Add Coolant to the Radiator
1. You can remove the radiator pressure cap when
the cooling system, including the radiator pressure
cap and upper radiator hose, is no longer hot.
Turn the pressure cap slowly counterclockwise
about one full turn.
If you hear a hiss, wait for that to stop. A hiss
means there is still some pressure left.
2. Then keep turning the pressure cap. Remove the
pressure cap.
5-30