jump start Oldsmobile Bravada 2004 Owner's Manuals
[x] Cancel search | Manufacturer: OLDSMOBILE, Model Year: 2004, Model line: Bravada, Model: Oldsmobile Bravada 2004Pages: 420, PDF Size: 4.37 MB
Page 198 of 420
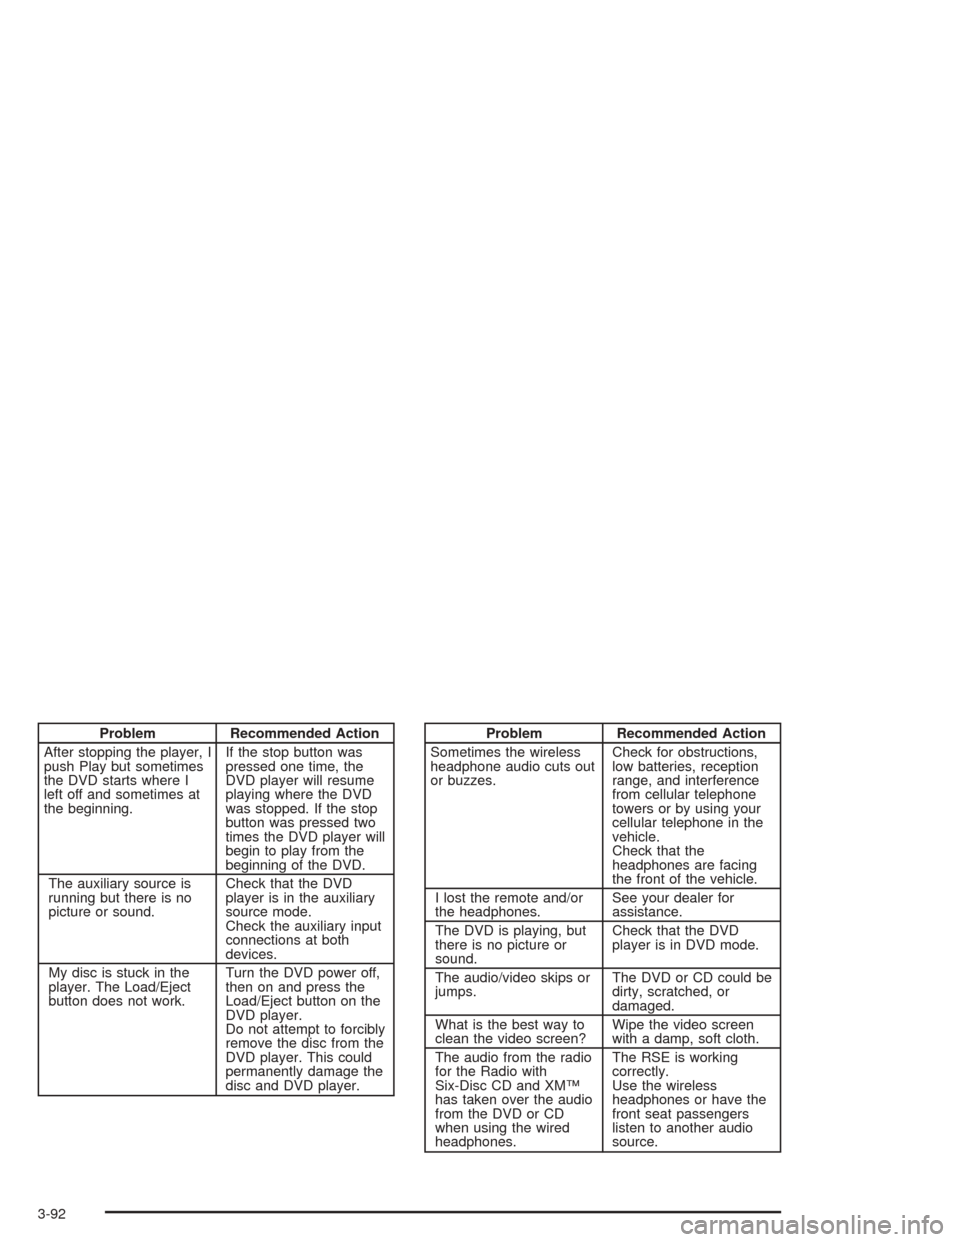
Problem Recommended Action
After stopping the player, I
push Play but sometimes
the DVD starts where I
left off and sometimes at
the beginning.If the stop button was
pressed one time, the
DVD player will resume
playing where the DVD
was stopped. If the stop
button was pressed two
times the DVD player will
begin to play from the
beginning of the DVD.
The auxiliary source is
running but there is no
picture or sound.Check that the DVD
player is in the auxiliary
source mode.
Check the auxiliary input
connections at both
devices.
My disc is stuck in the
player. The Load/Eject
button does not work.Turn the DVD power off,
then on and press the
Load/Eject button on the
DVD player.
Do not attempt to forcibly
remove the disc from the
DVD player. This could
permanently damage the
disc and DVD player.Problem Recommended Action
Sometimes the wireless
headphone audio cuts out
or buzzes.Check for obstructions,
low batteries, reception
range, and interference
from cellular telephone
towers or by using your
cellular telephone in the
vehicle.
Check that the
headphones are facing
the front of the vehicle.
I lost the remote and/or
the headphones.See your dealer for
assistance.
The DVD is playing, but
there is no picture or
sound.Check that the DVD
player is in DVD mode.
The audio/video skips or
jumps.The DVD or CD could be
dirty, scratched, or
damaged.
What is the best way to
clean the video screen?Wipe the video screen
with a damp, soft cloth.
The audio from the radio
for the Radio with
Six-Disc CD and XM™
has taken over the audio
from the DVD or CD
when using the wired
headphones.The RSE is working
correctly.
Use the wireless
headphones or have the
front seat passengers
listen to another audio
source.
3-92
Page 265 of 420
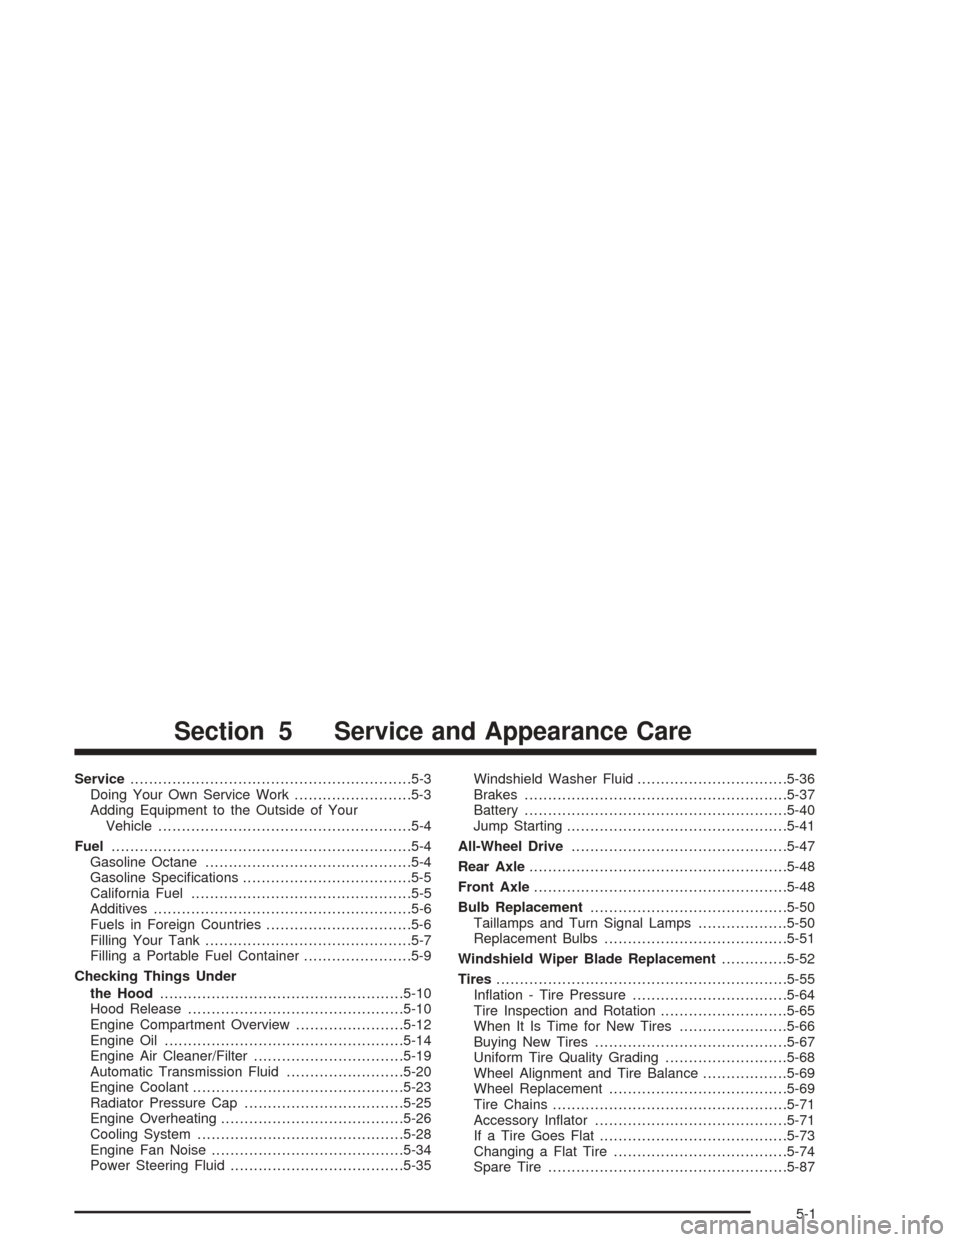
Service............................................................5-3
Doing Your Own Service Work.........................5-3
Adding Equipment to the Outside of Your
Vehicle......................................................5-4
Fuel................................................................5-4
Gasoline Octane............................................5-4
Gasoline Speci�cations....................................5-5
California Fuel...............................................5-5
Additives.......................................................5-6
Fuels in Foreign Countries...............................5-6
Filling Your Tank............................................5-7
Filling a Portable Fuel Container.......................5-9
Checking Things Under
the Hood....................................................5-10
Hood Release..............................................5-10
Engine Compartment Overview.......................5-12
Engine Oil...................................................5-14
Engine Air Cleaner/Filter................................5-19
Automatic Transmission Fluid.........................5-20
Engine Coolant.............................................5-23
Radiator Pressure Cap..................................5-25
Engine Overheating.......................................5-26
Cooling System............................................5-28
Engine Fan Noise.........................................5-34
Power Steering Fluid.....................................5-35Windshield Washer Fluid................................5-36
Brakes........................................................5-37
Battery........................................................5-40
Jump Starting...............................................5-41
All-Wheel Drive..............................................5-47
Rear Axle.......................................................5-48
Front Axle......................................................5-48
Bulb Replacement..........................................5-50
Taillamps and Turn Signal Lamps...................5-50
Replacement Bulbs.......................................5-51
Windshield Wiper Blade Replacement..............5-52
Tires..............................................................5-55
In�ation - Tire Pressure.................................5-64
Tire Inspection and Rotation...........................5-65
When It Is Time for New Tires.......................5-66
Buying New Tires.........................................5-67
Uniform Tire Quality Grading..........................5-68
Wheel Alignment and Tire Balance..................5-69
Wheel Replacement......................................5-69
Tire Chains..................................................5-71
Accessory In�ator.........................................5-71
If a Tire Goes Flat........................................5-73
Changing a Flat Tire.....................................5-74
Spare Tire...................................................5-87
Section 5 Service and Appearance Care
5-1
Page 278 of 420
I. Remote Negative (-) Terminal Marked “GND″. See
Jump Starting on page 5-41.
J. Brake Master Cylinder. SeeBrakes on page 5-37.
K. Battery. SeeBattery on page 5-40.
L. Engine Compartment Fuse Block. See “Engine
Compartment Fuse Block” underFuses and Circuit
Breakers on page 5-99.
Engine Oil
Checking Engine Oil
It is a good idea to check your engine oil every time you
get fuel. In order to get an accurate reading, the oil
must be warm and the vehicle must be on level ground.
The engine oil dipstick handle is a yellow loop. See
Engine Compartment Overview on page 5-12for
the location of the engine oil dipstick.
Turn off the engine and give the oil several minutes to
drain back into the oil pan. If you don’t, the oil
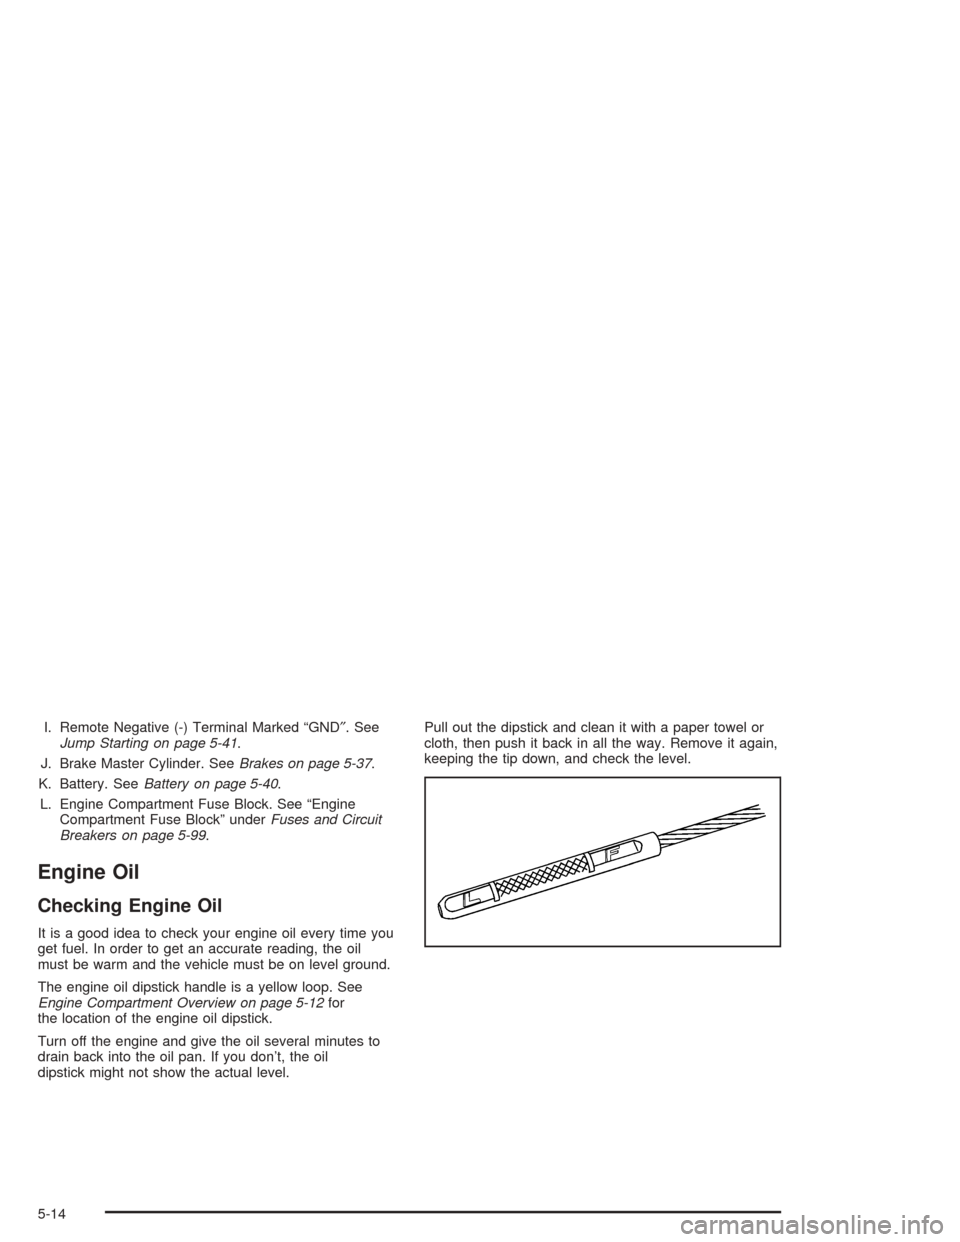
dipstick might not show the actual level.Pull out the dipstick and clean it with a paper towel or
cloth, then push it back in all the way. Remove it again,
keeping the tip down, and check the level.
5-14
Page 305 of 420
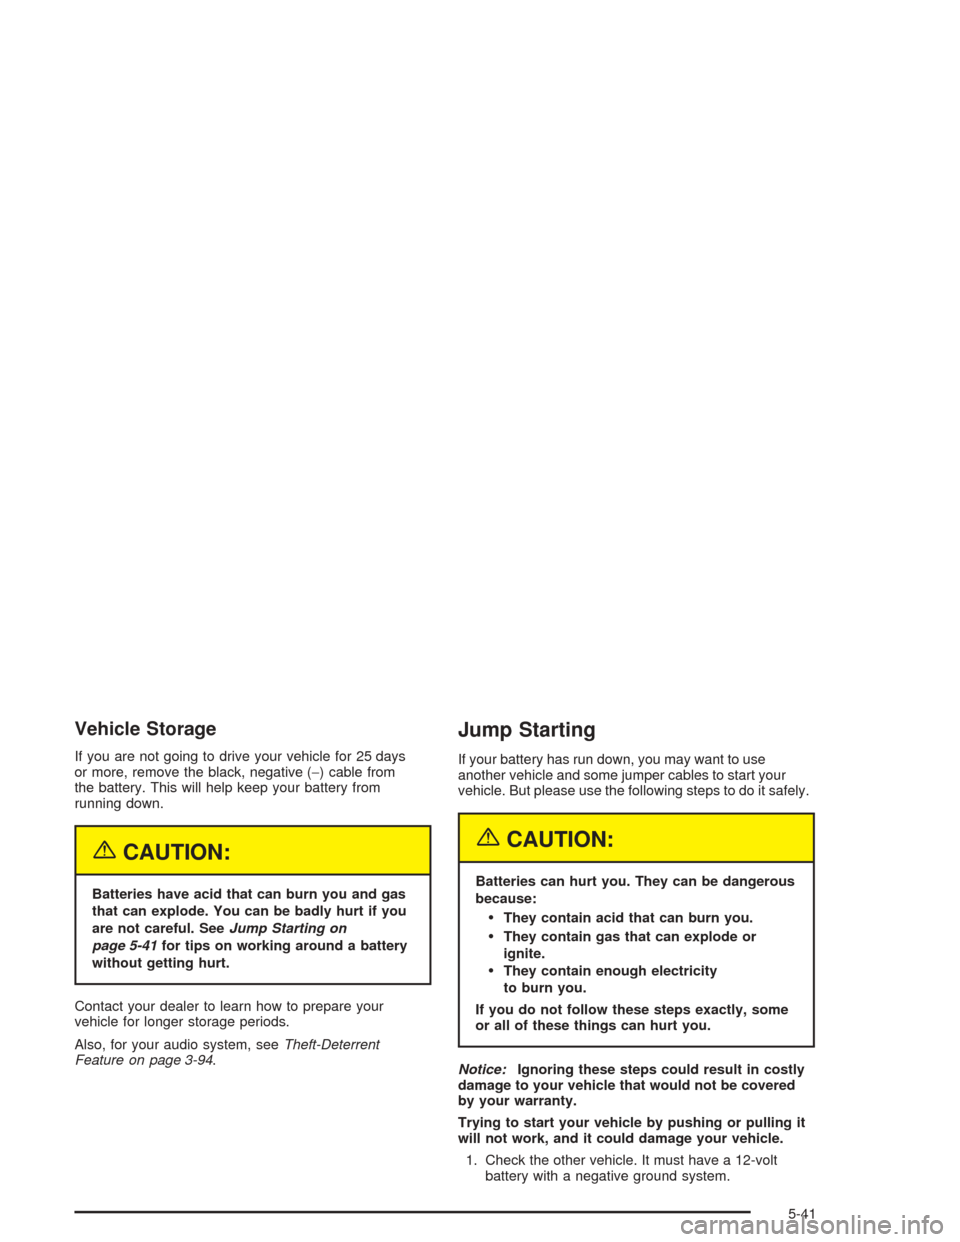
Vehicle Storage
If you are not going to drive your vehicle for 25 days
or more, remove the black, negative (−) cable from
the battery. This will help keep your battery from
running down.
{CAUTION:
Batteries have acid that can burn you and gas
that can explode. You can be badly hurt if you
are not careful. SeeJump Starting on
page 5-41for tips on working around a battery
without getting hurt.
Contact your dealer to learn how to prepare your
vehicle for longer storage periods.
Also, for your audio system, seeTheft-Deterrent
Feature on page 3-94.
Jump Starting
If your battery has run down, you may want to use
another vehicle and some jumper cables to start your
vehicle. But please use the following steps to do it safely.
{CAUTION:
Batteries can hurt you. They can be dangerous
because:
They contain acid that can burn you.
They contain gas that can explode or
ignite.
They contain enough electricity
to burn you.
If you do not follow these steps exactly, some
or all of these things can hurt you.
Notice:Ignoring these steps could result in costly
damage to your vehicle that would not be covered
by your warranty.
Trying to start your vehicle by pushing or pulling it
will not work, and it could damage your vehicle.
1. Check the other vehicle. It must have a 12-volt
battery with a negative ground system.
5-41
Page 306 of 420
Notice:If the other vehicle’s system is not a 12-volt
system with a negative ground, both vehicles can
be damaged. Only use vehicles with 12-volt systems
with negative grounds to jump start your vehicle.
2. Get the vehicles close enough so the jumper cables
can reach, but be sure the vehicles aren’t touching
each other. If they are, it could cause a ground
connection you don’t want. You wouldn’t be able to
start your vehicle, and the bad grounding could
damage the electrical systems.
To avoid the possibility of the vehicles rolling, set
the parking brake �rmly on both vehicles involved in
the jump start procedure. Put an automatic
transmission in PARK (P) or a manual transmission
in NEUTRAL before setting the parking brake. If
you have a four-wheel-drive vehicle, be sure
the transfer case is not in NEUTRAL.
Notice:If you leave your radio or other accessories
on during the jump starting procedure, they could
be damaged. The repairs would not be covered
by your warranty. Always turn off your radio and
other accessories when jump starting your vehicle.3. Turn off the ignition on both vehicles. Unplug
unnecessary accessories plugged into the cigarette
lighter or accessory power outlets (if equipped).
Turn off the radio and all lamps that aren’t needed.
This will avoid sparks and help to save both
batteries. And it could save your radio!
4. Open both hoods and locate the batteries. Find the
positive (+) and negative (−) terminals on each
battery. Your vehicle has a remote negative (−) jump
starting terminal. You should always use this
remote terminal instead of the terminal on the
battery. The remote negative (−) terminal is located
on the front engine lift bracket and is marked
GND. SeeEngine Compartment Overview on
page 5-12for more information on location.
5-42
Page 309 of 420
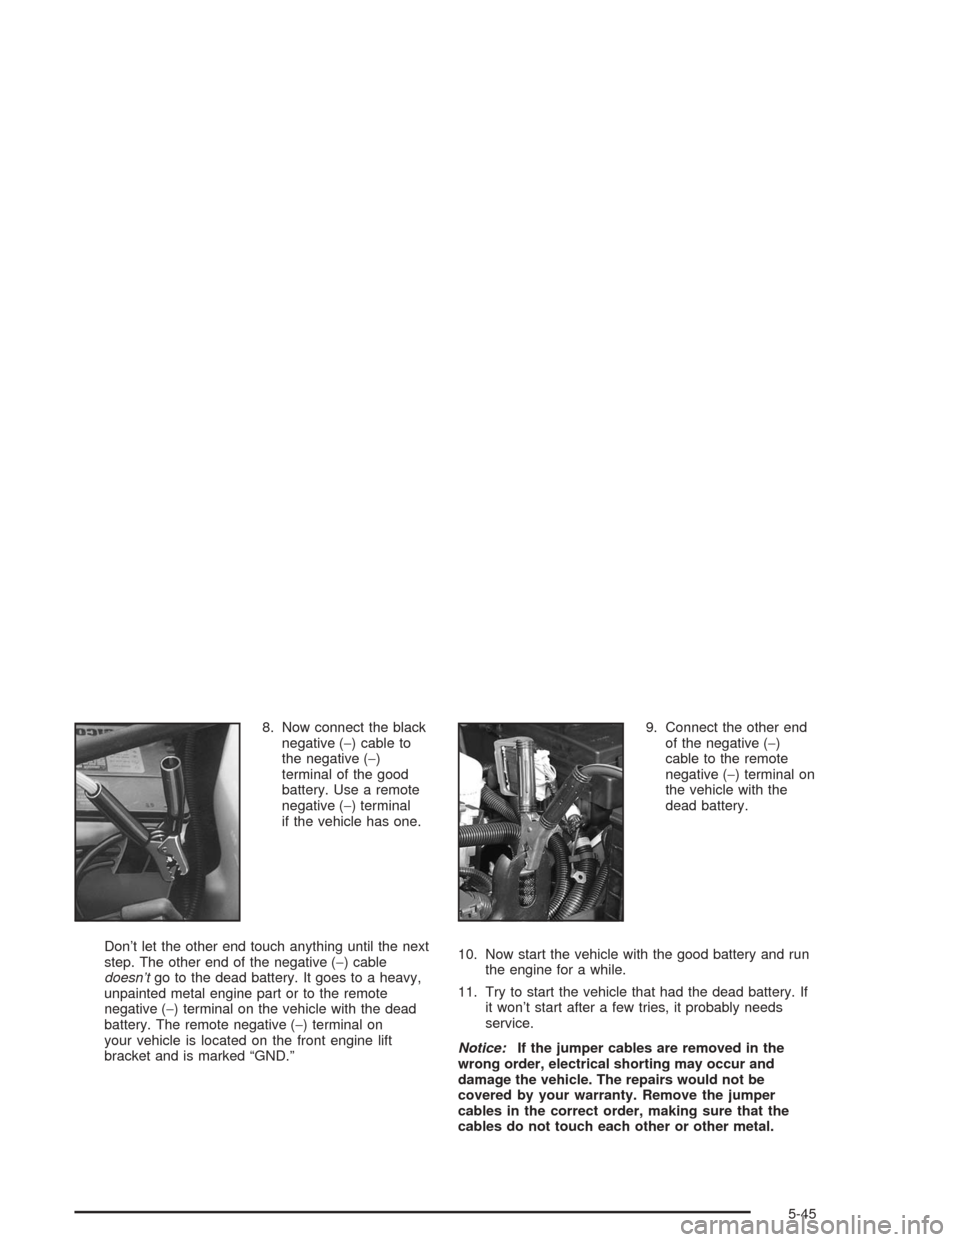
8. Now connect the black
negative (−) cable to
the negative (−)
terminal of the good
battery. Use a remote
negative (−) terminal
if the vehicle has one.
Don’t let the other end touch anything until the next
step. The other end of the negative (−) cable
doesn’tgo to the dead battery. It goes to a heavy,
unpainted metal engine part or to the remote
negative (−) terminal on the vehicle with the dead
battery. The remote negative (−) terminal on
your vehicle is located on the front engine lift
bracket and is marked “GND.”9. Connect the other end
of the negative (−)
cable to the remote
negative (−) terminal on
the vehicle with the
dead battery.
10. Now start the vehicle with the good battery and run
the engine for a while.
11. Try to start the vehicle that had the dead battery. If
it won’t start after a few tries, it probably needs
service.
Notice:If the jumper cables are removed in the
wrong order, electrical shorting may occur and
damage the vehicle. The repairs would not be
covered by your warranty. Remove the jumper
cables in the correct order, making sure that the
cables do not touch each other or other metal.
5-45
Page 394 of 420
Roadside Assistance Program
Security While You Travel
1-800-442-OLDS (6537)
As the proud owner of a new Oldsmobile vehicle, you
are automatically enrolled in the Oldsmobile Roadside
Assistance program. This value-added service is
intended to provide you with peace of mind as you drive
in the city or travel the open road. Oldsmobile’s
Roadside Assistance toll-free number is staffed by
courteous and capable Roadside Assistance
Representatives who are available 24 hours a day,
365 days a year.
We will provide the following services during the
Bumper-to-Bumper warranty period, at no expense
to you:
Fuel Delivery:Delivery of enough fuel
($5 maximum) for the customer to get to the
nearest service station.
Lock-out Service (identi�cation required):
Replacement keys or locksmith service will
be covered at no charge if you are unable to gain
entry into your vehicle. Delivery of the replacement
key will be covered within 10 miles.
Emergency Tow:Tow to the nearest dealership for
warranty service or in the event of a
vehicle-disabling accident. Assistance when the
vehicle is mired in sand, mud or snow.
Flat Tire Change:Installation of a spare tire will be
covered at no charge. (The customer is responsible
for the repair or replacement of the tire if not
covered by a warrantable failure.)
Jump Start:No-start occurrences which require a
battery jump start will be covered at no charge.
Dealer Locator Service
Trip Routing:Your Roadside Assistance
Representative can provide you with speci�c
information regarding this feature.
Trip Interruption Expense Bene�ts:Your
Roadside Assistance Representative can provide
you with speci�c information regarding this feature.
In many instances, mechanical failures are covered
under Oldsmobile’s Bumper-to-Bumper warranty.
However, when other services are utilized, our Roadside
Assistance Representatives will explain any payment
obligations you might incur.
7-6
Page 410 of 420
HomeLink®Transmitter, Programming................2-34
Hood
Checking Things Under................................5-10
Release.....................................................5-10
Horn............................................................... 3-7
How to Add Coolant to the Coolant Recovery
Tank ..........................................................5-29
How to Add Coolant to the Radiator..................5-32
How to Add Fluid............................................5-23
How to Check........................................5-21, 5-64
How to Check Lubricant...................................5-48
How to Check Power Steering Fluid..................5-35
How to Inspect...............................................5-20
How to Use This Manual...................................... ii
How to Wear Safety Belts Properly...................1-13
Hydroplaning..................................................4-32
I
ICE POSSIBLE..............................................3-56
If No Steam Is Coming From Your Engine..........5-27
If Steam Is Coming From Your Engine...............5-26If the Light Is Flashing.....................................3-38
If the Light Is On Steady.................................3-38
If You Are Caught in a Blizzard.........................4-40
If You Are Stuck in Sand, Mud, Ice or Snow.......4-42
If You Do Decide To Pull A Trailer.....................4-51
Ignition Positions.............................................2-19
Infants and Young Children, Restraints...............1-29
In�ation - Tire Pressure...................................5-64
Instrument Panel
Cluster.......................................................3-29
Overview..................................................... 3-4
Instrument Panel Brightness.............................3-17
Interior Lamps................................................3-17
J
Jump Starting.................................................5-41
K
Keyless Entry System....................................... 2-4
Keys............................................................... 2-3
8