OLDSMOBILE SILHOUETTE 1994 Owners Manual
Manufacturer: OLDSMOBILE, Model Year: 1994, Model line: SILHOUETTE, Model: OLDSMOBILE SILHOUETTE 1994Pages: 276, PDF Size: 15.82 MB
Page 171 of 276
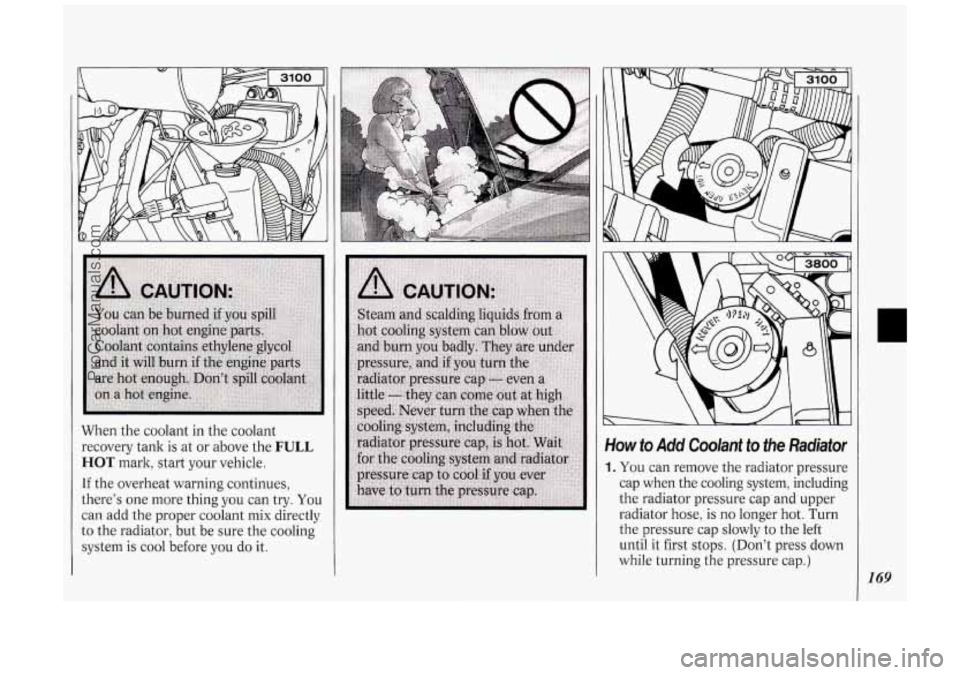
When the coolant in the coolant
recovery tank is
at or above the FULL
HOT mark, start your vehicle.
If the overheat warning continues,
there's one more thing you can try.
You
can add the proper coolant mix directly
to the radiator, but be sure the cooling
system is cool before you
do it.
Yow to Add Coolant to the Radiator
I. You can remove the radiator pressure
cap when the cooling system, including
the radiator pressure cap and upper
radiator hose, is
no longer hot. Turn
the pressure cap slowly to the left
until it first stops. (Don't press down
while turning the pressure cap.)
I69
ProCarManuals.com
Page 172 of 276
Problems on the Road
1 70
A
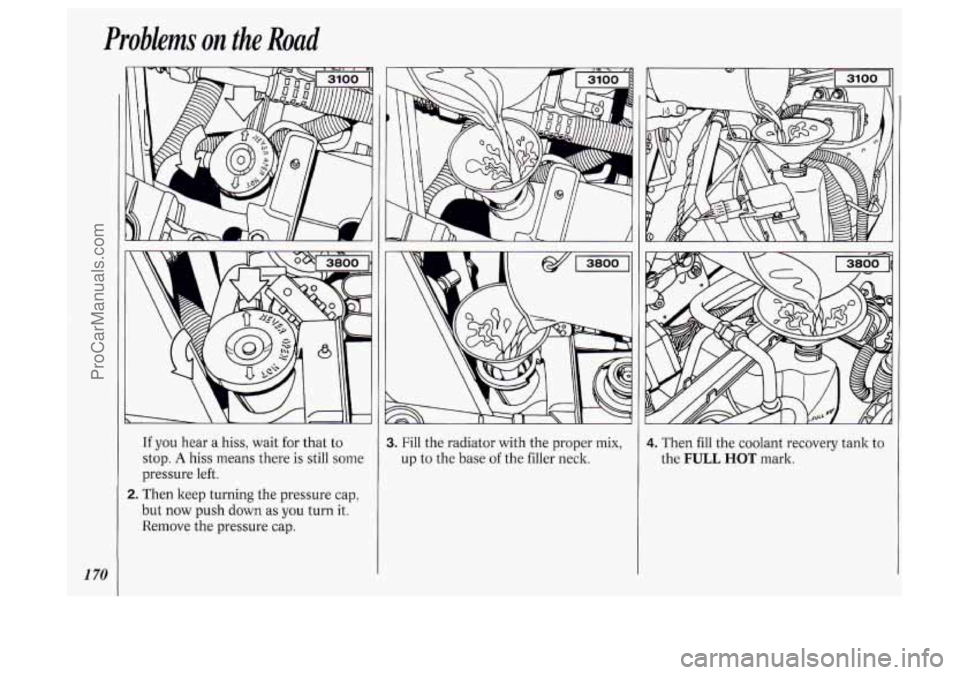
If you hear a hiss, wait for that to
stop.
A hiss means there is still some
pressure left.
E. Then keep turning the pressure cap,
but now push down as you turn it.
Remove the pressure cap.
I. Fill the radiator with the proper mix,
up to the base of the filler neck. 4. Then fill the coolant recovery tank to
the
FULL HOT mark.
ProCarManuals.com
Page 173 of 276
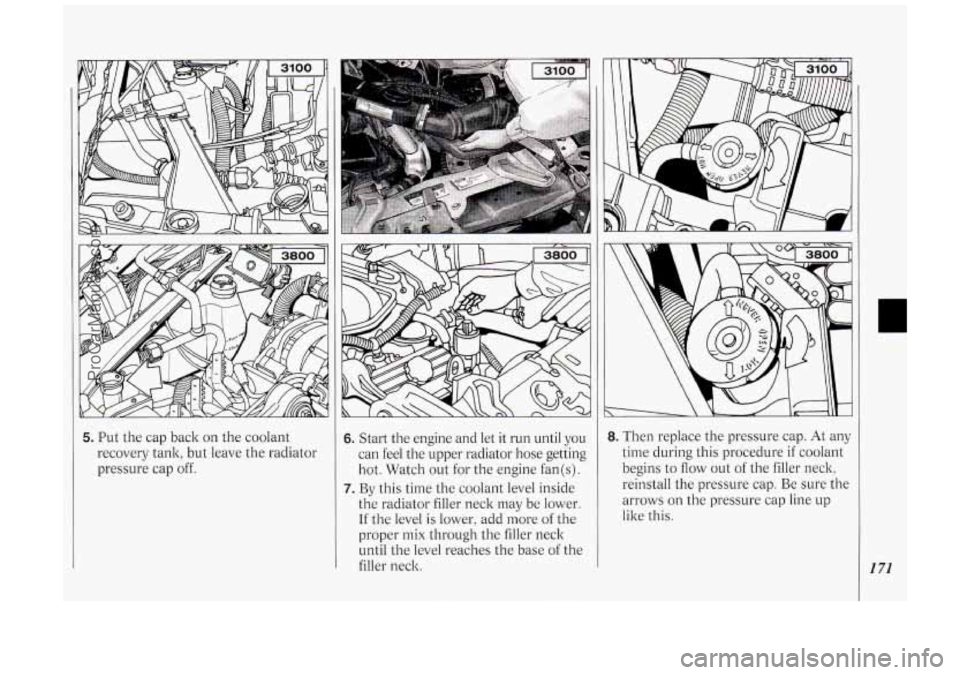
5. Put the cap back on the coolant
recovery tank, but leave the radiator
pressure cap off. 6. Start the engine and let it run until you
can feel the upper radiator hose getting
hot. Watch out for the engine fan(s).
7. By this time the coolant level inside
the radiator filler neck may be lower.
If the level is lower, add more of the
proper mix through the filler neck
until the level reaches the base of the
filler neck.
8. Then replace the pressure cap. At any
time during this procedure if coolant
begins to
flow out of the filler neck,
reinstall the pressure cap. Be sure the
arrows
on the pressure cap line up
like this.
171
ProCarManuals.com
Page 174 of 276
Problems on the Road
1 72
Ifa Tire Goes Flat
It’s unusual for a tire to “blow out”
while you’re driving, especially if
you
maintain your tires properly. If air goes
out of a tire, it’s much more likely to
leak out slowly. But
if you should ever
have a “blowout,” here are a few tips
about what to expect and what to do:
If a front tire fails, the flat tire will
create a drag that pulls the vehicle
toward that side. Take your foot
off the
accelerator pedal and grip the steering
wheel firmly. Steer
to maintain lane
position, then gently brake to a stop
well
out of the traffic lane.
A rear blowout, particularly on a curve,
acts much like a skid and may require
the same correction you’d use in a skid.
In any rear blowout, remove your foot
from the accelerator pedal. Get the
vehicle under control by steering the
way
you want the vehicle to go. It may
be very bumpy and noisy, but you can
still steer. Gently brake to a stop, well
off the road if possible.
If a tire goes flat, the next section shows
how to
use your jacking equipment to
change a flat tire safely.
Air Inflator
Your vehicle may have an air inflator
for use in bringing tires up to the proper
pressure.
To learn about it, see the
Index under Air Inflator System.
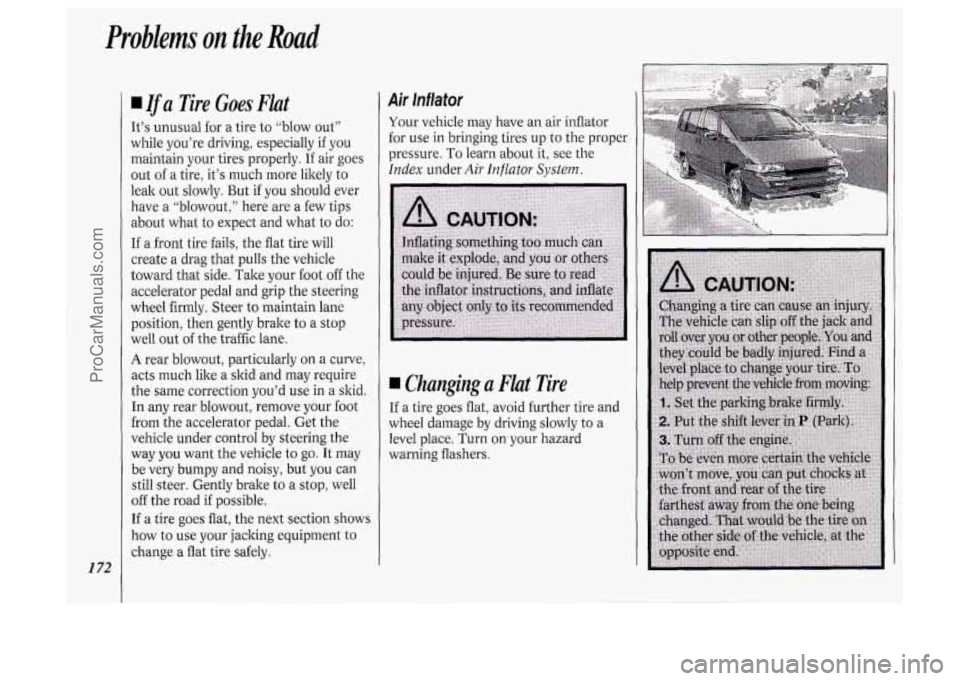
Changing a Flat Tire
If a tire goes flat, avoid further tire and
wheel damage by driving slowly to a
level place. Turn on your hazard
warning flashers.
ProCarManuals.com
Page 175 of 276
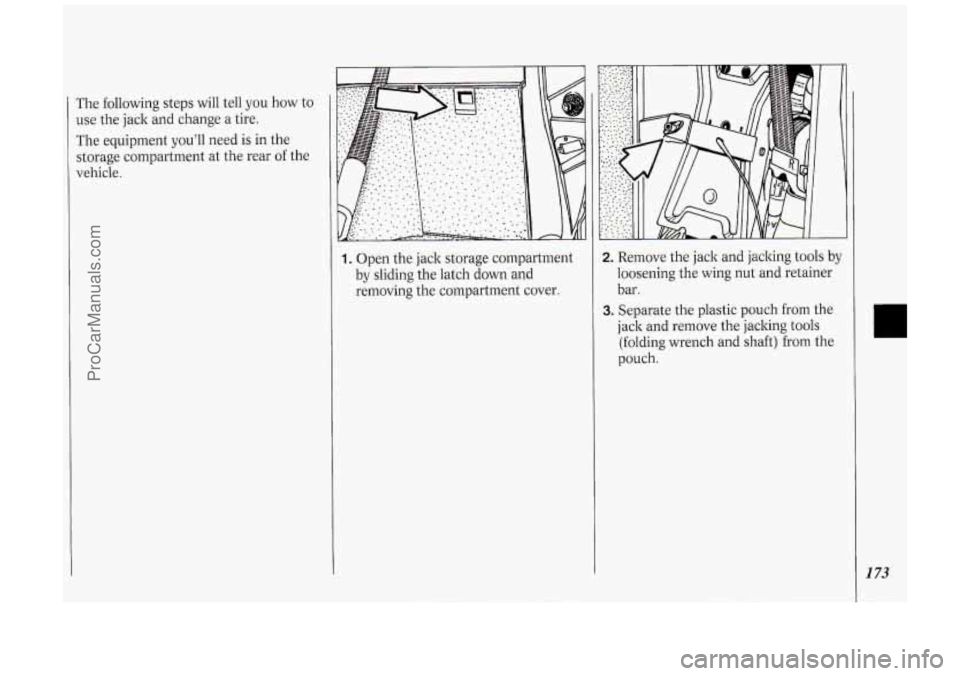
The following steps will tell you how to
use the jack and change
a tire.
The equipment you’ll need is in the
storage compartment
at the rear of the
vehicle.
1. Open the jack storage compartment
by sliding the latch down and
removing the compartment cover.
2. Remove the jack and jacking tools by
loosening the wing nut and retainer
bar.
3. Separate the plastic pouch from the
jack and remove the jacking tools
(folding wrench and shaft) from the
pouch.
I 73
ProCarManuals.com
Page 176 of 276
Problems on the Road
I 74
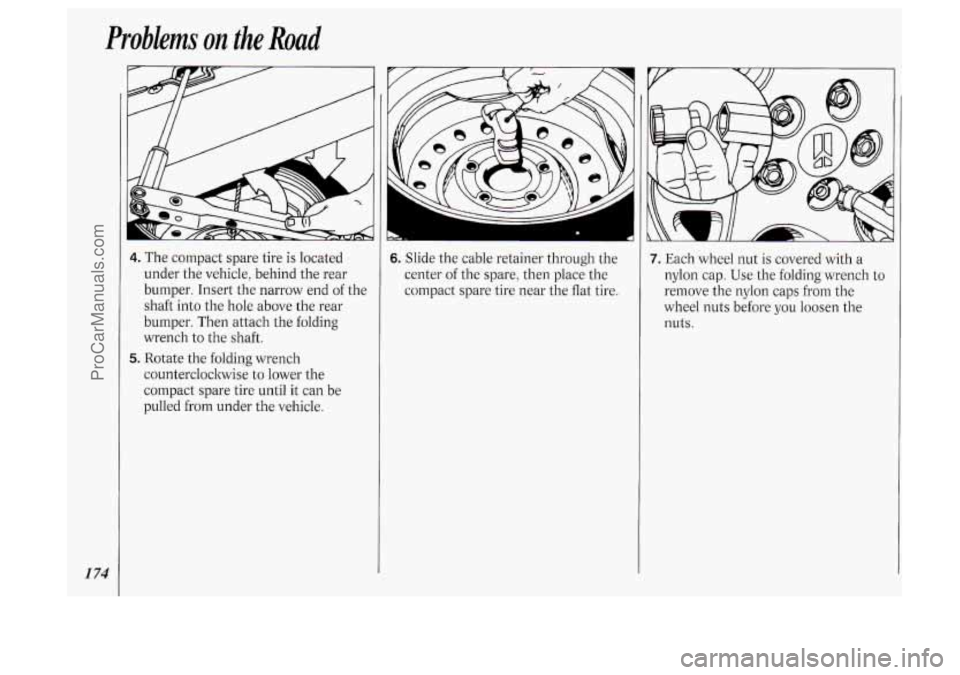
4. The compact spare tire is located
under the vehicle, behind the rear
bumper. Insert the narrow end of the
shaft into the hole above the rear
bumper. Then attach the folding
wrench to the shaft.
counterclockwise to lower the
compact spare tire until
it can be
pulled from under the vehicle.
5. Rotate the folding wrench
I
6. Slide the cable retainer through the
center of the spare, then place the
compact spare tire near the flat tire.
I
7. Each wheel nut is covered with a
nylon cap. Use the folding wrench to
remove the nylon caps from the
wheel nuts before
you loosen the
nuts.
ProCarManuals.com
Page 177 of 276
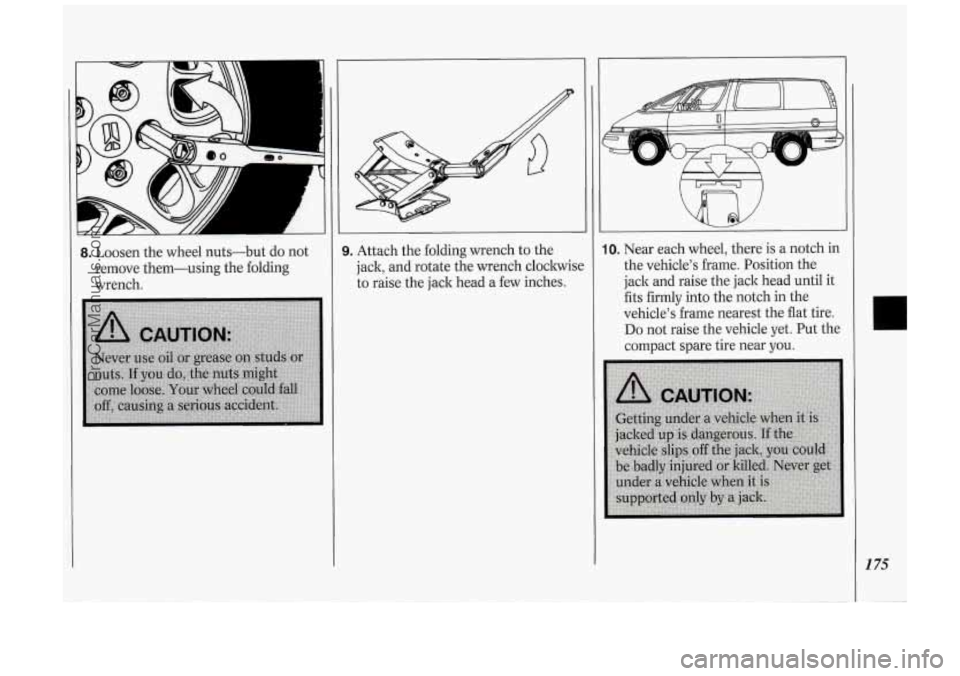
8. Loosen the wheel nuts-but do not
remove them-using the folding
wrench.
I
3. Attach the folding wrench to the
jack, and rotate the wrench cloclwisc
to raise the jack head a few inches. 10. Near each wheel, there is a notch in
the vehicle’s frame. Position the
jack and raise the jack head until it
fits firmly into the notch in the
vehicle’s frame nearest the flat tire.
Do not raise the vehicle yet. Put the
compact spare tire near you.
1 75
ProCarManuals.com
Page 178 of 276
Problems on the Road
1 76
NOTICE:
Raising your vehicle with the jack
improperly positioned will damage
the vehicle or may allow the vehicle
to fall off the jack. Be sure to fit the
jack lift head into the proper
location before raising your vehicle.
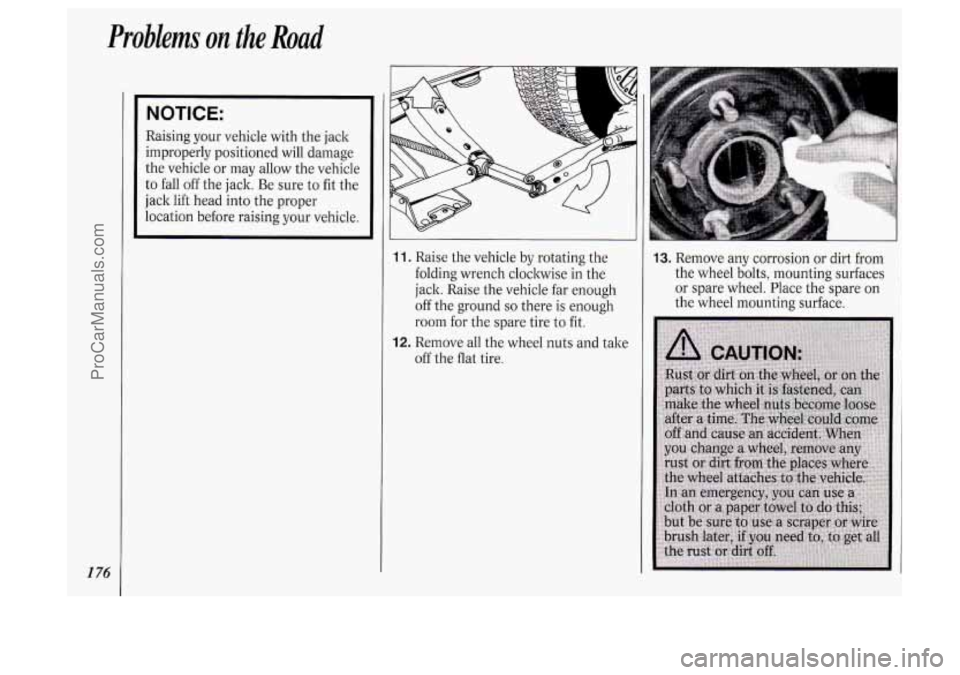
11. Raise the vehicle by rotating the
folding wrench clockwise in the
jack. Raise the vehicle far enough
off the ground
so there is enough
room for the spare tire to fit.
12. Remove all the wheel nuts and take
off the
flat tire.
3. Remove any corrosion or dirt from
the wheel bolts, mounting surfaces
or spare wheel. Place the spare on
the wheel mounting surface.
ProCarManuals.com
Page 179 of 276
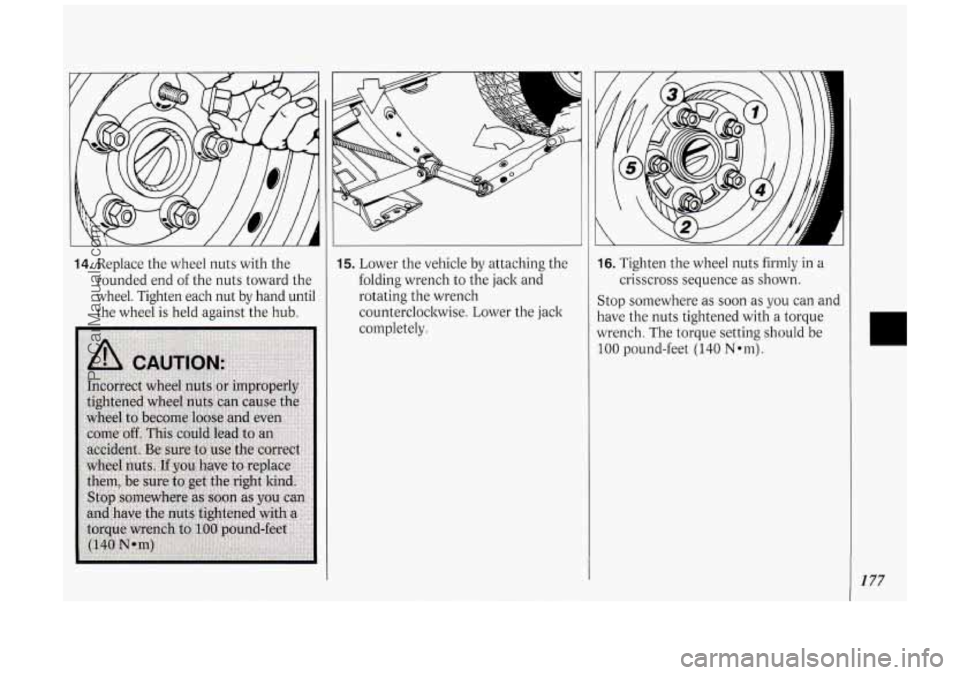
14. Replace the wheel nuts with the
rounded end of the nuts toward the
wheel. Tighten each nut by hand until
the wheel is held against the hub.
I
15. Lower the vehicle by attaching the
folding wrench to the jack and
rotating the wrench
counterclockwise. Lower the jack
completely.
I
16. Tighten the wheel nuts firmly in a
crisscross sequence as shown.
Stop somewhere as soon as you can and
have the nuts tightened with a torque
wrench. The torque setting should be
100 pound-feet (140 Nmm).
177
ProCarManuals.com
Page 180 of 276

Problems on the Road
1 78
17. Lay the flat tire near the rear of the
vehicle with the valve stem down.
Slide the cable retainer through the
center of the wheel and raise the flat
tire until you hear the hoist
mechanism click twice. This means
the wheel is firmly stored against
the underside of the vehicle. When
storing the spare tire, be certain to
turn the spare
so the valve stem is
near the rear of the vehicle. This
will help you to check and maintain
tire pressure in the spare.
Push against the tire to be certain it
is stored firmly.
18. Replace all jacking tools as they were
stored in the storage compartment and
replace the compartment cover. Be
sure to also store the nylon nut caps.
When
you replace the compact spare
tire with a full-size tire, replace the
nylon nut caps over the wheel nuts.
Tighten them “hand tight” using the
folding wrench (see step
7).
Compact Spare Tire
Although the compact spare was fr .Ill!
inflatedwhen you; vehiile was new, :
can lose air after a time. Check the
jr
it
inflation pressure regularly. It should be
60 psi (420 1tPa). After installing the
compact spare on your vehicle, you
should stop as soon as possible and
make sure your spare tire is correctly
inflated. The compact spare is made to
perform well at posted speed limits for
distances up to
3,000 miles (5 000 ltm).
The compact spare
is made to go up to
3,000 miles (5 000 ltm), so you can
finish your trip and have your full-size
tire repaired
or replaced where you
want. Of course, it’s best to replace
your spare with
a full-size tire as soon
as you can. Your spare will last longer
and be in good shape in case you need it
again.
ProCarManuals.com