instrument panel OLDSMOBILE SILHOUETTE 1994 Owners Manual
[x] Cancel search | Manufacturer: OLDSMOBILE, Model Year: 1994, Model line: SILHOUETTE, Model: OLDSMOBILE SILHOUETTE 1994Pages: 276, PDF Size: 15.82 MB
Page 29 of 276
Q;;=
LOW
SERVICE
ENGINE SOON (BRAI
la
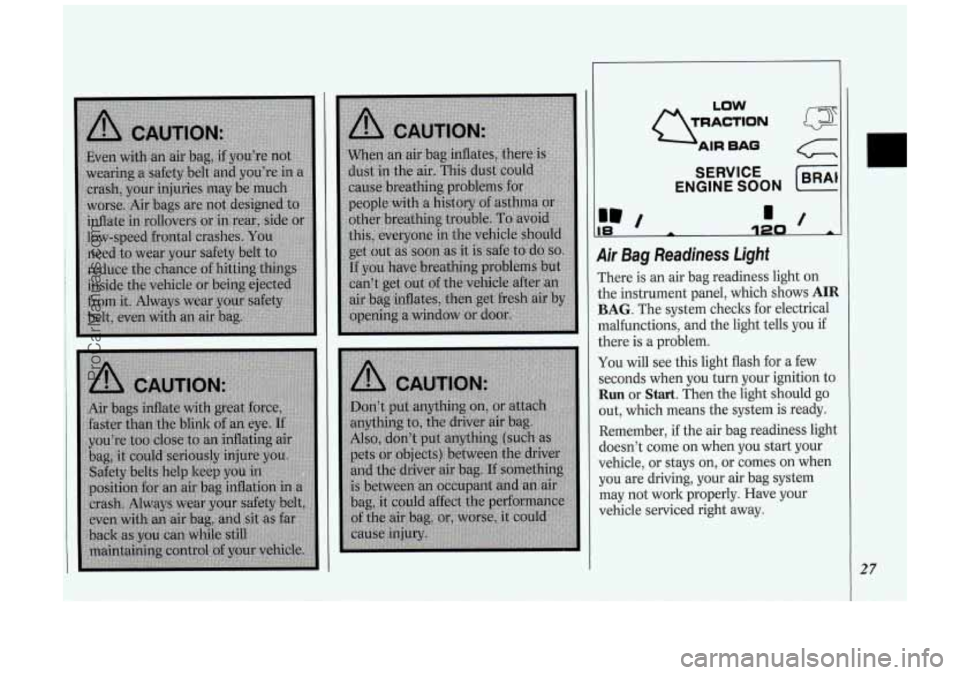
Air Bag Readiness Light
There is an air bag readiness light on
the instrument panel, which shows
AIR
BAG. The system checks for electrical
malfunctions, and the light tells you
if
there is a problem.
You will see this light flash for a few
seconds when you turn your ignition to
Run or Start. Then the light should go
out, which means the system is ready.
Remember,
if the air bag readiness light
doesn’t come
on when you start your
vehicle, or stays
on, or comes on when
you are driving, your air bag system
may not work properly. Have your
vehicle serviced right away.
27
ProCarManuals.com
Page 45 of 276
Here you can learn about the many standard and optional features on
your Oldsmobile. and information on
starting. shifting and braking
. Also
explained are the instrument panel
and the warning systems that tell you
if everything is working properly -
and what to do if you have a
problem
.
Part 2
Features & Controls
Keys ........................................................................\
................................................... 44
Front Doors
........................................................................\
....................................... 45
Remote Lock Control
........................................................................\
........................ 48
Liftgate
........................................................................\
............................................... 56
Starting Your Engine
........................................................................\
........................ 58
Engine Coolant Heater ........................................................................\
...................... 61
Loclts
........................................................................\
.................................................. 45
Sliding Door
........................................................................\
...................................... 51
Ignition ........................................................................\
.............................................. 58
Shifting the Transaxle
........................................................................\
....................... 62
Parking Brake
........................................................................\
.................................... 65
Shifting into Park
........................................................................\
.............................. 66
Horn ........................................................................\
................................................... 69
Tilt Steering Wheel
........................................................................\
............................ 69
Windows
........................................................................\
............................................ 69
Turn Signal and Lane Change Indicator
.................................................................. 71
Cruise Control ........................................................................\
................................... 72
Headlights
........................................................................\
.......................................... 74
Interior Lights
........................................................................\
................................... 76
Windshield Wipers
........................................................................\
............................ 77
Windshield Washer
........................................................................\
........................... 78
Mirrors
........................................................................\
............................................... 86
Glove
Box and Storage Compartments .................................................................... 88
Luggage Carrier ........................................................................\
................................. 92
Instrument Panel
........................................................................\
............................... 96
Warning Lights, Gages and Indicators
................................................................... 100 43
ProCarManuals.com
Page 51 of 276

you won't be able to set the door lock
with the power door lock switch or the
remote transmitter. This security
feature is designed to help keep you
from locking your keys in your vehicle.
Lock Delay
The lock delay feature can be operated
using either the remote key chain
transmitter or the power door locks
switch (see
Power Door Locks earlier in
this section).
For the lock delay feature to work, the
ignition and the interior lights control
to the left of the instrument panel
cluster must be off.
If any door is open when
you press B or
the rear of either power door lock
switch, a chime will sound three times.
This indicates that
all doors and the
liftgate will lock about five seconds after
the last door has been closed.
To override the lock delay feature, press
the lock symbol or the rear of either
power door lock switch again, and the
doors and liftgate will lock immediately.
To cancel the lock delay feature, press
the unlock symbol or the front of either
power door lock switch.
Remote Operation of Power Sliding
Door
If you have the optional power sliding
door (see
Power Sliding Door later in
this section), your remote transmitter
will have a third button labeled
.' .
Press it to open or close the sliding
door.
If the sliding door is locked, first press
a twice to unlock all doors, then press
You can operate the power sliding door
with the remote transmitter only when
the power sliding door enable switch on
the overhead console
is in the ON
position.
= to open the sliding door.
Matching Transmitter@) To Your
Vehicle
Each key chain transmitter is coded to
prevent another transmitter from
unlocking your vehicle. If a transmitter
is lost or stolen, a replacement can be
purchased through your dealer.
Remember to bring the remaining
transmitters with you when you go
to
your dealer. When the dealer matches
the replacement transmitter to your
vehicle, the remaining transmitters
must also be matched. Once the new
transmitter is coded, the lost
transmitter will not unlock your vehicle.
You can match
a transmitter to as many
different vehicles as you own, provided
they are equipped with
exactly the
same model system.
(General Motors
offers several different models of these
systems on their vehicles.) Each vehicle
can have up to four transmitters
matched to it.
See your dealer to match transmitters to
another vehicle.
49
ProCarManuals.com
Page 55 of 276

switch on the side of the overhead
console. (If you have the standard
compact overhead console, this switch
is located between the reading lights.)
The sliding door must be unlocked for
the power sliding door to operate. The
ignition does not have to be on, and the
key does not have to be in the ignition.
To prevent accidental operation
of the
sliding door, disable the power sliding
door by placing the power sliding door
enable switch in the
OFF position. The
power sliding door will only open if
the transaxle is in
P (Park). The
transaxle does not have to be in
P
(Park) to close the door. If the enable
switch is
ON and the power sliding
door is open or in the process
of closing
when you shift out of
P (Park), a
buzzer will sound and the '- -. light on
your instrument panel will flash (see the
Index under Sliding Door Ajar Warning
Light).
This is a warning that the sliding
door
is not completely closed.
c
53
ProCarManuals.com
Page 59 of 276
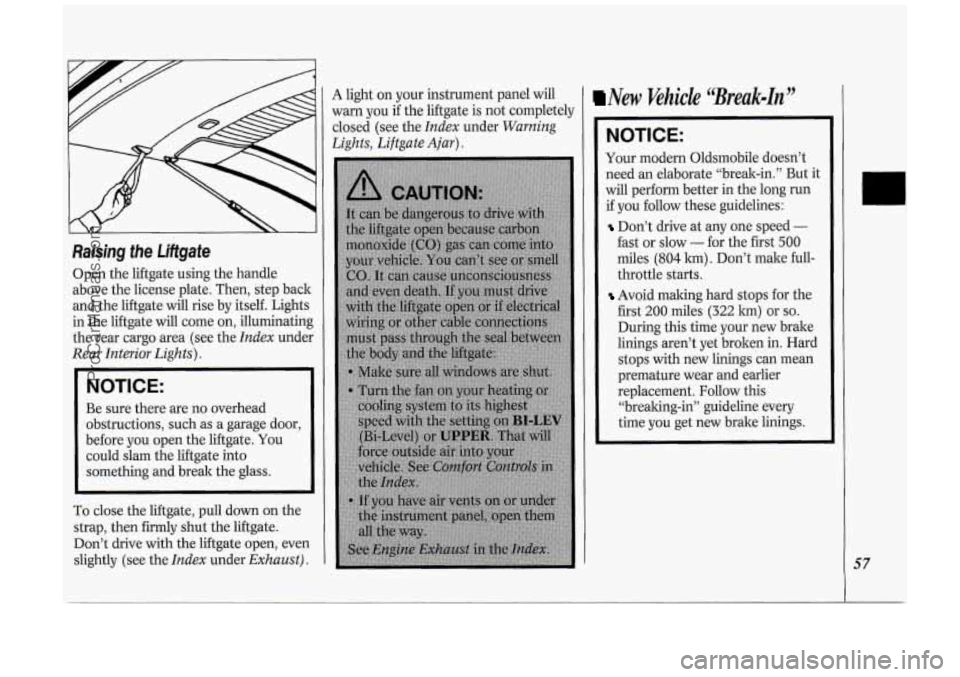
Raising the Liftgate
Open the liftgate using the handle
above the license plate. Then, step back
and the liftgate will rise by itself. Lights
in the liftgate will come on, illuminating
the rear cargo area (see the
Index under
Rear Interior Lights).
NOTICE:
Be sure there are no overhead
obstructions, such as a garage door,
before you open the liftgate. You
could slam the liftgate into
something and break the glass.
To close the liftgate, pull down on the
strap, then firmly shut the liftgate.
Don’t drive with the liftgate open, even
slightly (see the
Index under Exhaust).
A light on your instrument panel will
warn you
if the liftgate is not completely
closed (see the
Index under Warning
Lights, Liftgate Ajar).
New Vehicle “Break-In”
NOTICE:
Your modern Oldsmobile doesn’t
need an elaborate “break-in.” But it
will perform better in the long run
if you follow these guidelines:
Don’t drive at any one speed -
fast or slow - for the first 500
miles (804 km) . Don’t make full-
throttle starts.
Avoid making hard stops for the
first
200 miles (322 km) or so.
During this time your new brake
linings aren’t yet broken in. Hard
stops with new linings can mean
premature wear and earlier
replacement. Follow this
“breaking-in” guideline every
time you get new brake linings.
57
ProCarManuals.com
Page 60 of 276

Features & Con&oli
58
U
I Ignition Switch
With the ignition key in the ignition
switch, you can turn the switch to five
positions:
Accessory: An “on” position in which
you can operate your electrical power
accessories. Press in the ignition switch
as you turn the top
of it toward you.
Lock: The only position in which you
can remove the ltey. This loclts your
steering wheel, ignition and transaxle.
Off Unlocks the steering wheel,
ignition, and transaxle, but does not
send electrical power to any accessories
Use this position
if your vehicle must be
pushed or towed, but never try to push-
start your vehicle.
A warning chime will
sound
if you open the driver’s door the
ignition.
Run: An “on” position to which the
switch returns after you start your
engine and release the switch. The
switch stays in the
Run position when
the engine is running. But even when
the engine is not running, you can use
Run to operate your electrical power
accessories, and to display some
instrument panel warning lights.
Start: Starts the engine. When the
engine starts, release the ltey. The
ignition switch will return to
Run for
normal driving.
Note that even if the engine is not
running, the positions
Accessory and
Run are “on” positions that allow you
to operate your electrical accessories,
such as the radio.
NOTICE:
If your key seems stuck in Lock
and you can’t turn it, be sure it is
all the way in. If it is, then turn the
steering wheel left and right while
you turn the key hard. But turn the
key only with your hand. Using a
tool
to force it could break the key
or the ignition switch. If none of
this works, then your vehicle needs
service.
I Starting Your Engine
Engines start differently. The 8th digit
of your Vehicle Identification Number
(VIN) shows the code letter or number
for your engine.
You will find the VIN
at the top left of your instrument panel.
(See
Vehicle Identification Number in
the
Index.) Follow the proper steps to
start the engine.
Move your shift lever
to P (Park) or N
(Neutral). Your engine won’t start in
any other position
- that’s a safety
feature.
To restart when you’re already
moving, use
N (Neutral) only.
ProCarManuals.com
Page 73 of 276
0
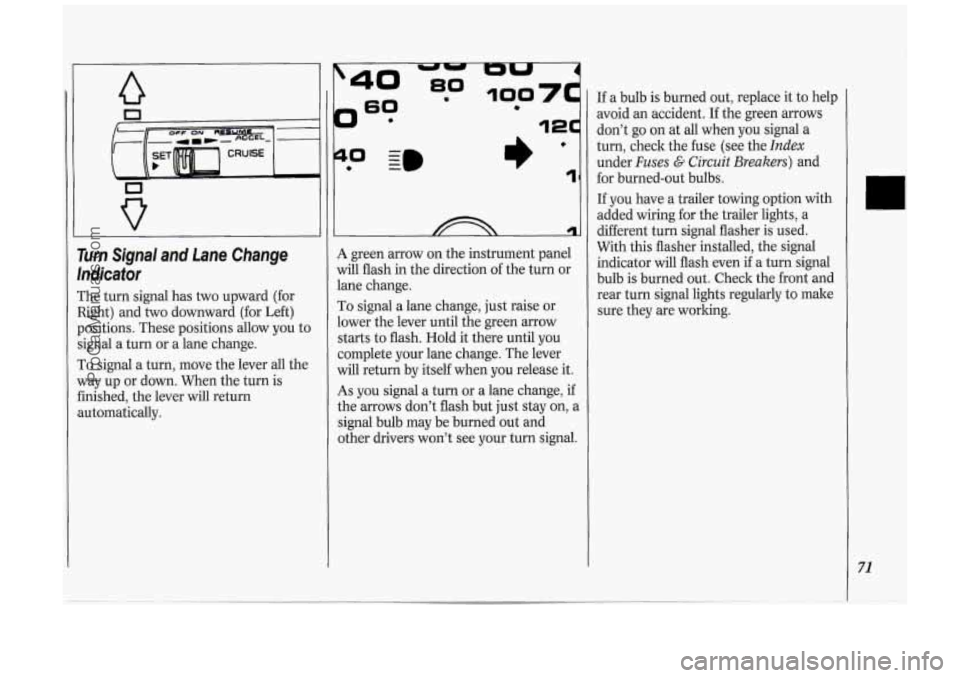
Turn Signal and Lane Change
lndicafor
The turn signal has two upward (for
Right) and two downward (for Left)
positions. These positions allow you to
signal a turn or a lane change.
To signal a turn, move the lever all the
way up or down. When the turn is
finished, the lever will return
automatically.
?
0 - I)’ 1
A green arrow on the instrument panel
will flash in the direction of the turn or
lane change.
To signal a lane change, just raise or
lower the lever until the green arrow
starts to flash. Hold it there until you
complete your lane change. The lever
will return by itself when you release it.
As you signal a turn or a lane change, if
the arrows don’t flash but just stay on, a
signal bulb may be burned out and
other drivers won’t see your turn signal. If
a bulb is burned out, replace it to help
avoid an accident. If the green arrows
don’t go on at all when you signal a
turn, check the fuse (see the
Index
under Fuses G Circuit Breakers) and
for burned-out bulbs.
If you have a trailer towing option with
added wiring for the trailer lights, a
different turn signal flasher is used.
With this flasher installed, the signal
indicator will flash even
if a turn signal
bulb is burned out. Check the front and
rear turn signal lights regularly to make
sure they are working.
71
ProCarManuals.com
Page 76 of 276
74
Features & Controls
To slow down in very small amounts,
push the button for less than half
a
second. Each time you do this, you'll
go
1 mph (1.6 ltm/h) slower.
Passing Another Vehicle While
Using Cruise Control
Use the accelerator pedal to increase
your speed. When you take your foot off
the pedal, your vehicle will slow down
to the cruise control speed you set
earlier.
Using Cruise Control on Hills
How well your cruise control will work
on hills depends upon your speed, load,
and the steepness of the hills. When
going up steep hills, you may have to
step on the accelerator pedal to
maintain your speed. When going
downhill,
you may have to brake or
shift to a lower gear to keep your speed
down. Of course, applying the brake
takes
you out of cruise control. Many
drivers find this to be too much trouble
and don't use cruise control on steep
hills.
To Get Out of Cruise Control
There are two ways to turn off the
cruise control:
Step lightly on the brake pedal; OR
Move the cruise switch to OFF.
If your vehicle has the optional traction
control system
(TCS), the cruise
control will shut
off when TCS is
actively controlling wheel spin. See the
Index under Traction Control System.
To Erase Cruise Speed Memory
When you turn off the cruise control or
the ignition, your cruise control set
speed memory is erased. If you have the
3800 V6 engine, cruise control memory
will also be erased when you place the
transaxle in
P (Park).
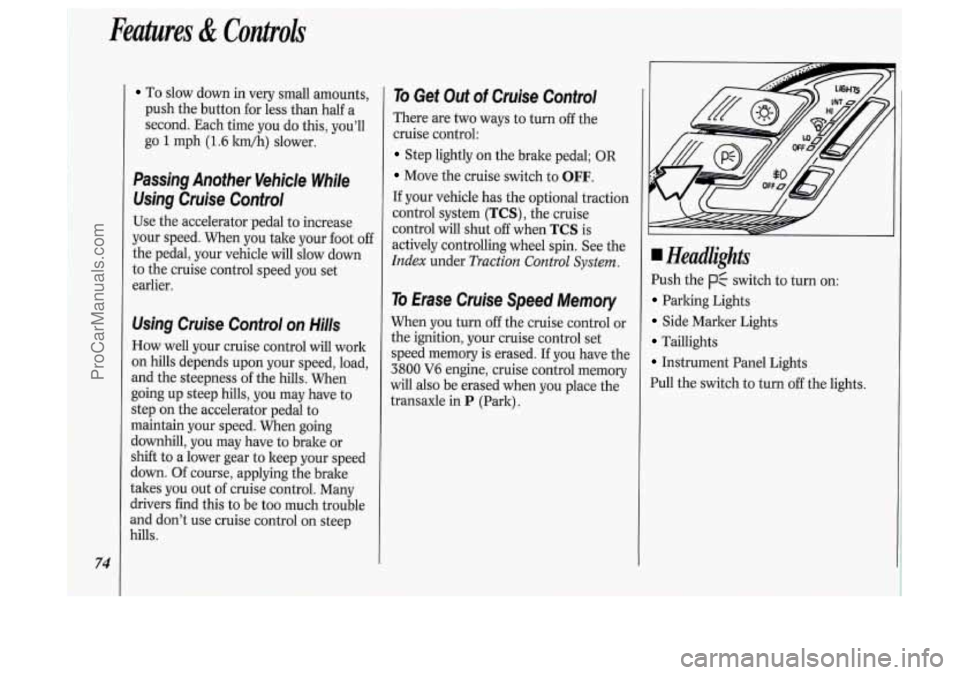
Headlights
Push the p$ switch to turn on:
Parking Lights
Side Marker Lights
Taillights
Instrument Panel Lights
Pull the switch to turn
off the lights.
ProCarManuals.com
Page 77 of 276

Push the -:a- switch to turn on the
headlights, kogether with:
Parking Lights
Side Marker Lights
Taillights
Instrument Panel Lights
Pull the switch to turn off the lights.
Operation of Lights
Although your vehicle’s lighting system
(headlights, parking lights, fog lamps,
side marker lights and taillights) meets
all applicable federal lighting
requirements, certain states and
provinces may apply their own lighting
regulations that may require special
attention before you operate these
lights.
For example, some jurisdictions may
require that you operate your fog lamps
only when your lower beam headlights
are also on, or that headlights be turned
on whenever you must use your
windshield wipers.
In addition, most
jurisdictions prohibit driving solely with
parking lights, especially at dawn or
dusk. It is recommended that you check
with your
own state or provincial
highway authority for applicable
lighting regulations.
Lights On Reminder
If you turn the ignition key to the Off or
Lock position while leaving the lights
on, you will hear
a warning chime.
Headlight High-Low Beam
Changer
To change the headlights from high to
low beam, or low to high, simply pull
the turn signal lever all the way toward
you. Then release it.
When the high beams are
on, a blue
light on the instrument cluster also will
be on.
75
ProCarManuals.com
Page 78 of 276
Features & Controls
76
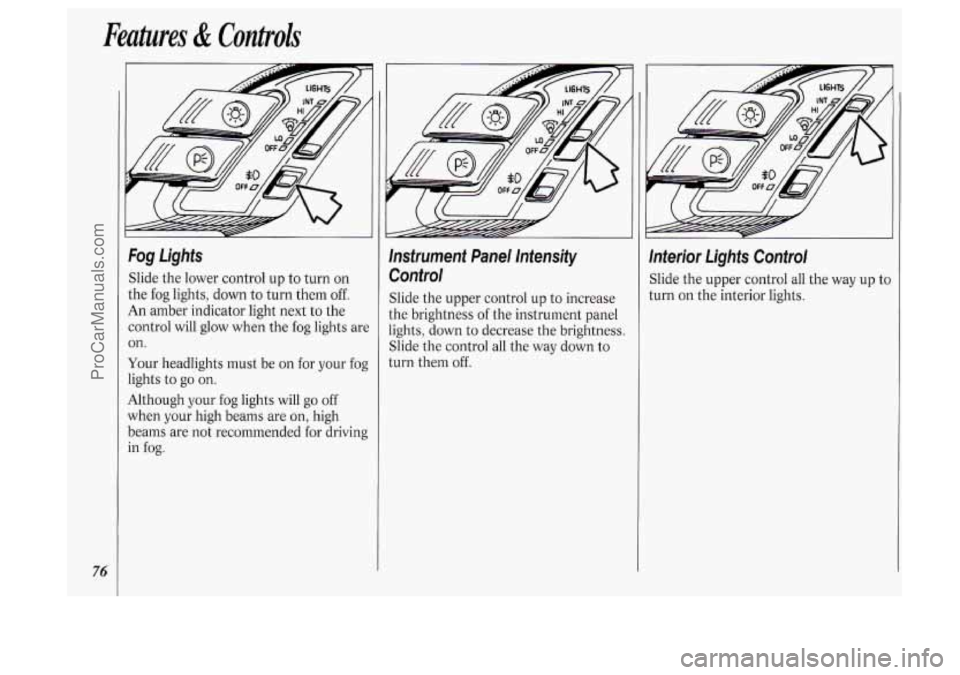
Fog Lights
Slide the lower control up to turn on
the fog lights, down to turn them
off.
An amber indicator light next to the
control will glow when the fog lights are
on.
Your headlights must be on for your fog
lights to
go on.
Although your fog lights will go off
when your high beams are on, high
beams are not recommended for driving
in
fog.
lnsfrument Panel lntensify
Control
Slide the upper control up to increase
the brightness of the instrument panel
lights, down to decrease the brightness.
Slide the control all the way down to
turn them off.
lnterior Lights Control
Slide the upper control all the way up tc
turn on the interior lights.
ProCarManuals.com