stop start OLDSMOBILE SILHOUETTE 1994 User Guide
[x] Cancel search | Manufacturer: OLDSMOBILE, Model Year: 1994, Model line: SILHOUETTE, Model: OLDSMOBILE SILHOUETTE 1994Pages: 276, PDF Size: 15.82 MB
Page 128 of 276
Comfort Conboh &Audio Systems
126
COMP (Compression): Press this
button to make soft and loud passages
more equal in volume. Press again to
resume normal play.
When Finished with the Compact
Disc Player:
If you press POWER or turn off the
ignition, the disc will stay in the player
and start again when you turn on the
ignition or power switch. The disc will
begin playing at the point where it had
been stopped.
ST/PL (Stop/Play): Press to stop the
disc player; the radio will play. Press
again to play the disc (the player will
start playing the disc where it was
stopped earlier).
EJCT (Eject): Press to eject the disc;
the radio will play.
CD Player Anti-Theft Feature
Delco LOC 110 is a security feature for
the compact disc player. It can be used
or ignored. If ignored, the system plays
normally. If it is used, your player won’t
be usable if it is ever stolen, because it will go
to LOC mode any time battery
power is removed. Until an
unLOC
code is entered, it will not turn on.
The instructions below tell you how to
enter
a secret code into the system. If
your vehicle loses battery power for any
reason, you must unlock the system
with the secret code before the radio
will turn on.
To Set the Anti-Theft System:
1. Write down any six-digit number and
2. Turn the ignition to the Accessory or
3. Press the POWER button to turn the
4. Press the PREV and FF buttons
keep
it in a safe place.
Run position.
radio off.
together. Hold them down until
“- - -”
shows on the display (at least five
seconds).
You are ready to enter your
secret code.
NOTE: If you allow more than
15
seconds to elapse between any steps,
the radio automatically reverts to time
and you must start the procedure over
at step
4.
5. Press SET and 000 will appear on
6. Press and hold SEEK until the first
7. Press and hold SCAN until the
the
display.
digit
of your code appears.
second and third digits of your code
appear.
8. Press AM/FM and 000 will appear
again. Now you are ready to enter the
last three digits of your code.
9. Repeat steps 6 and 7 for the last three
digits of your code.
IO. Press AM/FM and rEP will appear.
11. Repeat steps 6 through 10. This
time
SEC will appear, indicating
that the radio is secure. If
“- - -”
appears, the steps were not
successful and you must repeat the
entire procedure.
To Unlock the System After a Power
Loss:
When battery power is reapplied to a
secured radio, the radio won’t turn on
and
LOC will appear on the display.
Enter your secret code as follows; pause
no more than
15 seconds between
steps.
ProCarManuals.com
Page 138 of 276
Your Driving and the Road
* x1000
136
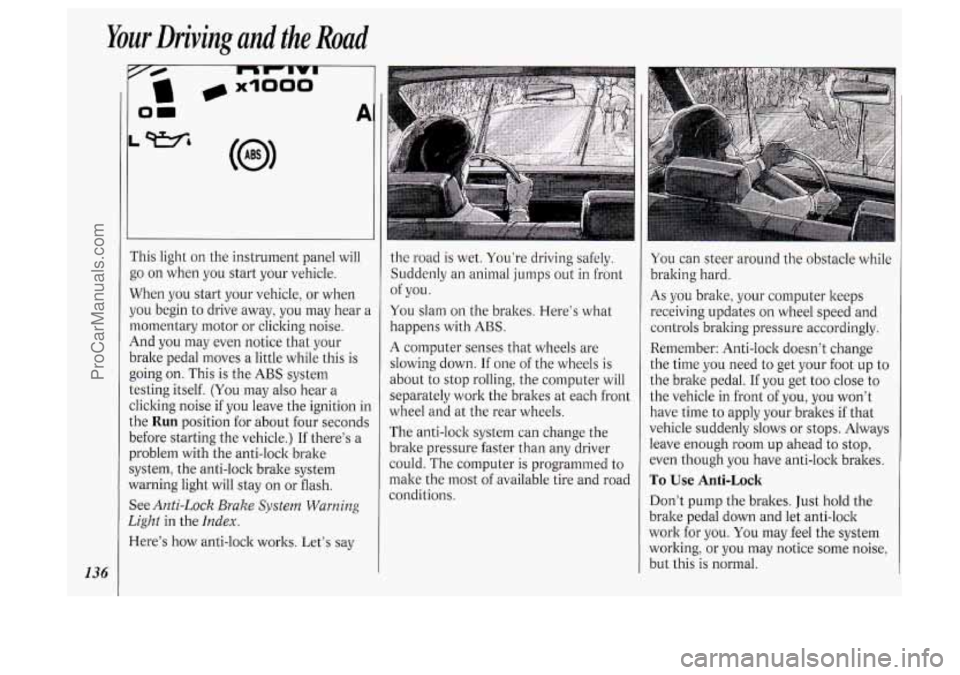
i‘his light on the instrument panel will
go on when you start your vehicle.
When you start your vehicle, or when
jou begin to drive away, you may hear a
nomentary motor or clicking noise.
4nd you may even notice that your
)rake pedal moves
a little while this is
going on. This is the
ABS system
:esting itself.
(You may also hear a
:licking noise if you leave the ignition in
.he
Run position for about four seconds
Iefore starting the vehicle.) If there’s a
Jroblem with the anti-lock brake
iystem, the anti-lock brake system
Yarning light will stay on or flash.
See
Anti-Lock Brake System Warning
2ight
in the Index.
lere’s how anti-lock works. Let’s say
1
the road is wet. You’re driving safely.
Suddenly an animal jumps out
in front
You slam on the brakes. Here’s what
happens with
ABS.
A computer senses that wheels are
slowing down.
If one of the wheels is
about to stop rolling, the computer will
separately work the brakes at each front
wheel and at the rear wheels.
The anti-lock system can change the
brake pressure faster than any driver
could. The computer is programmed to
make the most of available tire and road
conditions. of
you.
You can steer around the obstacle while
braking hard.
As you brake, your computer keeps
receiving updates on wheel speed and
controls braking pressure accordingly.
Remember: Anti-lock doesn’t change
the time you need
to get your foot up to
the brake pedal.
If you get too close to
the vehicle in front of you, you won’t
have time to apply your brakes if that
vehicle suddenly slows or stops. Always
leave enough room up ahead to stop,
even though you have anti-lock brakes.
To Use Anti-Lock
Don’t pump the brakes. Just hold the
brake pedal down and let anti-lock
work for you. You may feel the system
working, or you may notice some noise,
but this is normal.
ProCarManuals.com
Page 140 of 276

Your Driving and the Road
138
I’he traction control system
mtomatically comes
on whenever you
start your vehicle.
To limit wheel spin, especially in
slippery road conditions, you should
dways leave the system on. But you can
:urn the traction control system off if
IOU ever need to. (You should turn the
;ystem off
if your vehicle ever gets stuck
n sand, mud, ice or snow. See Rocking
Your Vehicle in the Index.)
To turn the system off, press the switch
ocated on the center instrument panel
:onsole.
The light on the switch will go
off. If the
Lraction control system is limiting wheel
;pin when you press the switch, the
;ystem won’t turn
off right away. It will wait until
there’s
no longer a current
need to limit wheel spin.
You can turn the system back on at any
time by pressing the switch again. The
light
on the switch should come on.
Braking in Emergencies
Use your anti-lock braking system when
you need to. With anti-lock, you can
steer and brake at the same time.
In
many emergencies, steering can help
you more than even the very best
braking.
Steering
Power Steering
If you lose power steering assist
because the engine stops or the system
is not functioning, you can steer but it
will take much more effort.
Steering Tips
Driving on Curves
It’s important to take curves at a
reasonable speed.
A lot of the “driver lost control”
accidents mentioned on the news
happen
on curves. Here’s why:
Experienced driver or beginner, each of
us is subject to the same laws of physics
when driving
on curves. The traction of
the tires against the road surface makes
it possible for the vehicle to change its
path when you turn the front wheels. If
there’s
no traction, inertia will keep the
vehicle going in the same direction.
If
you’ve ever tried to steer a vehicle on
wet ice, you’ll understand this.
The traction you can get in a curve
depends
on the condition of your tires
and the road surface, the angle at which
the curve is banked, and your speed.
While you’re in a curve, speed
is the one
factor you can control.
Suppose you’re steering through a
sharp curve. Then you suddenly
accelerate. Both control systems
-
steering and acceleration - have to do
their work where the tires meet the
road. Unless you have traction control
and the system is on, adding the sudden
acceleration can demand too much
of
those places. You can lose control.
ProCarManuals.com
Page 142 of 276
Your Driving and the Road
140
I
I Off-Road Recovery
You may find sometime that your right
wheels have dropped off the edge of a
road onto the shoulder while you’re
driving.
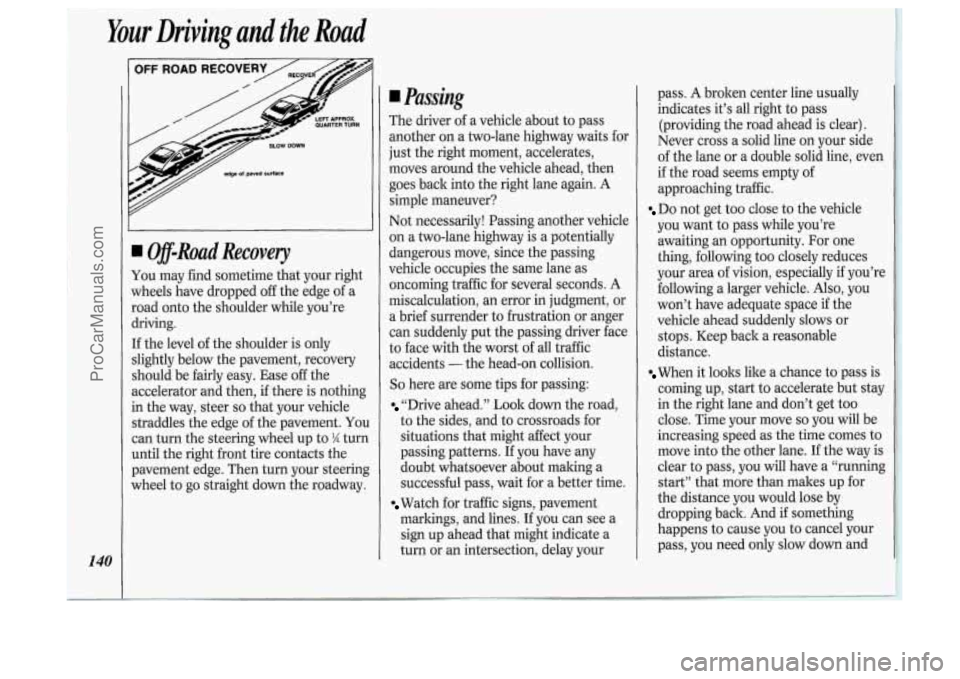
If the level of the shoulder is only
slightly below the pavement, recovery
should be fairly easy. Ease off the
accelerator and then, if there is nothing
in the way, steer
so that your vehicle
straddles the edge of the pavement.
You
can turn the steering wheel up to % turn
until the right front tire contacts the
pavement edge. Then turn your steering
wheel to go straight down the roadway.
I Passing
The driver of a vehicle abor It t o pass
another on a two-lane highway waits for
just the right moment, accelerates,
moves around the vehicle ahead, then
goes back into the right lane again.
A
simple maneuver?
Not necessarily! Passing another vehicle
on a two-lane highway is a potentially
dangerous move, since the passing
vehicle occupies the same lane as
oncoming traffic for several seconds.
A
miscalculation, an error in judgment, or
a brief surrender to frustration or anger
can suddenly put the passing driver face
to face with the worst of all traffic
accidents
- the head-on collision.
So here are some tips for passing:
“Drive ahead.” Look down the road,
to the sides, and to crossroads for
situations that might affect your
passing patterns. If you have any
doubt whatsoever about malting a
successful pass, wait for a better time.
markings, and lines. If you can see
a
sign up ahead that might indicate a
turn or an intersection, delay your
Watch for traffic signs, pavement pass.
A broken
center line usually
indicates it’s all right to pass
(providing the road ahead is clear).
Never cross a solid line on your side
of the lane or a double solid line, even
if the road seems empty of
approaching traffic.
Do not get too close to the vehicle
you want to pass while you’re
awaiting an opportunity. For one
thing, following too closely reduces
your area of vision, especially if you’re
following a larger vehicle. Also, you
won’t have adequate space if the
vehicle ahead suddenly
slows or
stops. Keep back a reasonable
distance.
When it looks like a chance to pass is
coming up, start to accelerate but stay
in the right lane and don’t get too
close. Time your move
so you will be
increasing speed as the time comes to
move into the other lane. If the way is
clear to pass, you will have
a “running
start” that more than rnaltes
up for
the distance you would lose by
dropping back. And if something
happens to cause you to cancel your
pass, you need only slow down and
ProCarManuals.com
Page 145 of 276

a driver who doesn’t lower the high
beams, or
a vehicle with misaimed
headlights), slow down a little. Avoid
staring directly into the approaching
lights.
Keep your windshield and all the glass
on your vehicle clean
- inside and out.
Glare
at night is made much worse by
dirt on the glass. Even the inside
of the
glass can build up a film caused by dust.
Dirty glass makes lights dazzle and
flash more than clean glass would,
making the pupils
of your eyes contract
repeatedly.
Remember that your headlights light up
far less of a roadway when you are in a
turn or curve. Keep your eyes moving;
that way, it’s easier to pick out dimly
lighted objects. Just as your headlights
should be checked regularly for proper
aim, so should your eyes be examined
regularly. Some drivers suffer from
night blindness
- the inability to see in
dim light
- and aren’t even aware of it.
4 Driving in the Rain
Rain and wet roads can mean driving
trouble. On a wet road you can’t stop,
accelerate or turn as well because your
tire-to-road traction isn’t as good as on
dry roads. And, if your tires don’t have
much tread left, you’ll get even less
traction. It’s always wise to go slower
and be cautious if rain starts to fall
while you are driving. The surface may
get wet suddenly when your reflexes are
tuned for driving on dry pavement. The
heavier the rain, the harder it is to
see. Even
if your windshield wiper
blades are in good shape, a heavy rain
can make it harder to see road signs and
traffic signals, pavement markings, the
edge of the road, and even people
walking.
It’s wise to keep your wiping equipment
in good shape and keep your windshield
washer tank filled. Replace your
windshield wiper inserts when they
show signs of streaking or missing areas
on the windshield, or when strips of
rubber start to separate from the
inserts.
143
ProCarManuals.com
Page 148 of 276
Your Driving and the Road
146
flow. Try to merge into the gap at close
to the prevailing speed. Switch on your
turn signal, check your mirrors and
glance over your shoulder as often as
necessary. Try to blend smoothly with
the traffic flow.
Once
you are on the freeway, adjust
your speed to the posted limit or to the
prevailing rate
if it’s slower. Stay in the
right lane unless you want to pass.
Before changing lanes, check your
mirrors. Then use your turn signal.
Just before you leave the lane, glance
quickly over your shoulder to make sure
there isn’t another vehicle in your
“blind” spot.
Once you are moving
on the freeway,
make certain you allow a reasonable
following distance. Expect to move
slightly slower at night.
When you want to leave the freeway,
move to the proper lane well in
advance. If you
miss your exit do not,
under any circumstances, stop and back
up. Drive on to the next exit.
The exit ramp can be curved, sometimes quite sharply. The exit
speed
is usually posted.
Reduce your speed according to your
speedometer, not to your sense of
motion. After driving for any distance at
higher speeds, you may tend to think
you are going slower than you actually
are.
I Before Leaving on a Long
Trip
Make sure you’re ready. Try to be well
rested. If you must start when you‘re
not fresh
- such as after a day’s work
- don’t plan to make too many miles
that first part of the journey. Wear
comfortable clothing and shoes you can
easily drive in.
Is your vehicle ready for a long trip? If
you keep it serviced and maintained, it’s
ready to go. If
it needs service, have it
done before starting out. Of course,
you’ll find experienced and able service
experts in Oldsmobile dealerships all
across North America. They‘ll be ready
and willing to help
if you need it.
Here are some things you can check
before a trip:
Windshield Washer Fluid: Is the
reservoir full? Are
all windows clean
inside and outside?
shape?
you checked all levels?
lenses clean?
safe, trouble-free trip.
Is the tread
good enough for long-distance
driving? Are the tires all inflated to
the recommended pressure?
weather outlook along your route?
Should you delay your trip a short
time to avoid a major storm system?
Maps: Do you have up-to-date maps?
Wiper Blades: Are they in good
Fuel, Engine Oil, Other Fluids: Have
Lights: Are they all working? Are the
Tires: They are vitally important to a
Weather Forecasts: What’s the
Highway Hypnosis
Is tbere actually such a condition as
“highway hypnosis”? Or is it just plain
falling asleep at the wheel? Call it
highway hypnosis, lack of awareness, or
whatever.
ProCarManuals.com
Page 157 of 276
During your trip, check occasionally to
be sure that the load is secure, and that
the lights and
any trailer brakes are still
working.
Following Distance
Stay at least twice as far behind the
vehicle ahead as you would when
driving your vehicle without a trailer.
This can help you avoid situations that
require heavy braking and sudden
turns.
Passing
You’ll need more passing distance up
ahead when you’re towing a trailer.
And, because you’re a good deal longer,
you’ll need to go much farther beyond
the passed vehicle before you can return
to your lane.
Backing Up
Hold the bottom of the steering wheel
with one hand. Then, to move the
trailer to the left, just move that hand to
the left.
To move the trailer to the right,
move your hand to the right. Always back up
slowly and, if possible, have
someone guide you.
Making Turns
When you’re turning with a trailer,
make wider turns than normal. Do this
so your trailer won’t strike soft
shoulders, curbs, road signs, trees, or
other objects. Avoid jerky or sudden
maneuvers. Signal well in advance.
Turn Signals When Towing a
Trailer
When you tow a trailer, your vehicle has
to have a different turn signal flasher
and extra wiring. The green arrows on
your instrument panel will flash
whenever you signal a turn or lane
change. Properly hooked up, the trailer
lights will
also flash, telling other
drivers you’re about to turn, change
lanes or stop.
When towing a trailer, the green arrows
on your instrument panel will flash for
turns even
if the bulbs on the trailer are
burned out. Thus, you may think
drivers behind you are seeing your signal
when they are not.
It’s important
to check occasionally to be sure the
trailer bulbs are still working.
Driving On Grades
Reduce speed and shift to a lower gear
before you start down a long or steep
downgrade. If you don’t
shift down, you
might have to use your brakes
so much
that they would get hot and
no longer
work well.
On a long uphill grade, shift down and
reduce your speed to around
45 mph
(70 lwh) to reduce the possibility of
engine and transaxle overheating.
If you are towing a trailer that weighs
more than
1,000 pounds (454 kg), and
you have an automatic transaxle with
Overdrive, you may prefer to drive in
D
instead of Overdrive (or, as you need to,
a lower gear). This will minimize heat
build-up and extend the life of your
transaxle.
n
ProCarManuals.com
Page 158 of 276
Your Driving and the Road
156
Parking on Hills
You really should not park your vehicle,
with a trailer attached, on a hill. If
something goes wrong, your rig could
start to move. People can be injured,
and both your vehicle and the trailer
can be damaged.
But
if you ever have to park your rig on
a hill, here’s how to do it:
1. Apply your regular brakes, but don’t
shift into
P (Park) yet.
2. Have someone place choclts under
the trailer wheels.
3. When the wheel chocks are in place,
release the regular brakes until the
chocks absorb the load.
apply your parking brake, and then
shift to
P (Park).
4. Reapply the regular brakes. Then
5. Release the regular brakes.
When You Are Ready to Leave
Affer Parking on a Hill
1. Apply your regular brakes and hold
the pedal down while
you:
Start your engine;
Shift into a gear; and
Release the parking brake.
2. Let up on the brake pedal.
3. Drive slowly until the trailer is clear
4. Stop and have someone pick up and
of
the chocks.
store the chocks.
Maintenance When Trailer Towing
Your vehicle will need service more
often when you’re pulling a trailer. See
the Maintenance Schedule
for more on
this. Things that are especially important in
trailer operation are
automatic transaxle fluid (don’t
overfill), engine oil, belts, cooling
system, and brake adjustment. Each of
these is covered in this manual, and the
Index will help you find them quicltly. If
you’re trailering, it’s a good idea to
review these sections before you start
your trip.
Check periodically to see that all hitch
nuts and bolts are tight.
ProCarManuals.com
Page 171 of 276
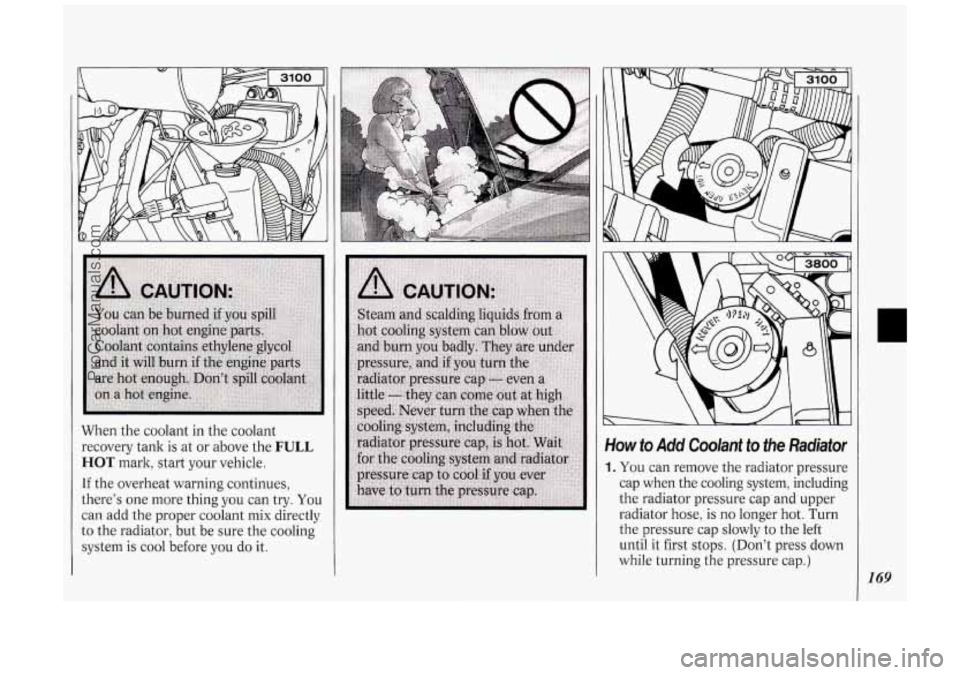
When the coolant in the coolant
recovery tank is
at or above the FULL
HOT mark, start your vehicle.
If the overheat warning continues,
there's one more thing you can try.
You
can add the proper coolant mix directly
to the radiator, but be sure the cooling
system is cool before you
do it.
Yow to Add Coolant to the Radiator
I. You can remove the radiator pressure
cap when the cooling system, including
the radiator pressure cap and upper
radiator hose, is
no longer hot. Turn
the pressure cap slowly to the left
until it first stops. (Don't press down
while turning the pressure cap.)
I69
ProCarManuals.com