heating OLDSMOBILE SILHOUETTE 1994 Owners Manual
[x] Cancel search | Manufacturer: OLDSMOBILE, Model Year: 1994, Model line: SILHOUETTE, Model: OLDSMOBILE SILHOUETTE 1994Pages: 276, PDF Size: 15.82 MB
Page 8 of 276
How to Use this Manual
MANY PEOPLE READ THEIR OWNER’S
manual from beginning to end when
they
first receive their new vehicle.
This
wdl help you learn about the
features and controls for your vehicle.
In
this manual, you’ll find that
pictures and words work together
to explain things quickly.
There are nine parts with thumb-
tabbed pages in this manual.
Each part begins with
a brief list of
contents,
so you can usually tell at a
glance if that part contains the
information you want.
You can bend the manual slightly
to
reveal the tabs that help you find a
part.
6
Part 1: Seats & Restraint Systems
This part tells you how to use your
seats and safety belts properly.
Part 2: Features 8 Controls
This part explains how to start and
operate your Oldsmobile.
Part 4: Your Driving and the Road
Here you’ll find helpful information
and tips about the road and how to
drive under different conditions.
Part 5: Problems on the Road
This part tells you what to do if you
have
a problem while driving, such as
Part 3: Comfort Controls & Audio Systems a flat tire or engine overheating.
This
part tells you how to adjust the
ventilation and comfort controls and
how to operate your audio system.
ProCarManuals.com
Page 105 of 276
18 ‘I I
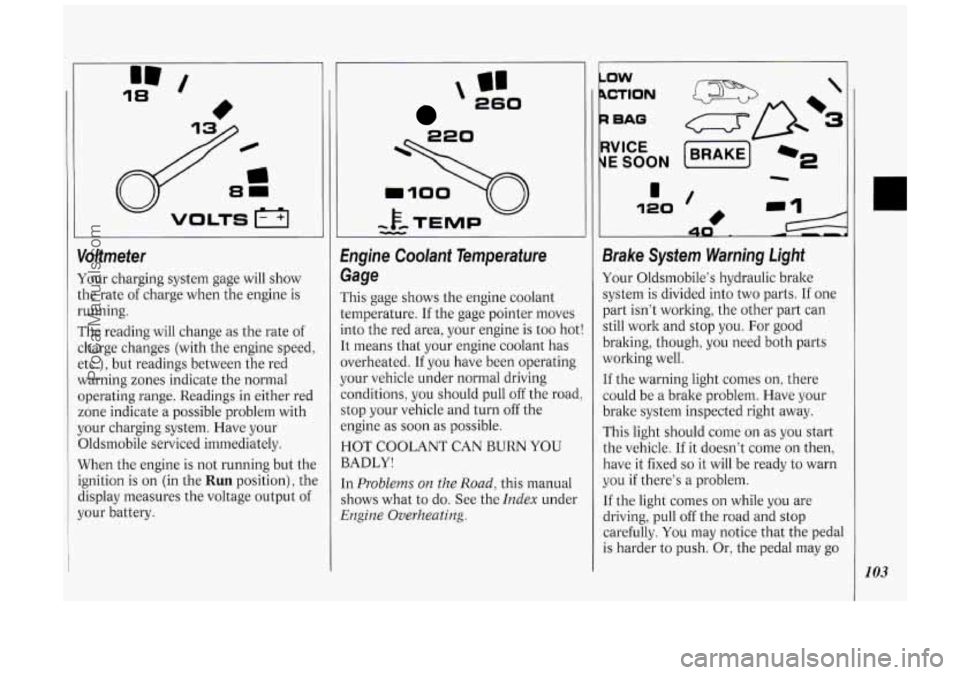
Voltmeter
Your charging system gage will show
:he rate
of charge when the engine is
running.
The reading will change as the rate of
:barge changes (with the engine speed,
?tc.), but readings between the red
warning zones indicate the normal
3perating range. Readings in either red
zone indicate a possible problem with
your charging system. Have your
Oldsmobile serviced immediately.
When the engine is not running but the
ignition
is on (in the Run position), the
display measures the voltage output of
your battery.
I’ 260
1
‘
1
Engine Coolant Temperature
Gage
rhis gage shows the engine coolant
Iemperature. If the gage pointer moves
.nto the red area, your engine is too hot
[t means that your engine coolant has
werheated. If you have been operating
{our vehicle under normal driving
:onditions, you should pull off the road
;top your vehicle and turn off the
mgine as soon as possible.
HOT COOLANT CAN BURN YOU
BADLY!
[n
Problems on the Road, this manual
shows what to do. See the
Index under
Engine Overheating.
LOW
BAG
E SOON
Brake System Warning Light
Your Oldsmobile’s hydraulic brake
system is divided into two parts.
If one
part isn’t working, the other part can
still work and stop you. For good
braking, though, you need both parts
working well.
If the warning light comes on, there
could be a brake problem. Have your
brake system inspected right away.
This light should come on as you start
the vehicle. If it doesn’t come on then,
have it fixed
so it will be ready to warn
you if there’s a problem.
If the light comes on while you are
driving, pull off the road and stop
carefully.
You may notice that the pedal
is harder to push.
Or, the pedal may go
103
ProCarManuals.com
Page 113 of 276
![OLDSMOBILE SILHOUETTE 1994 Owners Manual I Climate Control System
Your vehicle’s heater and air
conditioner work best if you keep your
windows closed. Your vehicle also has
flow-through ventilation, described late]
in this s OLDSMOBILE SILHOUETTE 1994 Owners Manual I Climate Control System
Your vehicle’s heater and air
conditioner work best if you keep your
windows closed. Your vehicle also has
flow-through ventilation, described late]
in this s](/img/31/58207/w960_58207-112.png)
I Climate Control System
Your vehicle’s heater and air
conditioner work best if you keep your
windows closed. Your vehicle also has
flow-through ventilation, described late]
in this section, to bring outside air into
your vehicle.
If you have the optional engine coolant
heater and use it during cold weather,
0°F (-18°C) or lower, your heating
system will more quicldy provide heat
because the engine coolant is already
warmed. See the
Index under Engine
Coolant Heater.
OFF: Press to turn the system off. Press
any climate control setting to turn the
system on.
8: Slide the lever to the right to increase
fan speed,
decrease fan speed. to the left
to
Temperature Control Lever: Slide
the
lever to the right for warmer, heated air;
slide it to the left for cooled air.
Air Conditioner
When the temperature outside is above
freezing, the air conditioner compressor
will automatically condition the air
when
you press RECIRC (the A/C
indicator light will glow), DEFOG or
DEF (the A/C indicator light will not
Press
A/C (the A/C indicator light will
glow) to condition the air when you
press
UPPER, BI-LEV or LOWER. To
turn off the air conditioner compressor
in these settings, press
A/C again (the
indicator light will go off).
glow).
Each time you turn on the ignition, the
air conditioner will default to the setting
you had selected before last turning off
the ignition.
When the air conditioner compressor is
on, you may sometimes notice slight
changes in your vehicle’s engine
performance and power. This is normal, because
the system is designed to help
fuel economy while it maintains the
desired cooling level.
The air conditioner removes moisture
from the air,
so you may sometimes
notice water dripping from under your
vehicle when it
is idling or after it has
been turned off. This is normal.
On very hot days, your vehicle will cool
down more quickly and economically if
you open the windows long enough to
let hot inside air escape. For all settings,
adjust the temperature control lever and
fan speed as desired.
Directional Controls
RECIRC (Recirculate): Press to get
maximum cooling or quick cool-down
on very hot days. This setting
recirculates much of the air inside your
vehicle. It should not be used for long
periods of time because the air may
become too cold and dry.
Slide the temperature control lever
down to the coolest setting and adjust
the fan speed as desired.
UPPER: For normal cooling on hot
days, press
A/C along with UPPER.
1
111
ProCarManuals.com
Page 157 of 276
During your trip, check occasionally to
be sure that the load is secure, and that
the lights and
any trailer brakes are still
working.
Following Distance
Stay at least twice as far behind the
vehicle ahead as you would when
driving your vehicle without a trailer.
This can help you avoid situations that
require heavy braking and sudden
turns.
Passing
You’ll need more passing distance up
ahead when you’re towing a trailer.
And, because you’re a good deal longer,
you’ll need to go much farther beyond
the passed vehicle before you can return
to your lane.
Backing Up
Hold the bottom of the steering wheel
with one hand. Then, to move the
trailer to the left, just move that hand to
the left.
To move the trailer to the right,
move your hand to the right. Always back up
slowly and, if possible, have
someone guide you.
Making Turns
When you’re turning with a trailer,
make wider turns than normal. Do this
so your trailer won’t strike soft
shoulders, curbs, road signs, trees, or
other objects. Avoid jerky or sudden
maneuvers. Signal well in advance.
Turn Signals When Towing a
Trailer
When you tow a trailer, your vehicle has
to have a different turn signal flasher
and extra wiring. The green arrows on
your instrument panel will flash
whenever you signal a turn or lane
change. Properly hooked up, the trailer
lights will
also flash, telling other
drivers you’re about to turn, change
lanes or stop.
When towing a trailer, the green arrows
on your instrument panel will flash for
turns even
if the bulbs on the trailer are
burned out. Thus, you may think
drivers behind you are seeing your signal
when they are not.
It’s important
to check occasionally to be sure the
trailer bulbs are still working.
Driving On Grades
Reduce speed and shift to a lower gear
before you start down a long or steep
downgrade. If you don’t
shift down, you
might have to use your brakes
so much
that they would get hot and
no longer
work well.
On a long uphill grade, shift down and
reduce your speed to around
45 mph
(70 lwh) to reduce the possibility of
engine and transaxle overheating.
If you are towing a trailer that weighs
more than
1,000 pounds (454 kg), and
you have an automatic transaxle with
Overdrive, you may prefer to drive in
D
instead of Overdrive (or, as you need to,
a lower gear). This will minimize heat
build-up and extend the life of your
transaxle.
n
ProCarManuals.com
Page 159 of 276
Here you’ll find what to do about
some problems that can occur
on the
road
.
Part 5
Problems on the Road
Hazard Warning Flashers ..................... .. ................................................................ 158 .
Jump Starting ........................................................................\
.................................. 158
Towing Your Vehicle
........................................................................\
....................... 162
Engine Overheating
........................................................................\
......................... 165
If a Tire Goes Flat
........................................................................\
........................... 172
Changing a Flat Tire
........................................................................\
........................ 172
Compact Spare Tire ........................................................................\
........................ 178
If You’re Stuck: In Sand, Mud, Ice or Snow ......................................................... 179
157
ProCarManuals.com
Page 167 of 276
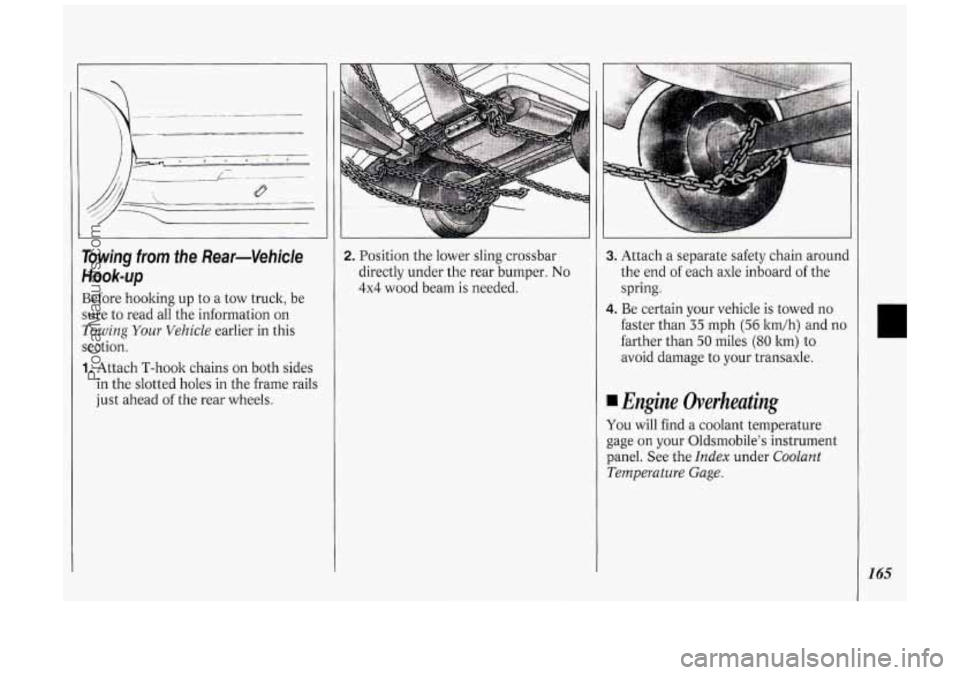
Towing from fhe Rear-Vehicle
HOOk-Up
Before hooking up to a tow truck, be
sure to read all the information
on
Towing Your Vehicle earlier in this
section.
1. Attach T-hook chains on both sides
in the slotted holes in the frame rails
just ahead
of the rear wheels.
I
2. Position the lower sling crossbar
directly under the rear bumper. No
4x4 wood beam is needed.
3. Attach a separate safety chain around
the end of each axle inboard
of the
spring.
4. Be certain your vehicle is towed no
faster than
35 rnph (56 ltm/h) and no
farther than
50 miles (80 ltm) to
avoid damage to your transaxle.
Engine Overheating
You will find a coolant temperature
gage on your Oldsmobile's instrument
panel. See the
Index under Coolant
Temperature Gage.
1
165
ProCarManuals.com
Page 170 of 276
Problems on the Road
1..
NOTICE:
Engine damage from running your
engine without coolant isn’t
covered by your warranty. If
there seems to be
no leak, check to
see if the electric engine fan is running.
If the engine is overheating, the fan
should be running. If it isn’t, your
vehicle needs service.
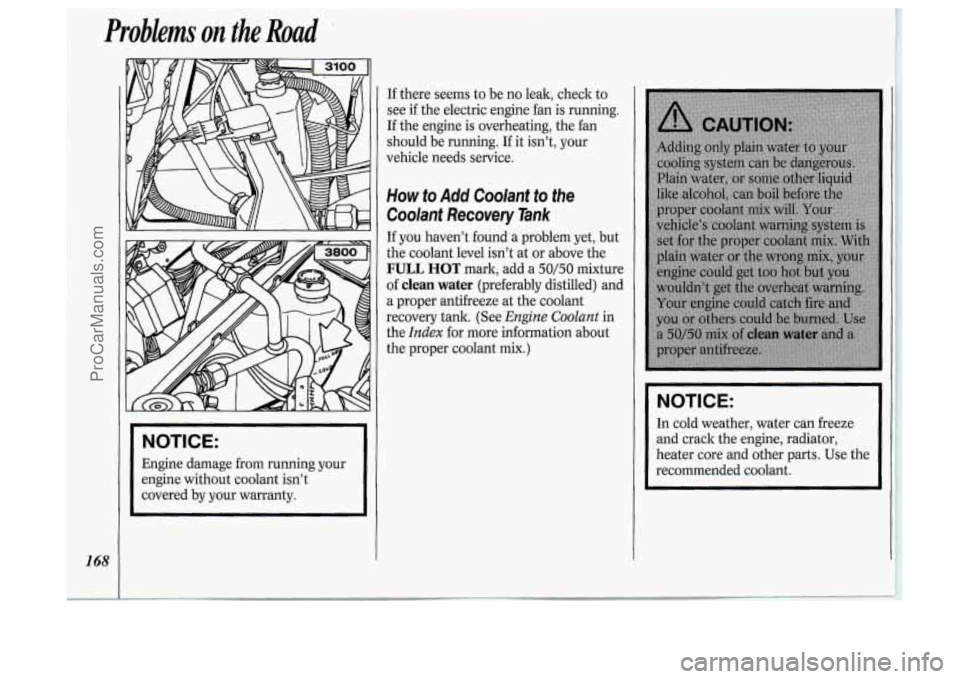
How to Add Coolant to the
Coolant Recovery Tank
If you haven’t found a problem yet, but
the coolant level isn’t at or above the
FULL HOT mark, add a 50/50 mixture
of
clean water (preferably distilled) and
a proper antifreeze at the coolant
recovery tank. (See
Engine Coolant in
the
Index for more information about
the proper coolant mix.)
NOTICE:
In cold weather, water can freeze
and crack the engine, radiator,
heater core and other parts. Use the
recommended coolant.
ProCarManuals.com
Page 199 of 276
How to Add Fluid
Refer to the Maintenance Schedule to
determine what kind of transaxle fluid
to use. See
Recommended Fluids and
Lubricants
in the Index.
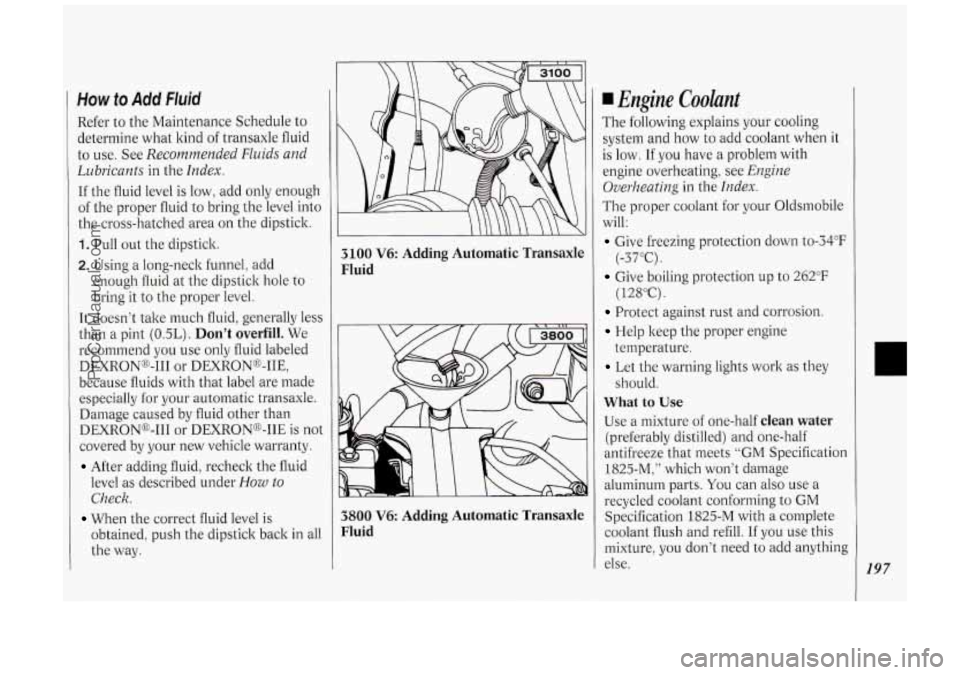
If the fluid level is low, add only enough
of the proper fluid to bring the level into
the cross-hatched area
on the dipstick.
1. Pull out the dipstick.
2. Using a long-neck funnel: add
enough fluid at the dipstick hole to
bring it to the proper level.
It doesn’t take much fluid, generally less
than a pint
(OSL). Don’t overfill. We
recommend you use only fluid labeled
DEXRONo-I11 or DEXRON@-IIE,
because fluids with that label are made
especially for your automatic transaxle.
Damage caused by fluid other than
DEXRONo-I11 or DEXRONB-IIE is not
covered by your new vehicle warranty.
After adding fluid, recheck the fluid
level as described under
How to
Check.
obtained, push the dipstick back in all
the way.
When the correct fluid level is
3100 V6: Adding Automatic Transaxle
Fluid
3800 V6: Adding Automatic Transaxle
Fluid
Engine Coolant
The following explains your cooling
system and how to add coolant when it
is
low. If you have a problem with
engine overheating, see
Engine
Overheating
in the Index.
The proper coolant for your Oldsmobile
will:
Give freezing protection down to-34”F
Give boiling protection up to 262°F
Protect against rust and corrosion.
Help keep the proper engine
Let the warning lights work as they
What to Use
Use a mixture of one-half clean water
(preferably distilled) and one-half
antifreeze that meets
“GM Specification
1825-M:” which won’t damage
aluminum parts.
You can also use a
recycled coolant conforming to
GM
Specification 1825-M with a complete
coolant flush and refill.
If you use this
mixture,
you don’t need to add anything
else.
(-37°C).
( 12SoC).
temperature. should.
197
ProCarManuals.com
Page 201 of 276
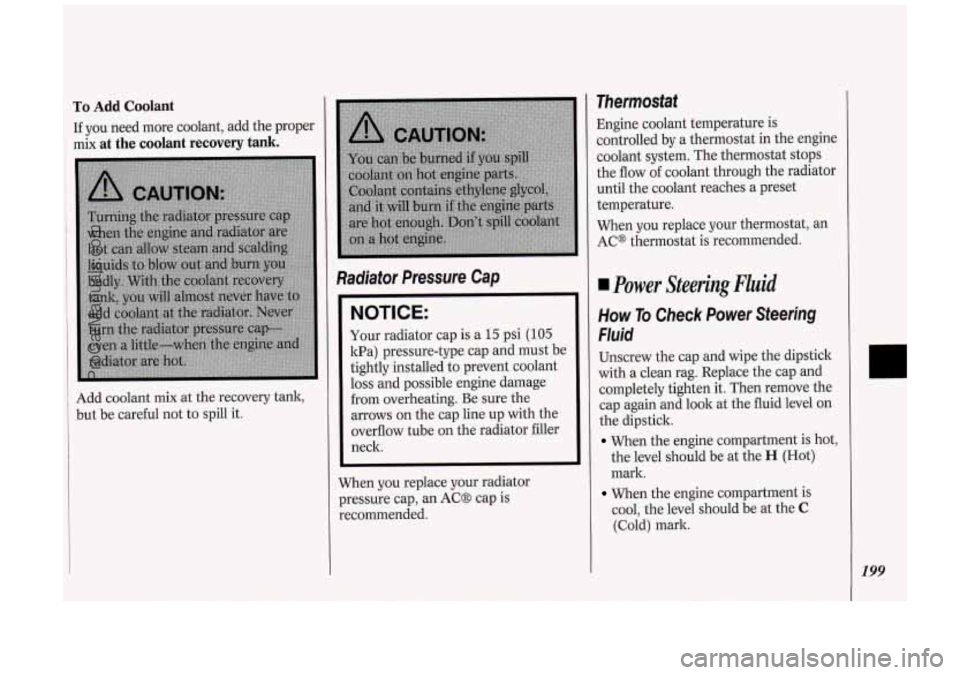
To Add Coolant
If you need more coolant, add the proper
mix
at the coolant recovery tank.
Add coolant mix at the recovery tank,
but be careful not to spill it.
Radiator Pressure Cap
NOTICE:
Your radiator cap is a 15 psi (105
kPa) pressure-type cap and must be
tightly installed to prevent coolant
loss and possible engine damage
from overheating. Be sure the
arrows on the cap line up with the
overflow tube on the radiator filler
neck.
When you replace your radiator
pressure cap, an AC8 cap is
recommended.
Thermostat
Engine coolant temperature is
controlled by a thermostat in the engine
coolant system. The thermostat stops
the flow of coolant through the radiator
until the coolant reaches a preset
temperature.
When you replace your thermostat, an
AC@ thermostat is recommended.
Power Steering Fluid
How To Check Power Steering
Fluid
Unscrew the cap and wipe the dipstick
with a clean rag. Replace the cap and
completely tighten it. Then remove the
cap again and look at the fluid level on
the dipstick.
When the engine compartment is hot,
the level should be at the
H (Hot)
mark.
When the engine compartment is
cool, the level should be at the
C
(Cold) mark.
199
ProCarManuals.com
Page 267 of 276
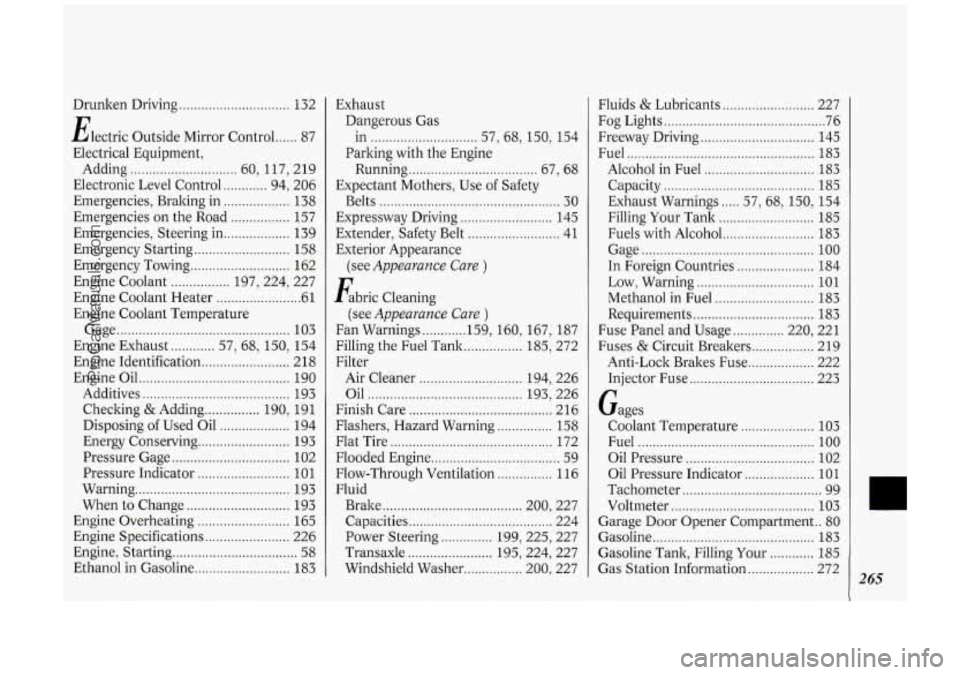
Drunken Driving .............................. 132
Electric Outside Mirror Control
...... 87
Electrical Equipment.
Adding
............................. 60. 117. 219
Electronic Level Control
............ 94. 206
Emergencies. Braking in
.................. 138
Emergencies on the Road
................ 157
Emergencies. Steering in
.................. 139
Emergency Starting
.......................... 158
Emergency Towing ........................... 162
Engine Coolant
................ 197, 224, 227
Engine Coolant Heater
....................... 61
Engine Coolant Temperature
Gage
............................................... 103
Engine Exhaust
............ 57. 68, 150, 154
Engine Identification
........................ 218
Engine Oil
......................................... 190
Additives
........................................ 193
Checking
& Adding ............... 190. 191
Disposing of Used Oil
................... 194
Energy Conserving
......................... 193
Pressure Gage
................................ 102
Pressure Indicator
......................... 101
Warning
.......................................... 193
When to Change
............................ 193
Engine Overheating
......................... 165
Engine Specifications
....................... 226
Engine. Starting
.................................. 58
Ethanol in Gasoline .......................... 183
Exhaust
Dangerous Gas
Parking with the Engine
in
............................. 57.
68. 150. 154
Running
................................... 67. 68
Expectant Mothers. Use
of Safety
Belts
................................................. 30
Expressway Driving
......................... 145
Extender. Safety Belt
......................... 41
Exterior Appearance
Fabric Cleaning
Fan Warnings
............ 159. 160. 167. 187
Filling the Fuel Tank ................ 185. 272
Filter Air Cleaner
............................ 194. 226
Oil
.......................................... 193. 226
Finish Care
....................................... 216
Flat Tire
............................................ 172
Flooded Engine
................................... 59
Fluid (see
Appearance
Care )
(see Appearance Care )
Flashers. Hazard Warning ............... 158
Flow-Through Ventilation
............... 116
Brake
...................................... 200. 227
Capacities
....................................... 224
Power Steering
.............. 199. 225. 227
Transaxle
....................... 195. 224. 227
Windshield Washer
................ 200. 227 Fluids
& Lubricants ......................... 227
Fog Lights
............................................ 76
Freeway Driving
............................... 145
Fuel
................................................... 183
Alcohol in Fuel
.............................. 183
Capacity
......................................... 185
Exhaust Warnings ..... 57. 68. 150. 154
Filling
Your Tank .......................... 185
Fuels with Alcohol
......................... 183
Gage
............................................... 100
In Foreign Countries ..................... 184
Low. Warning
................................ 101
Methanol in Fuel
........................... 183
Requirements ................................. 183
Fuse Panel and Usage .............. 220. 221
Fuses
& Circuit Breakers ................. 219
Anti-Lock Brakes Fuse
.................. 222
Injector Fuse
.................................. 223
Gages Coolant Temperature
.................... 103
Fuel
................................................ 100
Oil Pressure ................................... 102
Oil Pressure Indicator
................... 101
Tachometer
...................................... 99
Voltmeter
....................................... 103
Garage Door Opener Compartment
.. 80
Gasoline
............................................ 183
Gasoline Tank, Filling Your
............ 185
Gas Station Information .................. 272 265
ProCarManuals.com