mirror OLDSMOBILE SILHOUETTE 1994 Owners Manual
[x] Cancel search | Manufacturer: OLDSMOBILE, Model Year: 1994, Model line: SILHOUETTE, Model: OLDSMOBILE SILHOUETTE 1994Pages: 276, PDF Size: 15.82 MB
Page 45 of 276
Here you can learn about the many standard and optional features on
your Oldsmobile. and information on
starting. shifting and braking
. Also
explained are the instrument panel
and the warning systems that tell you
if everything is working properly -
and what to do if you have a
problem
.
Part 2
Features & Controls
Keys ........................................................................\
................................................... 44
Front Doors
........................................................................\
....................................... 45
Remote Lock Control
........................................................................\
........................ 48
Liftgate
........................................................................\
............................................... 56
Starting Your Engine
........................................................................\
........................ 58
Engine Coolant Heater ........................................................................\
...................... 61
Loclts
........................................................................\
.................................................. 45
Sliding Door
........................................................................\
...................................... 51
Ignition ........................................................................\
.............................................. 58
Shifting the Transaxle
........................................................................\
....................... 62
Parking Brake
........................................................................\
.................................... 65
Shifting into Park
........................................................................\
.............................. 66
Horn ........................................................................\
................................................... 69
Tilt Steering Wheel
........................................................................\
............................ 69
Windows
........................................................................\
............................................ 69
Turn Signal and Lane Change Indicator
.................................................................. 71
Cruise Control ........................................................................\
................................... 72
Headlights
........................................................................\
.......................................... 74
Interior Lights
........................................................................\
................................... 76
Windshield Wipers
........................................................................\
............................ 77
Windshield Washer
........................................................................\
........................... 78
Mirrors
........................................................................\
............................................... 86
Glove
Box and Storage Compartments .................................................................... 88
Luggage Carrier ........................................................................\
................................. 92
Instrument Panel
........................................................................\
............................... 96
Warning Lights, Gages and Indicators
................................................................... 100 43
ProCarManuals.com
Page 88 of 276
86
Features & Controls
you may damage the system. After 30
minutes, wait at least 10 minutes before
restarting the air inflator.
To turn off the inflator, press OFF and
detach the hose, first from the inflated
object, then from the outlet. Place the
inflator kit tools
in the pouch and store
it in the glove box.
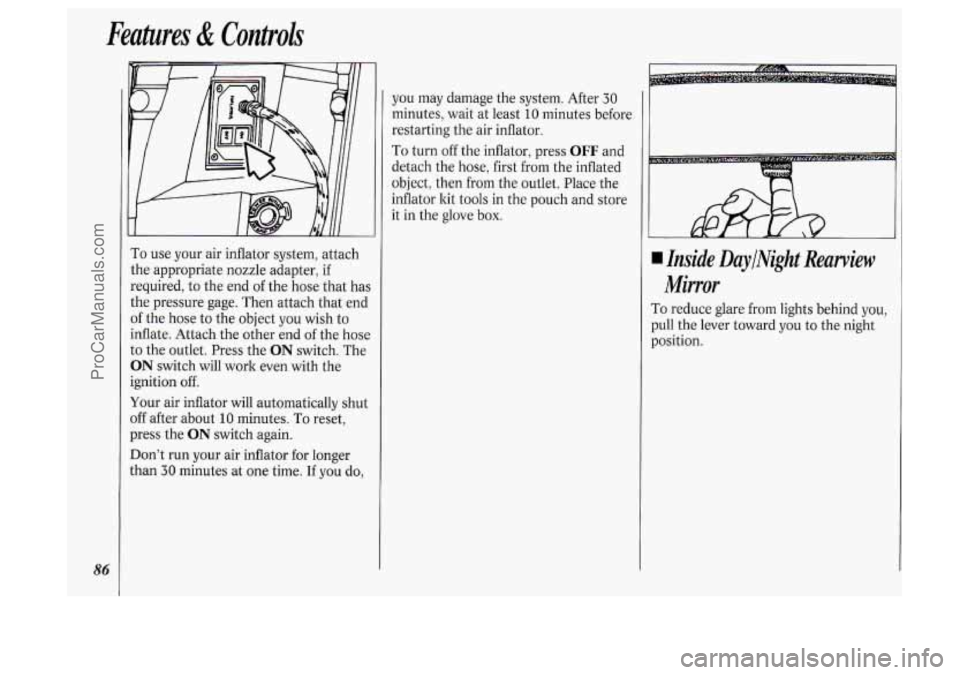
To use your air inflator system, attach
the appropriate nozzle adapter, if
required, to the end of the hose that has
the pressure gage. Then attach that end
of the hose to the object you wish to
inflate. Attach the other end
of the hose
to the outlet. Press the
ON switch. The
ON switch will work even with the
ignition off.
Your air inflator will automatically shut
off after about
10 minutes. To reset,
press the
ON switch again.
Don’t run your air inflator for longer
than
30 minutes at one time. If you do,
4 Inside DaylNight Rearview
Mirror
To reduce glare from lights behind you,
pull the lever toward you to the night
position.
ProCarManuals.com
Page 89 of 276
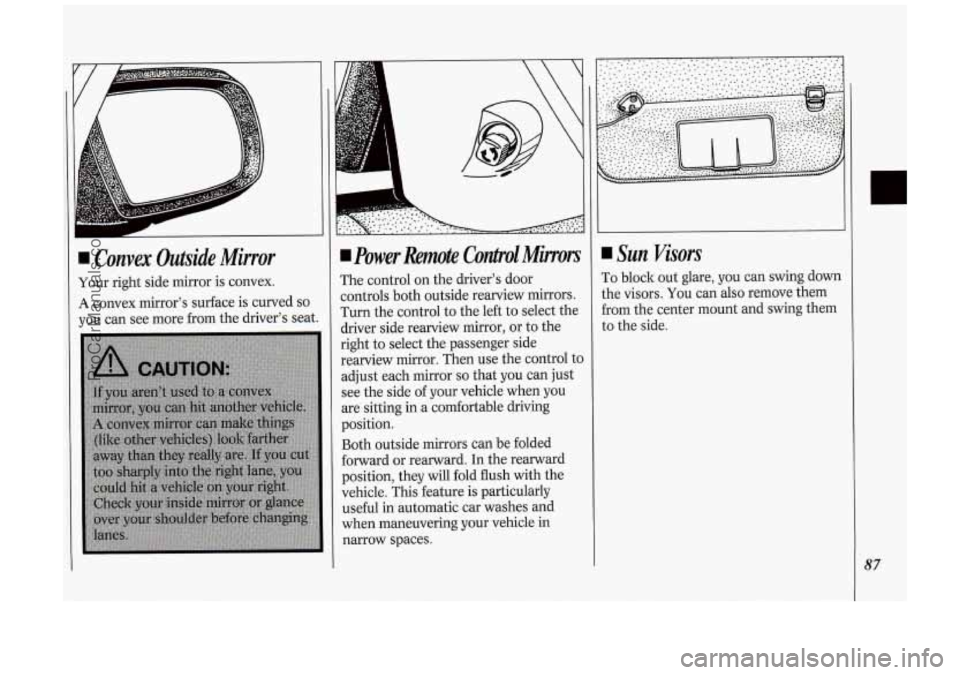
I Convex Outside Mirror
Your right side mirror is convex.
A convex mirror's surface is curved so
you can see more from the driver's seat.
power Remote Contpol Minors
The control on the driver's door
controls both outside rearview mirrors.
Turn the control to the left to select the
driver side rearview mirror, or to the
right
to select the passenger side
rearview mirror. Then use the control to
adjust each mirror
so that you can just
see the side of your vehicle when you
are sitting in a comfortable driving
position.
Both outside mirrors can be folded
forward or rearward. In the rearward
position, they will fold flush with the
vehicle. This feature is particularly
useful
in automatic car washes and
when maneuvering your vehicle in
narrow spaces.
Sun Visors
To block out glare, you can swing down
the visors. You can also remove them
from the center mount and swing them
to the side.
87
ProCarManuals.com
Page 90 of 276
Features & Controls
88
I I I I
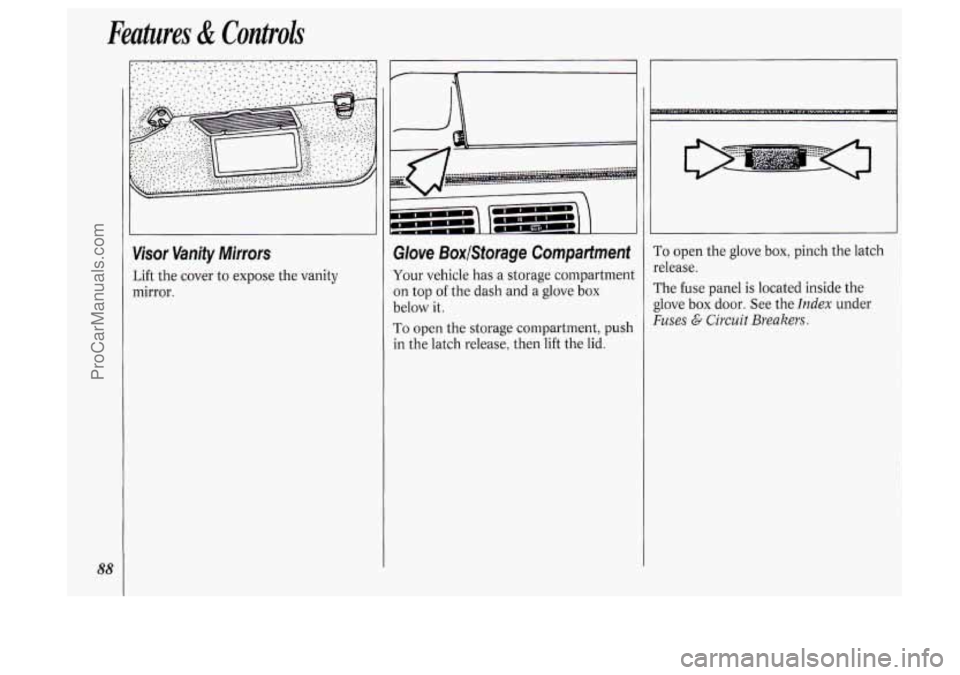
Visor Vanity Mirrors
Lift the cover to expose the vanity
mirror.
I
Glove BoxlStorage Compartment
Your vehicle has a storage compartment
on top of the dash and
a glove box
below it.
To open the storage compartment, push
in the latch release, then lift the lid.
To open the glove box, pinch the latch
release.
The fuse panel is located inside the
glove box door. See the
Index under
Fuses G Circuit Breakers.
ProCarManuals.com
Page 143 of 276

drop back again and wait for another
opportunity.
slow vehicle, wait your turn. But take
care that someone isn’t trying to pass
you as you pull out to pass the slow
vehicle. Remember to glance over
your shoulder and check the blind
spot.
Check your mirrors, glance over your
shoulder, and start your left lane
change signal before moving out
of
the right lane to pass. When you are
far enough ahead of the passed
vehicle to see its front in your inside
mirror, activate your right lane change
signal and move back into the right
lane. (Remember that your right
outside mirror
is convex. The vehicle
you just passed may seem to be
farther away from you than it really
is.)
Try not to pass more than one vehicle
at a time on two-lane roads. Reconsider before passing the next
vehicle.
vehicle
too rapidly. Even though the
If other cars are lined up to pass a
Don’t overtake a slowly moving brake
lights are not flashing, it may be
slowing down or starting to turn.
If you’re being passed, make it easy
for the following driver to get ahead of
you. Perhaps you can ease a little to
the right.
Loss of Control
Let’s review what driving experts say
about what happens when the three
control systems (brakes, steering and
acceleration) don’t have enough friction
where the tires meet the road to do
what the driver has asked.
In any emergency, don’t give up. Keep
trying to steer and constantly seek
an
escape route or area of less danger.
In a skid, a driver can lose control of
the vehicle. Defensive drivers avoid
most skids by taking reasonable care
suited to existing conditions, and by not
“overdriving” those conditions. But
skids are always possible.
The three types of skids correspond to
your Oldsmobile’s three control systems.
In the braking skid your
wheels aren’t rolling. In the steering or
cornering skid, too much speed or
steering in
a curve causes tires to slip
and lose cornering force. And in the
acceleration skid
too much throttle
causes the driving wheels to spin.
A cornering skid is best handled by
easing your foot
off the accelerator
pedal.
If you have the traction control
system, remember: It helps avoid only
the acceleration skid. If you do not have
traction control, or
if the system is off,
then an acceleration skid is also best
handled by easing your foot
off the
accelerator pedal.
If your vehicle starts to slide, ease your
foot off the accelerator pedal and
quicltly steer the way you want the
vehicle to go.
If you start steering
quickly enough, your vehicle may
straighten out. Always be ready for a
second skid
if it occurs.
Of course, traction is reduced when
water, snow, ice, gravel, or other
material is on the road. For safety,
you’ll want to slow down and adjust
your driving to these conditions. It is
important to slow down on slippery
141
ProCarManuals.com
Page 144 of 276

Your Driving and the Rod
142
surfaces because stopping distance will
be longer and vehicle control more
limited.
While driving on a surface with reduced
traction, try your best to avoid sudden
steering, acceleration, or braking
(including engine braking by shifting to
a lower gear). Any sudden changes
could cause the tires to slide.
You may
not realize the surface is slippery until
your vehicle
is skidding. Learn to
recognize warning clues
- such as
enough water, ice or packed snow on
the road to make a “mirrored surface”
- and slow down when you have any
doubt.
Remember: Any anti-lock braking
system
(ABS) helps avoid only the
braking skid.
Driving at Night
Night driving is more dangerous than
day driving. One reason is that some
drivers are likely to be impaired
- by
alcohol or drugs, with night vision
problems, or by fatigue.
Here are some tips on night driving.
Drive defensively.
Don’t drink and drive.
Adjust your inside rearview mirror to
reduce the glare from headlights
behind you.
Since you can’t see as well, you may
need to slow down and keep more
space between you and other vehicles.
Slow down, especially on higher
speed roads. Your headlights can light
up only
so much road ahead.
In remote areas, watch for animals.
If you’re tired, pull off the road in a
safe place and rest.
Night Vision
No one can see as well at night as in the
daytime. But as we get older these
differences increase.
A 50-year-old
driver may require at least twice as
much light to see the same thing at
night
as a 20-year-old.
What you do in the daytime can also
affect your night vision. For example, if
you spend the day in bright sunshine
you are wise to wear sunglasses. Your
eyes will have less trouble adjusting to
night. But if you’re driving, don’t wear
sunglasses at night. They may cut down
on glare from headlights, but they also
make a lot
of things invisible.
You can be temporarily blinded by
approaching lights. It can take a second
or two, or even several seconds, for
your eyes to readjust to the dark. When
you are faced with severe glare (as from
ProCarManuals.com
Page 148 of 276
Your Driving and the Road
146
flow. Try to merge into the gap at close
to the prevailing speed. Switch on your
turn signal, check your mirrors and
glance over your shoulder as often as
necessary. Try to blend smoothly with
the traffic flow.
Once
you are on the freeway, adjust
your speed to the posted limit or to the
prevailing rate
if it’s slower. Stay in the
right lane unless you want to pass.
Before changing lanes, check your
mirrors. Then use your turn signal.
Just before you leave the lane, glance
quickly over your shoulder to make sure
there isn’t another vehicle in your
“blind” spot.
Once you are moving
on the freeway,
make certain you allow a reasonable
following distance. Expect to move
slightly slower at night.
When you want to leave the freeway,
move to the proper lane well in
advance. If you
miss your exit do not,
under any circumstances, stop and back
up. Drive on to the next exit.
The exit ramp can be curved, sometimes quite sharply. The exit
speed
is usually posted.
Reduce your speed according to your
speedometer, not to your sense of
motion. After driving for any distance at
higher speeds, you may tend to think
you are going slower than you actually
are.
I Before Leaving on a Long
Trip
Make sure you’re ready. Try to be well
rested. If you must start when you‘re
not fresh
- such as after a day’s work
- don’t plan to make too many miles
that first part of the journey. Wear
comfortable clothing and shoes you can
easily drive in.
Is your vehicle ready for a long trip? If
you keep it serviced and maintained, it’s
ready to go. If
it needs service, have it
done before starting out. Of course,
you’ll find experienced and able service
experts in Oldsmobile dealerships all
across North America. They‘ll be ready
and willing to help
if you need it.
Here are some things you can check
before a trip:
Windshield Washer Fluid: Is the
reservoir full? Are
all windows clean
inside and outside?
shape?
you checked all levels?
lenses clean?
safe, trouble-free trip.
Is the tread
good enough for long-distance
driving? Are the tires all inflated to
the recommended pressure?
weather outlook along your route?
Should you delay your trip a short
time to avoid a major storm system?
Maps: Do you have up-to-date maps?
Wiper Blades: Are they in good
Fuel, Engine Oil, Other Fluids: Have
Lights: Are they all working? Are the
Tires: They are vitally important to a
Weather Forecasts: What’s the
Highway Hypnosis
Is tbere actually such a condition as
“highway hypnosis”? Or is it just plain
falling asleep at the wheel? Call it
highway hypnosis, lack of awareness, or
whatever.
ProCarManuals.com
Page 149 of 276
There is something about an easy
stretch
of road with the same scenery,
along with the hum
of the tires on the
road, the drone
of the engine, and the
rush
of the wind against the vehicle that
can make you sleepy. Don’t let it
happen to you!
If it does, your vehicle
can leave the road in
less than a
second, and you could crash and be
injured.
What can you do about highway
hypnosis? First, be aware that it can
happen.
Then here are some tips:
Make sure your vehicle is well
ventilated, with a comfortably cool
interior.
ahead and to the sides. Check your
mirrors and your instruments
frequently.
If you get sleepy, pull off the road into
a rest, service, or parking area and
take a nap, get some exercise, or both.
For safety, treat drowsiness on the
highway as an emergency.
Keep your eyes moving. Scan the road
I
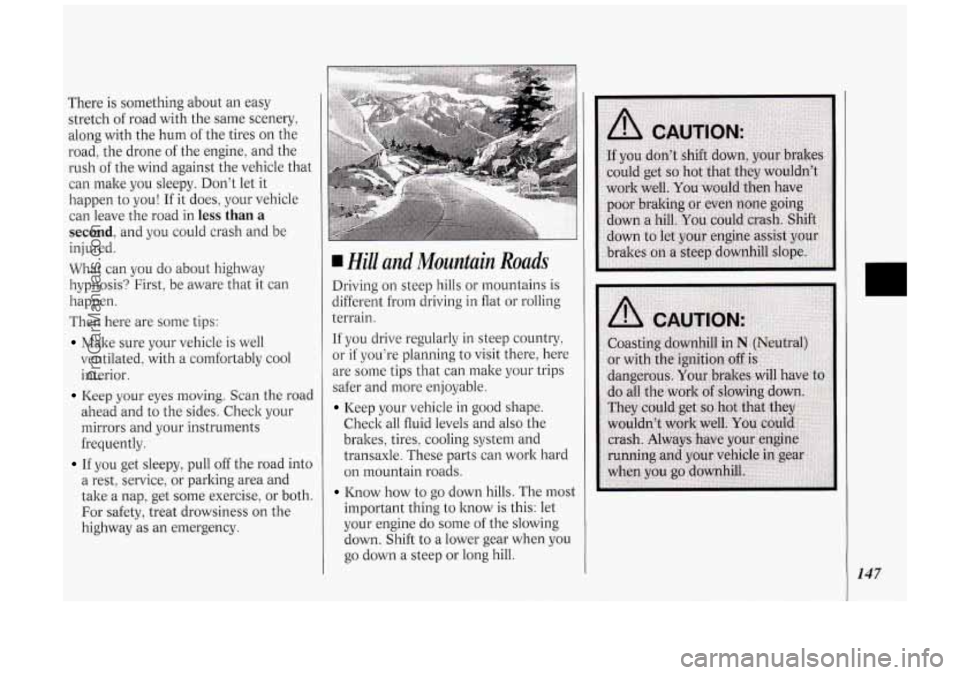
Hill and Mountain Roads
Driving on steep hills or mountains is
different from driving in flat or rolling
terrain.
If you drive regularly in steep countly,
or if you’re planning to visit there, here
are some tips that can make your trips
safer and more enjoyable.
Keep your vehicle in good shape.
Check all fluid levels and also the
brakes, tires, cooling system and
transaxle. These parts can work hard
on mountain roads.
Know how to go down hills. The most
important thing to know
is this: let
your engine do some
of the slowing
down. Shift to a lower gear when you
go down a steep
or long hill.
147
ProCarManuals.com
Page 156 of 276
Your Driving and the Road
154
hitches to them. Use only a frame-
mounted hitch that does not attach to
the bumper.
Safety Chains
You should always attach chains
between
your vehicle and your trailer.
Cross the safety chains under the
tongue of the trailer
so that the tongue
will not drop to the road if it becomes
separated from the hitch. Instructions
about safety chains may be provided by
the hitch manufacturer
or by the trailer
manufacturer. Follow the
manufacturer’s recommendation for
attaching safety chains. Always leave
just enough slack
so you can turn with
your rig. And, never allow safety chains
to drag on the ground.
Trailer Brakes
If your trailer weighs more than 1,000
pounds (450 kg) loaded, then it needs
its own brakes
- and they must be
adequate. Be sure to read and follow
the instructions for the trailer brakes
so
you’ll be able to install, adjust and
maintain them properly. Because
you have anti-lock brakes, do
not try to tap into your vehicle‘s brake
system. If you do, both brake systems
won’t work well, or at all.
Driving with a Trailer
Towing a trailer requires a certain
amount of experience. Before setting
out for the open road,
you’ll want to get
to know your rig. Acquaint yourself
with the feel of handling and braking
with the added weight of the trailer.
And always keep in mind that the
vehicle you are driving is now a good
deal longer and not nearly
so responsive
as your vehicle is by itself.
Before you start, check the trailer hitch
and platform, safety chains, electrical
connector, lights, tires and mirror
adjustment. If the trailer has electric
brakes, start your vehicle and trailer
moving and then apply the trailer brake
controller by hand to be sure the brakes
are working. This lets you check your
electrical connection at the same time.
ProCarManuals.com
Page 222 of 276
![OLDSMOBILE SILHOUETTE 1994 Owners Manual Service &Appeurunce Cure
220
+I
r=J
HORN
prpl
m
STOP-HA2 F-PUMP
m3 AUX
r?]
.pg
TURN BIU
GAGE
prpl LPS
(31 ABS
RDO 2
pTo4
ca
rn
ca
R-WIPER F-WIPER
rfpl IGN
HTR-A/C R-BLWR
Posi OLDSMOBILE SILHOUETTE 1994 Owners Manual Service &Appeurunce Cure
220
+I
r=J
HORN
prpl
m
STOP-HA2 F-PUMP
m3 AUX
r?]
.pg
TURN BIU
GAGE
prpl LPS
(31 ABS
RDO 2
pTo4
ca
rn
ca
R-WIPER F-WIPER
rfpl IGN
HTR-A/C R-BLWR
Posi](/img/31/58207/w960_58207-221.png)
Service &Appeurunce Cure
220
+I
r=J
HORN
prpl
m
STOP-HA2 F-PUMP
m3 AUX
r?]
.pg
TURN BIU
GAGE
prpl LPS
(31 ABS
RDO 2
pTo4
ca
rn
ca
R-WIPER F-WIPER
rfpl IGN
HTR-A/C R-BLWR
Position Rating (AMP.)
CTSY
ELC
HORN STOP HAZ
F PUMP
AUX
TAIL
ECM
TURN B/U
GAGE
LPS
ABS RD02
WIPER
FflIPER
IGN
HTR A/C
R BLWR 15
20
15
15
10
20
15
10
15
7.5
7.5
3
15
20
25 15
25
25
Circuitry
Dome Lamps, Courtesy Lamps, Power Door Lock Switches, Glove
Box Lamp, Power Mirrors, Power Sliding Delay Lock Module
Auto Level Control, Underhood Lamp
Horns, Horn Relay, Safety Belt Buzzer
Front/Rear Turn Lamps, Front Side Marker Lamps, Rear Stop Lamps,
Instrument Cluster Turn Indicator Lamps, Cruise Brake Switch
Fuel Pump, Oil Pressure Sender/Fuel Pump Switch
Radio, Front Cigar Lighter, Accessory Power Outlet
Front Park Lamps, Rear Tail Lamps, Front Side Marker Lamps,
License Plate Lamp, Radio, Heat/Vent/AC Control Head, Power
Sliding Door
Throttle Body Fuel Injection, Fuel Pump Relay, Elec. Vac. Reg. Valve,
Elec. Control Module, Elec. Spark Control Module
Front/Rear Turn Lamps, Front Side Marker Lamps, Cluster Turn
Telltale, Back-up Lamps, Fog Lamps
Cluster, Anti-Lock Brake System Lamp Module, Elec. Level Control Sensor
Cluster, Radio, Wiper Switch, Headlamp Switch? Rear Blower Switch,
Heat/Vent/AC Control Head, Door Switch Illumination, Front/Rear
Ashtray Illumination Bulbs
Anti-Lock Brake System Radio
Rear WiperNasher Motors; Overhead Console Compass
Front Wiperflasher Motor
A/C Compressor, A/C Solenoid Box, Compressor Relay, Temp.
Door
Motor, Low Blower Relay; Heat/Vent/AC Control Head; Cruise
Module; Cooling Fan Relay; Rear Defogger Relay; Key Chime; Vehicle
Speed Sensor Buffer and Generator Charge Discrete, Transaxle
Converter Clutch Switch
Front/Rear Blower Motors, High Blower Relay
Rear Blower, Rear Heat/Vent/AC
ProCarManuals.com