light OLDSMOBILE SILHOUETTE 1996 User Guide
[x] Cancel search | Manufacturer: OLDSMOBILE, Model Year: 1996, Model line: SILHOUETTE, Model: OLDSMOBILE SILHOUETTE 1996Pages: 372, PDF Size: 19.39 MB
Page 85 of 372

Liftgate Lock Theft
J
To unlock the liftgate, insert the door key and turn the
lock clockwise. The liftgate will automatically lock
when you close
it.
If you have the optional power door locks or the Remote
Lock Control system, the liftgate will lock and unlock
differently. See “Power
Door Locks” in the Index. Vehicle theft is big business, especially
in some cities.
Although your Oldsmobile has a number
of theft-deterrent
features, we know that nothing we put
on it can make it
impossible to steal. However, there are ways you
can help.
Key in the Ignition
If you leave your vehicle with the keys inside, it’s an
easy target for joy riders
or professional thieves -- so
don’t do it.
When
you park your Oldsmobile and open the driver’s
door, you’ll hear a chime reminding
you to remove your
key from the ignition and take
it with you. Always do this.
Your steering wheel will be locked, and
so will your
ignition and transaxle. And remember to lock the doors.
Parking at Night
Park in a lighted spot, close all windows and lock your
vehicle. Remember
to keep your valuables out of sight.
Put them in a storage area, or take them with you.
.~ 2-21
ProCarManuals.com
Page 87 of 372

Ignition Positions
With the ignition key in the ignition switch, you can turn
the switch to five positions.
C
A E
ACCESSORY (A): An on position in which you can
operate your electrical power accessories. Press in the
ignition switch
as you turn the top of it toward you.
LOCK (B): This is the only position in which you can
remove
the key. This locks your steering wheel, ignition
and transaxle.
OFF (C): This position unlocks the steering wheel,
ignition and transaxle, but does not send electrical
power to any accessories. Use this position
if your
vehicle must be pushed
or towed, but never try to
push-start your vehicle. A warning chime will sound if
you open the driver’s door when the ignition is
OFF and
the key is
in the ignition.
RUN (D): An on position to which the switch returns
after
you start your engine and release the switch. The
switch stays
in the RUN position when the engine is
running. But
even when the engine is not running, you
can use the
RUN position to operate your electrical
power accessories, and to display some instrument panel
warning lights.
START (E): This position starts the engine. When the
engine starts, release the key. The ignition switch will
return
to the RUN position for normal driving.
ProCarManuals.com
Page 95 of 372
FIRST (1): This position gives you even more power (but
lower
fuel economy) than SECOND (2). You can use it on
very steep hills, or
in deep snow or mud. If the selector
lever
is put in FlRST (l), the transaxle won’t shift into
first gear until the vehicle is going slowly enough.
NOTICE:
If your front wheels can’t rotate, don’t try to
drive. This might happen if you were stuck in
very deep sand or mud or were up against a solid
object. You could damage your transaxle.
Also,
if you stop when going uphill, don’t hold
your vehicle there with only the accelerator
pedal. This could overheat and damage the
transaxle. Use your brakes
or shift into PARK (P)
to hold your vehicle in position on a hill.
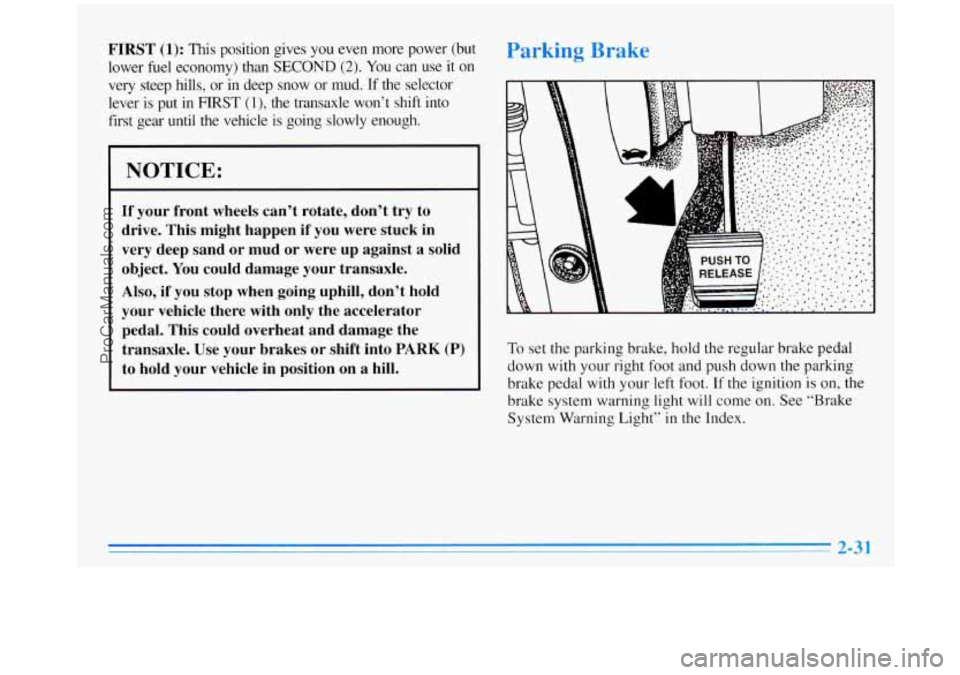
To set the parking brake, hold the regular brake pedal
down with your right foot and push down the parking
brake pedal with your left foot. If the ignition is on,
the
brake system warning light will come on. See “Brake
System Warning Light” in the Index.
ProCarManuals.com
Page 104 of 372

Ttrrn Signal and Lane Change Indicator
The turn signal has two upward (for right) and two
downward (for left) positions. These positions allow you
to signal a turn or a lane change.
To signal a turn, move the lever all the way up or down.
When the turn
is finished, the lever will return automatically.
An arrow on the instrument panel will flash in the
direction of the turn or lane change.
To signal a lane change, just raise or lower the lever
until the arrow starts to flash. Hold it there until you
complete your lane change. The lever will return by
itself when you release it.
As you signal a turn or a lane change, if the arrows don’t
flash but just stay on, a signal bulb may be burned out
and other drivers won’t
see your turn signal.
If a bulb
is burned out, replace it to help avoid an
accident. If
the arrows don’t go on at all when you
signal a turn, check for burned-out bulbs and check the
fuse (see “Fuses and Circuit Breakers’’ in the Index).
If you have a trailer towing option with added wiring for
the trailer lamps,
a different turn signal flasher is used.
With this flasher installed, the signal indicator will flash
even
if a turn signal bulb is burned out. Check the front
and rear turn signal lamps regularly
to make sure they
are working.
Headlamp High/Low Beam Changer
To change the headlamps
from high to low beam, or
low to high, simply pull the
turn signal lever all the way
toward you. Then release it.
When the high beams are on, a light on the instrument
cluster will also be on.
ProCarManuals.com
Page 105 of 372
WindsL'-.'3 Wipers
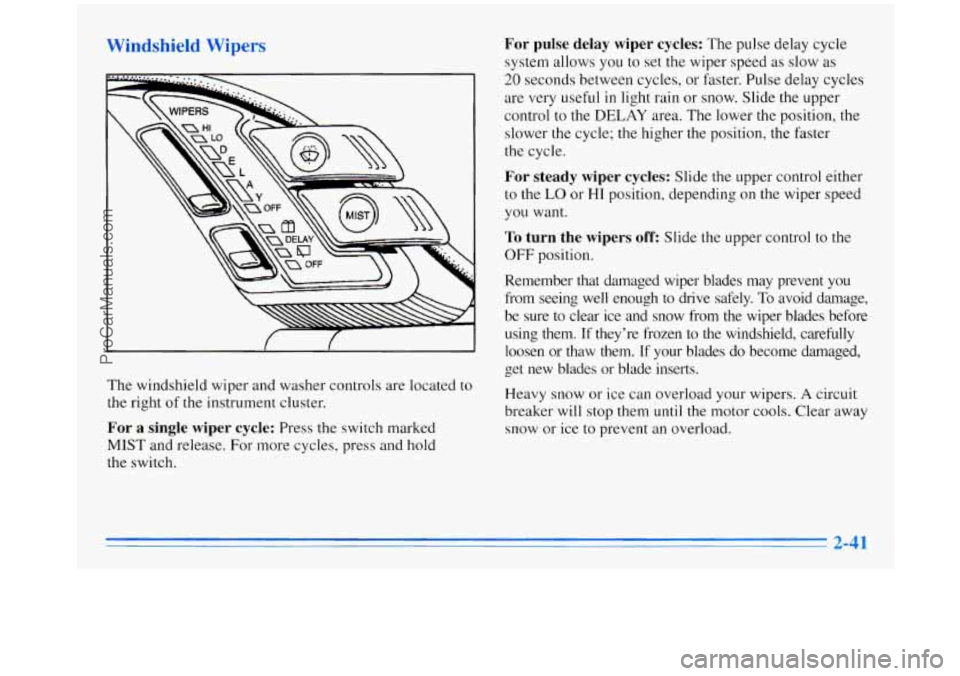
The windshield wiper and washer controls are located to
the right of the instrument cluster.
For a single wiper cycle: Press the switch marked
MIST and release. For more cycles, press and hold
the switch.
For pulse delay wiper cycles: The pulse delay cycle
system allows you to set the wiper speed as slow as
20 seconds between cycles, or faster. Pulse delay cycles
are very useful in light rain
or snow. Slide the upper
control to the
DELAY area. The lower the position, the
slower the cycle; the higher the position, the faster
the cycle.
For steady wiper cycles: Slide the upper control either
to the
LO or HI position, depending on the wiper speed
you want.
To turn the wipers off: Slide the upper control to the
OFF position.
Remember that damaged wiper blades may prevent
you
from seeing well enough to drive safely. To avoid damage,
be sure to clear ice and snow from the wiper blades before
using them. If they're frozen to the windshield, carefully
loosen or thaw them. If your blades do become damaged,
get new blades or blade inserts.
Heavy snow or ice can overload your wipers.
A circuit
breaker will stop them until the motor cools. Clear away
snow or ice to prevent an overload.
ProCarManuals.com
Page 111 of 372
Reducing Speed While Using Cruise Control
0 Push in the button at the end of the lever until you
reach the lower speed
you want, then release it.
To slow down in very small amounts, push the
button for less than half a second. Each time you do
this, you’ll
go 1 mph (1.6 km/h) slower.
Passing Another Vehicle While Using Cruise Control
Use the accelerator pedal to increase your speed. When
you take your foot
off the pedal, your vehicle will slow
down to the cruise control speed you set earlier.
Using Cruise Control on Hills
How well your cruise control will work on hills depends
upon your speed, load and the steepness of the hills.
When going
up steep hills, you may have to step on the
accelerator pedal to maintain your speed. When going downhill,
you may have to brake or shift to a lower gear
to keep your speed down.
Of course, applying the brake
takes you out of cruise control. Many drivers find this to
be too much trouble and don’t use cruise control on
steep hills.
Ending Cruise Control
There are two ways to turn off the cruise control:
0 Step lightly on the brake pedal; OR
Move the cruise switch to OFF.
Erasing Cruise Speed Memory
When you turn off the cruise control or the ignition,
your cruise control set speed memory is erased.
ProCarManuals.com
Page 112 of 372

Lamps
Headlamps
PC: Push this switch to turn on:
0 Parking Lamps
Sidemarker Lamps
0 Taillamps
Instrument Panel Lights
Pull the switch to turn
off the lamps.
-:g-: Push this switch to turn on the headlamps,
together with:
Parking Lamps
Sidemarker Lamps
0 Taillamps
0 Instrument Panel Lights
Pull the switch to turn
off the lamps.
Lamps On Reminder
If you turn the ignition key to the OFF or LOCK
position while leaving the lamps on,
you will hear a
warning chime.
2-48
ProCarManuals.com
Page 113 of 372

Fog Lamps
Slide the lower lever on the lights control panel up to
turn on the fog lamps, down to turn them off.
An
indicator light next to the control will glow when the fog
lamps are on.
Your headlamps must be on for your fog lamps to go on.
Although your fog lamps will go
off when your high
beams are on, high beams are not recommended for
driving in fog.
Interior Lamps
Instrr--- Bt Panel Intensity Control
Slide the upper lights control all the way up to increase
the brightness of the instrument panel lights, down to
decrease the brightness. Slide the control all
the way
down to turn them off.
Interior Lights Control
Slide the upper lights control (located to the left of the
instrument panel cluster) all the way up to turn on the
interior lamps.
Interior Lights Override Switch
This switch is located to the left of the cigarette lighter
in the center instrument panel console. It has two
positions,
DOOR (on) and OFF, and overrides all
interior lamps except the reading lamps.
The interior lamps
go on each time you open the doors.
You can turn off these lamps
so that the doors may be
left open without running down the battery by turning
the interior lights override switch to
OFF.
2-49
ProCarManuals.com
Page 114 of 372
Illuminated Entry System (Option)
This option comes with the optional Remote Lock
Control system.
When you open the driver’s door (by itself or in
combination with any passenger door or the liftgate) the
interior lamps will come on and then gradually dim to
off 10 seconds after the last door is closed. (If the
driver’s door has not been opened, the interior lamps
will immediately dim to off.)
When you press
the unlock symbol on your remote
transmitter, the lamps inside your vehicle will go
on,
then gradually dim to off after about 40 seconds, unless
a door or the liftgate is opened.
When you turn
on the ignition, the interior lamps will
immediately dim
to off.
Overhead Console Reading Lamps
To turn on or off either reading lamp, press the switch
next to it. To adjust the aim of the lamps, pivot the
lamps in their sockets.
Center Dome Lamp
This lamp is located in the center of your vehicle and
has no switch of its own. It will go on each time you
open the doors, unless you turn the interior lights
override switch in the center instrument panel console
to
OFF.
If you have the optional rear climate control, you will
not have a center dome lamp.
2-50
ProCarManuals.com
Page 115 of 372
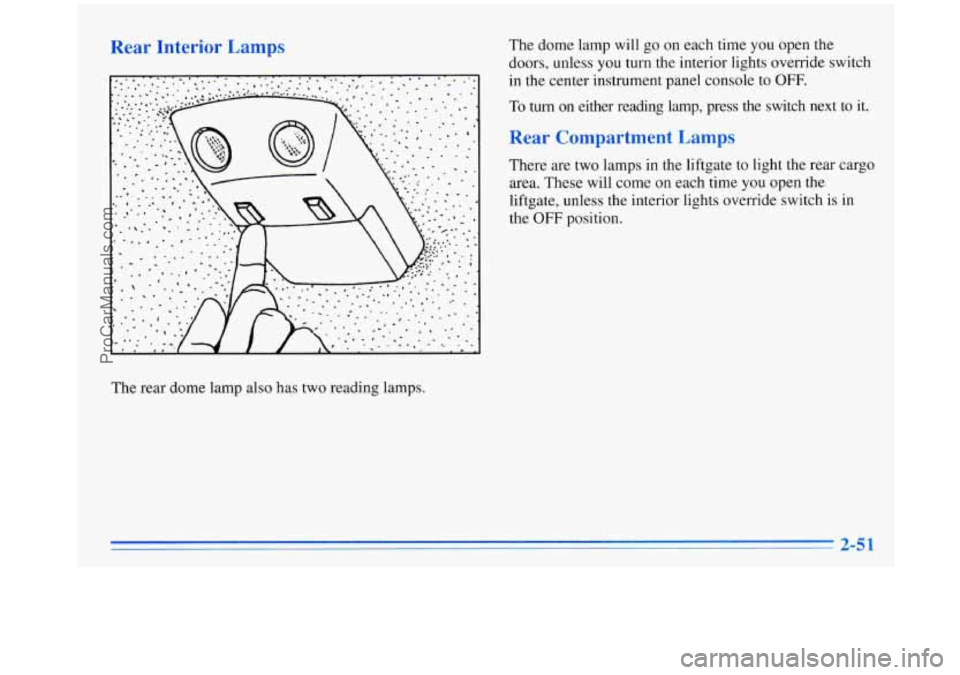
Rear Interior Lamps The dome lamp will go on each time you open the
doors, unless
you turn the interior lights override switch
in
the center instrument panel console to OFF.
To turn on either reading lamp, press the switch next to it.
Rear Compartment Lamps
There are two lamps in the liftgate to light the rear cargo
area. These will come on each time
you open the
liftgate, unless the interior lights override switch is in
the
OFF position.
The rear dome lamp also has two reading lamps.
2-5 1
ProCarManuals.com