warning light OLDSMOBILE SILHOUETTE 1996 Owners Manual
[x] Cancel search | Manufacturer: OLDSMOBILE, Model Year: 1996, Model line: SILHOUETTE, Model: OLDSMOBILE SILHOUETTE 1996Pages: 372, PDF Size: 19.39 MB
Page 7 of 372

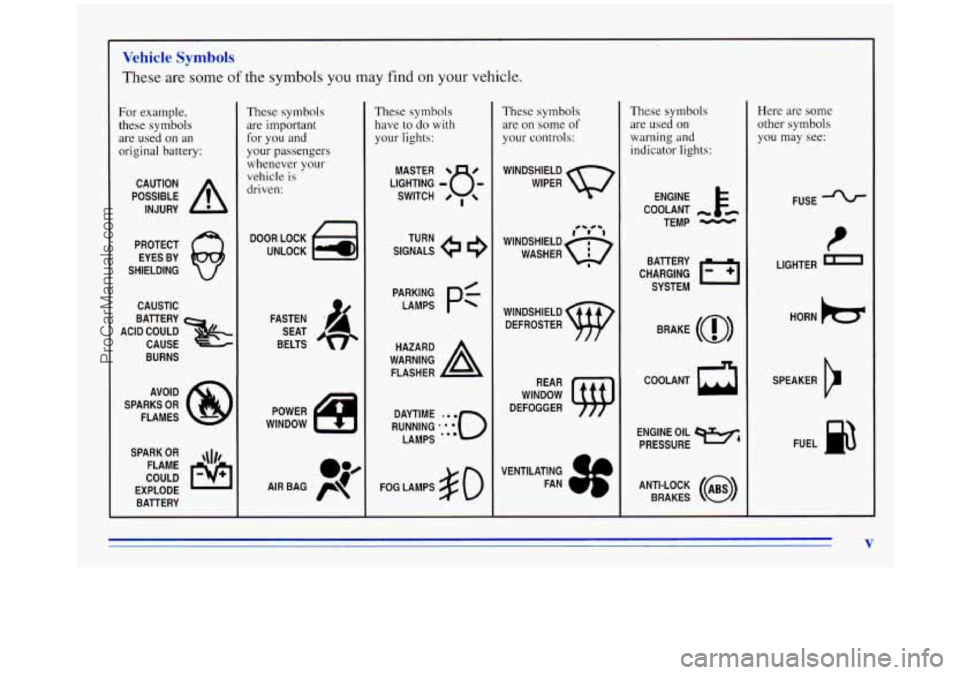
Vehicle Symbols
These are some of the symbols you may find on your vehicle.
For example,
these symbols are used on an
original battery:
POSSIBLE A
CAUTION
INJURY
PROTECT EYES BY
SHIELDING
CAUSTIC
BURNS
SPARK
OR ,\I/,
COULD FLAME
EXPLODE BAllERY
These symbols are important for you and
your passengers
whenever your
vehicle is
driven:
DOOR LOCK
UNLOCK
SEAT
BELTS
These symbols have to
do with
your lights:
SIGNALS TURN
FOG LAMPS
# 0
These symbols
are
on some of
your controls:
WINDSHIELD
WIPER
WINDOW
DEFOGGER
VENTILATING FAN
These symbols are used on
warning and
indicator lights:
ENGINE k
COOLANT - t6
TEMP -
CHARGING I-1
BAllERY
SYSTEM
BRAKE
(0)
h
COOLANT
ENGINE OIL
e,
PRESSURE
ANTI-LOCK
(@)
BRAKES
Here are some
other symbols
you may see:
FUSE
P
LIGHTER n
HORN b
SPEAKER
b
FUEL e3
V
ProCarManuals.com
Page 79 of 372

When the key is in the ignition in the RUN position,
the power sliding door will only open if
the transaxle
is
in PARK (P). The transaxle does not have to be in
PARK (P) to close the door.
If the ON/OFF switch is in
the
ON position and the power sliding door is open or in
the process
of closing when you shift out of PARK (P), a
tone will sound and the power sliding door warning light
on your instrument panel will flash (see “Power Sliding
Door Warning Light”
in the Index). This is a warning
light that the sliding door is not completely closed.
IAC TION: I
If you shift the transaxle out of PARK (P) and
accelerate before the power sliding door latches
closed, the door may reverse to the open position.
A child or others could fall out of the vehicle and
be injured.
Always make sure the power sliding
door
is closed and latched before you drive away.
If anything obstructs the power sliding door while it is
closing, the door will automatically reverse to the open
position, provided it meets sufficient resistance. Resistance must be
as strong as the force of the closing
door, or stronger.
The force of the closing door increases
significantly
as the door approaches the latch position.
ProCarManuals.com
Page 84 of 372

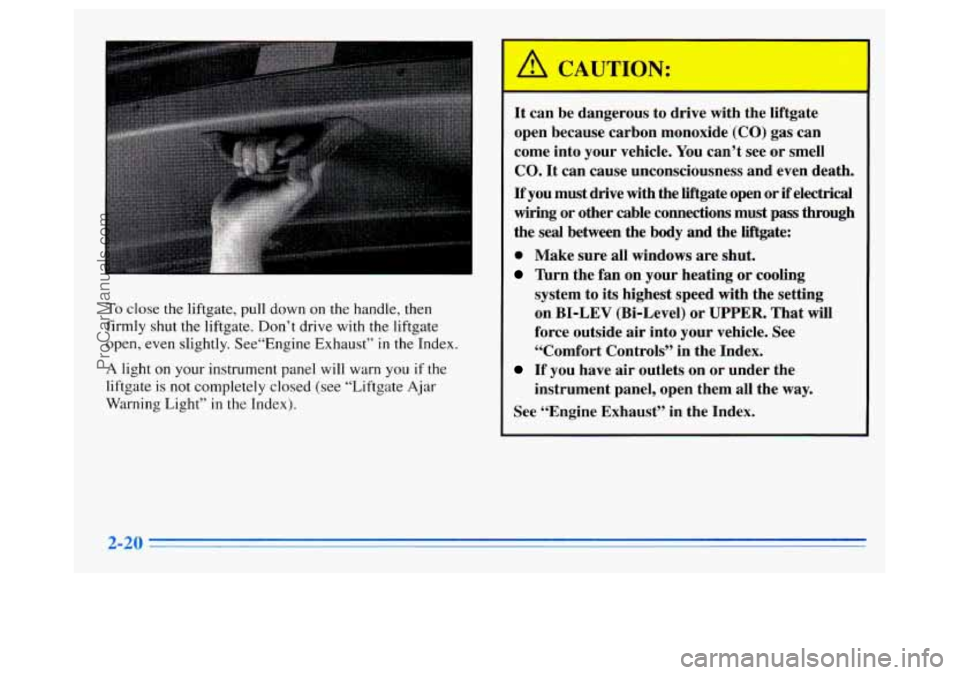
To close the liftgate, pull down on the handle, then
firmly shut the liftgate. Don’t drive with the liftgate
open, even slightly. See“Engine Exhaust”
in the Index.
A light on your instrument panel will warn you if the
liftgate is not completely closed (see “Liftgate Ajar
Warning Light”
in the Index).
2-
It can be dangerous to drive with the liftgate
open because carbon monoxide
(CO) gas can
come into your vehicle. You can’t see or smell
CO. It can cause unconsciousness and even death.
If you must drive with the liftgate open or if electrical
wiring or other cable connections must
pass through
the seal between the body and the liftgate:
0 Make sure all windows are shut.
lhrn the fan on your heating or cooling
system to
its highest speed with the setting
on BI-LEV (Bi-Level) or
UPPER. That will
force outside air into your vehicle. See
“Comfort Controls” in the Index.
If you have air outlets on or under the
instrument panel, open them all the way.
See “Engine Exhaust” in the Index.
ProCarManuals.com
Page 87 of 372

Ignition Positions
With the ignition key in the ignition switch, you can turn
the switch to five positions.
C
A E
ACCESSORY (A): An on position in which you can
operate your electrical power accessories. Press in the
ignition switch
as you turn the top of it toward you.
LOCK (B): This is the only position in which you can
remove
the key. This locks your steering wheel, ignition
and transaxle.
OFF (C): This position unlocks the steering wheel,
ignition and transaxle, but does not send electrical
power to any accessories. Use this position
if your
vehicle must be pushed
or towed, but never try to
push-start your vehicle. A warning chime will sound if
you open the driver’s door when the ignition is
OFF and
the key is
in the ignition.
RUN (D): An on position to which the switch returns
after
you start your engine and release the switch. The
switch stays
in the RUN position when the engine is
running. But
even when the engine is not running, you
can use the
RUN position to operate your electrical
power accessories, and to display some instrument panel
warning lights.
START (E): This position starts the engine. When the
engine starts, release the key. The ignition switch will
return
to the RUN position for normal driving.
ProCarManuals.com
Page 95 of 372

FIRST (1): This position gives you even more power (but
lower
fuel economy) than SECOND (2). You can use it on
very steep hills, or
in deep snow or mud. If the selector
lever
is put in FlRST (l), the transaxle won’t shift into
first gear until the vehicle is going slowly enough.
NOTICE:
If your front wheels can’t rotate, don’t try to
drive. This might happen if you were stuck in
very deep sand or mud or were up against a solid
object. You could damage your transaxle.
Also,
if you stop when going uphill, don’t hold
your vehicle there with only the accelerator
pedal. This could overheat and damage the
transaxle. Use your brakes
or shift into PARK (P)
to hold your vehicle in position on a hill.
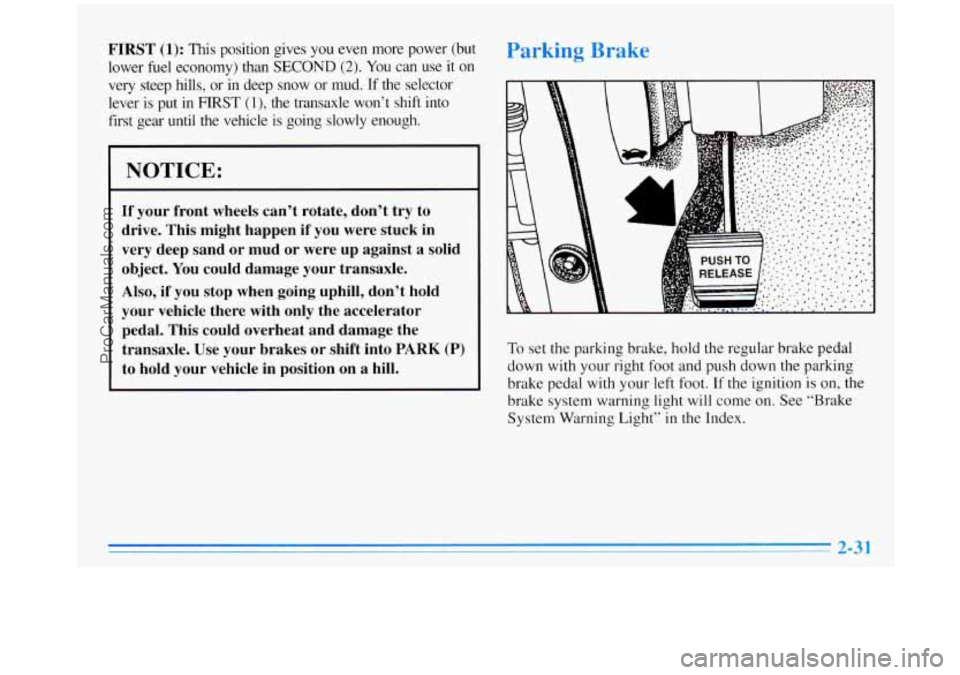
To set the parking brake, hold the regular brake pedal
down with your right foot and push down the parking
brake pedal with your left foot. If the ignition is on,
the
brake system warning light will come on. See “Brake
System Warning Light” in the Index.
ProCarManuals.com
Page 112 of 372

Lamps
Headlamps
PC: Push this switch to turn on:
0 Parking Lamps
Sidemarker Lamps
0 Taillamps
Instrument Panel Lights
Pull the switch to turn
off the lamps.
-:g-: Push this switch to turn on the headlamps,
together with:
Parking Lamps
Sidemarker Lamps
0 Taillamps
0 Instrument Panel Lights
Pull the switch to turn
off the lamps.
Lamps On Reminder
If you turn the ignition key to the OFF or LOCK
position while leaving the lamps on,
you will hear a
warning chime.
2-48
ProCarManuals.com
Page 133 of 372

Your instrument panel is designed to let you know at a
glance how your vehicle is running. You’ll know how fast
you’re going, how much fuel you’re using, and many
other things you’ll need to drive safely and economically.
Refer to the accompanying diagram
of your instrument
panel to locate
the components listed below.
1. Side Vents
2. Lamp Controls
3. Turn Signal/Multifunction Lever
4. Tilt Steering Wheel Lever
5. Instrument Cluster
6. Gearshift Lever
7. Wiper/Washer Controls
8. Center Vents
9. Storage Compartment
10. Side Vents
1 1. Circuit Breaker/Relay Panel
12. Glove Box/Fuse Panel
13. Audio System
14. Rear Fan Controls
15. CupholdedAshtray
16. Locking Storage Bin
1 7. Lighter
18. Interior Lights Override Switch
19. Climate Controls
20. Hazard Warning Flashers Switch
21. Ignition Switch
22. Horn
23. Steering Wheel Touch Controls (Option)
2-69
ProCarManuals.com
Page 134 of 372

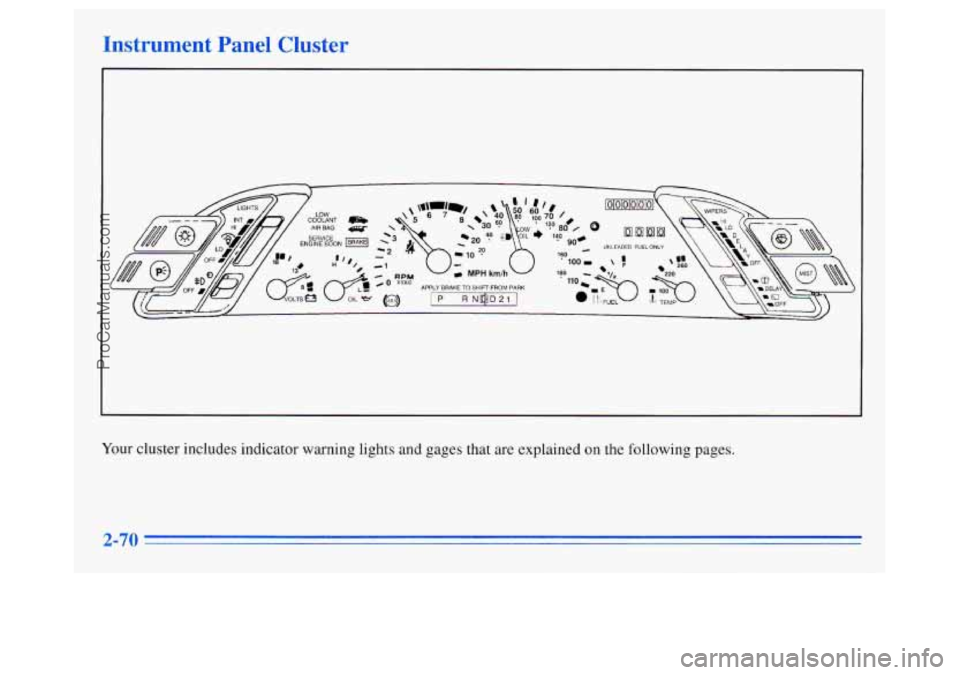
Instrument Panel Cluster
Your cluster includes indicator warning lights and gages that are explained on the following pages.
2-70
ProCarManuals.com
Page 136 of 372

Rip Odometer
UNLEADED FUEL ONLY
The trip odometer can tell you how far your vehicle has
been driven since
you last set it to zero. To set it to zero,
push the reset button located above the fuel gage.
Warning Lights, Gages and Indicators
This part describes the warning lights and gages that may
be on
your vehicle. The pictures will help you locate them.
Warning lights and gages can signal that something is
wrong before
it becomes serious enough to cause an
expensive repair or replacement. Paying attention to
your warning lights and gages could also save you or
others from injury.
Warning lights come on when there may be or
is a
problem with one of your vehicle’s functions.
As you
will see in the details on the next few pages, some
warning lights come on briefly when you start the
engine just to let you know they’re working.
If you are
familiar with this section, you should not be alarmed
when this happens.
Gages can indicate when there may be or
is a problem
with one
of your vehicle’s functions. Often gages and
warning lights work together to let you know when
there’s a problem with
your vehicle.
When one
of the warning lights comes on and stays on
when you are driving, or when one of the gages shows
there may be a problem, check the section that tells you
what to do about
it. Please follow this manual’s advice.
Waiting
to do repairs can be costly -- and even
dangerous.
So please get to know your warning lights
and gages. They’re a big help.
ProCarManuals.com
Page 138 of 372

Voltmeter Brake System Warning Light
Irn
18 /
Your charging system gage will show the rate of charge
when the engine is running.
The reading will change
as the rate of charge changes
(with the engine speed, etc.), but readings between the
red warning zones indicate the normal operating range.
Readings
in either red zone indicate a possible problem
with your charging system. Have your Oldsmobile
serviced immediately.
When the engine
is not running, but the ignition is on (in
the RUN position), the display measures the voltage
output
of your battery. Your
Oldsmobile’s hydraulic brake system is divided
into two parts.
If one part isn’t working, the other part
can still work and stop you. For good braking, though,
you need both parts working well.
If the warning light comes on, there could be a brake
problem. Have your brake system inspected right away.
I BRAKE I
This light should come on
briefly
when you turn the
ignition key to RUN.
If it
doesn’t come on then,
have
it fixed so it will be
ready to warn you if there’s
a problem.
If the light comes on while you are driving, puli off the
road and stop carefully. You may notice that the pedal is
harder to push. Or, the pedal may go closer to the floor.
It may take longer to stop. If the light is still on, or if the
anti-lock brake system warning light is flashing, have
the vehicle towed for service. (See “Anti-Lock Brake
System Warning Light” and “Towing Your Vehicle”
in
the Index.)
ProCarManuals.com